I had the pleasure of working with a customer who wanted to use property groups within vRealize Automation, to provide various configuration data to drive their deployments. They asked some queries about how to use property groups that went beyond the documentation, so I thought it would also make a good blog post.
What are property groups?
Property groups were introduced in vRealize Automation 7.x and sorely missed when the 8.x version was shipped. They were reintroduced in vRA 8.3.
When you several properties that always appear together in your Cloud Templates, you can create a property group to store them together.
This allows you to re-use the same properties over and again across Cloud Templates from a central construct, rather than replicate the same information directly into each cloud template.
The benefit of doing this, is that if you update any information, it is pushed to all linked cloud templates. Potentially this could be a disadvantage as well, so once you use these in production, be mindful of any updates to in-use groups.
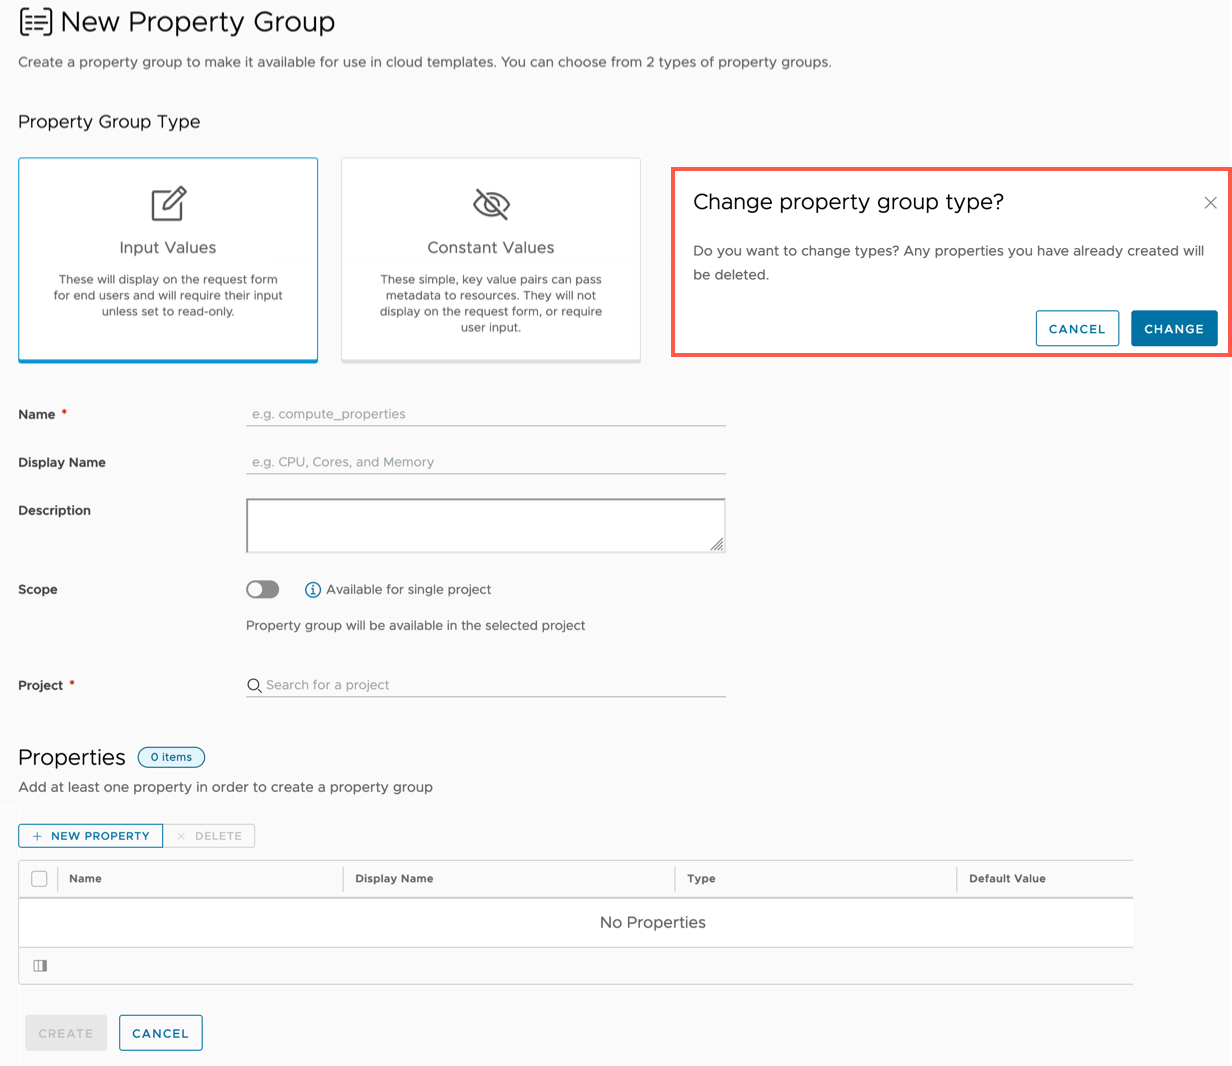
There are two types of property groups. When creating a property group, you select the type. You do not have the ability to change or convert the type once the group has been created.
- Inputs
Input property groups gather and apply a consistent set of properties at user request time. Input property groups can include entries for the user to add or select, or they might include read-only values that are needed by the design.
Properties for the user to edit or select can be readable or encrypted. Read-only properties appear on the request form but can’t be edited. If you want read-only values to remain totally hidden, use a constant property group instead.
- Constants
Constant property groups silently apply known properties. In effect, constant property groups are invisible metadata. They provide values to your Cloud Assembly designs in a way that prevents a requesting user from reading those values or even knowing that they’re present. Examples might include license keys or domain account credentials.
Getting Started with a Input Property Group
Ultimately the Input Property Group works the exact same way as Inputs you specify on the cloud template directly. The group option simply provides a way to centralise these inputs for use between cloud templates.
Create an Input Property Group
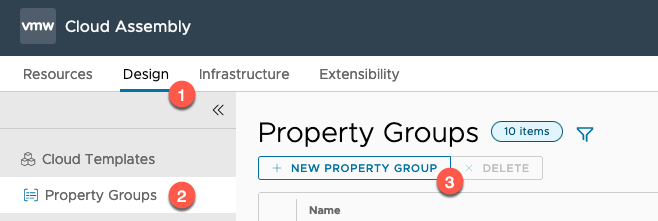
- Click on Design Tab
- Click Property Groups from the left-hand navigation pane
- Select New Property Group
- Select the type of property group
- Before you create this group, you can still type.
- After you have saved this group, you cannot change the type.
- Provide a name
- Select the Scope of projects this is appliable to
- Select the project it is linked to (as necessary)
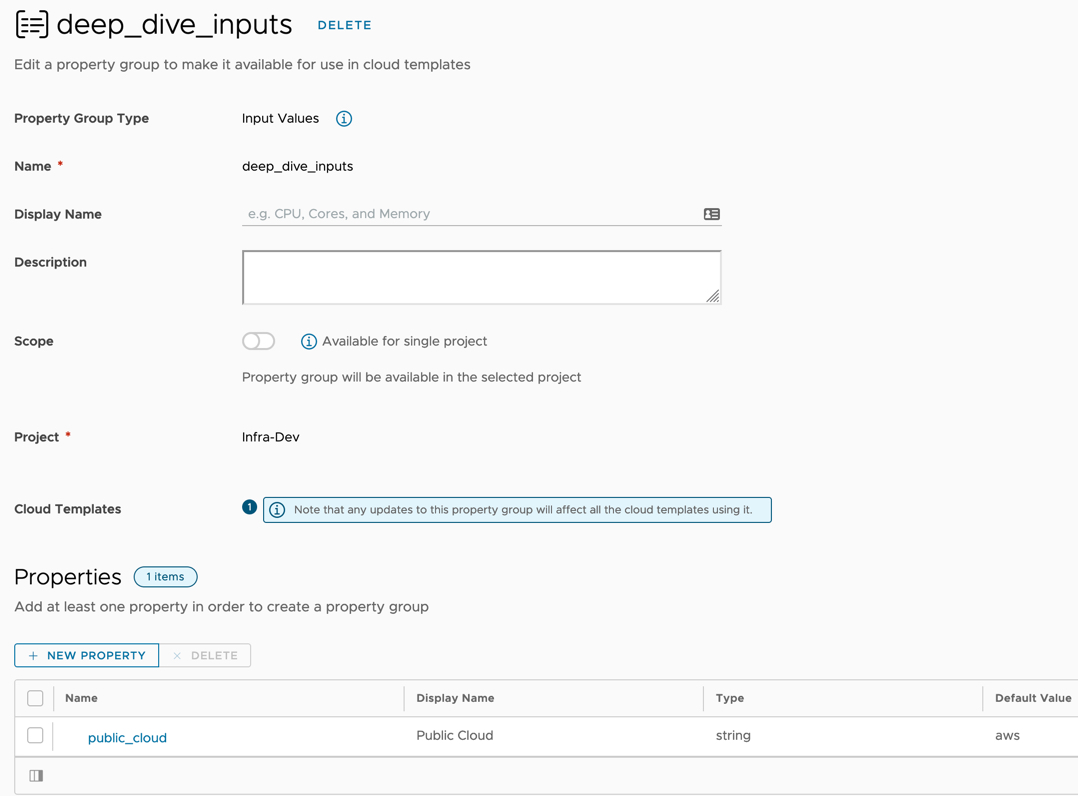
Now it’s as simple as clicking “New Property” to create your properties that make up the group.
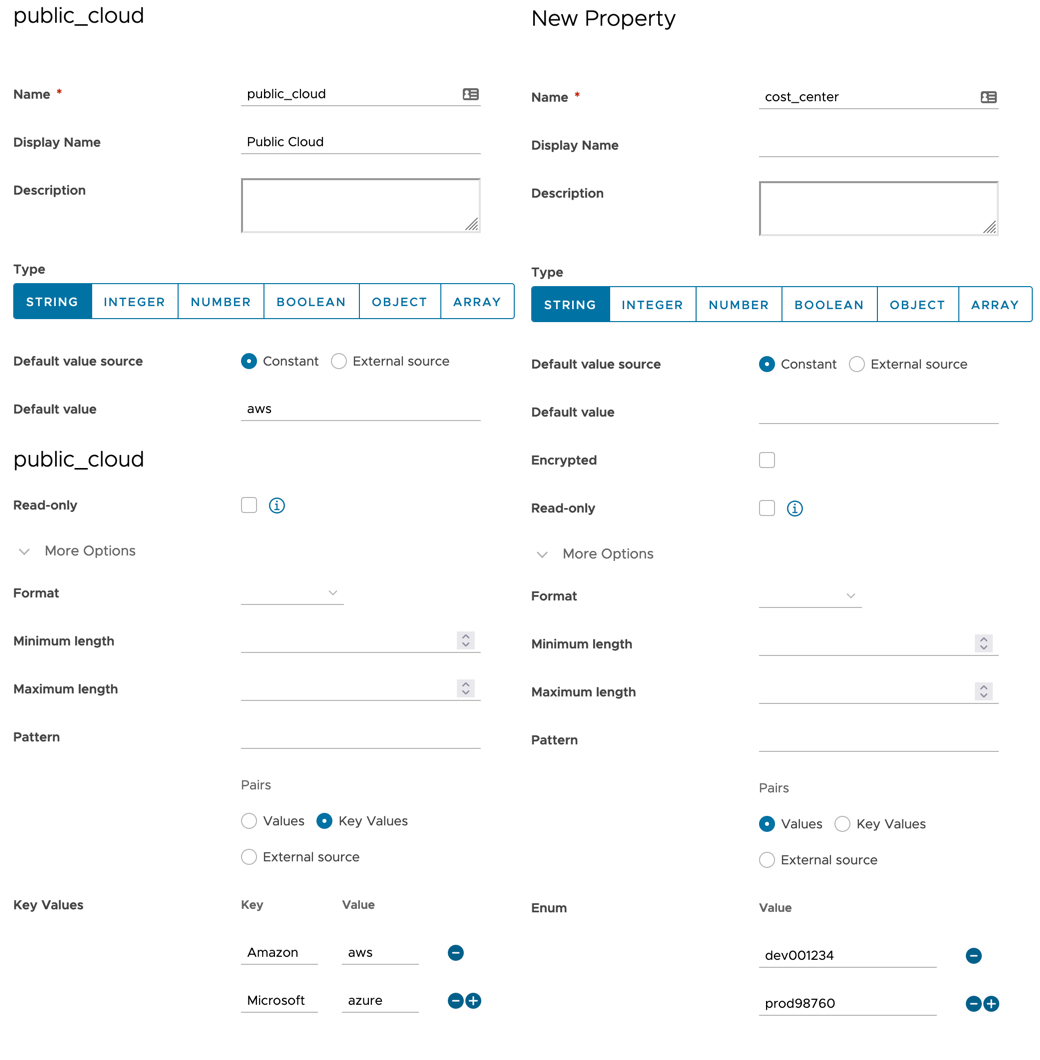
Below I’ve already created a “public_cloud” property, and I’m going to create a second for cost centers.
On the left is my existing “public_property”, which is using Key Value pairs.
on the right is my new “cost_center” property, which is just values.
Clicking save takes you back to the property group screen, and you’ll see a green dialog confirmation box.
You can then click save on the property group itself.
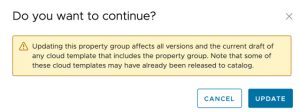
If you are updating an existing property group, you will be told this affects any cloud templates that consume the group.
Using the Input Property Group on a Cloud Template
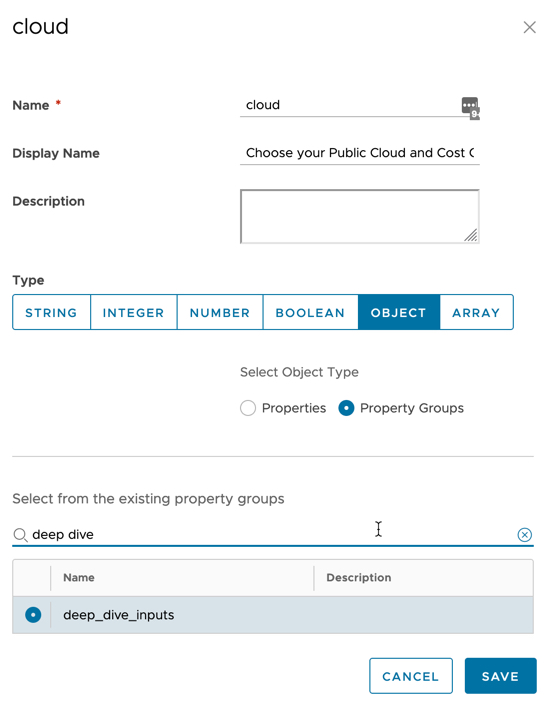
On the Cloud Template screen, you can add the property group using the Inputs wizard and selecting the type as “object” + “property group” and you associated group.
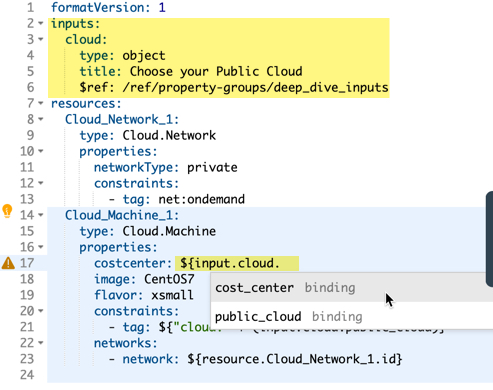
Below is the highlighted Input now added to the cloud template. You can see that a new unlisted value of “$ref” is used to point to the property group.
To access properties inside of the group, you specify “input” + “group name” + “property”. The autocomplete options will also show you the contents of the property group, as per the example below on line 17.
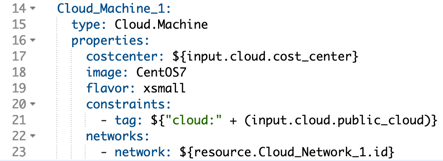
I can also use the Input property group as part of an expression, for example to build the tag used for a contraint.
Below is my full cloud template example.
formatVersion: 1
inputs:
  cloud:
    type: object
    title: Choose your Public Cloud and Cost Center
    $ref: /ref/property-groups/deep_dive_inputs
resources:
  Cloud_Network_1:
    type: Cloud.Network
    properties:
      networkType: private
      constraints:
        - tag: net:ondemand
  Cloud_Machine_1:
    type: Cloud.Machine
    properties:
      costcenter: ${input.cloud.cost_center}
      image: CentOS7
      flavor: xsmall
      constraints:
        - tag: ${"cloud:" + (input.cloud.public_cloud)}
      networks:
        - network: ${resource.Cloud_Network_1.id}
Now to test and deploy the cloud template, and I can select the values from both specified properties in the Group. As this is an input group, all properties with their values will be displayed, even if they are not used elsewhere within the template.
Once the request has gone through, you can see the “Request details” and user inputs, they are pulled through as JSON.
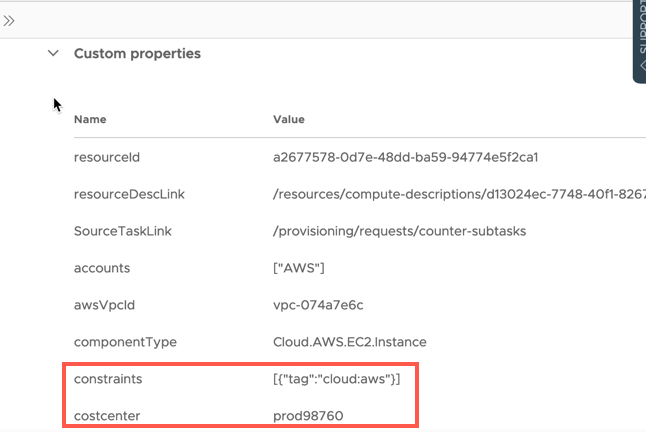
Once the deployment has succeeded, you can click on the object, in this case my virtual machine resource, and see all of the custom properties. In the screenshot below, you can see that inputs have been computed, to provide the constraints for placement and tags.
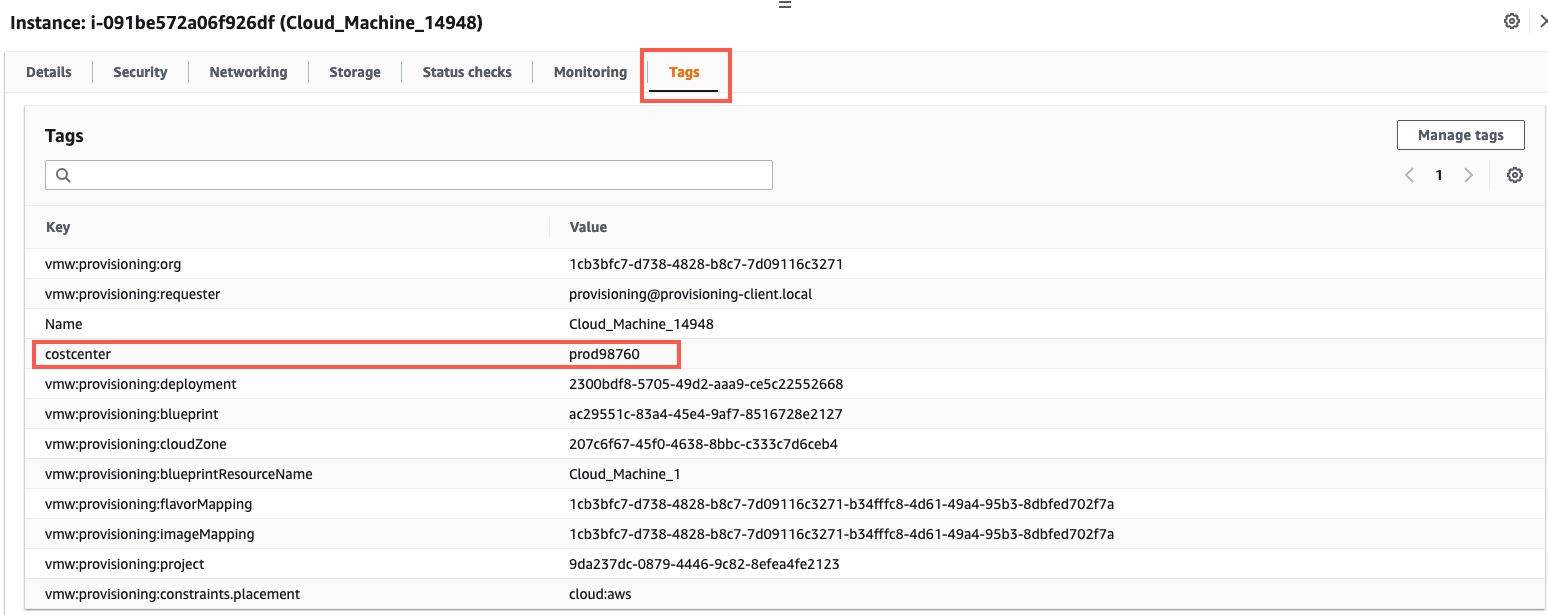
Below we can see the “costcenter” tag is added to the EC2 instance in AWS.
Using a Constant Property Group
Now we shall step this up to more advanced use cases by implementing a Constant Property Group.
Creating a constant group is same process as input type, you just select the constant type.
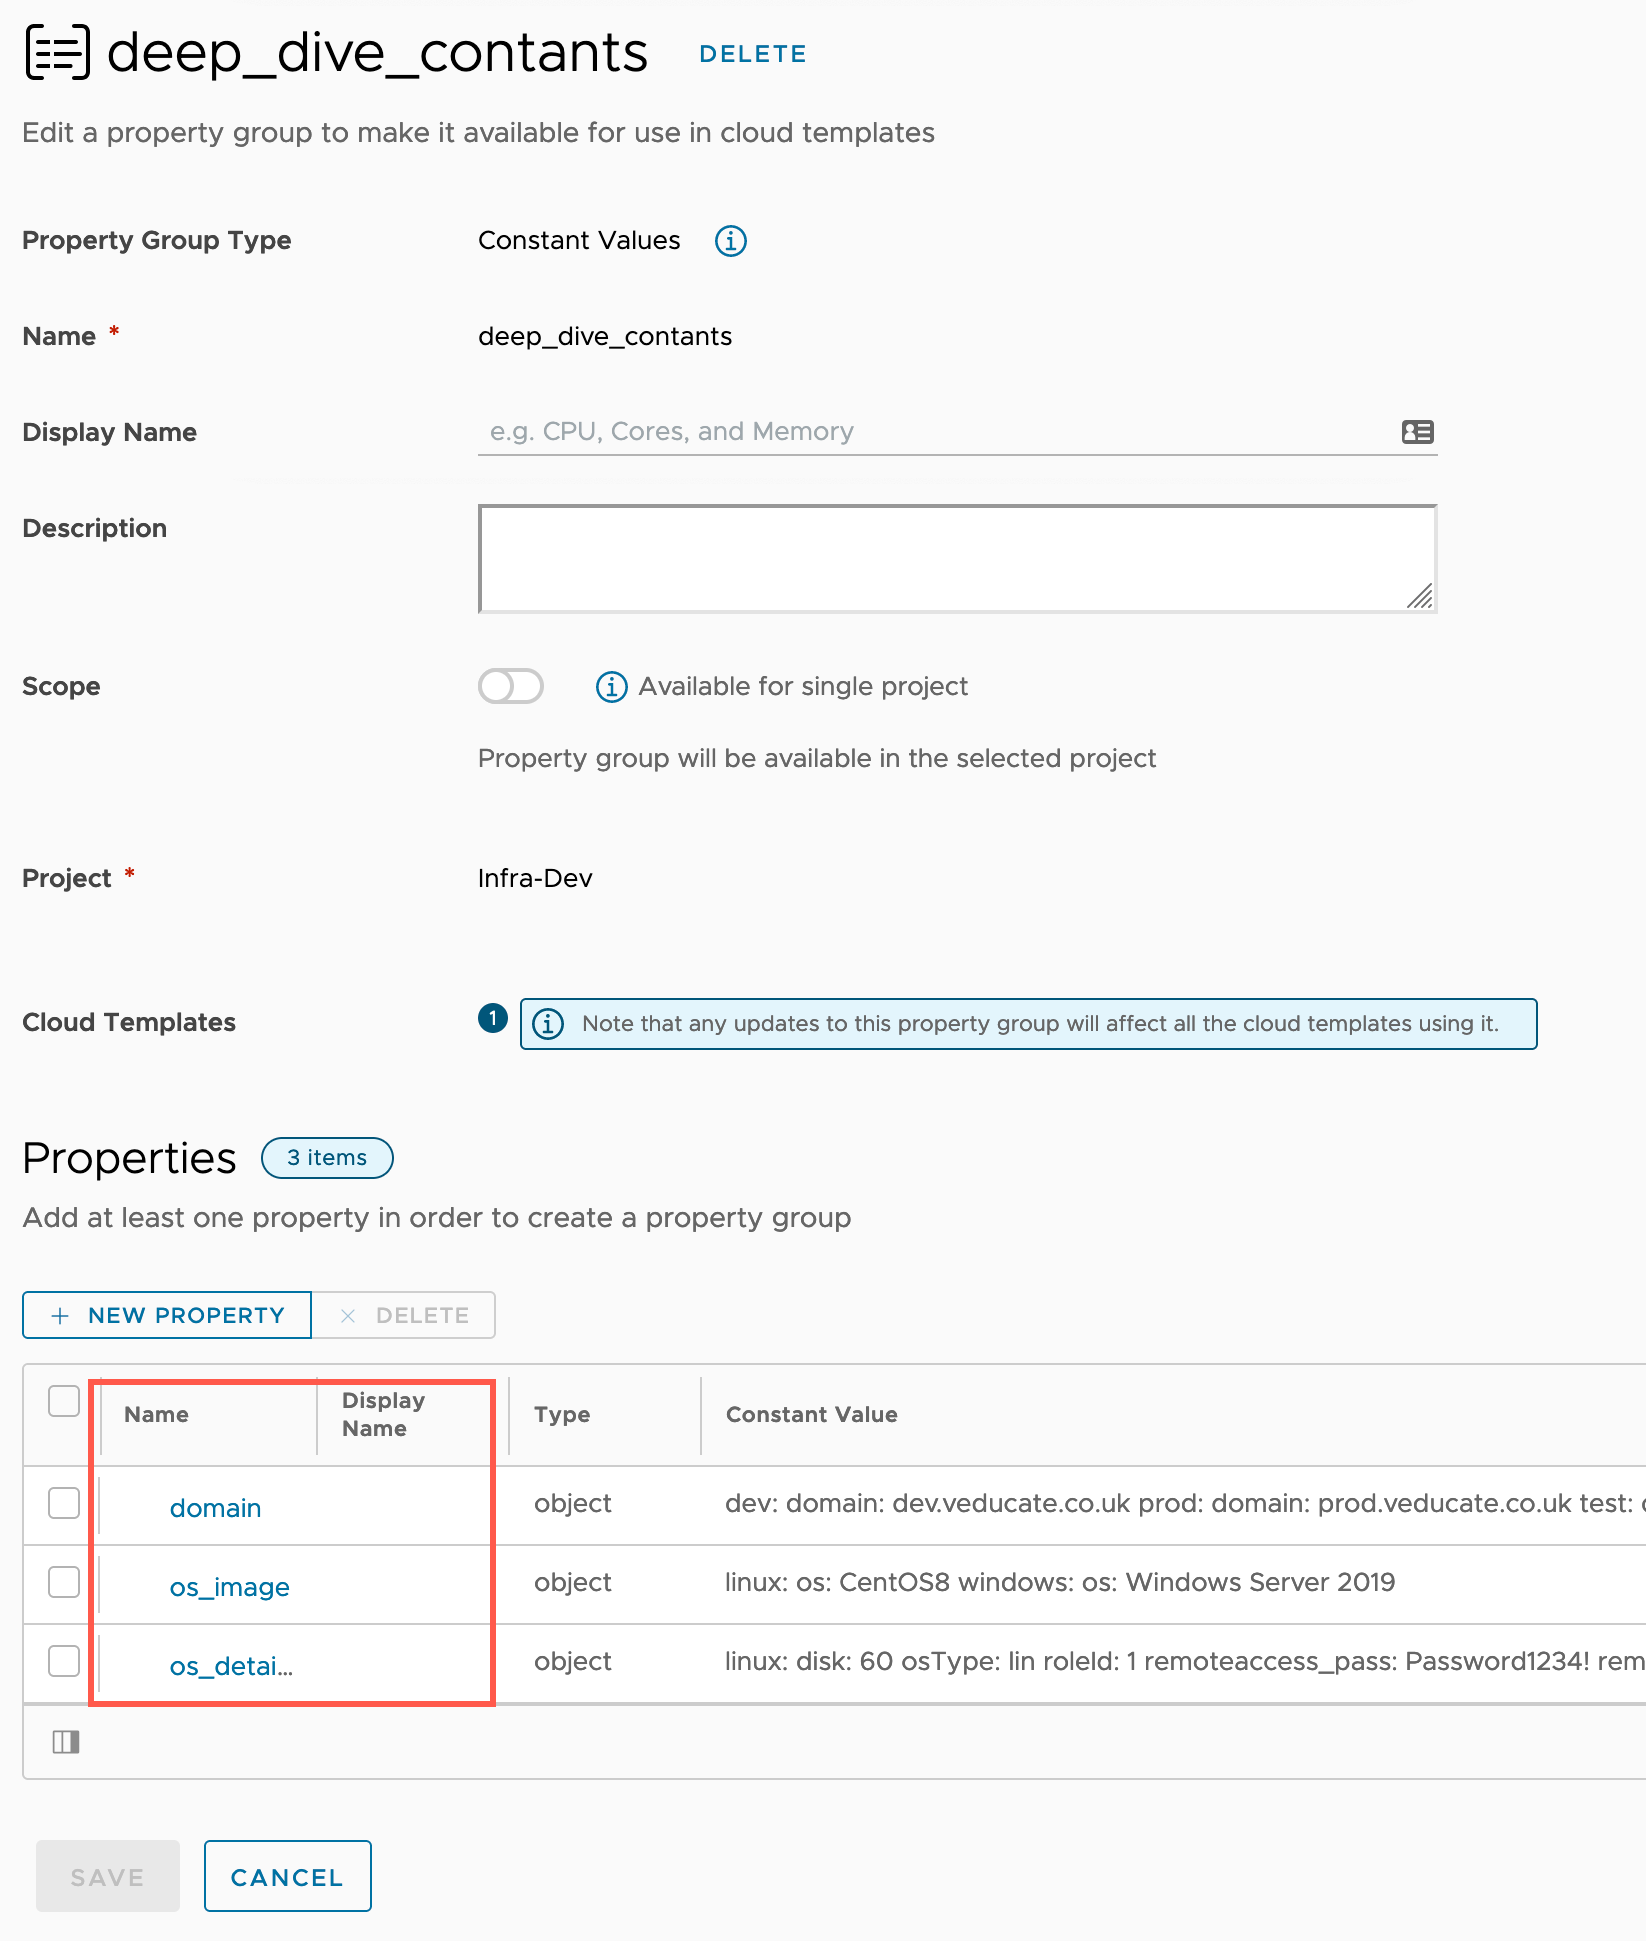
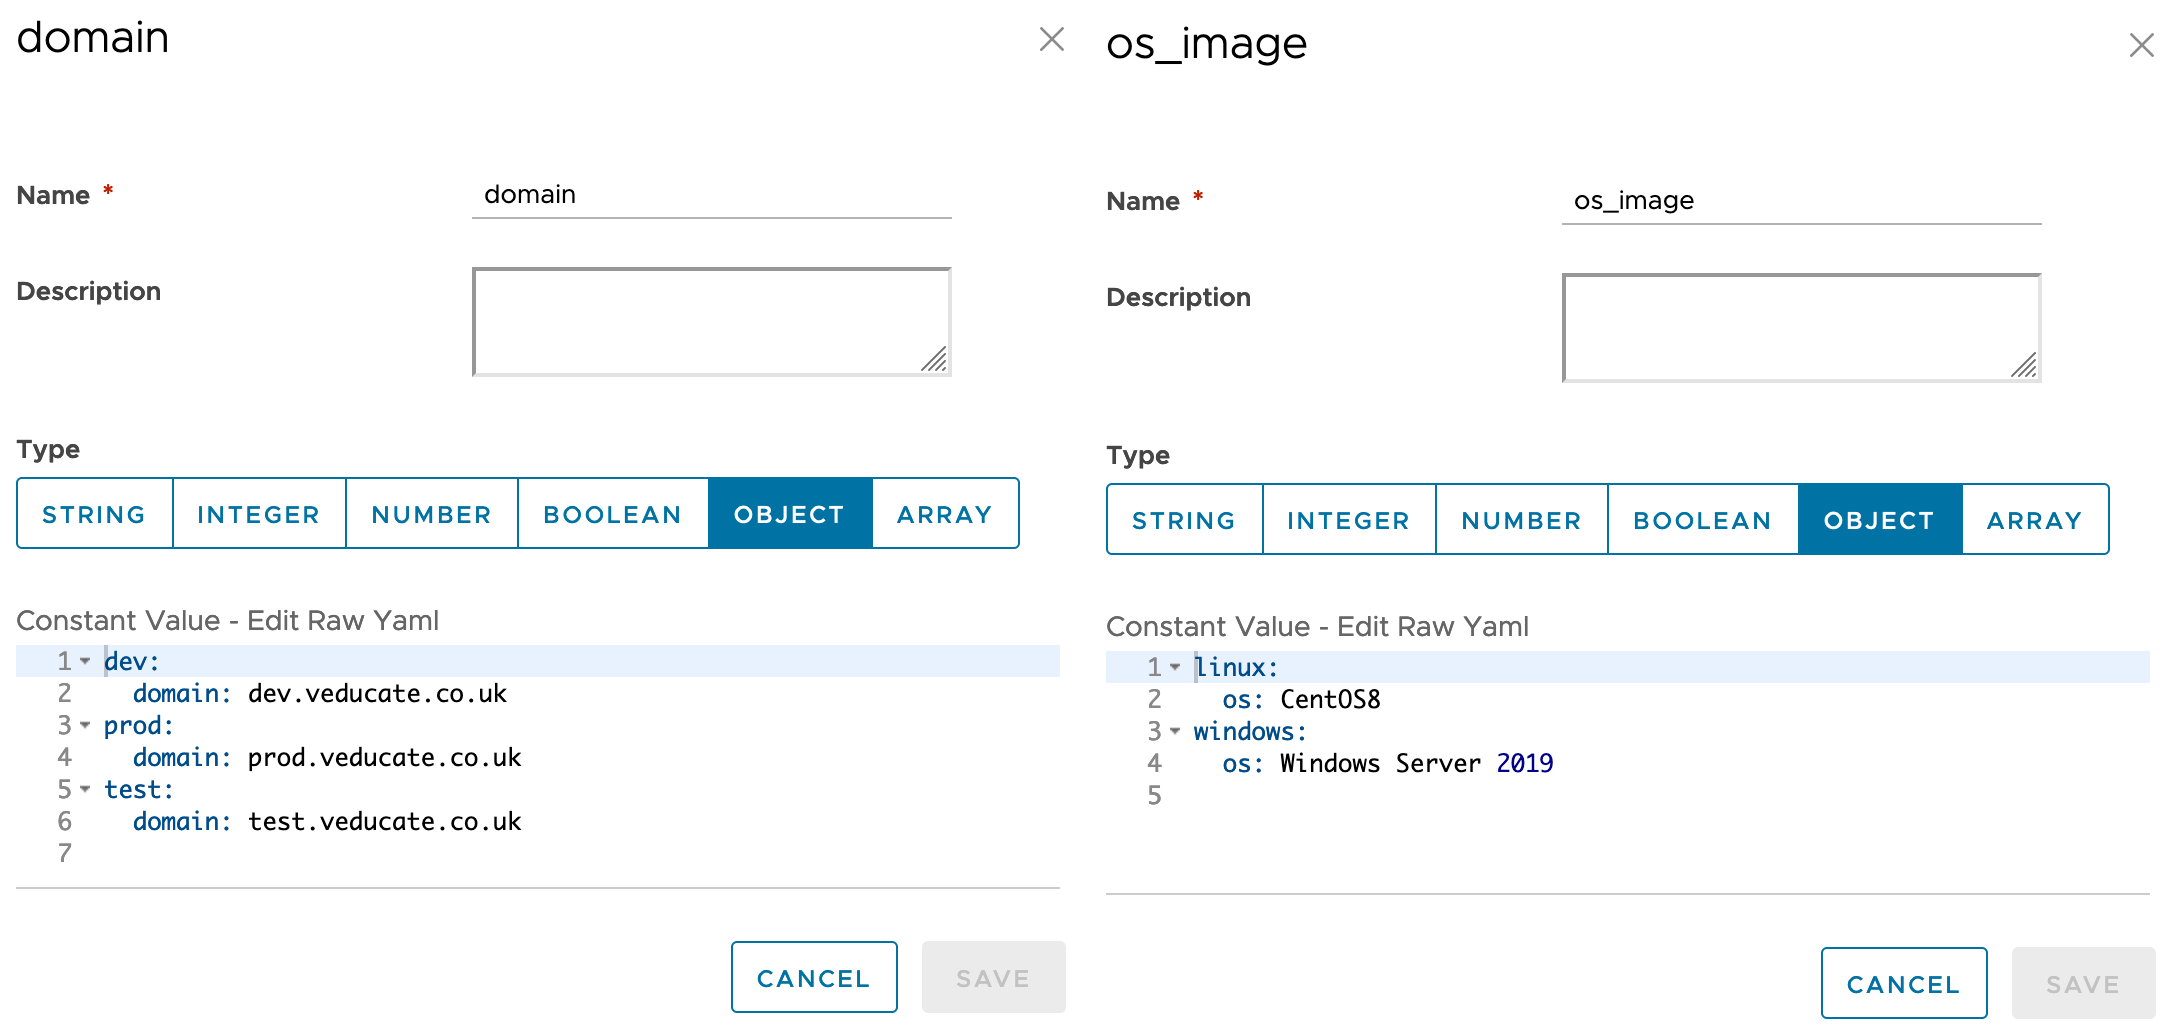
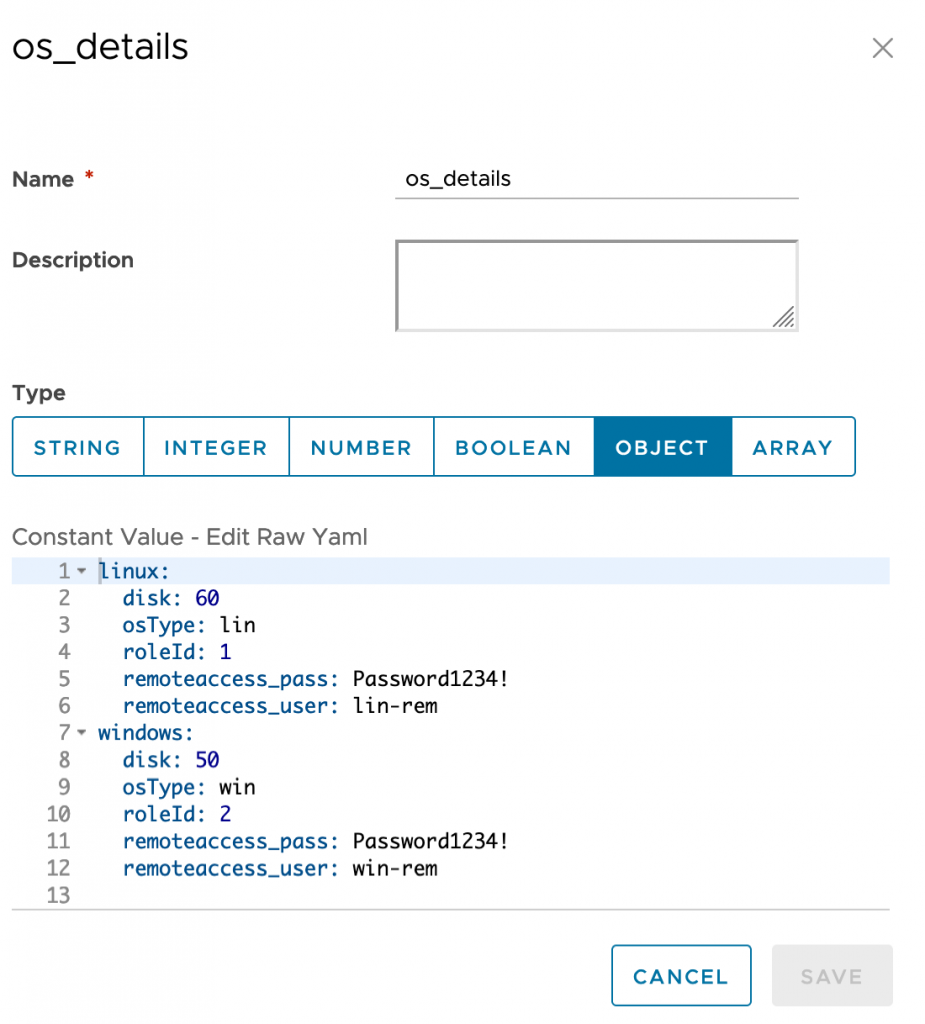
Below are the three properties, and the data. The plan is to access the data nested within each of these properties of the group. And using this in different ways within the template.
To reference a constant property group within the Cloud Template, you use the syntax:
${propgroup.group_name.property_name}

# For example
${propgroup.deep_dive_contants.os_details}

# To reference data within the the property itself
${propgroup.deep_dive_contants.os_details[linux]}
${propgroup.deep_dive_contants.os_details[linux][roleId]}
First, in the cloud template, I’ve created some custom property data on the resource object.
You will also note that for the first square brackets of data, I’m using the “input” from the cloud template itself.
When a deployment is requested, the user input will be taken and computed into the rest of the cloud template code syntax.
# Cloud Template code
${propgroup.deep_dive_contants.os_details[input.platformInputs.platform]["av_install"]}

# Becomes the below after the user input is processed during a deployment
${propgroup.deep_dive_contants.os_details[linux]["av_install"]}
Continuing down the cloud template code, the other specified data inputs follow the same format.
The last line of code to call out is setting the name for the resource once it’s deployed, here I bring together several of the data points to build this computed string.
The first expression is placed as normal after the curly brace, any additional expressions used need to be within brackets.
# Syntax
${propgroup.group_name.property[data] + extra_data}

# Example of bringing together multiple property groups and user inputs data

name: ${propgroup.deep_dive_contants.os_details[input.platformInputs.os_type]["osType"] + "-" + (propgroup.deep_dive_contants.os_details[input.platformInputs.os_type]["roleId"]) + "-" + (input.platformInputs.platform) + "-" + (input.name)}
Below is the full Cloud Template YAML for my example.
formatVersion: 1
inputs:
  platformInputs:
    type: object
    title: Choose your Public Cloud, Cost Center and Operating System
    $ref: /ref/property-groups/deep_dive_inputs
  name:
    type: string
    title: Machine Name
    maxLength: 6
    minLength: 2
    pattern: '[a-z]+'
resources:
  Cloud_Network_1:
    type: Cloud.Network
    properties:
      networkType: public
  Cloud_Machine_1:
    type: Cloud.Machine
    properties:
      domain: ${propgroup.deep_dive_contants.domain[input.platformInputs.platform]["domain"]}
      tags:
        - key: costcenter
          value: ${input.platformInputs.cost_center}
      image: ${propgroup.deep_dive_contants.os_image[input.platformInputs.os_type]["os"]}
      flavor: small
      constraints:
        - tag: ${"cloud:" + (input.platformInputs.public_cloud)}
      networks:
        - network: ${resource.Cloud_Network_1.id}
      remoteAccess:
        authentication: usernamePassword
        username: ${propgroup.deep_dive_contants.os_details[input.platformInputs.os_type]["remoteaccess_user"]}
        password: ${propgroup.deep_dive_contants.os_details[input.platformInputs.os_type]["remoteaccess_pass"]}
      name: ${propgroup.deep_dive_contants.os_details[input.platformInputs.os_type]["osType"] + "-" + (propgroup.deep_dive_contants.os_details[input.platformInputs.os_type]["roleId"]) + "-" + (input.platformInputs.platform) + "-" + (input.name)}
Now let’s see what happens when this is provisioned.
First are my requester details.
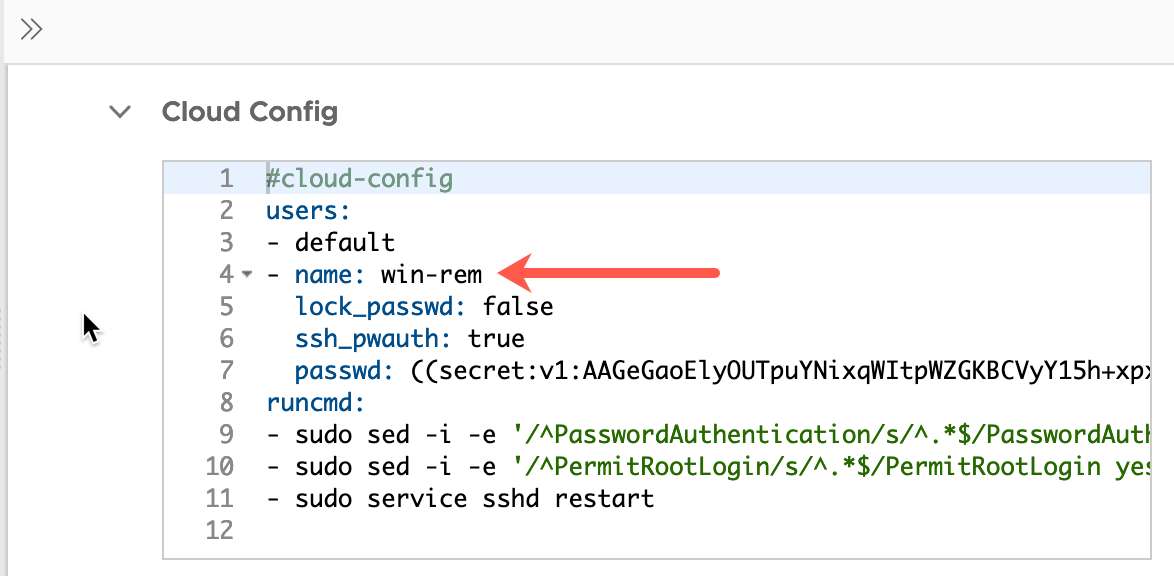
Below is the cloud config section, used to configure the username and password in the image. You can see it’s taking the username held in the property group.
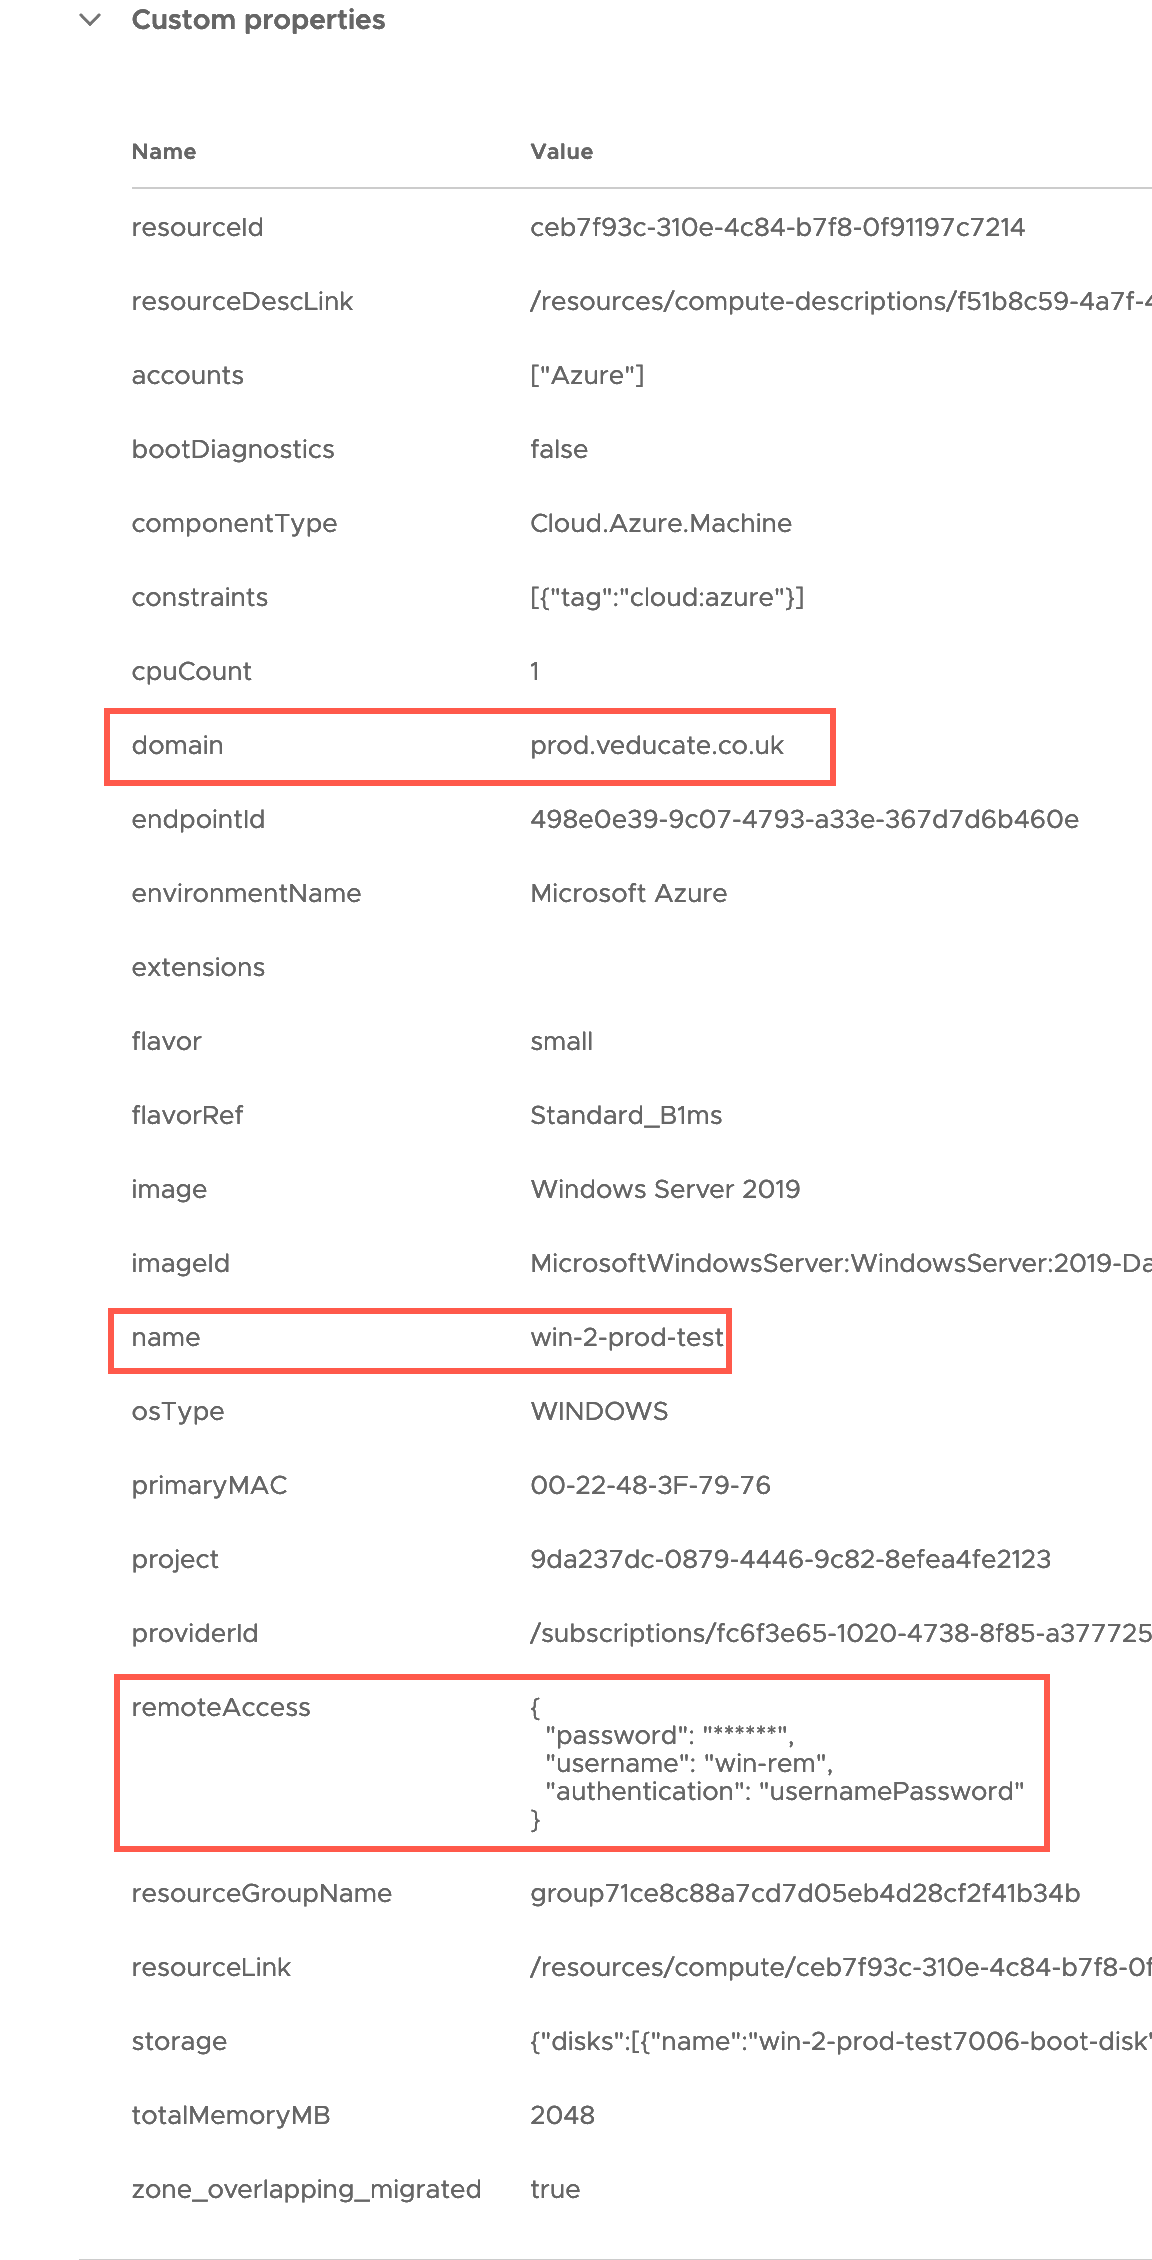
Finally, all of the custom properties metadata for the object. I have highlighted the other items that are from the property group.
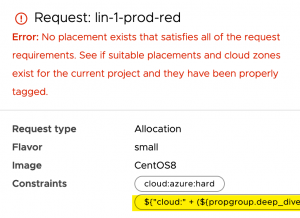
One area to note, is the inability to nest a user input whilst specifying a property group, for the use of a constraint. For example, the following will not work:
constraints:
  - tag: ${"cloud:" + (${propgroup.deep_dive_contants.os_image[input.platformInputs.os_type]["os"])}

# When you run the deployment, it will compute the constraint as the exact value still:

${"cloud:" + (${propgroup.deep_dive_contants.os_image[input.platformInputs.os_type]["os"])}
Below is the result from the provisioning diagram.
Regards
