In this two-part blog post series, I’m going to detail what I consider a basic customer use case when deploying new Windows Servers in their environment.
- Deploy a Windows Server Virtual Machine
- Add to the Active Directory Domain
- Install software
- Configure some system settings
To achieve this, I’m going to use vRealize Automation to deploy the virtual machine, and then the SaltStack Config component to configure the virtual machine once it’s up and running.
vRA SaltStack Config is part of the vRealize Automation product, it comes from the VMware acquisition of SaltStack (the company). VMware integrated SaltStack Enterprise (the product) into vRA, as either a licence stand-alone component, i.e. you can still buy just SaltStack on its own, or as part of vRealize Automation itself. Additionally, features such as SaltStack Protect+Comply, how now transformed into vRA SaltStack SecOps, an addon licence to the existing product.
You may have previously heard of Salt, the open-source project focusing on the core features of configuration management, but lacks the enterprise features of SaltStack Config, such as (but not limited to) centralised management UI and RBAC. This remains an open-source project, with VMware becoming the guardians of the product.
In this Part 1, we are going to cover the following:
For both blog posts I’ve also recorded an accompanying video detailing the configuration. Below is part one, and you can see the part two video on second blog post.
Preparing the Windows Server Template
For my example, I am using a Windows Server 2019 image. For no other reason than I already had one in my environment.
The following configurations need to be in place:
- Create a firewall rule for TCP 445 – Allow on all profiles
-
New-NetFirewallRule -Name "SMB445" -DisplayName "SMB445" -Protocol TCP -LocalPort 445

Set-Item (dir wsman:\localhost\Listener\*\Port -Recurse).pspath 445 -Force

Restart-Service winrm
-
- Ensure SMB2 is enabled
-
get-smbserverconfiguration | select EnableSMB2Protocol
-
- Configure winrm
-
winrm quickconfig -transport:http
-
- Set UAC to never notify
-
Select Start > Control Panel

Click System Security

Under Action Center, choose Change User Account Control settings

Move the slider bar down to the Never notify selection and click OK

Reboot the machine for changes to take effect
-
- CloudBase-Init installed with the machine syspreped and shutdown (this needs to be the last step of your preparation).
- Binaries download location
- VMware Blog – Windows guest initialization with Cloudbase-Init in vCenter
- Configure as per this blog post, with the change added in below
- Cloudbase-init.conf
- first_logon_behaviour=no
- Control the behaviour of what happens at next logon. If this option is set to no, the user is never forced to change the password. (If this is set to always, the salt minion install will fail).
- first_logon_behaviour=no
These steps should have you fully covered. The best SaltStack resource I could find on configuring your Windows images is here, however most of the information is pointed at examples for Salt running on a Windows image in AWS for example. Which has specific requirements. There is also this VMware Documentation page as well.
vRealize Automation with SaltStack Config integration
You should have a vRA environment already, and a SaltStack Config setup. If you need to install the latter, which is not an out of the box install as part of vRA. Then I recommend you do this using the vRealize Suite LifeCycle Manager method. This deploys a single PhotonOS appliance with the Salt Components installed and will integrate this for you into vRealize Automation. You can read the steps on official documentation page.
Note: The vRealize Suite Lifecycle Manager installation method is not recommended for production grade systems with more than 1,000 nodes.

Which installation scenerio should I use?
To integrate an existing standalone installation into vRealize Automation, please see this documentation.
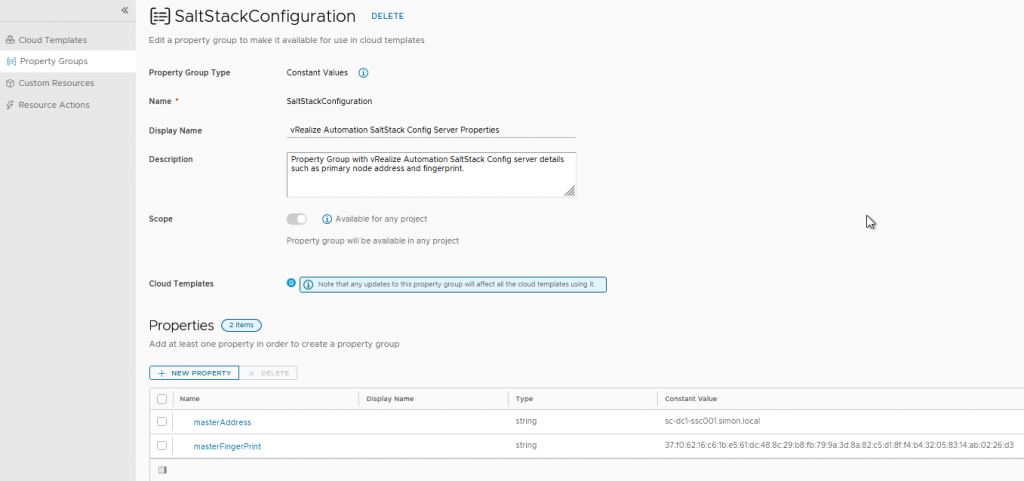
During the integration via vRSLCM, a property group is created which holds the Salt Master details.
Testing A VM deployment and installing the Salt Minion
Before we get too far ahead of ourselves, let’s make sure that we can successfully deploy our Windows Server image, and install the Salt Minion.
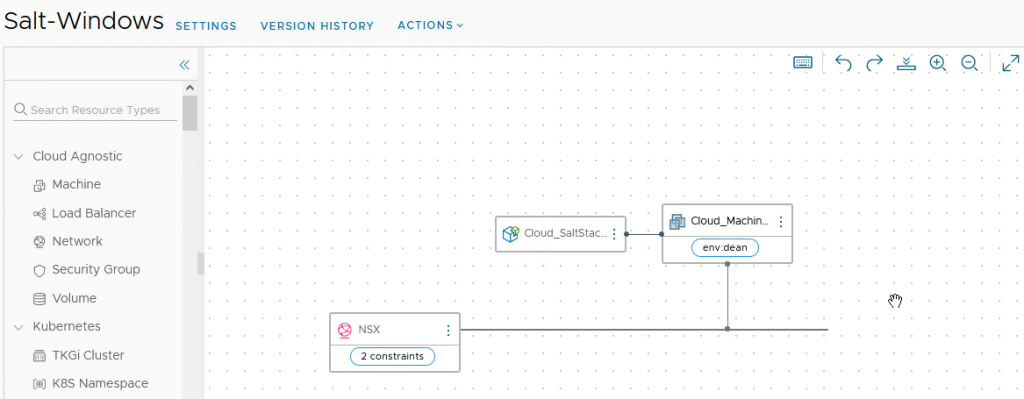
The cloud template is a small simple one:
- One user input – Machine Name
- Cloud.SaltStack
- Which host to deploy to, defined by creating a link between the two on the canvas or manually specifying the VM resource object
- masterId – using the default “saltstack_enterprise_installer” id used by SaltStack
- stateFiles – which states to apply, here I’m just asking it to configure the presence becon back to the salt master from the minion
- saltEnvironment: this is the environment (within the Salt Master file server) where the stateFiles are located.
- Cloud.vSphere.Machine
- Usual parameters passed (image, flavour, name from input, network)
- remoteAccess details are specified, as these are used by the SaltStack configuration element for authentication
- Cloud.NSX.Network
- Here I am just specifying to use an existing network defined within a Network Profile I configured earlier.
The below template should be roughly enough to get you started with some minor modifications, such as for your mapping names, and any tags as necessary.
One of the reasons we need CloudBase-Init installed in our Windows Server Template, not only for the sysprep function to give us the new deployment experience and configure new SIDs, but also so we can pass the remoteAuthentication details to the image. These properties from the Cloud Template, are used by SaltStack to connect to the Server and deploy the Salt Minion.
I do not recommend you use the “cloudConfig” properties to configure the VM, as cloudConfig is ran on first boot only, but also reboots the machine afterwards, which can interupt the SaltStack Minion install.
formatVersion: 1
inputs:
  Machine_Name:
    type: string
    title: Machine Name
    default: veducate
resources:
  Cloud_SaltStack_1:
    type: Cloud.SaltStack
    properties:
      hosts:
        - ${resource.Cloud_Machine_1.id}
      masterId: saltstack_enterprise_installer
      stateFiles:
        - /presence/init.sls
      saltEnvironment: base
  Cloud_Machine_1:
    type: Cloud.vSphere.Machine
    properties:
      image: 'Windows Server'
      flavor: small
      name: ${input.Machine_Name}
      constraints:
        - tag: env:dean
      remoteAccess:
        authentication: usernamePassword
        username: Admin
        password: VMware1!
      networks:
        - network: ${resource.NSX.id}
  NSX:
    type: Cloud.NSX.Network
    properties:
      networkType: existing
      constraints:
        - tag: net:existing
        - tag: net:dean
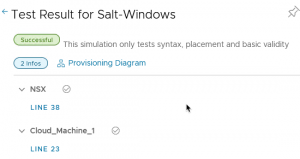
Once you have this setup, run a quick validation test, then deploy, and hopefully this will be successful first time, with the Salt Minion on the VM reporting back to the Salt Master.
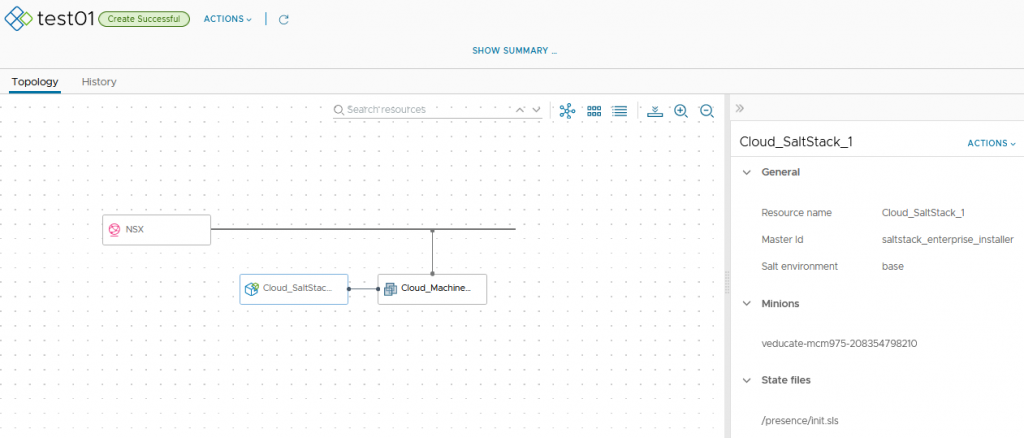
Notice in the below screenshot the SaltStack element is not tested.
Once deployed, you will see the resource objects, as you would with any other type of deployment.
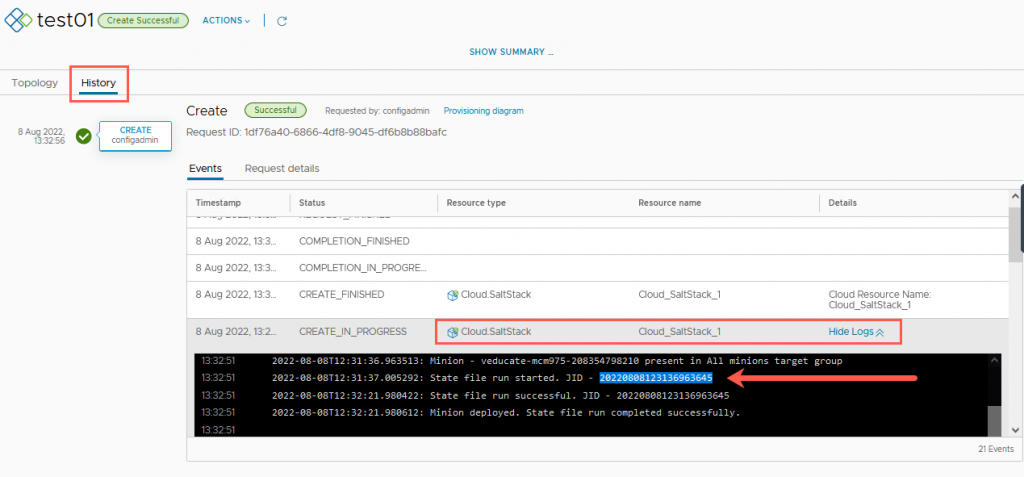
Clicking on the History tab, and scrolling through the events, you’ll be able to see the SaltStack execution logs. These are the logs from vRA passing over the request to SaltStack Config itself. Most importantly is the Job ID (JID).
- I’ve taken a copy of the JID, and now we’ll view this in the SaltStack Config UI for further details.
- In the SaltStack Config UI, Click on “Activity” in the left-hand navigation
- Then select Completed
- In the main window you’ll see all the job activities, you can filter on most of the heads, in my example we’ll provide the JID from vRA.
- Then click the blue hypertext of our JID in question.
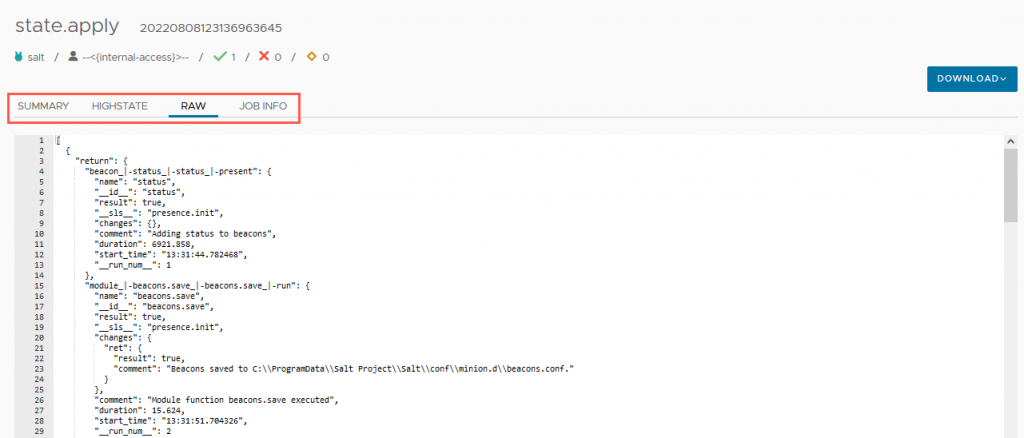
Now you will have the job run history in full, with several tabs to view the data and outputs.
And finally, we can see the Virtual Machine under the Minion page, showing as present as the presence has been enabled.
A few error examples
It took me a few times to get everything right, mainly down to misconfigurations in my Windows Template. I thought it would be useful to document a few error examples here.
- No Route to Host
- Probably self-explanatory, but the Minion Deployment fails as the Salt Master (vRA SSC appliance) cannot connect to the deployed VM. SaltStack gets the IP address from vRA, which gets it from VMware Tools
- Check your Template doesn’t have a static IP address still set
ValueError(\"Failed to connect to '%s:%s': %s\" % (self.server, self.port, str(err))) from err\nValueError: Failed to connect to '192.168.110.90:445': [Errno 113] No route to host\n"
- This one was easier, my salt environment needed the Master Key regenerating, as I was using a templated SSC deployment (hey, it’s a demo environment not real life!).
- remove the master key
-
rm /etc/salt/pki/master/sseapi_key.pub
-
- restart master service
-
systemctl restart salt-master
-
- Accept master key in the SaltStack Config UI
- Restart raas and master services
-
systemctl restart raas
systemctl restart salt-master
-
- remove the master key
salt.exceptions.SaltException(msg)\nsalt.exceptions.SaltException: Request failed: Authentication failed: invalid or expired SSC token
- SMB Connection Closed
- Check SMB2 is enabled in your image
- Get-SmbServerConfiguration | Select EnableSMB2Protocol
- Should be “True”
- Get-SmbServerConfiguration | Select EnableSMB2Protocol
- Check the deployed VM isn’t rebooting unexpectedly.
- In my case, I was still allowing CloudBase-Init to configure some things via the Cloud Template “cloudConfig” parameter, meaning the VM reboots during the deployment.
- Check SMB2 is enabled in your image
SMBConnectionClosed('SMB socket was closed, cannot send or receive any more data')\nsmbprotocol.exceptions.SMBConnectionClosed: SMB socket was closed, cannot send or receive any more data
- SMB Response Exception
- This was due to the Account used to authenticate, provided in the Cloud Template, was set to have it’s password changed on first logon, in the CloudBase-Init config.
SMBResponseException(response)\nsmbprotocol.exceptions.SMBResponseException: Received unexpected status from the server: Unknown error. (3221226020) UNKNOWN_ENUM: 0xc0000224
Summary and on to part 2
Let’s bring this blog post to an end at this point, as we’ve now setup our Windows Template, our vRA and SaltStack Config environments and integration, and successfully deployed a virtual machine that has the state minion deployed and the enable presence state returned.
In part 2, we will start creating the salt states we need to deploy to our Windows Server virtual machine to configure it for use on our enterprise network example.
Regards
