Safely Clean Up Orphaned First Class Disks (FCDs) in VMware vSphere with PowerCLI
vSphere Orphaned First Class Disk (FCD) Cleanup Script Orphaned First Class Disks (FCDs) in VMware vSphere environments are a surprisingly common and…
Read guide →186 practical VMware guides and field notes.
vSphere Orphaned First Class Disk (FCD) Cleanup Script Orphaned First Class Disks (FCDs) in VMware vSphere environments are a surprisingly common and…
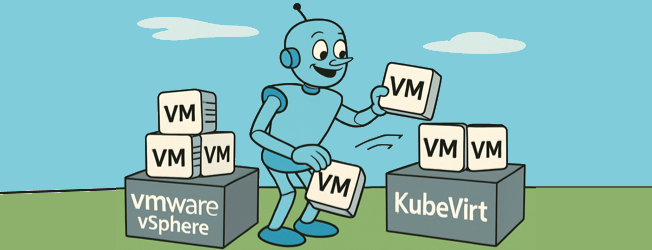
Read guide →As a vSphere administrator, you've built your career on understanding infrastructure at a granular level, datastores, DRS clusters, vSwitches, and HA…
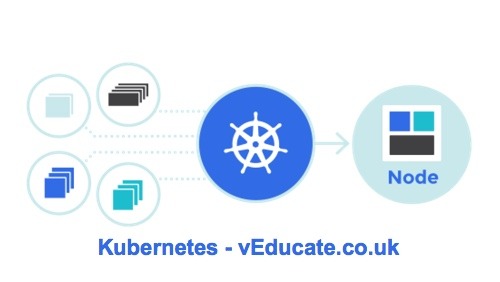
Read guide →The Issue Someone has deleted the Cloud-Provider-vSphere project in the gcr.io registry for container images. The default pull policy for the vSphere CSI when…
Read guide →The Issue I keep saying, there are no new ideas in technology, just re-hashes of old ones. That is also true for VMware and their data loss issues. The…
Read guide →The VMware Fusion KB to remove the software makes reference to a number of areas you need to manually cleanup, so below a little script which closes the…
Read guide →