Tag Archives: Kubernetes

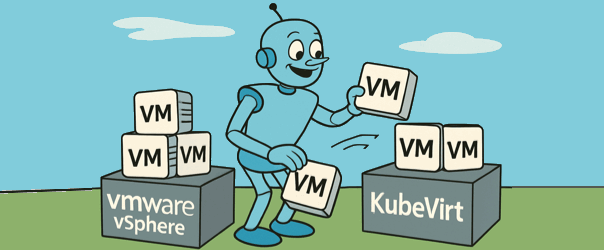
Learn Kubevirt - migrating from VMware - header image

Learn KubeVirt: Deep Dive for VMware vSphere Admins

As a vSphere administrator, you’ve built your career on understanding infrastructure at a granular level, datastores, DRS clusters, vSwitches, and HA configurations. You’re used to managing VMs at scale. Now, you’re hearing about KubeVirt, and while it promises Kubernetes-native VM orchestration, it comes with a caveat: Kubernetes fluency is required. This post is designed to bridge that gap, not only explaining what KubeVirt is, but mapping its architecture, operations, and concepts directly to vSphere terminology and experience. By the end, you’ll have a mental model of KubeVirt that relates to your existing knowledge.

What is KubeVirt?

KubeVirt is a Kubernetes extension that allows you to run traditional virtual machines inside a Kubernetes cluster using the same orchestration primitives you use for containers. Under the hood, it leverages KVM (Kernel-based Virtual Machine) and QEMU to run the VMs (more on that futher down).

Kubernetes doesn’t replace the hypervisor, it orchestrates it. Think of Kubernetes as the vCenter equivalent here: managing the control plane, networking, scheduling, and storage interfaces for the VMs, with KubeVirt as a plugin that adds VM resource types to this environment.

Tip: KubeVirt is under active development; always check latest docs for feature support.

Core Building Blocks of KubeVirt, Mapped to vSphere

KubeVirt Concept vSphere Equivalent Description
VirtualMachine (CRD) VM Object in vCenter The declarative spec for a VM in YAML. It defines the template, lifecycle behaviour, and metadata.
VirtualMachineInstance (VMI) Running VM Instance The live instance of a VM, created and managed by Kubernetes. Comparable to a powered-on VM object.
virt-launcher ESXi Host Process A pod wrapper for the VM process. Runs QEMU in a container on the node.
PersistentVolumeClaim (PVC) VMFS Datastore + VMDK Used to back VM disks. For live migration, either ReadWriteMany PVCs or RAW block-mode volumes are required, depending on the storage backend.
Multus + CNI vSwitch, Port Groups, NSX Provides networking to VMs. Multus enables multiple network interfaces. CNIs map to port groups.
Kubernetes Scheduler DRS Schedules pods (including VMIs) across nodes. Lacks fine-tuned VM-aware resource balancing unless extended.
Live Migration API vMotion Live migration of VMIs between nodes with zero downtime. Requires shared storage and certain flags.
Namespaces vApp / Folder + Permissions Isolation boundaries for VMs, including RBAC policies.

KVM + QEMU: The Hypervisor Stack

Continue reading Learn KubeVirt: Deep Dive for VMware vSphere Admins

Kubernetes Header Image

Kubernetes Scheduling: nodeSelector vs nodeAffinity

When deploying workloads in Kubernetes, controlling where your pods land is crucial. Two primary mechanisms facilitate this: nodeSelector and nodeAffinity. While they might seem similar at first glance, they serve different purposes and offer varying degrees of flexibility.

The Basics: nodeSelector

The nodeSelector is the simplest way to constrain pods to specific nodes. It matches pods to nodes based on key-value pairs. For instance:

spec:
  nodeSelector:
    disktype: ssd

This configuration ensures that the pod is scheduled only on nodes labeled with disktype=ssd.

However, nodeSelector has its limitations. It doesn’t support complex queries or multiple values for a single key. If you attempt to specify multiple values for the same key, like so:

nodeSelector:
  topology.kubernetes.io/zone: us-east-1a
  topology.kubernetes.io/zone: us-east-1b

Only the last key-value pair is considered, effectively ignoring the previous ones. This behavior stems from the fact that YAML maps require unique keys, and Kubernetes doesn’t merge these entries.

Enter nodeAffinity

For more granular control, nodeAffinity comes into play. It allows you to define rules using operators like In, NotIn, Exists, and DoesNotExist. This flexibility enables you to match pods to nodes based on a range of criteria.

Suppose you want to schedule a pod on nodes in either us-east-1a or us-east-1b. Here’s how you’d achieve that with nodeAffinity: Continue reading Kubernetes Scheduling: nodeSelector vs nodeAffinity

Kubernetes Header Image

Highlight Kubernetes Labels in your Terminal with AWK

A quick tip and bit of code: if you’re outputting a lot of Kubernetes metadata using the --show-labels command, it can feel like looking for a needle in a haystack. The snippet below colorizes key label outputs to make them stand out.

The Code Snippet

When working with Kubernetes, it can be helpful to visually scan for certain node labels—such as service.cilium.io/node=... or custom readiness flags like ingress-ready=true. Using a simple awk script, we can colorize these labels directly in our terminal output. This script uses ANSI escape codes to wrap matched text in color and awk’s gsub() function to apply substitutions line by line. It’s a lightweight and effective way to highlight key data points in otherwise dense CLI output.

kubectl get ciliumnodes --show-labels | awk '
BEGIN {
  color_start = "\033[1;36m"; # cyan
  color_end = "\033[0m";
}
{
  gsub(/service\.cilium\.io\/node=[^, ]+/, color_start "&" color_end);
  gsub(/ingress-ready=true/, color_start "&" color_end);
  print
}'

Screenshot Example


Screenshot showing the use of an awk command to color-highlight the ingress-ready=true label in red within kubectl get ciliumnodes --show-labels output in a Kubernetes terminal session.

Breakdown of the Code

We pipe the output of the kubectl command to awk. The BEGIN block sets up the ANSI color codes used for matching patterns.

  • \033[1;36m is an ANSI escape code that starts cyan-colored text.
  • \033[0m resets the text color back to normal.

gsub(...)

These two lines apply substitutions to each input line:

  • gsub() is a global substitution function that replaces all matches in the line.
    • service\.cilium\.io\/node=[^, ]+ matches a full key-value pair like service.cilium.io/node=mynode
    • [^, ]+ grabs the node value until the next comma or space
    • ingress-ready=true matches the exact label string
    • & refers to the entire matched string, which we wrap in color codes

print

This prints the modified line after substitutions are applied.

Customize the Highlight Color

You can change \033[1;36m to another color code:

  • Red: \033[1;31m
  • Green: \033[1;32m
  • Yellow: \033[1;33m
  • Blue: \033[1;34m
  • Magenta: \033[1;35m

A Final Note on sub() vs gsub()

  • sub() replaces only the first occurrence of the regex in the line
  • gsub() replaces all occurrences of the regex in the line

Regards


Bluesky Icon
Follow me on Bluesky

Dean Lewis

Kubernetes

Kubernetes Metric Server – cannot validate certificate because it doesn’t contain any IP SANs

The Issue

Whilst trying to install the Metric’s server:

kubectl apply -f https://github.com/kubernetes-sigs/metrics-server/releases/latest/download/components.yaml

so I could use kubectl top node for it’s metrics on Node resource useage, I found the pods were not loading, and upon inspection found the following:

> kubectl logs -n kube-system metrics-server-6f6cdbf67d-v6sbf 

I0717 12:19:32.132722 1 server.go:187] "Failed probe" probe="metric-storage-ready" err="no metrics to serve"
E0717 12:19:39.159422 1 scraper.go:140] "Failed to scrape node" err="Get \"https://192.168.49.2:10250/metrics/resource\": x509: cannot validate certificate for 192.168.49.2 because it doesn't contain any IP SANs" node="minikube"

The Cause

The issue here was due to the installation of Cert-Manager and setting up some TLS configurations within the CNI and Self-Signed certificates, the metric’s server wasn’t able to validate the authority of the Kubernetes API

The Fix

As this is communication within the cluster, I could simply fix this by telling Metric Server container to trust the insecure certificates from the API using the below
kubectl patch command:

kubectl patch deployment metrics-server -n kube-system --type='json' -p='[{"op": "add", "path": "/spec/template/spec/containers/0/args/-", "value": "--kubelet-insecure-tls"}]'


Regards

Dean Lewis

Kubernetes

Quick Tip: Supercharge Kubernetes Resource Retrieval with ‘kubectl get -f’

Did you know you can use the -f argument with kubectl get? Yep me either.

It’s pretty handy actually, as it will provide the status for all your Kubernetes resources deployed using that file or even file from hyperlink!

Below is a screenshot example using a file.

kubectl get -f

You can also specify multiple files by adding -f {file}for each file you want to check (this also works when deploying resources too!).

kubect get -f multiple files

And another example, using a hyperlink as the file location.

kubectl get -f from url

Hope this little tip helps someone!

Just for fun, here’s the ChatGPT write-up!

The command “kubectl get -f” is used in Kubernetes to retrieve information about Kubernetes resources defined in a file or multiple files. Let’s break down the command and its components:

  • “kubectl”: It is the command-line interface (CLI) tool for interacting with Kubernetes clusters. It allows you to manage and control Kubernetes resources.
  • “get”: It is the action or subcommand used to retrieve information about Kubernetes resources.
  • “-f”: It is a flag that specifies that the input will be provided from a file or multiple files rather than directly on the command line. It is followed by the path to the file(s) containing the Kubernetes resource definitions.

When you use “kubectl get -f <file>”, Kubernetes reads the file(s) provided and retrieves the information about the resources defined within those files. The information can include the names, statuses, and other details of the resources.

For example, if you have a file named “deployment.yaml” that defines a Kubernetes Deployment resource, you can use the command “kubectl get -f deployment.yaml” to retrieve information about that specific Deployment resource.

You can also provide multiple files by separating them with commas or specifying a directory containing multiple resource files. For instance, “kubectl get -f file1.yaml,file2.yaml” or “kubectl get -f /path/to/files” (where /path/to/files is the directory path).

By using this command, you can quickly retrieve information about Kubernetes resources defined in files without needing to manually create or modify resources using the command line.

Regards

Dean Lewis