In this blog post I am covering the vRealize Automation native feature that allows you to deploy Tanzu clusters via the Tanzu Kubernetes Grid Service of vCenter.
If you have been following my posts in 2021, I wrote a blog and presented as part of VMworld on how to deploy Tanzu Clusters using vRA Code Stream, due to the lack of native integration.
Now you have either option!
Pre-requisites
- A working vSphere with Tanzu setup
- Create a Supervisor Namespace that we can deploy clusters into
- vRA requires an existing Supervisor namespace to deploy clusters into, despite the separate capability that vRA can create Supervisor namespaces via a Cloud Template
- This namespace needs a VM Class and Storage Policy to be attached.
Configuring the vRealize Automation Infrastructure settings
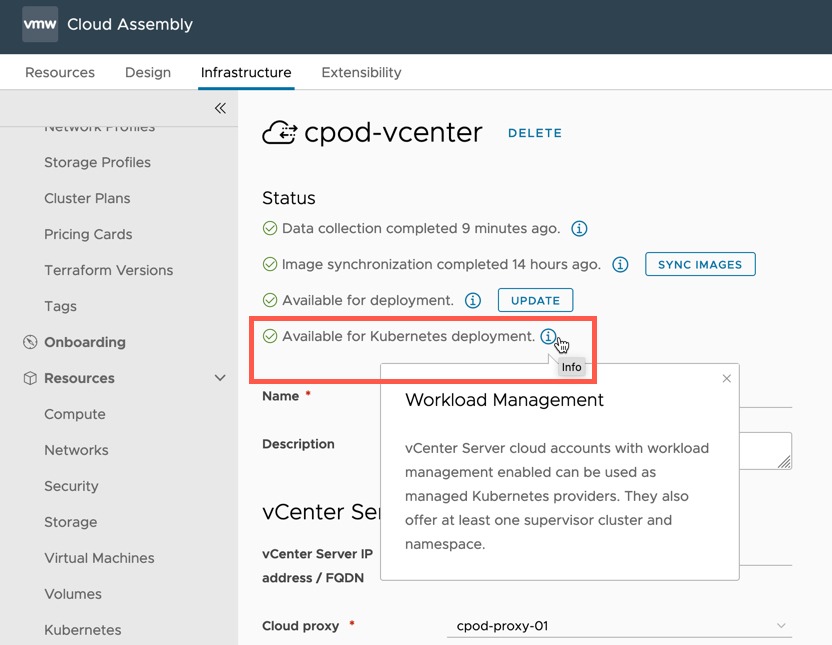
- Create a Cloud Account for your vCenter
- Ensure that once the data collection has run, the account shows “Available for Kubernetes deployment”
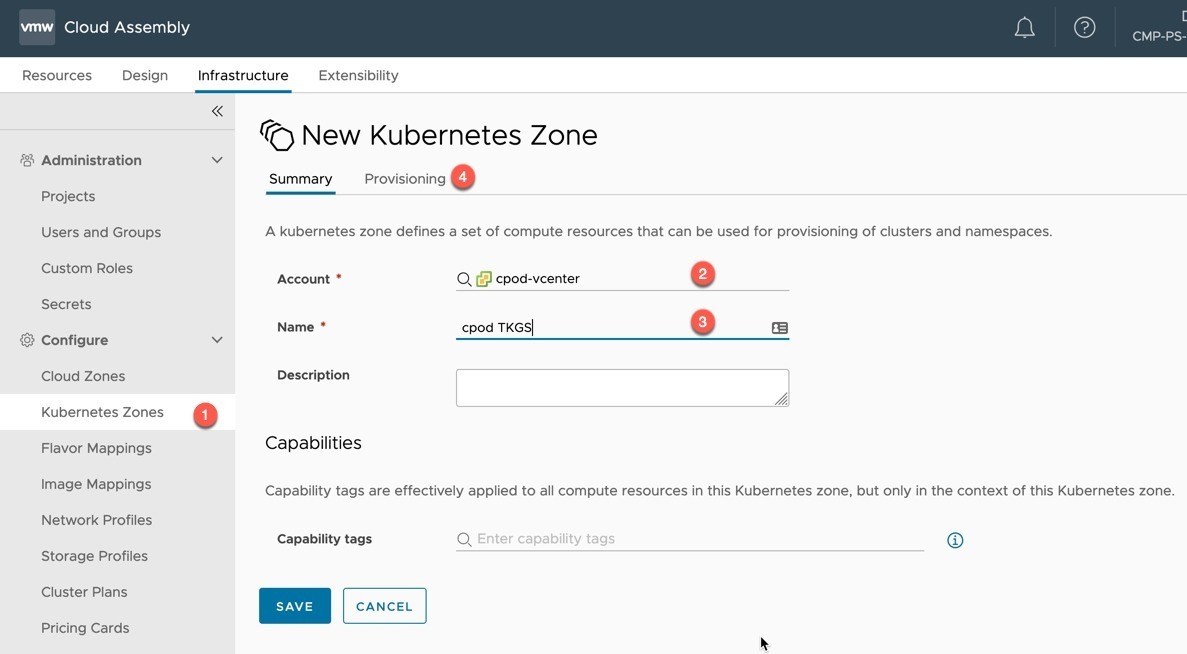
- Create a new Kubernetes Zone
- Select your Cloud Account linked vCenter
- Provide a name
- Select the Provisioning tab
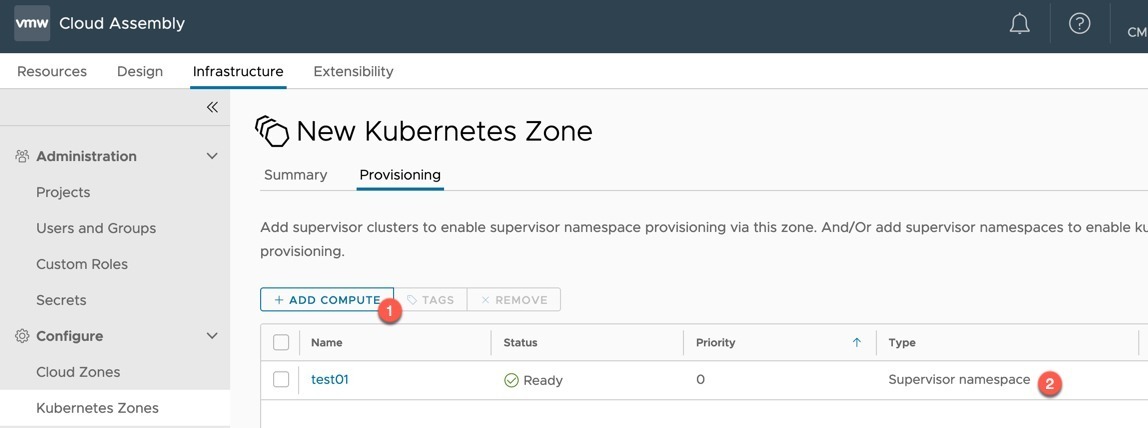
- Click to add compute to the zone.
- For the Tanzu Cluster deployment, this needs to be into existing Supervisor namespaces (as in the pre-reqs).
- Add your existing Supervisor namespaces you are interested in using
You can add the Supervisor cluster itself, but it won’t be used in this feature walk-through. If you have multiple Supervisor namespaces, I recommend tagging them in this view. So that you can use it as a constraint tag in the Cloud Template.
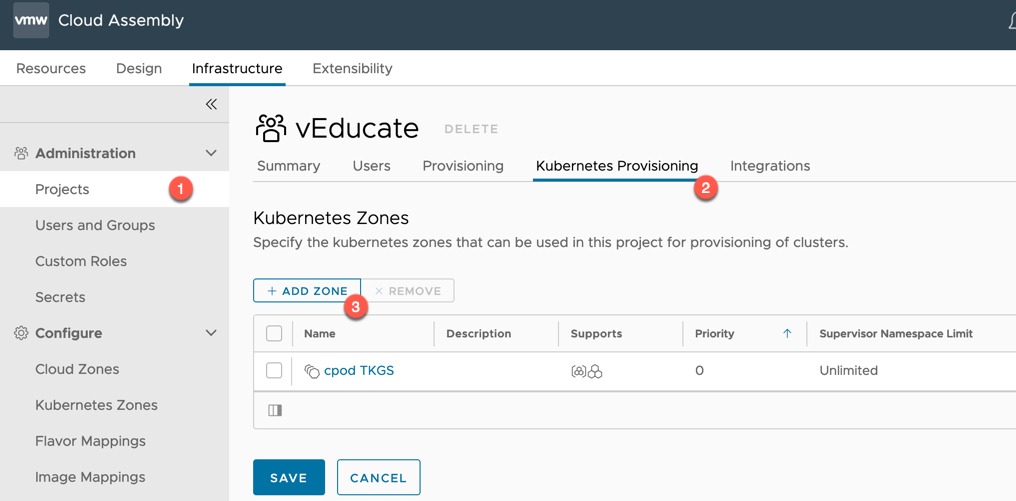
- Click Projects, select your chosen project
- Select the Kubernetes Provisioning tab
- Add your Kubernetes Zone
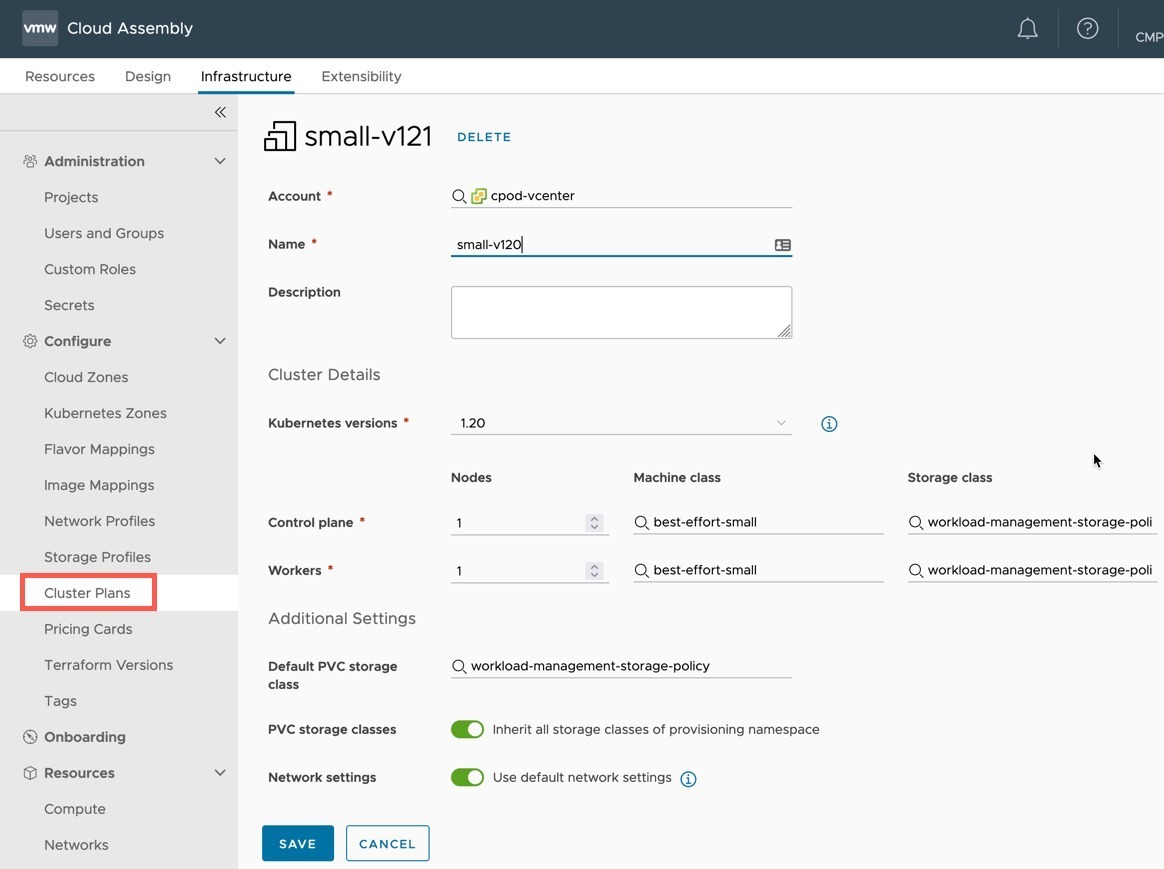
- Click Cluster Plans under Configure heading
- Create a new Cluster Plan with your specification
- Select the vCenter Account it will apply to
- Provide a name (a-z,A-Z,0-9,-)
- The UI will allow you to input characters that are not supported on the Cloud Template for name property
- Select your Kubernetes version to deploy
- Number of Nodes for Control and Worker nodes
- The Machine Class (VM Class on the Supervisor Namespace) for each Node Type
- You will be able to select from the VM classes added at the Supervisor namespace in vCenter
- Select the Storage Class for each Node Type
- Select the default PVC storage class in the cluster
- Enable/disable including all Supervisor Namespace storage classes
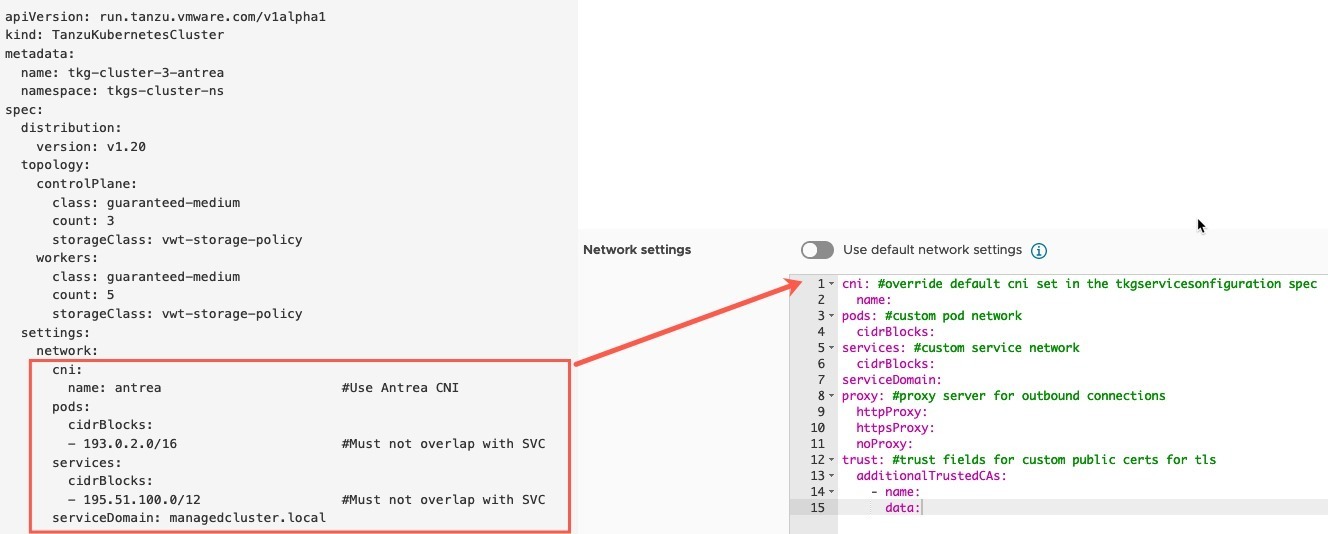
- Choose either default networking deployment for clusters or provide your own specification.
Regarding the network settings, below in the image I have highlighted how the Tanzu Kubernetes Grid Service v1alpha1 API YAML format for a cluster creation request maps across to the settings expected by vRA.
You can find further examples here.
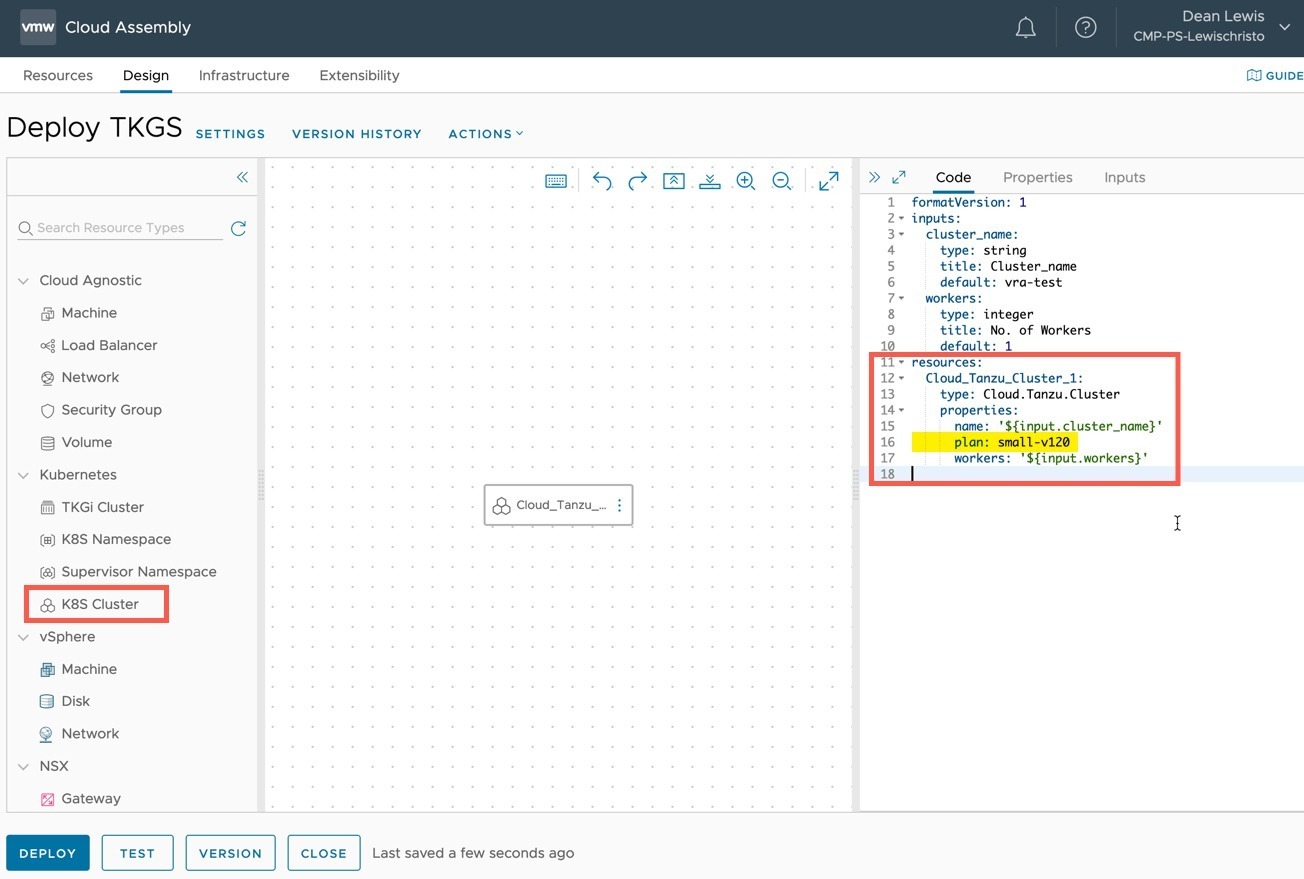
- Create a Cloud Template
- Place the “K8s Cluster” resource object on your canvas
- Configure the properties as needed
- The workers property will override the workers number in the Cluster Plan
Below is the example I used.
formatVersion: 1
inputs:
  cluster_name:
    type: string
    title: Cluster_name
    default: vra-test
  workers:
    type: integer
    title: No. of Workers
    default: 1
resources:
  Cloud_Tanzu_Cluster_1:
    type: Cloud.Tanzu.Cluster
    properties:
      name: '${input.cluster_name}'
      plan: small-v120
      workers: '${input.workers}'
Once you are happy, deploy the Cloud Template.
Successful Deployment of a Tanzu Cluster
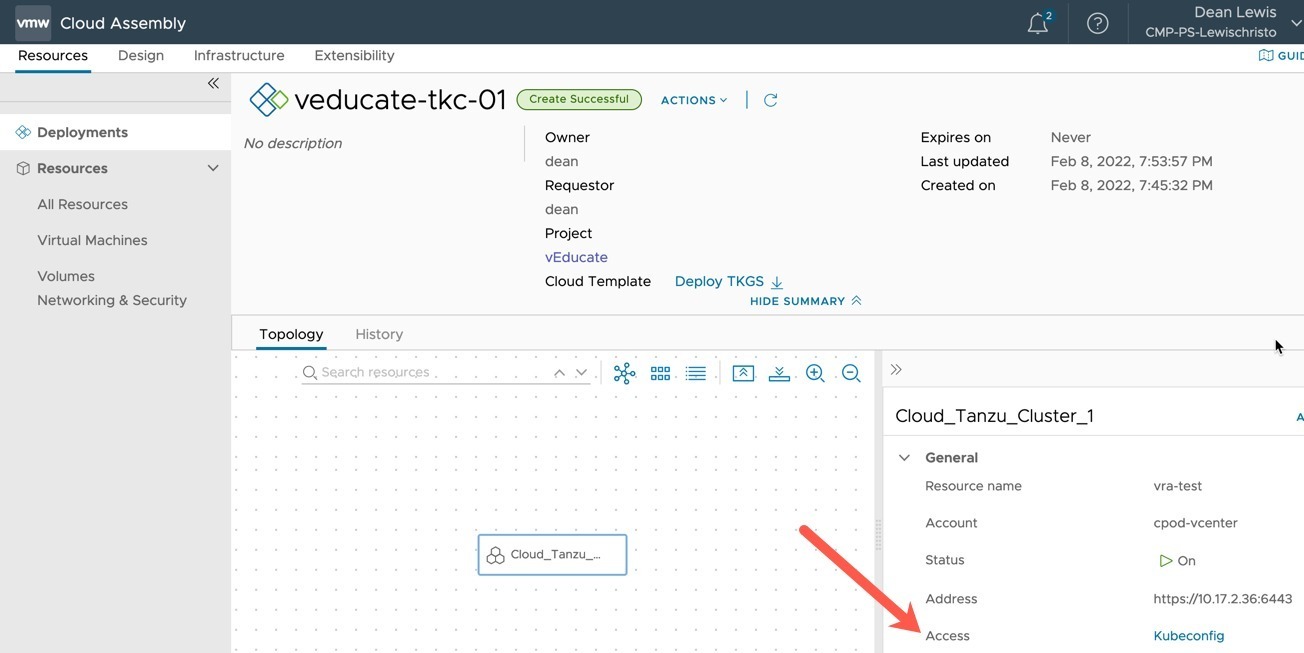
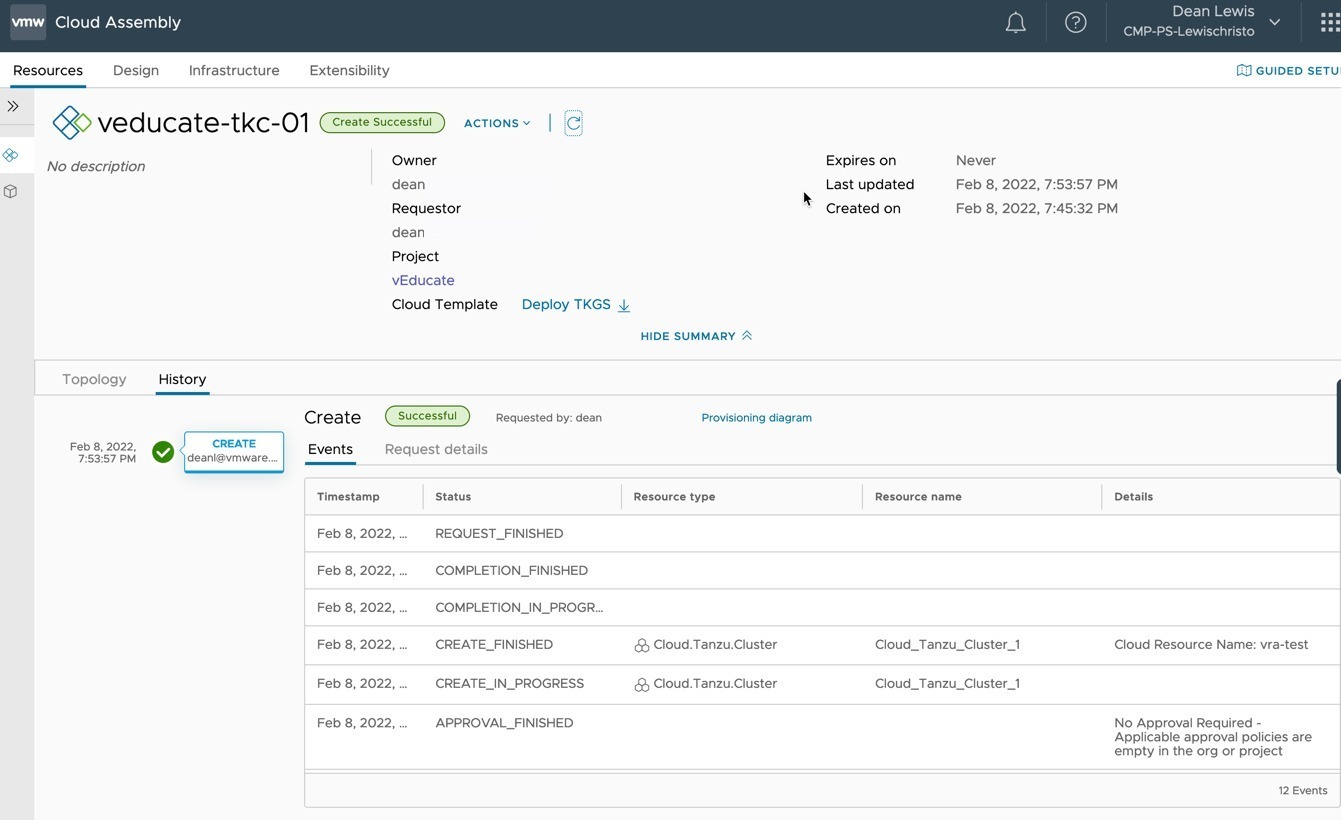
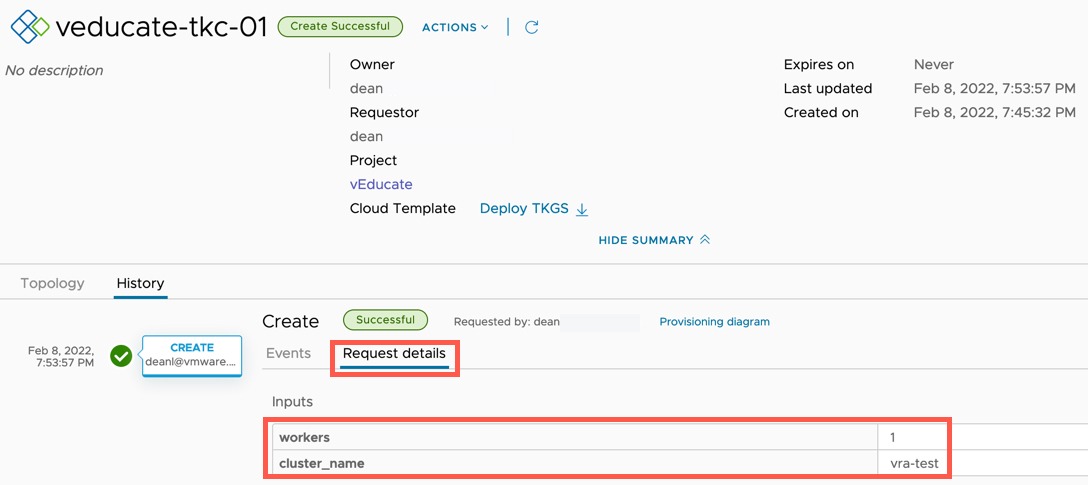
In the below screenshots, you can see the completed deployment.
- Clicking on the Resource Object, you have the ability to download a Kubeconfig file to access the cluster.
- Viewing the History Tab will show you details about the creation.
- Clicking on Request Details Tab will show you the user inputs take at the time of deployment.
If you look at the “Infrastructure” tab and the configuration under Kubernetes, you will see this cluster is onboarded into vRA. You can further use other cloud templates against this cluster to create Kubernetes namespaces within the cluster, for example.
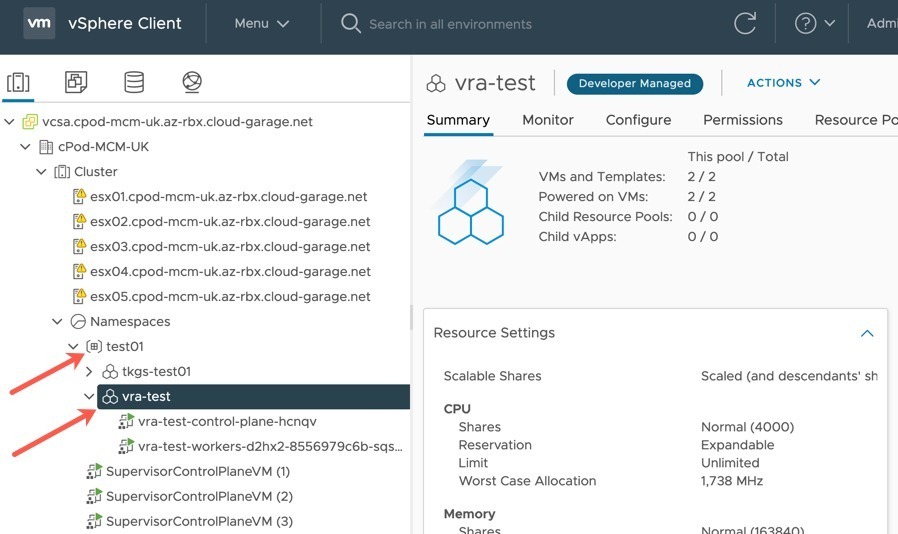
Finally, within my vCenter you can see my deployed cluster, to the Supervisor Namespace I specified in the Kubernetes Zone.
Regards
