Install OpenShift 4.x on vSphere 6.x/7.x
The following procedure is intended to create VM’s from an OVA template booting with static IP’s when the DHCP server can not reserve the IP addresses.
The Problem
OCP requires that all DNS configurations be in place. VMware requires that the DHCP assign the correct IPs to the VM. Since many real installations require the coordination with different teams in an organization, many times we don’t have control of DNS, DHCP or Load balancer configurations.
The CoreOS documentation explain how to create configurations using ignition files. I created a python script to put the network configuration using the ignition files created by the openshift-install program.
Reference Architecture
For this guide, we are going to deploy 3 master nodes (control-plane) and 2 worker nodes (compute This guide uses RHEL CoreOS 4.3 as the virtual machine image, deploying Red Hat OCP 4.3, as per the support of N-1 from Red Hat.
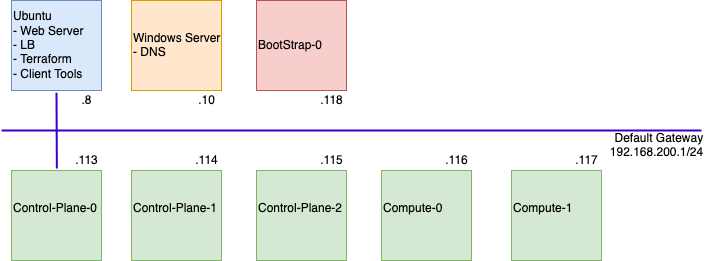
We will use a centralised Linux server (Ubuntu) that will perform the following functions;
- Load Balancer – HAProxy
- Web Server – Apache2
- Terraform automation host – version 0.11.14
- The deployment will be semi-automated using Terraform, so that we can easily build configuration files used by the CoreOS VM’s that have Static IP settings.
- Using a later version of Terraform will cause failures.
- Client Tools for OpenShift deployment
- OC
- Kubectl
- Openshift-install
DNS will be provided by a Windows Server.
The installation will use a Bootstrap server to bring the cluster online, which will be removed at the end of the build process.
Deployment Steps
In this guide we will deploy our environment in the following order;
- Configure DNS
- Import Red Hat Core OS image into vCenter
- Deploy Ubuntu Host
- Configure Apache
- Configure HAProxy
- Install Client-Tools
- Install Terraform
- Build OpenShift Cluster configuration
- Configuring the Terraform deployment
- Running the Terraform deployment
DNS
Openshift uses a “clusterName.BaseDomain” format.
For example; I want to call my Openshift cluster Demo. And my DNS Domain is Simon.local, then my full format used by Openshift is “demo.simon.local”
Below is a table plan of the IP addresses you will use to build the environment.
The last three addresses are cluster level resources that are available on each control-plane node, accessible via the load balancer.
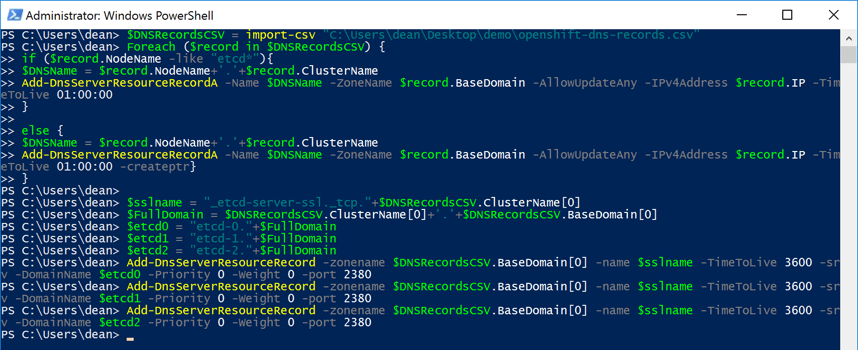
To configure the DNS records in Windows, you can use the Script and CSV file here
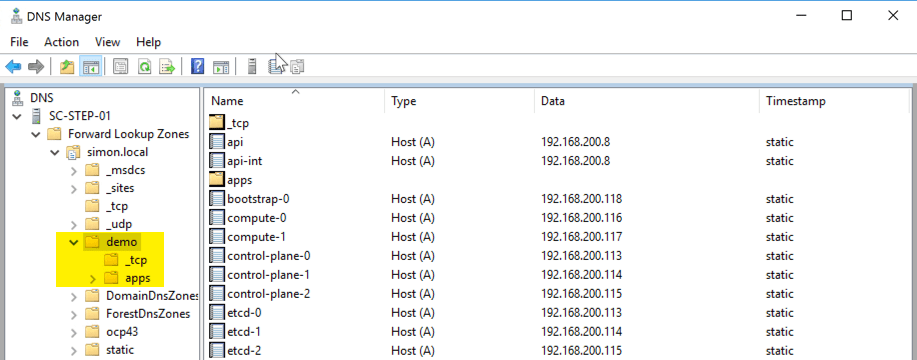
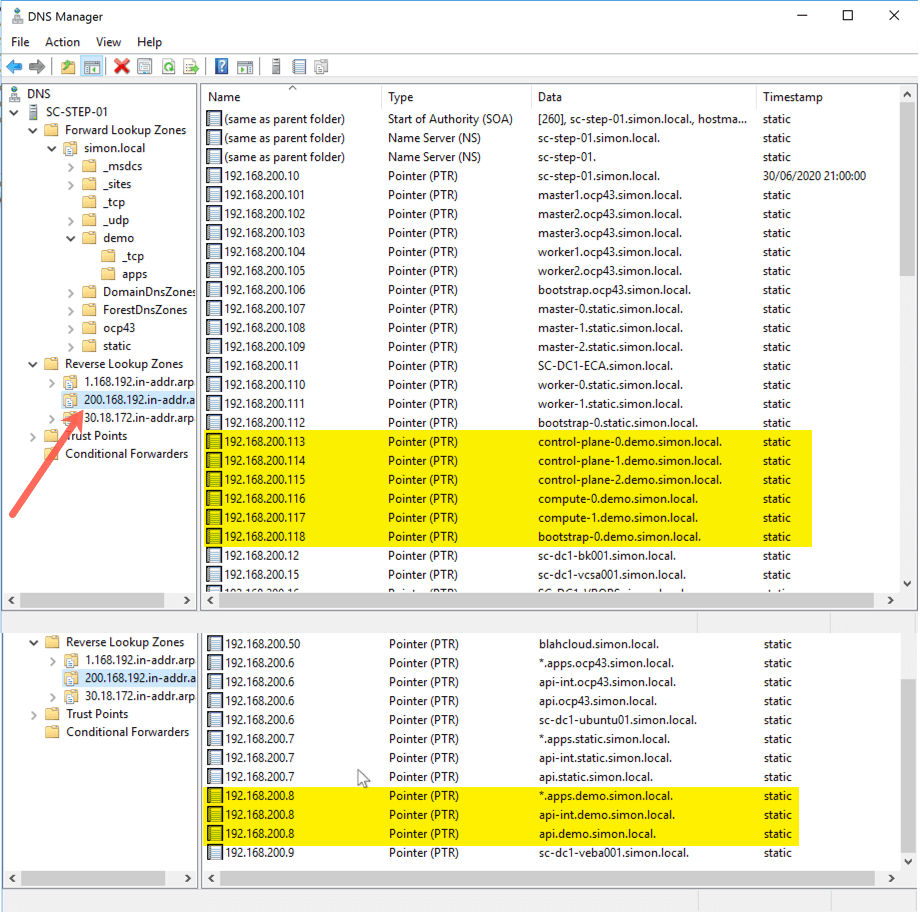
In the below screenshot, the script has created the “demo” domain folder and entered my records. It is important that you have PTR records setup for everything apart from the “etcd-X” records.
Import Red Hat CoreOS Image into vCenter
Import the following OVA into your vCenter;
Using another image version may cause deployment issues.
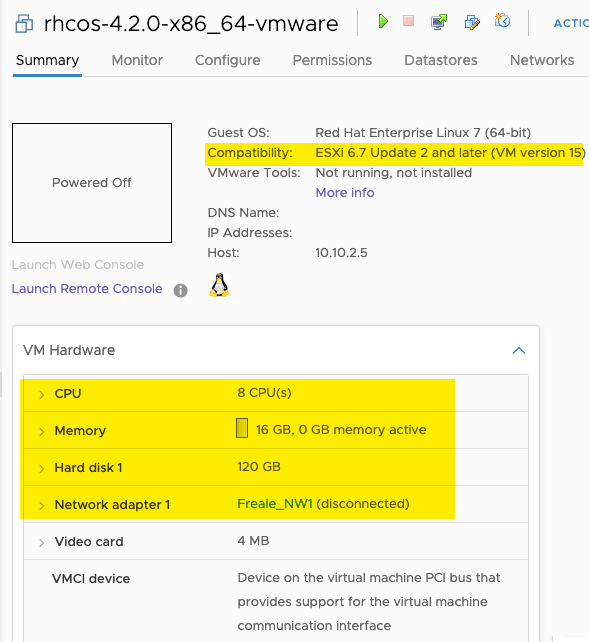
Configure the Virtual Machine with the necessary resources;
- CPU = 2 Cores or Higher
- Memory = 16GB or Higher
- Disk = 120GB or higher
- Network = Set to your preferred network
- Virtual Machine Compatibility = version 15 or higher
Convert the virtual machine to a template.
Setting up your Ubuntu machine
Deploy a virtual machine running Ubuntu, in this guide I used the latest server build.
Apache2;
- Install
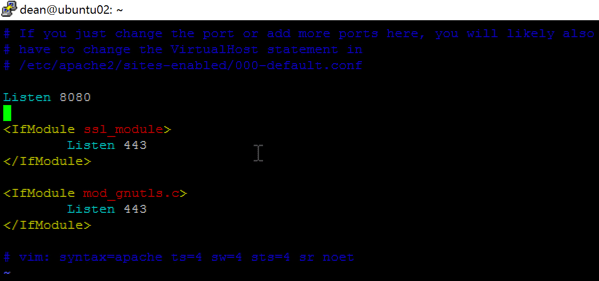
- Configure to listen on port 8080
sudo vi /etc/apache2/ports.conf

Find line starting “listen 80” and change to “listen 8080”
Save and restart the apache service
HaProxy
- Install
- Configure HAProxy to load balance the following services
To do this, edit the following file;
/etc/haproxy/haproxy.cfg
Insert the following lines to the bottom of the default configuration, making the changes for your IP addresses in your environment.
You can reference my full configuration file here;
frontend haproxynode
    bind *:6443
    mode tcp
            option tcplop
    default_backend backendnodes
            backend backendnodes
    balance source
            mode tcp
            server bootstrap 192.168.200.118:6443 check
            server Control-plane-0 192.168.200.113:6443 check
            server Control-plane-1 192.168.200.114:6443 check
            server Control-plane-2 192.168.200.115:6443 check

frontend machineconfig
    bind *:22623
    mode tcp
            option tcplog
    default_backend machinenodebackend
            backend machinenodebackend

    balance source
            mode tcp
            server bootstrap 192.168.200.118:22623 check
            server Control-plane-0 192.168.200.113:22623 check
            server Control-plane-1 192.168.200.114:22623 check
            server Control-plane-2 192.168.200.115:22623 check

frontend ingress-http
    bind *:80
    default_backend ingress-http
    mode tcp
    option tcplog

backend ingress-http
   balance source
   mode tcp
           server Control-plane-0 192.168.200.113:80 check
           server Control-plane-1 192.168.200.114:80 check
           server Control-plane-2 192.168.200.115:80 check
           server Compute-0 192.168.200.116:80 check
           server Compute-1 192.168.200.117:80 check

frontend ingress-https
    bind *:443
    default_backend ingress-https
    mode tcp
    option tcplog

backend ingress-https
    balance sourc
    mode tcp
           server Control-plane-0 192.168.200.113:443 check
           server Control-plane-1 192.168.200.114:443 check
           server Control-plane-2 192.168.200.115:443 check
           server Compute-0 192.168.200.116:443 check
           server Compute-1 192.168.200.117:443 check
Install Openshift Client Tools
Download the following tools, extract and copy to /usr/bin
- Openshift Client for Linux 4.3.19
- Openshift Install for Linux 4.3.19
You can download a later version within the 4.3.x builds. But this guide tested with the 4.3.19 version.
curl https://mirror.openshift.com/pub/openshift-v4/clients/ocp/4.3.19/openshift-client-linux-4.3.19.tar.gz -o openshift-client-linux-4.3.19.tar.gz

curl https://mirror.openshift.com/pub/openshift-v4/clients/ocp/4.3.19/openshift-install-linux-4.3.19.tar.gz -o openshift-install-linux-4.3.19.tar.gz
Untar the files
  tar -xvf openshift-install-linux-4.3.19.tar.gz

 tar -xvf openshift-client-linux-4.3.19.tar.gz
copy the files to your /usr/bin location
sudo cp oc kubectl openshift-install /usr/bin
Terrform v0.11.14
In this guide will use Terraform v0.11.14, at the time of writing this is not the latest available version. However, errors have been found in running our terraform files in the later version due to changes the supported file syntax.
Install unzip into your Ubuntu machine
sudo apt-get install unzip
Download and install Terraform
mkdir ~/bin
cd /tmp/
export TERRAFORM_VERSION=0.11.14

curl -O -L https://releases.hashicorp.com/terraform/${TERRAFORM_VERSION}/terraform_${TERRAFORM_VERSION}_linux_amd64.zip

unzip terraform_${TERRAFORM_VERSION} linux_amd64.zip -d ~/usr/bin/

Running the following will return your terraform version;

terraform -v
   Terraform v0.11.14
Build the OpenShift cluster configuration
I recommend working from a folder location for all your files etc, in my example, I am working from a folder called “demo” which is the name of my OpenShift cluster.
Create a file containing your Openshift Pull Secret.
Ensure you have an SSH public key available
- run “ssh-keygen” if you do not
Build your install-config.yaml file that will be used by the OpenShift-Install tool.
I do this by specifying variables that are used to create the file;
export DOMAIN=Domain.local
export CLUSTERID=demo
export VCENTER_SERVER=vCenter_FQDN
export VCENTER_USER="Username
export VCENTER_PASS='Password'
export VCENTER_DC=Datacenter
export VCENTER_DS=Datastore
export PULL_SECRET=$(< Pull_Secret_Location)
export OCP_SSH_KEY=$(< id_rsa.pub_Location)
To create the Install-config.yaml run;
cat <<EOF >> install-config.yaml
apiVersion: v1
baseDomain: ${DOMAIN}
compute:
- hyperthreading: Enabled
  name: worker
  replicas: 0
controlPlane:
  hyperthreading: Enabled
  name: master
  replicas: 3
metadata:
  name: ${CLUSTERID}
networking:
  networkType: OpenShiftSDN
  clusterNetworks:
  - cidr: 10.254.0.0/16
    hostPrefix: 24
  serviceNetwork:
  - 172.30.0.0/24
platform:
  vsphere:
    vcenter: ${VCENTER_SERVER}
    username: ${VCENTER_USER}
    password: ${VCENTER_PASS}
    datacenter: ${VCENTER_DC}
    defaultDatastore: ${VCENTER_DS}
pullSecret: '${PULL_SECRET}'
sshKey: '${OCP_SSH_KEY}'
EOF
You can find the examples here;
Run the following command to build the ignition files that will be used when the virtual machines boot.
openshift-install create ignition-configs
Copy the bootstrap.ign to your web server directory.
sudo cp bootstrap.ign /var/www/html/ignition/
sudo  chmod -R 755 /var/www/html/ignition/bootstrap.ign
Configuring the Terraform Deployment
Clone the following github repo;
git clone https://github.com/openshift/installer.git -b release-4.3
Move into the following folder location;
cd installer/upi/vsphere
copy the terraform.tfvars.example file
sudo cp terraform.tfvars.example terraform.tfvars
Edit the terraform.tfvars file, these are the lines you need to configure;
- cluster_id
- cluster_domain
- base_domain
- vsphere_server
- vsphere_user
- vsphere_password
- vsphere_cluster
- vsphere_datacenter
- vsphere_datastore
- vm_template
- machine_cidr
- vm_network
- control_plane_count
- compute_count
- bootstrap_ignition_url
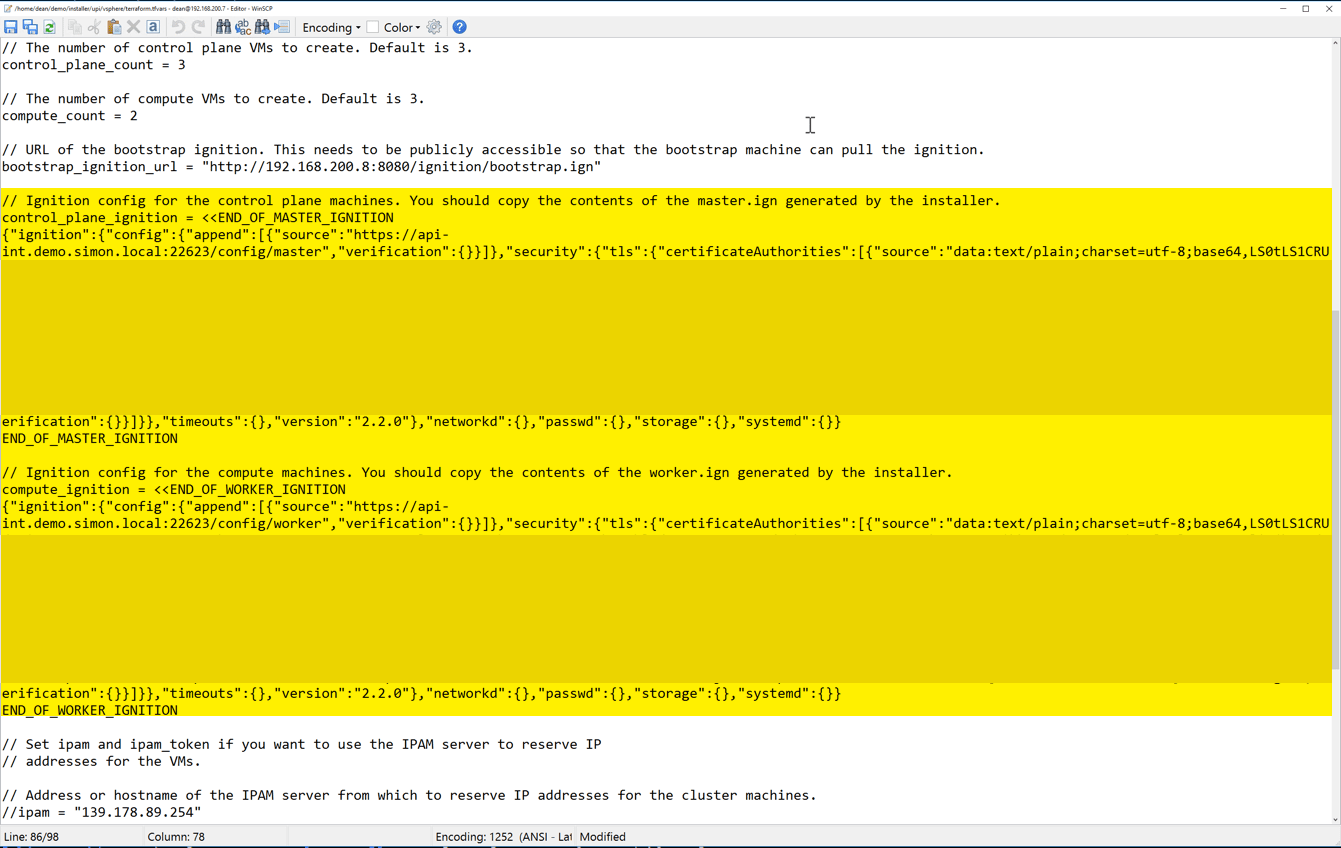
- control_plane_ignition
- compute_ignition
- bootstrap_ip
- control_plane_ips
- compute_ips
I dropped my “compute_count” figure to 2 in my example. If you are deploying a higher figure than this, you need to create the relevant DNS records.
Add in a line to set the VM network. This can go anywhere in the file.
//Set the vSphere network your VMs will be deployed to.
vm_network = "VM Network"
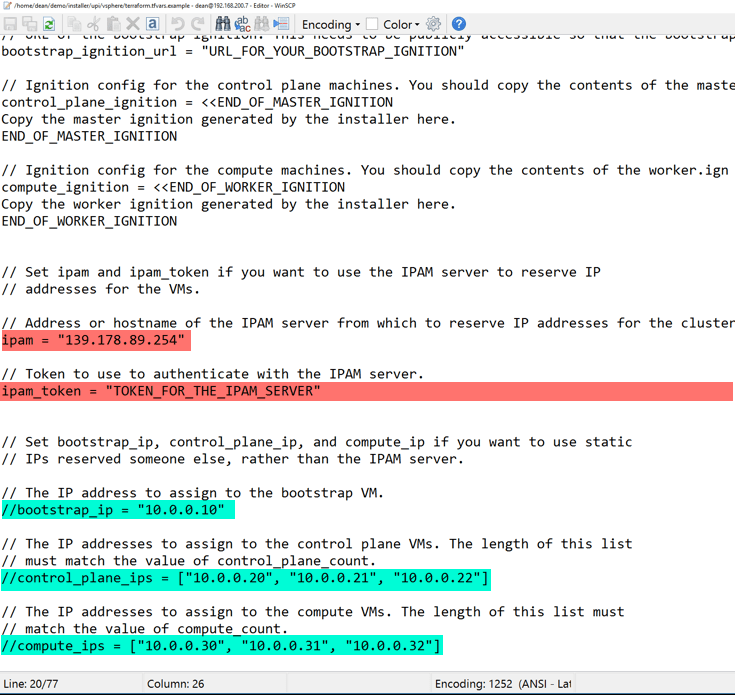
For any line starting IPAM, comment it out with double / (highlighted in red), and remove the double / from the static IP config (highlighted in green).
You can find an example of my terraform.tfvars file here;
Modify the file main.tf and delete or comment out (//) the module “dns” part, since we do not want to use Route53/AWS as DNS provider:
// module "dns" {
//   source = "./route53"
//
//   base_domain         = "${var.base_domain}"
//   cluster_domain      = "${var.cluster_domain}"
//   bootstrap_count     = "${var.bootstrap_complete ? 0 : 1}"
//   bootstrap_ips       = ["${module.bootstrap.ip_addresses}"]
//   control_plane_count = "${var.control_plane_count}"
//   control_plane_ips   = ["${module.control_plane.ip_addresses}"]
//   compute_count       = "${var.compute_count}"
//   compute_ips         = ["${module.compute.ip_addresses}"]
// }
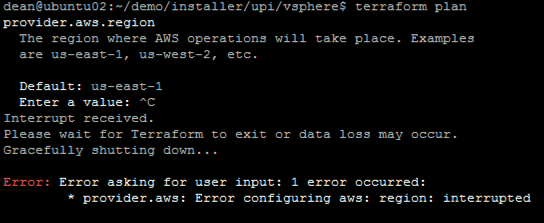
I deleted this in my example. If you do not edit the main.tf file, you will see this when you run “terraform plan”.
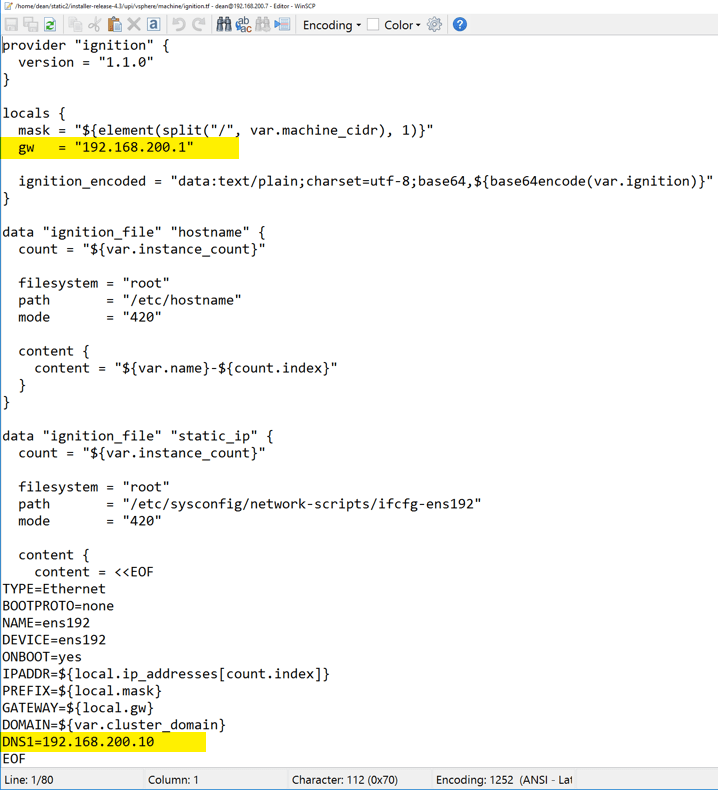
In the Machine folder, edit the ignition.tf file and add in your gateway and DNS.
Edit the main.tf file and change the disk size from 60 to 120.
If you miss this step, you will have the following error when you run “terraform plan”.
You can find an example of this here;
Running the Terraform Deployment
From your installer/upi/vsphere folder run the following commands;
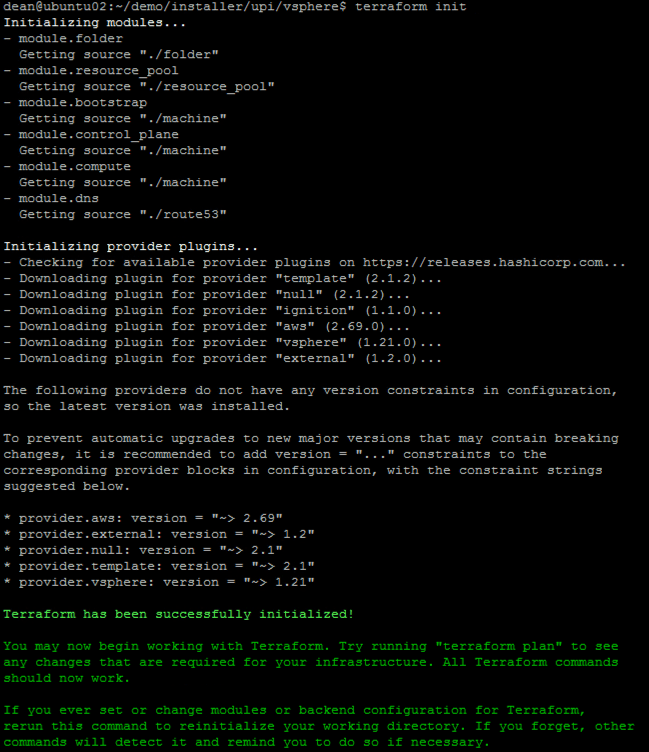
terraform init
This will check the main.tf file and download the plugins;
terraform plan
This will check the config against the environment to plan for the changes to be made. You will see at the end of the output;
Plan: 8 to add, 0 to change, 0 to destroy
Now to start the deployment by running the command;
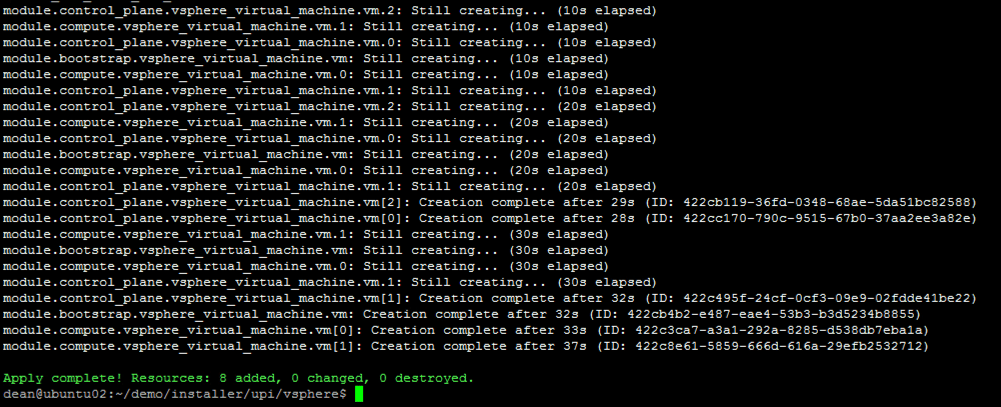
terraform apply -auto-approve
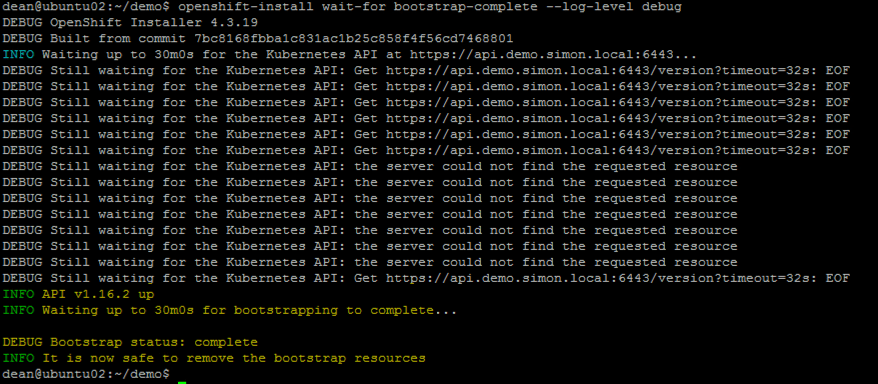
You can monitor the Openshift cluster build process by going back to the root of your folder (in my example “demo”), and running;
openshift-install wait-for bootstrap-complete --log-level debug
Upon receiving the following message;
INFO It is now safe to remove the bootstrap resources
Move back to the installer/upi/vsphere folder and run the command
terraform apply -auto-approve -var 'bootstrap_complete=true'
This will remove the bootstrap VM as it is no longer needed. Edit your HAProxy.cfg file and remove the bootstrap from the configuration, save the file and restart the HAProxy service.
You can compare against my HAProxy.cfg file here;
Move back to your root directory (in my example “demo”) and run the following;
openshift-install wait-for install-complete
Once finished, you’ll be provided the kubeadmin login to authenticate into the console.
For running the “oc” commands on your Ubuntu box run the “export” command that is shown in your output.
If there is no object-storage available, set the image-registry to NULL
oc patch configs.imageregistry.operator.openshift.io cluster --type merge --patch '{"spec":{"managementState": "Managed"}}'
References
- https://www.openshift.com/blog/how-to-install-openshift-on-vmware-with-terraform-and-static-ip-addresses
- https://labs.consol.de/container/platform/openshift/2020/01/31/ocp43-installation-vmware.html#dns-configuration
Regards








Hello Dean, thank you for you wonderfull tutorial. Is helped a lot with the comprehension, especially on Terraform. Unfortunatly it seems that my worker can’t boot due apparently the missing config in mycluster.domain.com:22623/config/worker. I get Internal Server Error 500 on my workers.
Do you have any path that I could follow to debug this ?
Thanks !
I assume you are using something like OCP 4.5.2/3, if so this is a known bug and is addresses in the nightly beta builds for 4.5.6.
If you are using a lower version, I recommend you submit an issue on the github pages for Openshift with your logs output. I know with a few versions of OCP 4.3.x I seen some similar issues where the bootstrap never quite got to building the workers, but I didn’t indepth troubleshoot these, I moved to known working builds.
If you aren’t using the exact builds in my blog post, I’d recommend you start there first if you are still struggling.
Hello Dean,
Thank you for your answer.
I was indeed trying to use the Openshift installer version 4.5.6 I guess.
I took you advice and tried to setup the same version as in your tutorial. It seems that now the masters and the workers are properly provisionned. They can also get the ignition files.
However I came accros another issue that I haven’t figured the cause yet :
“99_openshift-machine config 99-worker-ssh.yaml”: unable to get REST mapping for 99_openshift-machine config 99-worker-ssh.yaml : no matches found for kind “MachineConfig”.
Did you came accross something similar ?
Thank you again.
Philippe
This is a known issue in the build and can be ignored if your cluster builds.