In this blog post we will cover the following topics;
- Adding your Azure Repository to Veeam Backup and Replication
- Viewing your protected data
- What can you do with your data?
- - Backup Copy to another repository
- - File Level Recovery
- - Veeam Explorer - Application Item restore
- - Instant Virtual Machine recovery to vSphere and Hyper-v
- - Restore to Amazon EC2 or Microsoft Azure
The follow up blog posts are;
- Getting started with Veeam Backup for Azure
- - Configuring the backup infrastructure
- - Monitoring
- - Protecting your installation
- - System and session logs
- Configuring a backup policy
- - Viewing and Running a Backup Policy
- - Looking at Session logs
- Restoring a Backup
- - Viewing protected data
- - File Level Recovery
- - Virtual Machine Disk Restore
- - Full VM Restore
If you have an Veeam Backup and Replication install up and running, either on-premise to protect VMware or Hyper-V workloads, or even running in a Public cloud to provide resiliency to your infrastructure, then it’s simple enough to integrate that deployment with the data protected by Veeam Backup for Microsoft Azure.
By linking your Veeam Backup for Azure repository (Azure Storage Account) to your Veeam Backup and Replication environment, you then get access to a whole host of options.
- File level recovery via Veeam Backup and Replication console
- Instant VM recovery to vSphere/Hyper-V
- Restore VM to Amazon EC2
- Restore VM to Microsoft Azure
- Perform a Backup Copy to another location such as a Cloud Connect Partner.
Adding your Azure Repository to Veeam Backup and Replication
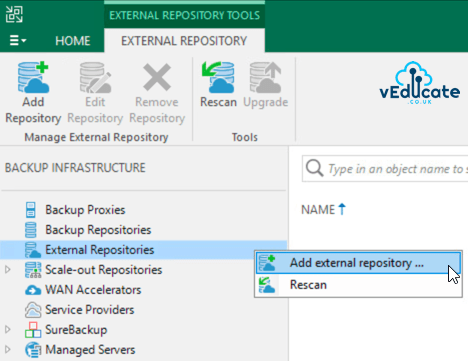
Open your Veeam Backup and Replication console > Go to the “Backup Infrastructure” tab, and right click on External Repositories > Click “Add external repositories”, this will open up the wizard.
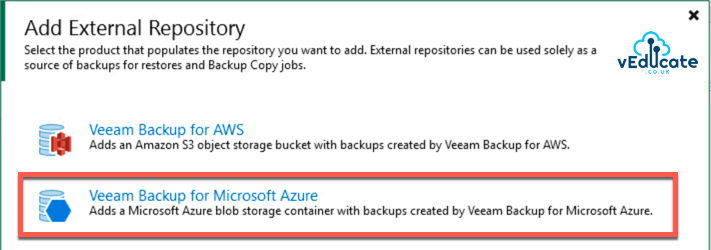
Select “Veeam Backup for Microsoft Azure”
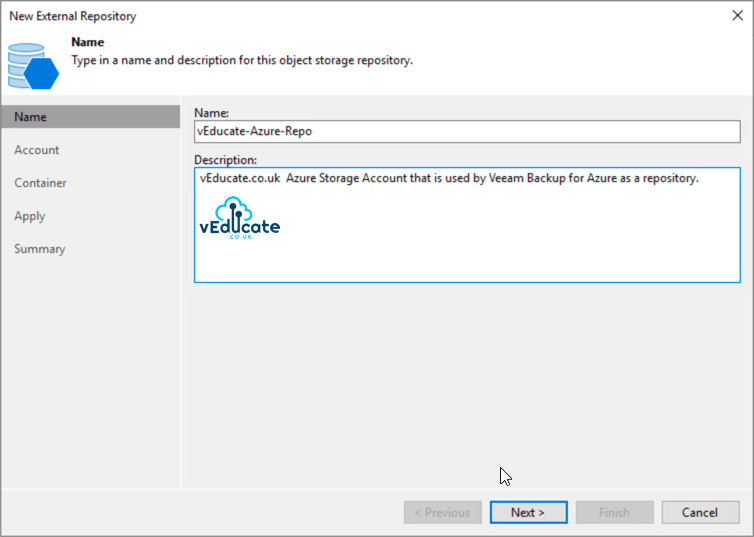
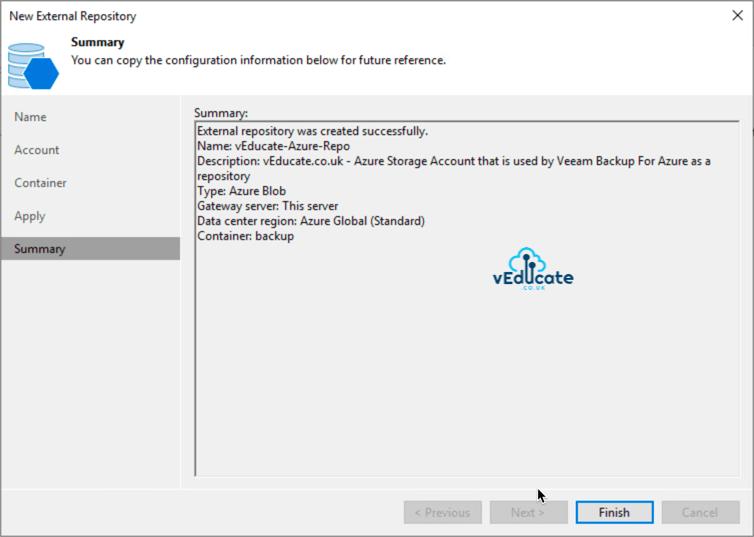
Enter the name and description as you would like it to be displayed in Veeam Backup and Replication.
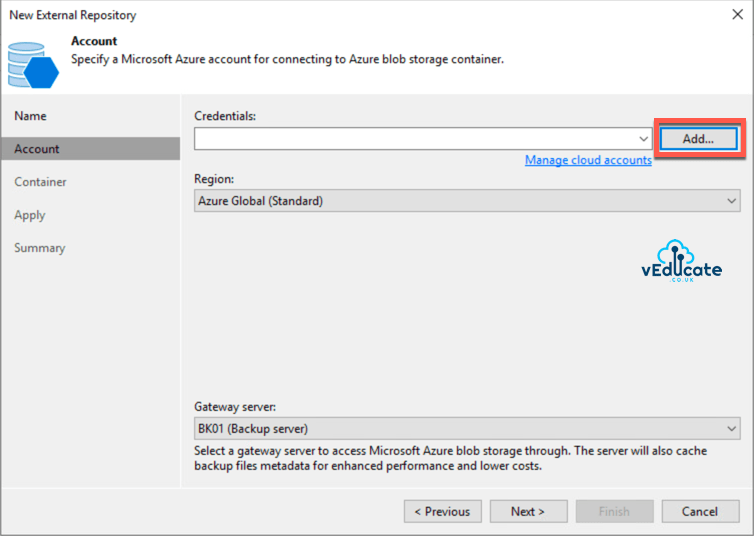
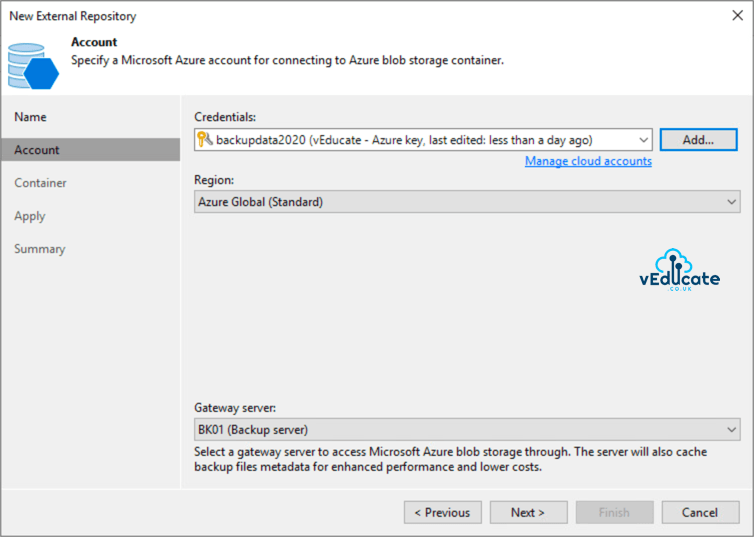
Specify your Microsoft Azure account details, if you do not have anything configured already, click the add button.
For configuring the account, you need the details from;
Azure Portal > Storage Account that Veeam Backup for Azure is configured to use as a repository > Access Keys
- Storage account name
- Key 1 or Key 2
Select your account, and Azure Region, and gateway server that has access to the Storage Account, click next.
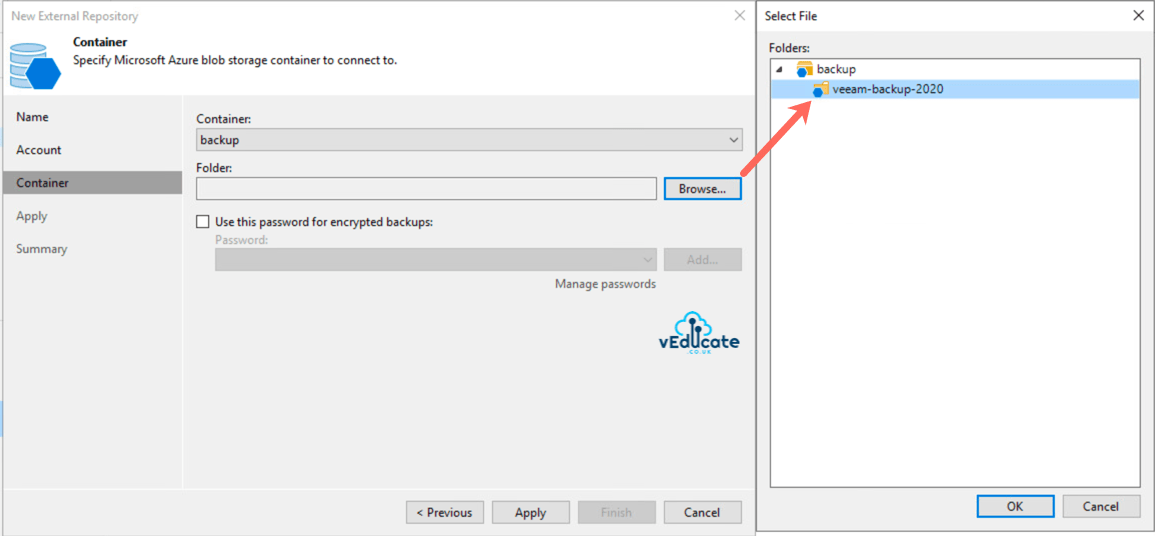
Select your container and folder and specify the encryption password if necessary. Click Apply.
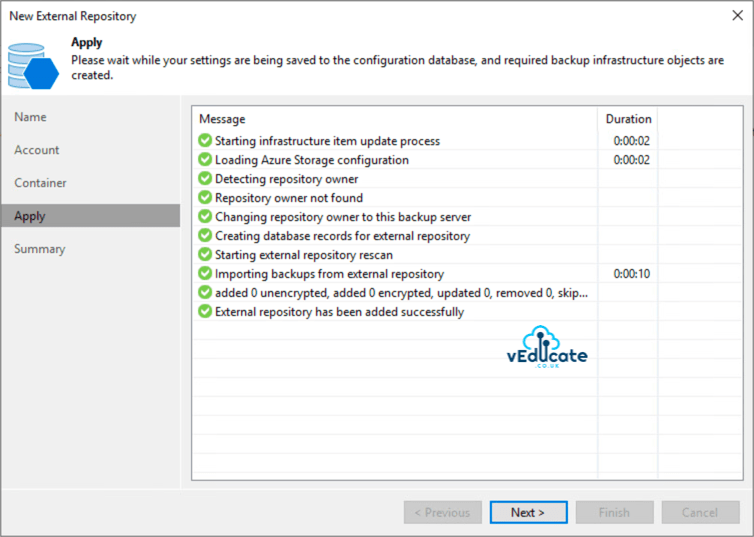
You will see the status logs for VBR connecting to your Azure Storage Account, and if there are available backups available, you will see this on the second to last line.
In my example, there were no backups available, however I ran a re-sync after I ran my Backup Policy in Veeam Backup for Azure, and you can see VBR recognises the files.
Below you can see my new external repository in the VBR console, and confirmation of files found after a rescan.
Viewing your protected data
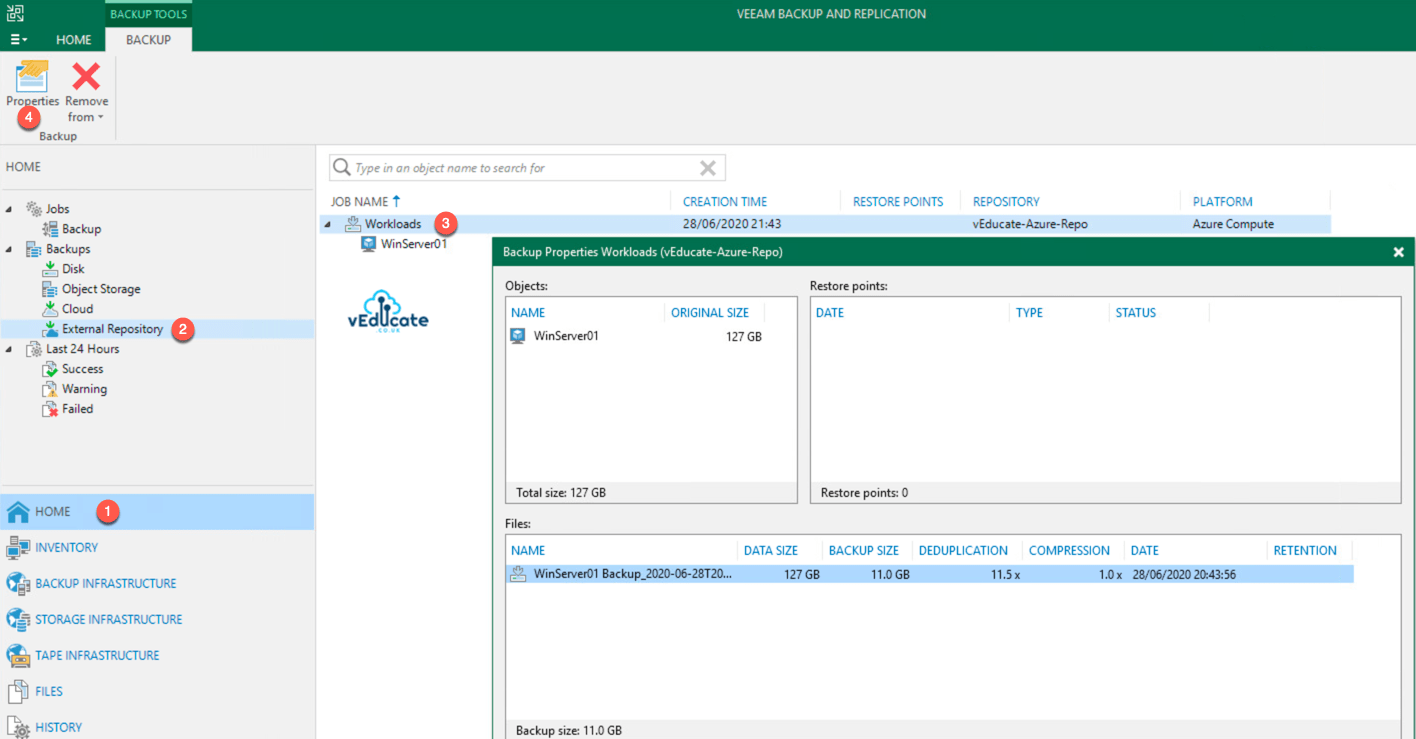
To view the data in your VBR console, that is held in the Azure Storage Account;
- Click the “Home” navigation tab > Under Backups, select External Repository
You will see the backups as per the policy (job names) in Veeam Backup for Azure. Below I have opened the properties of the job files, which shows us my restore points for my protected virtual machines. This is the same as you would find opening up the properties of backups performed by VBR.
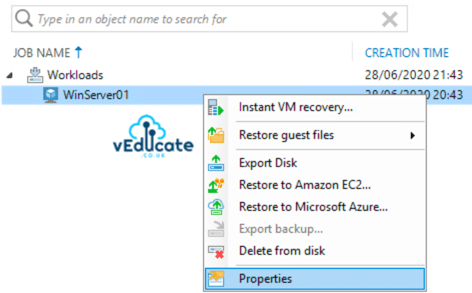
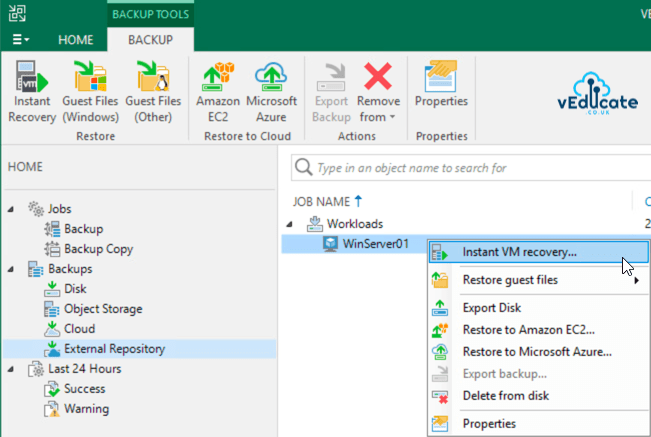
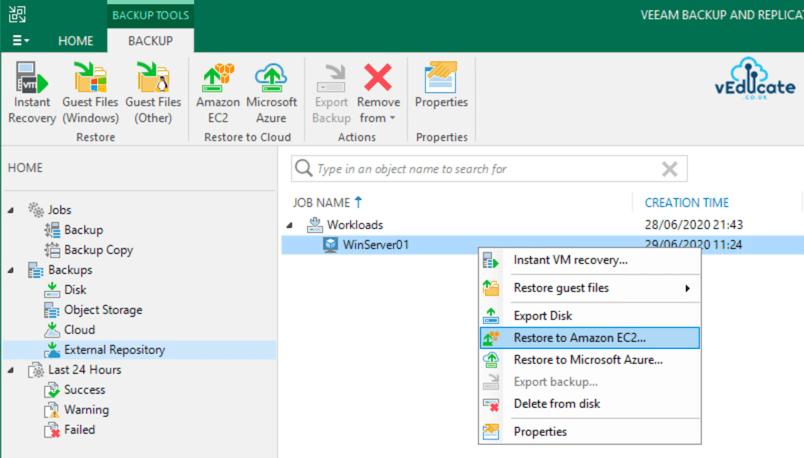
Right clicking on a virtual machine contained within the backups, shows us the available options for restoring your data, or protecting it further. Which we’ll continue to investigate in further detail in this article.
What can you do with your data?
Looking at the above screenshot gives several available restore options.
- File Level Recovery
- Instant Virtual Machine recovery to VMware vSphere and Microsoft Hyper-V
- Restore to AWS EC2
- Restore to Microsoft Azure
Finally you copy the data to another location (3-2-1 rule) by creating a new backup copy job. This for me is one of the most important parts, as it allows you to easily create another copy of your backup data outside of the Azure Storage Account.
- Backup Copy to another repository
Backup Copy to another repository
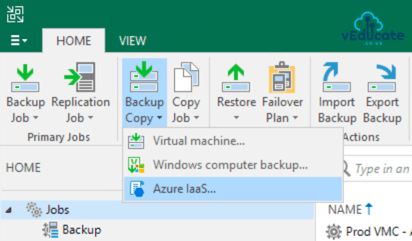
In your VBR console, go Home in the navigation pane, and on the top ribbon select “Backup Copy” > Azure IaaS.
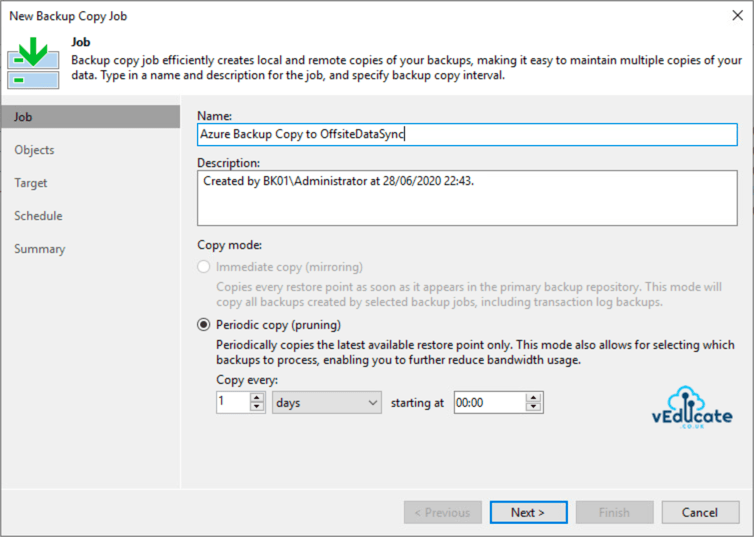
Specify your job name and description as needed. I am going to copy my data to my cloud connect provider OffsiteDataSync. Set your Copy mode settings, as this repository is external (in Azure), you will only be able to this periodically.
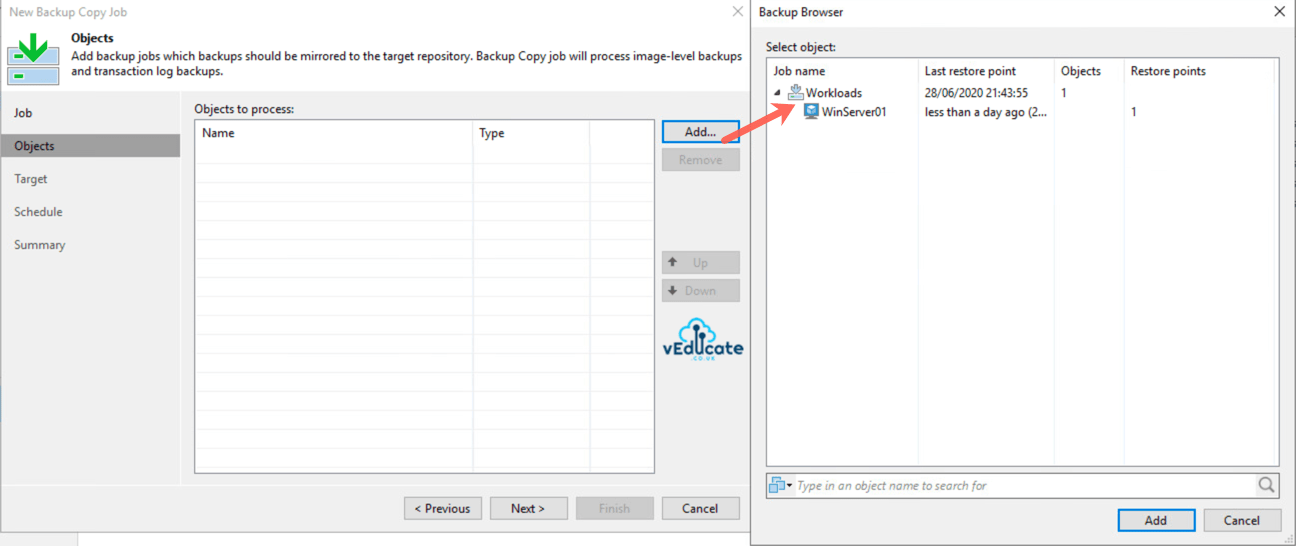
Click Add to add in the workloads you want to copy to a secondary location, you will only be shown the backup policies (job names) and workloads protected in Azure Storage Accounts.
Only backups created by Veeam Backup for Azure will be transferred, and not snapshots.
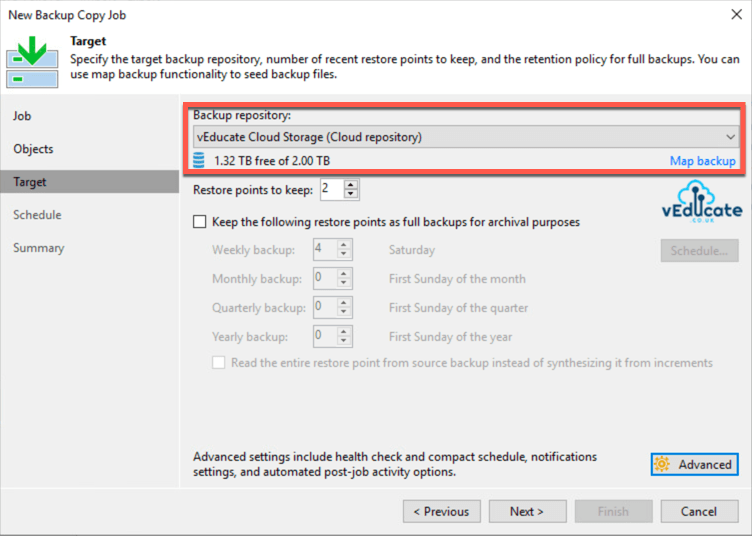
Configure;
- Backup Repository
- Restore points
- GFR restore points
- Any advance settings such as storage optimizations and notifications for example
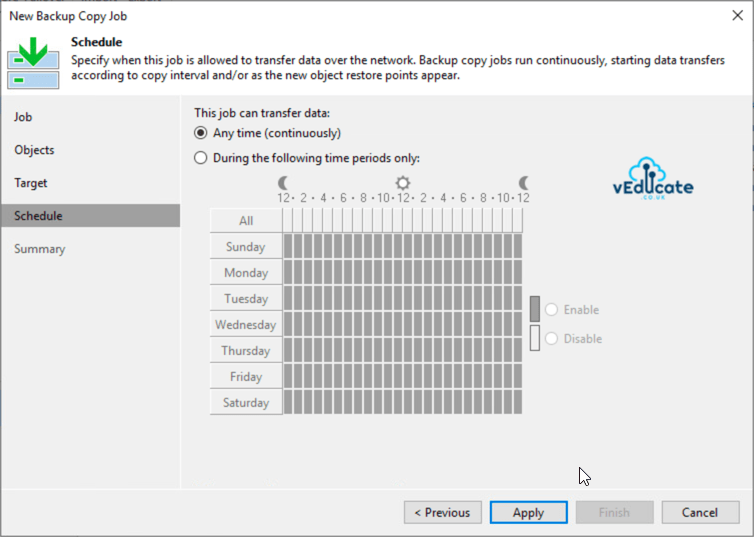
Set your schedule settings.
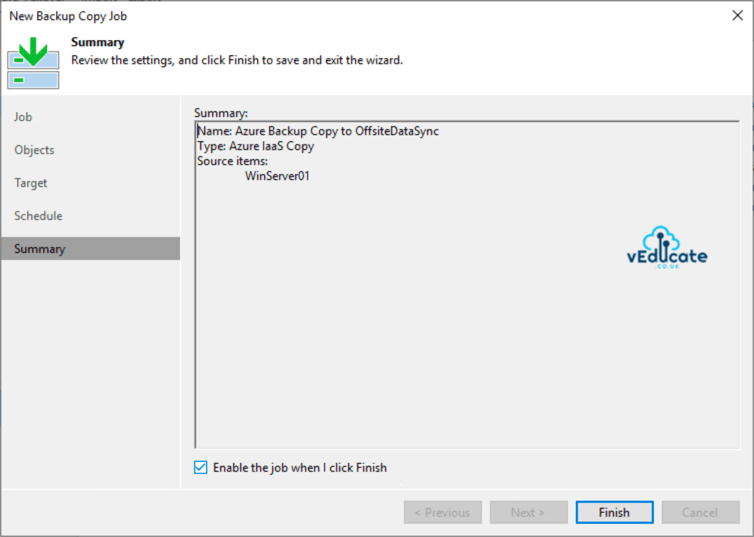
Final summary and click to finish.
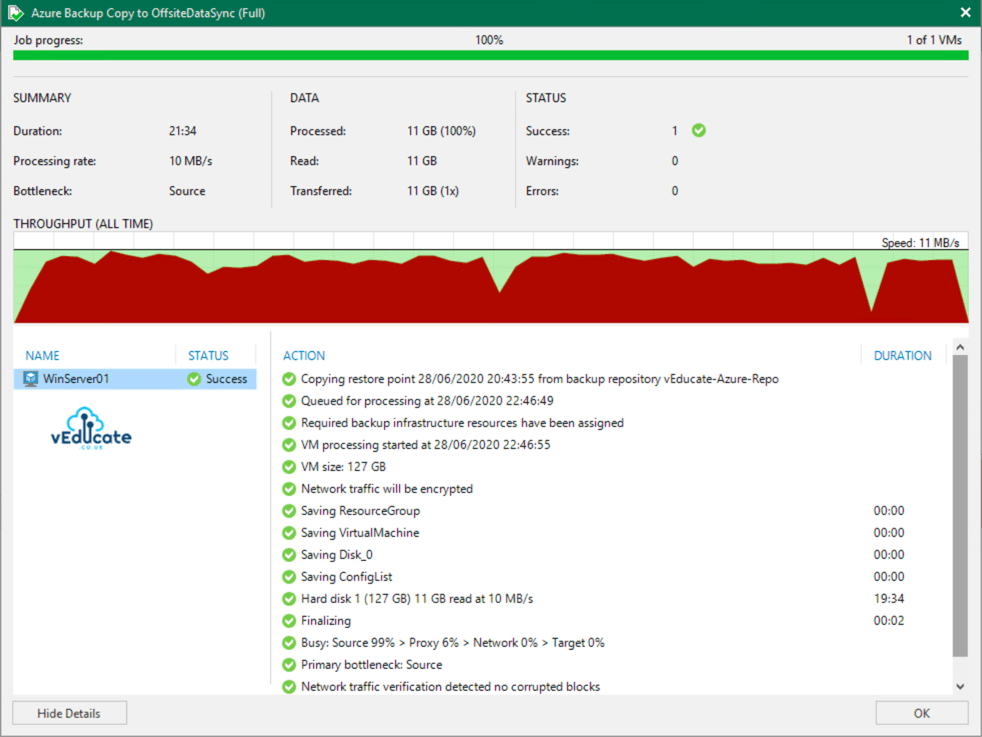
Below you can see the copy job running. My transfer speeds are quite slow, as my gateway server is sat on-prem outside of Azure, so the data is pinned through the gateway server up to the cloud connect repository. So, you will need to think about the architecture when running this. Personally, I would have a gateway server sat in Azure to have more local access to the Azure Storage Account.
File Level Recovery
File Level Recovery in VBR for Azure Storage Accounts works the same as any other FLR running against VBR backups.
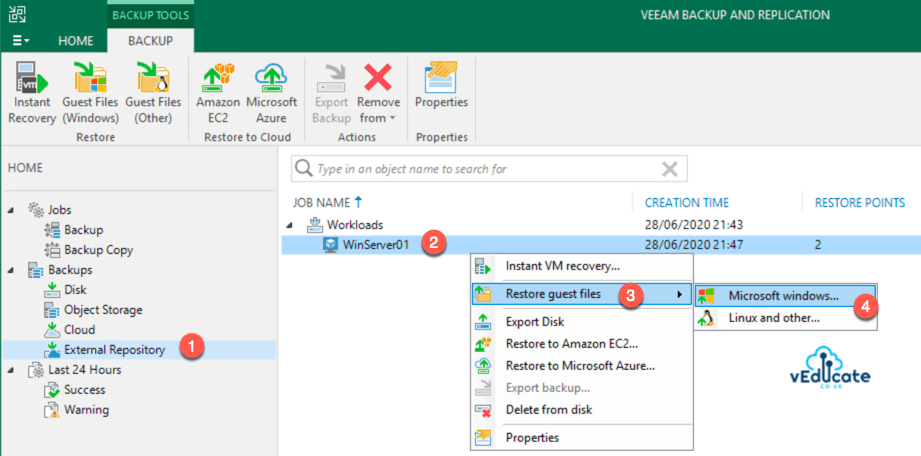
Find your virtual machine in the backups, right click > Restore guest files and type.
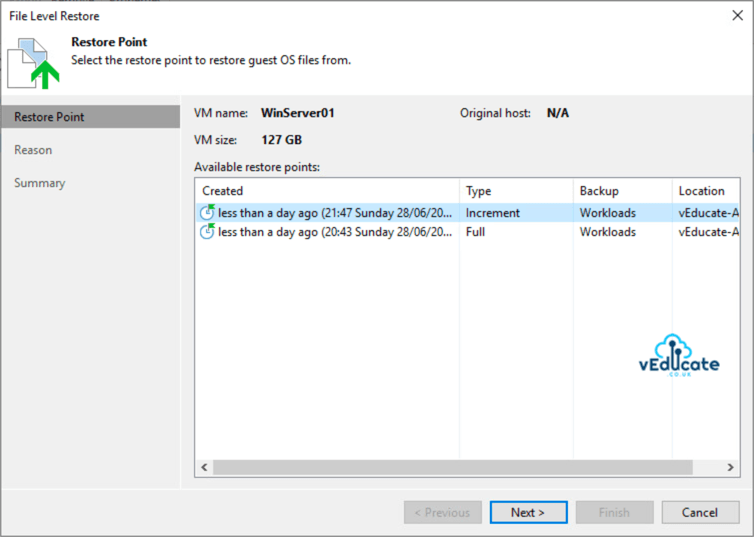
Select restore point, again you will only see the restore points for backups and not Azure VM snapshots.
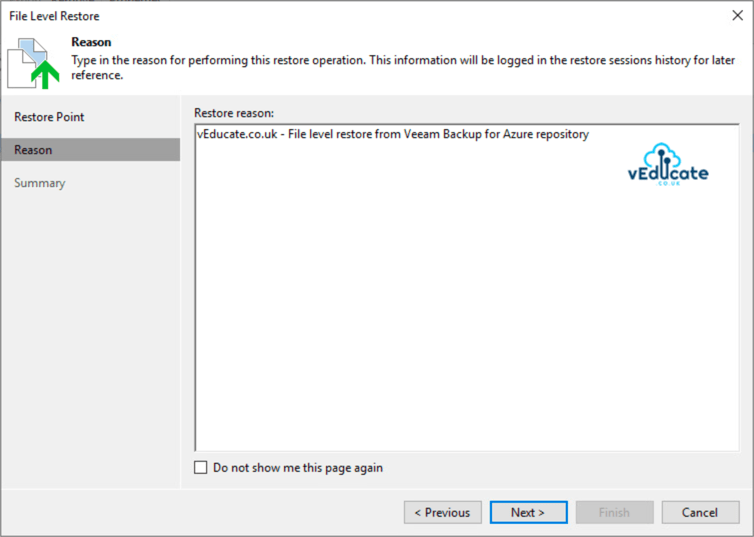
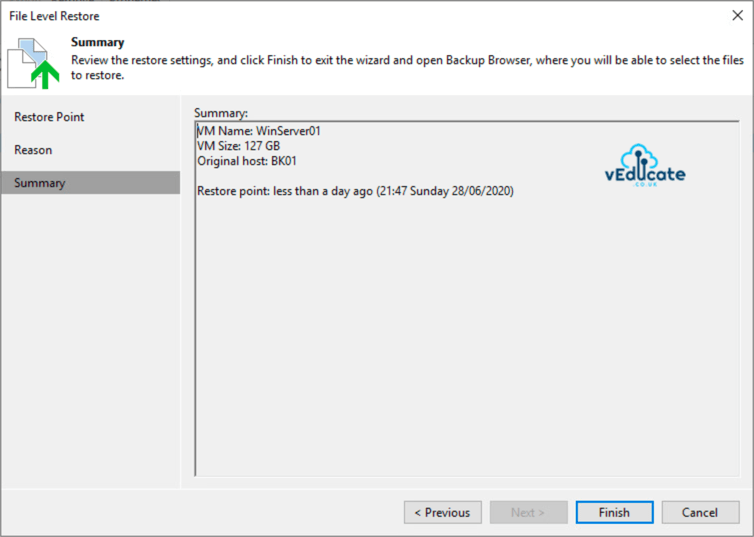
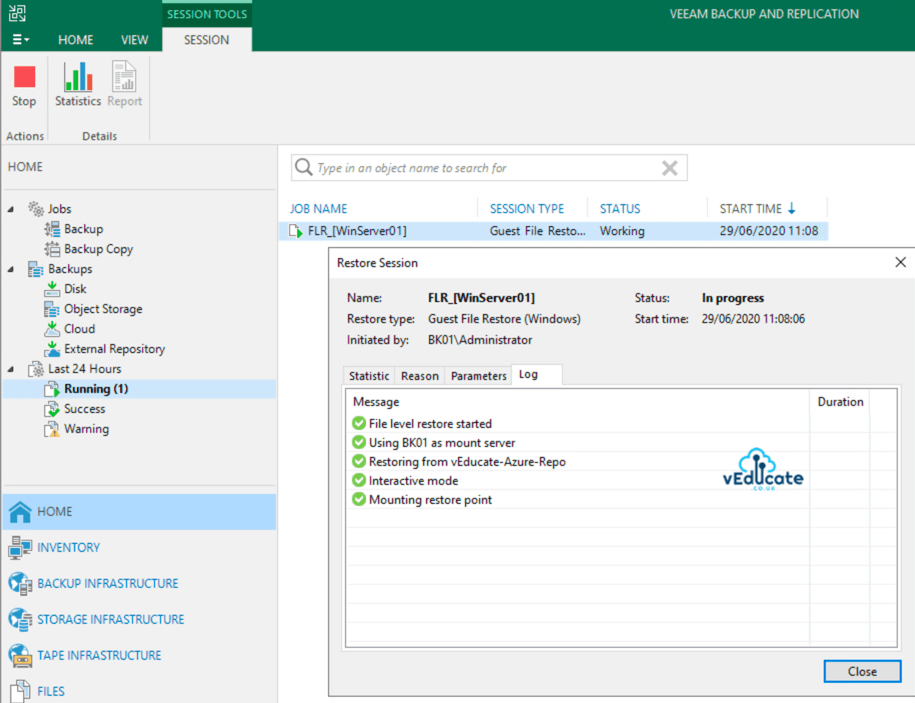
Input a reason for the restore and select next, on the summary page, click Finish which will kick off the restore session.
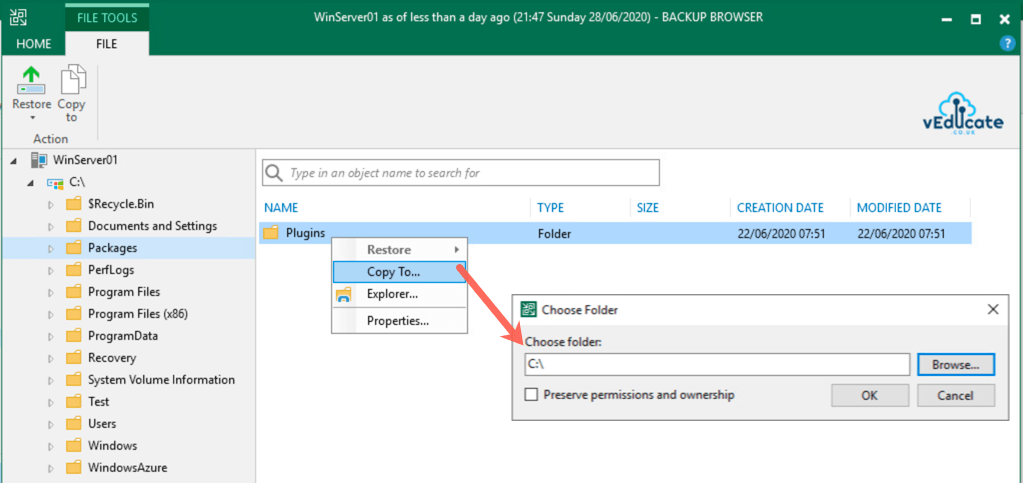
Once the session has mounted the restore point, you will be given the File Explorer window, and you can browse your backup. You will not be able to restore files directly back to the original machine (same limitation as FLR in Veeam Backup for Azure).
You will have the options to copy files to your local machine where you are running the VBR console from.
Veeam Explorer – Application Item restore
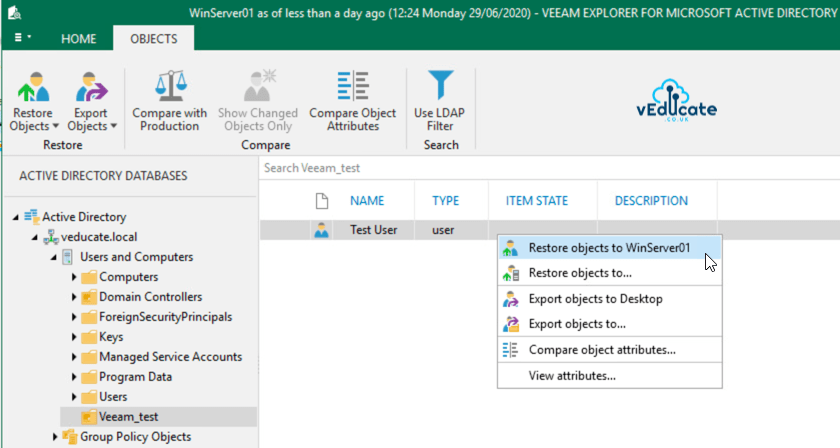
Whilst browsing your file level explorer, you also have the option to perform an Application Item restore using the Veeam explorers.
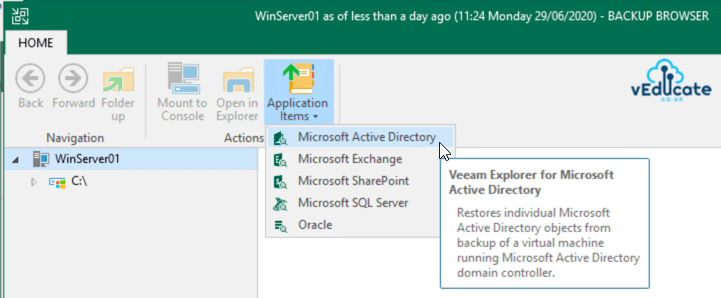
Click on Application Items in the File Level Restore Window.
Below we can see that my virtual machine in Azure was configured with Active Directory and I have the options to restore or export the application items. For restore in this example, my mount server (server hosting the FLR), needs access to the AD domain.
Instant Virtual Machine recovery to vSphere and Hyper-V
You can perform an Instant VM recovery to either vSphere or Hyper-V, by right clicking on your protected virtual machine, and selecting “Instant VM Recovery”
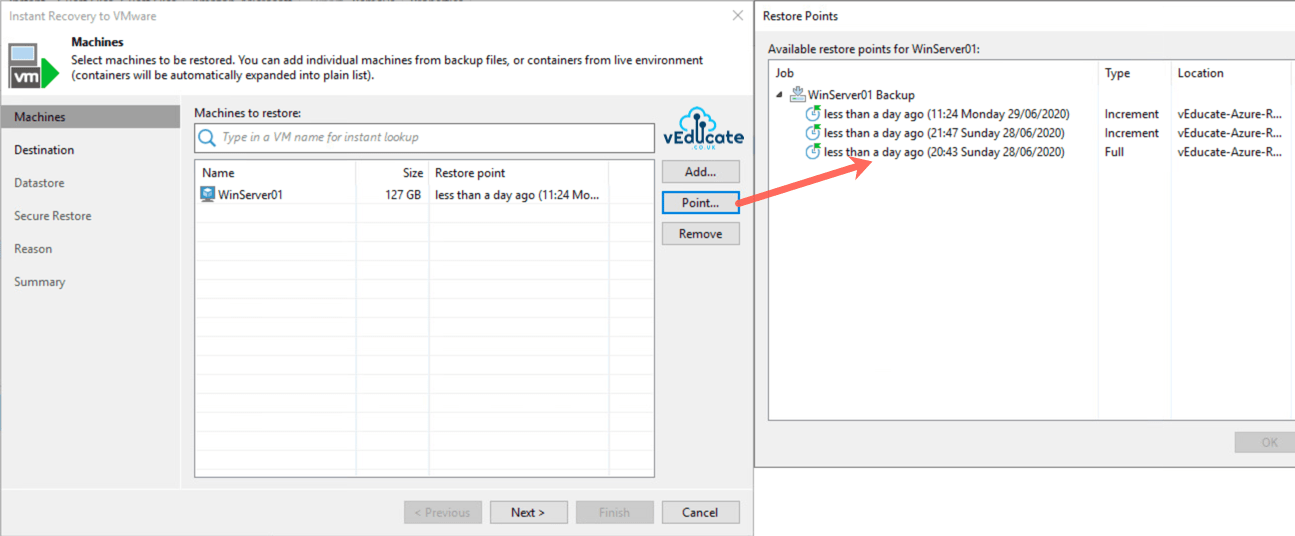
Select your restore point.
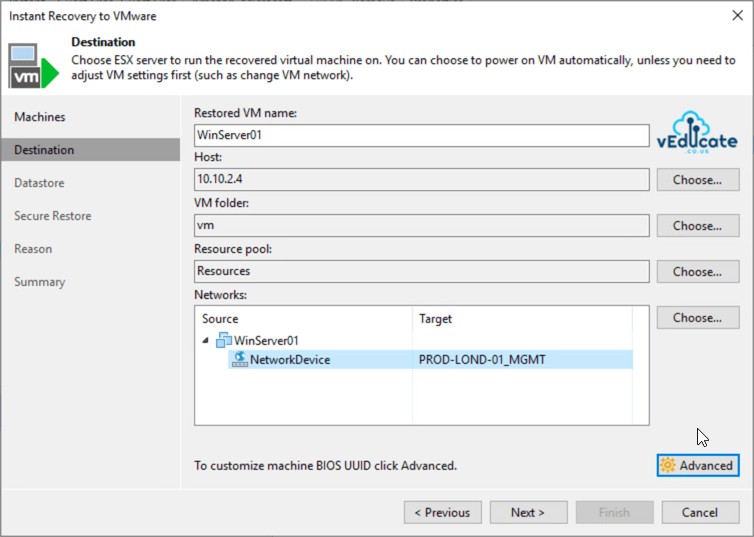
Input the destination settings;
- Restored VM name
- Host
- VM Folder
- Resource pool
- Networks
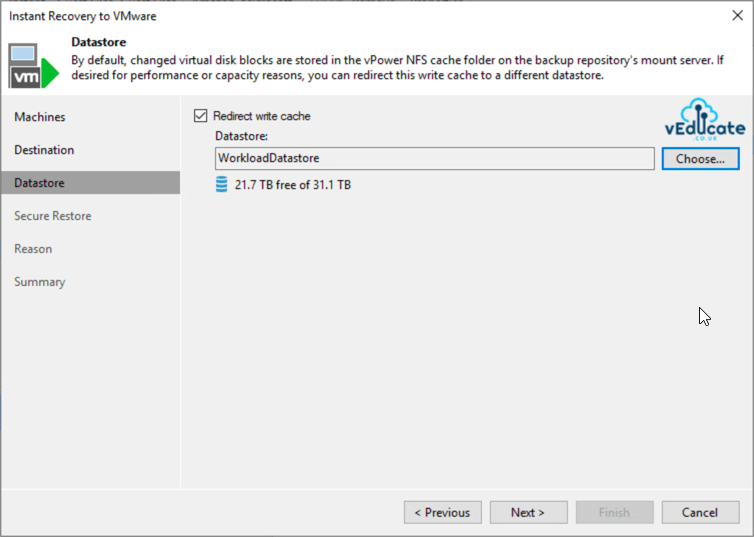
vPower NFS will be used to mount the virtual machine to your environment, however you can redirect write cache to another datastore.
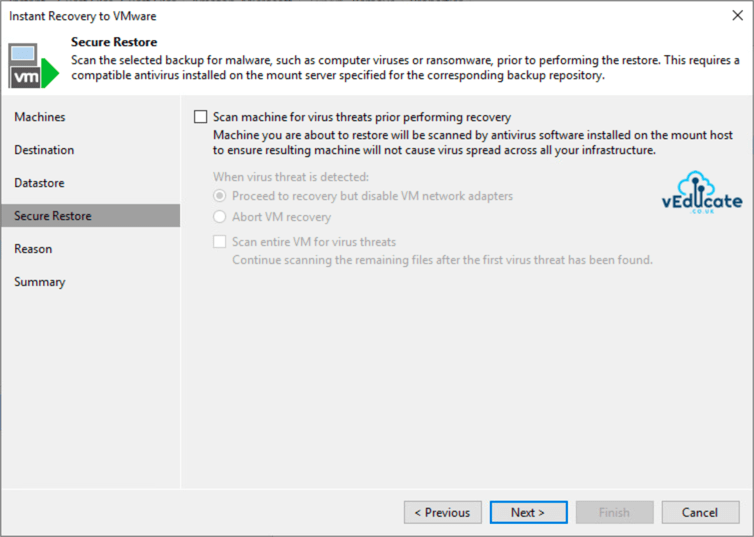
Configure for Secure Restore if needed, for example, when looking for viruses in your backup files.
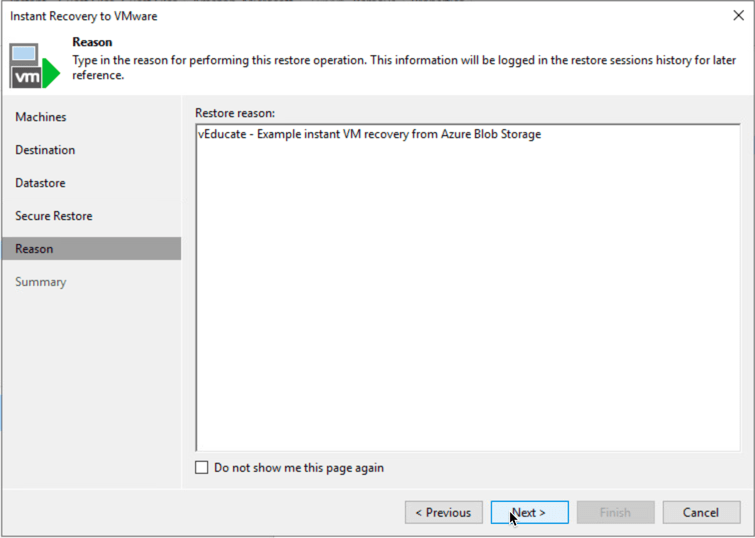
Enter your restore reason.
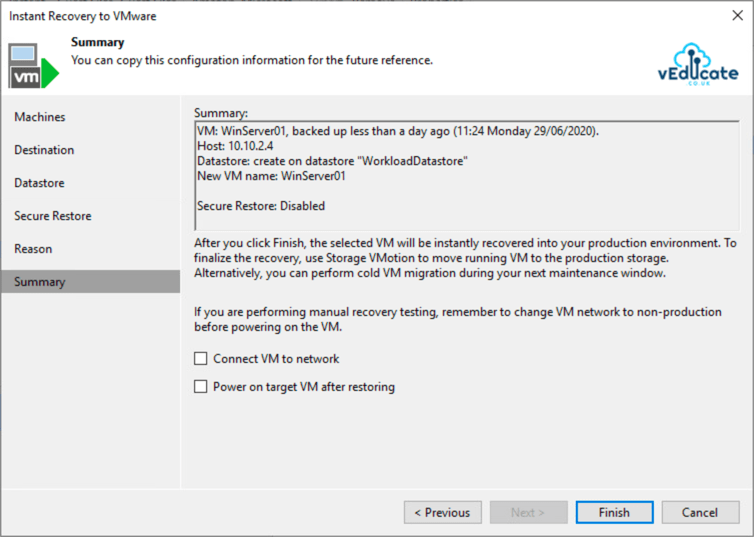
Finally confirm if you want the VM to be powered on and connected to the network automatically at the end of the Instant recovery.
Once the process has completed, you will see your VM available in VMware vSphere or Hyper-V, the VM files will be running from the vPower NFS service. You will need to migrate your VM onto the production hypervisor storage if you will to continue using the VM for long term.
Restore to Amazon EC2 or Microsoft Azure
Finally, you can restore the virtual machine to AWS EC2 or Microsoft Azure. If you were to choose Azure, I’d expect you’d do this to another location (or use the Veeam Backup from Azure console).
In this example, I’ll run through the steps for restoring the VM to AWS EC2 instead.
Right click your virtual machine backup and select “Restore to Amazon EC2”.
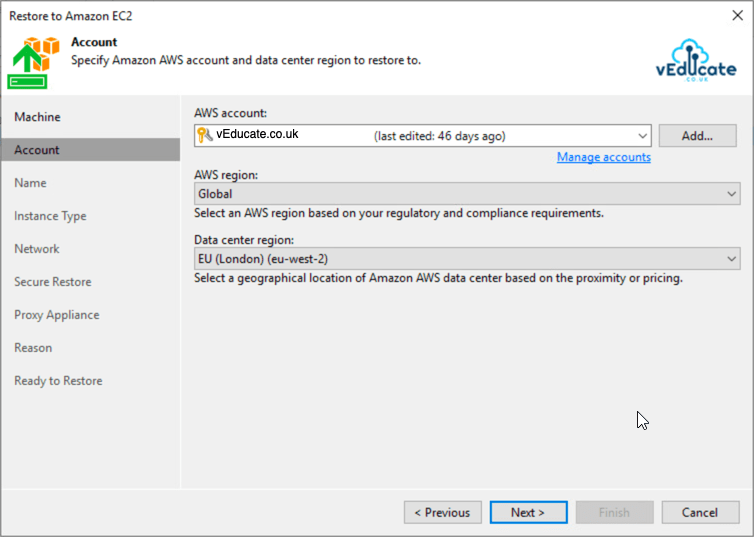
Specify your account details and where you want to place your restored VM.
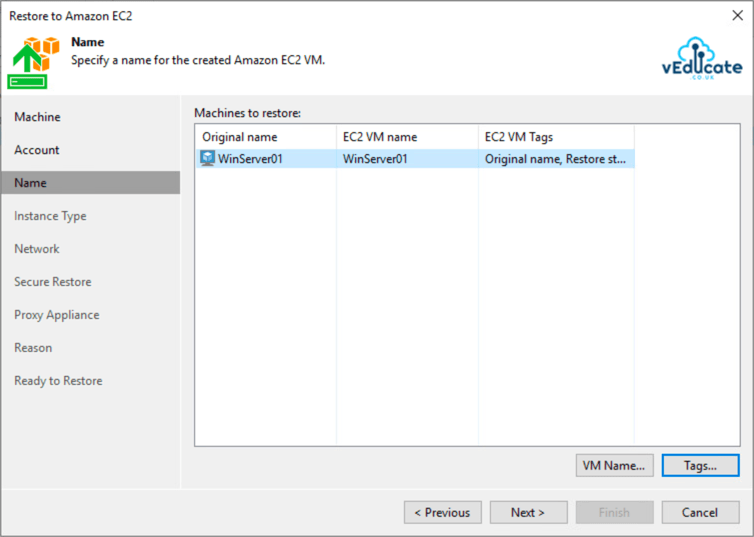
Specify your name and tags for the restored VM.
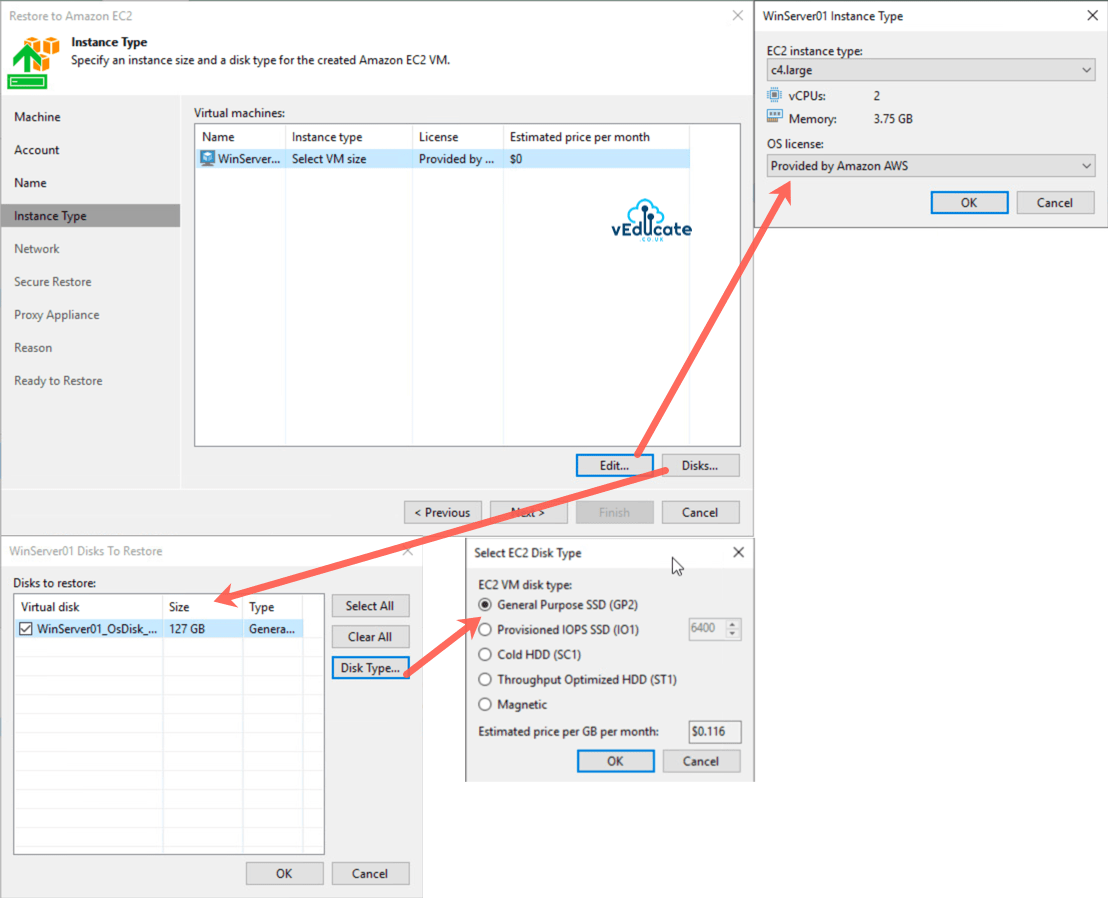
Specify your virtual machine instance type, and EC2 Disk type. You can also exclude disks at this point too.
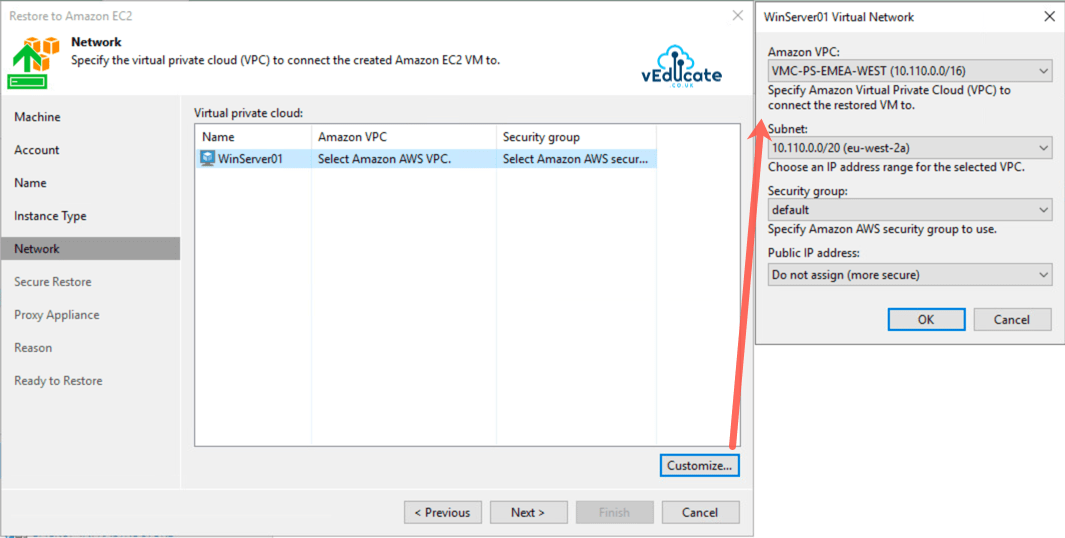
Set your network for the VM.
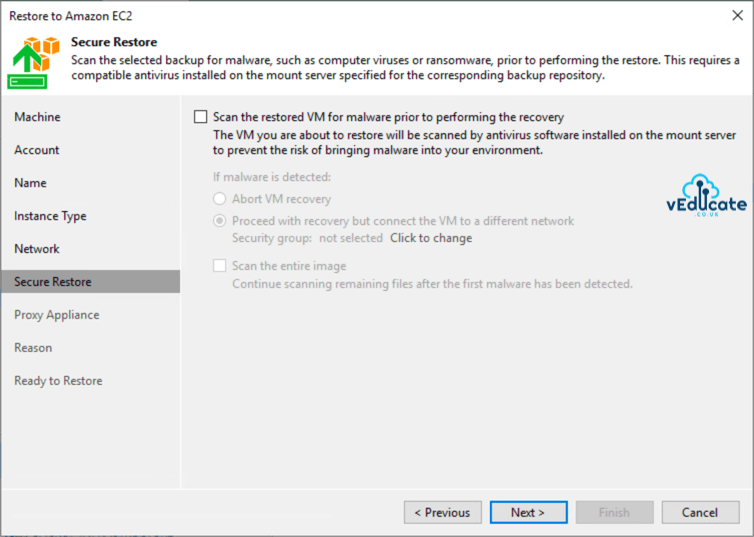
Configure your Secure Restore settings, if needed.
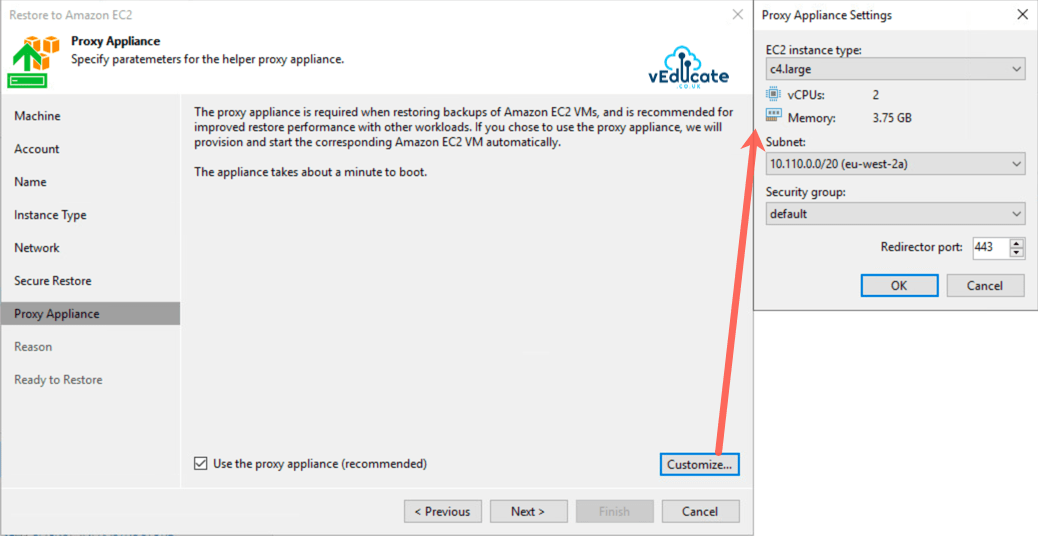
Configure the proxy appliance for better performance, if required.
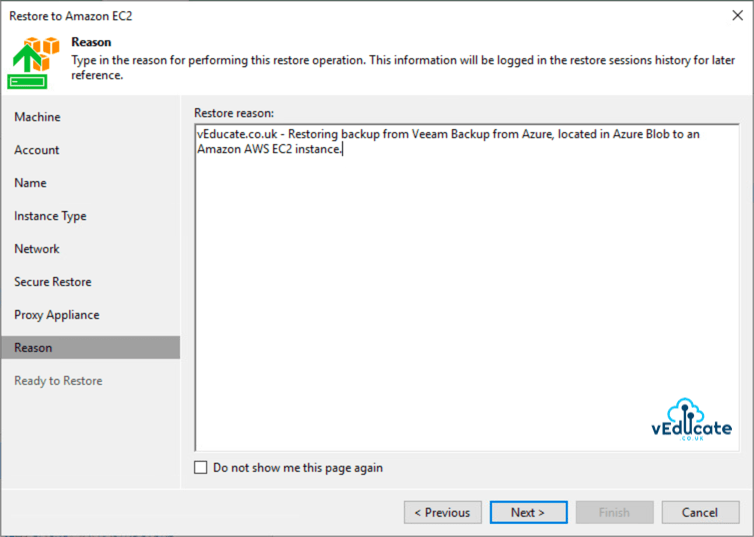
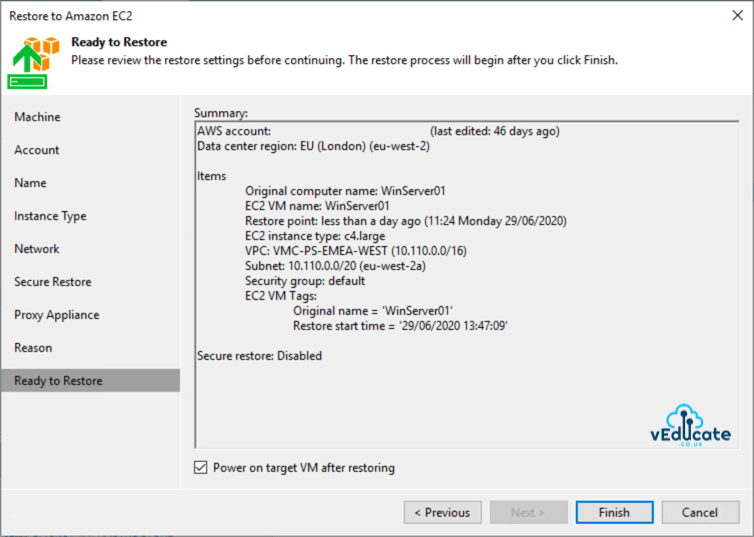
Finally set your restore reason, as needed. Then review your summary of configuration for restore, clicking Finish will kick off the restore into Amazon EC2.
Summary
It’s quick and simple to bring in the Azure Storage account used by Veeam Backup for Azure into VBR. And due to Veeam’s portable file format, we have all options available for restoring the data into our other platforms or copying that data to another location.
As Veeam Backup for Azure expands, I expect several of the features in VBR will become available natively. Maybe it’s worth tracking the updates to Veeam Backup for AWS, for some of the future features that will be offered in the Azure space.
The earlier blog posts I’ve wrote on this subject are;
- Getting started with Veeam Backup for Azure
- - Configuring the backup infrastructure
- - Monitoring
- - Protecting your installation
- - System and session logs
- Configuring a backup policy
- - Viewing and Running a Backup Policy
- - Looking at Session logs
- Restoring a Backup
- - Viewing protected data
- - File Level Recovery
- - Virtual Machine Disk Restore
- - Full VM Restore
Regards

