In this blog post we will cover the following topics
- How a backup policy works
- Creating a Backup Policy
- Viewing and Running a Backup Policy
- - Looking at Session logs
- Summary and next steps
The follow up blog posts are;
- Getting started with Veeam Backup for Azure
- - Configuring the backup infrastructure
- - Monitoring
- - Protecting your installation
- - System and session logs
- Restoring a backup
- - Viewing protected data
- - File Level Recovery
- - Virtual Machine Disk Restore
- - Full VM Restore
- Integrating with Veeam Backup and Replication
- - Adding your Azure Repository to Veeam Backup and Replication
- - Viewing your protected data
- - What can you do with your data?
- - - Restore/Recover/Protect
How a backup policy works
Veeam Backup for Microsoft Azure, allows you to create the following types of snapshots and backups:
- Snapshots; managed & unmanaged VHDs of Microsoft Azure VMs, which includes the configuration of a VM.
- Backups of managed & unmanaged VHDs of Microsoft Azure VMs, which includes the configuration of a VM.
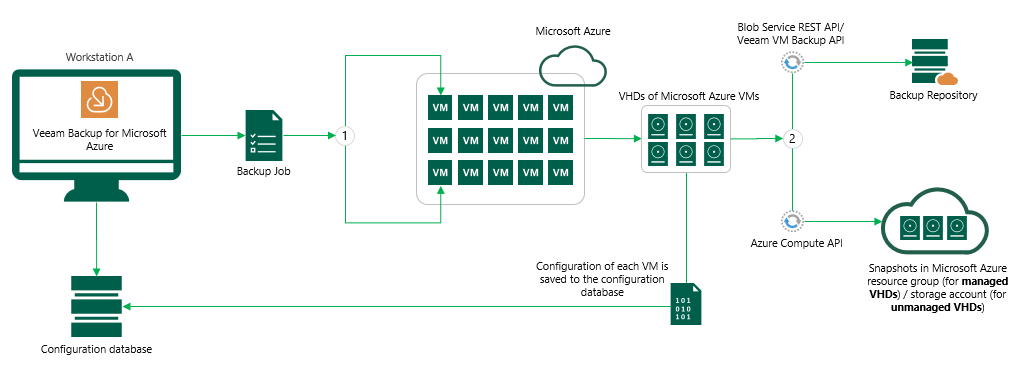
When you run a backup policy (A.k.a Backup Job), the Veeam services will perform the following tasks;
- Retrieve the configuration of your Microsoft Azure VMs, that are selected in the policy.
- Create either a backup or snapshot for the Microsoft Azure VMs, depending on the policy configuration
- Backups - Both managed/unmanaged VHDs are saved to the configured Backup Repository.
- Snapshots
- Managed VHDs - snapshot saved to resource group of source VM,
- Unmanaged VHDs - snapshots saved to Azure Storage Account of source VHD
For both backups and snapshots, the VM configuration is saved to the Veeam Backup for Microsoft Azure configuration database.
The backup services running on the workers, encrypt & compresses data that you back up to backup repositories.
Creating a Backup Policy
If you are in configuration mode, you can select the "exit configuration" in the top left of the UI.
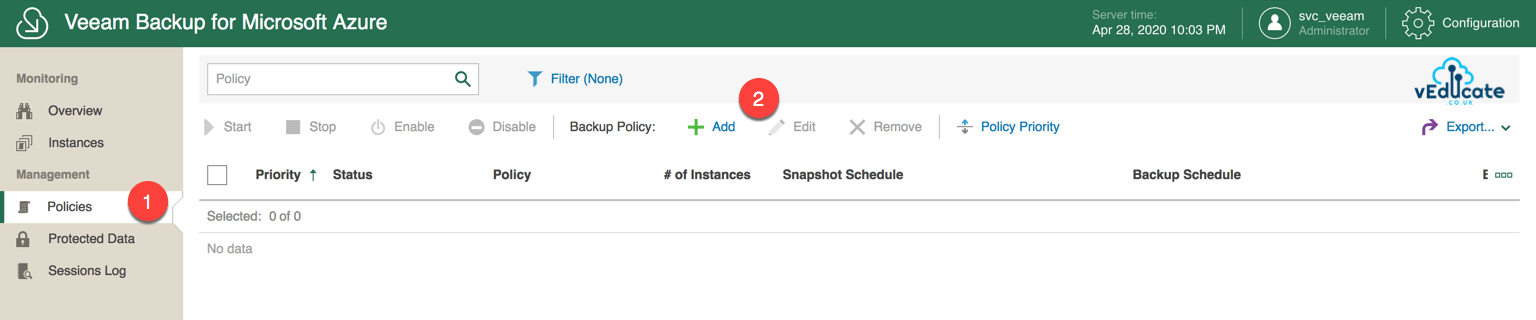
Under Management, Select Policies > Add
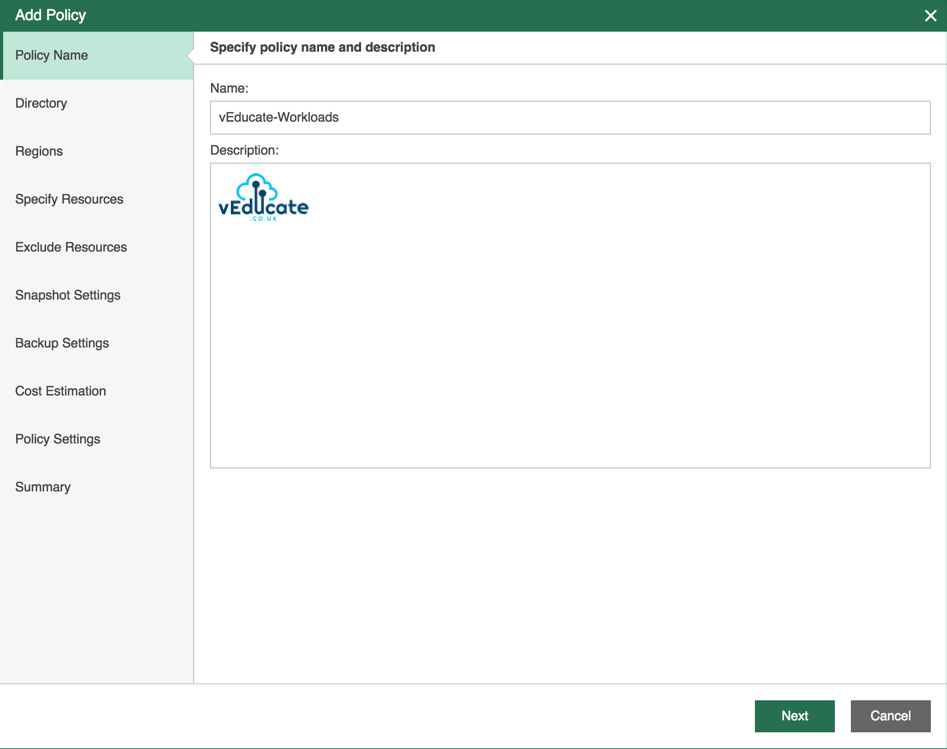
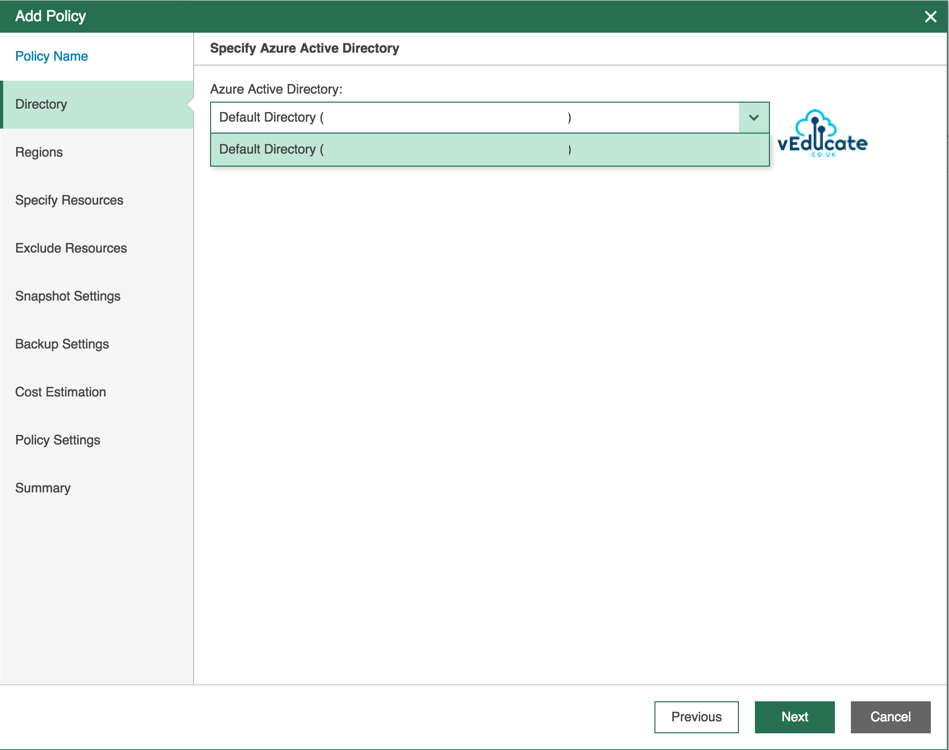
- Set your Policy name and description
- Select your Azure Active Directories where your workloads are located
- Select your regions that you want the policy to cover. Only workloads running in these regions will be backed up by the policy.

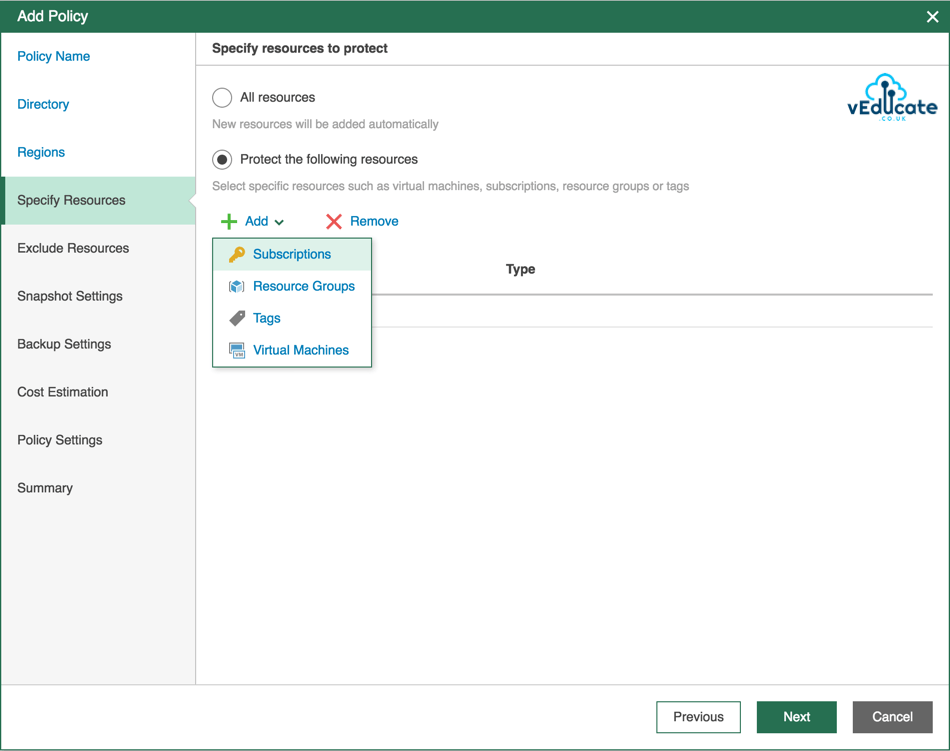
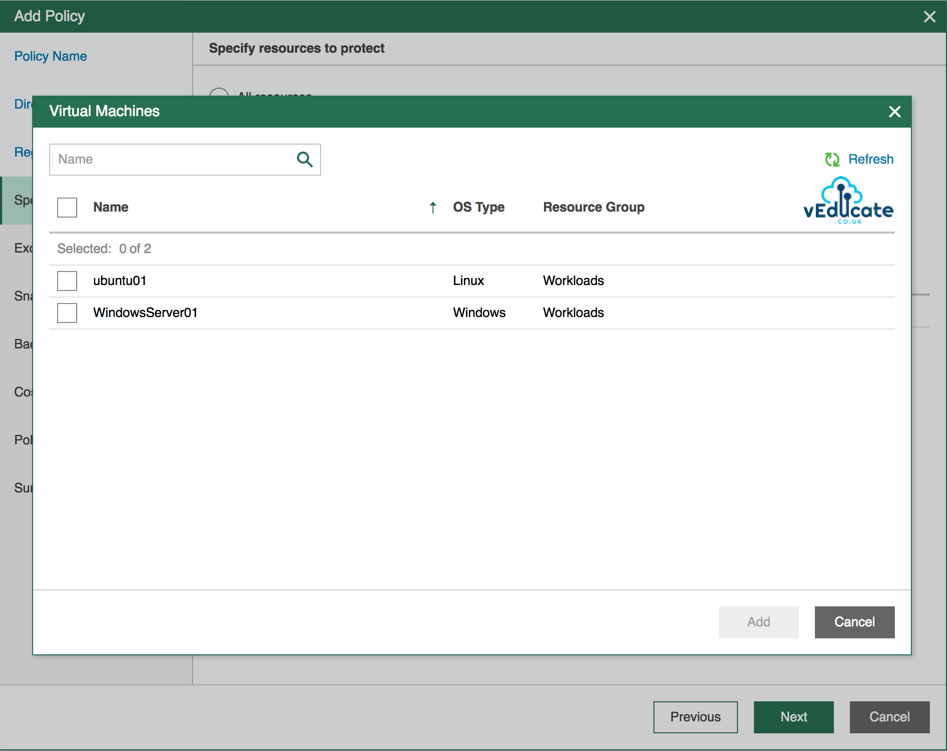
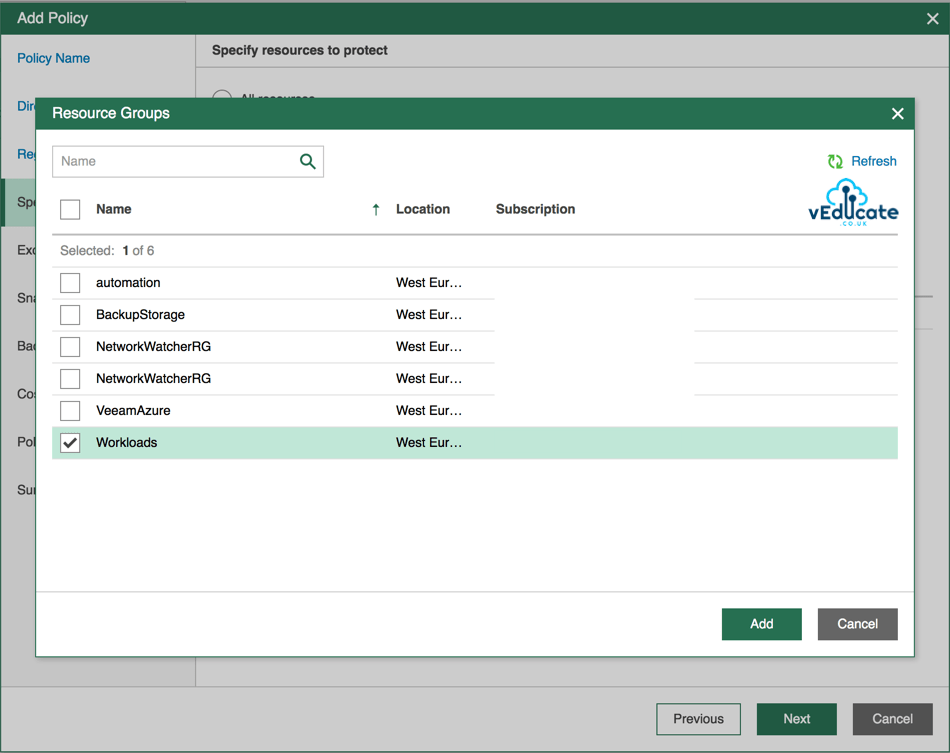
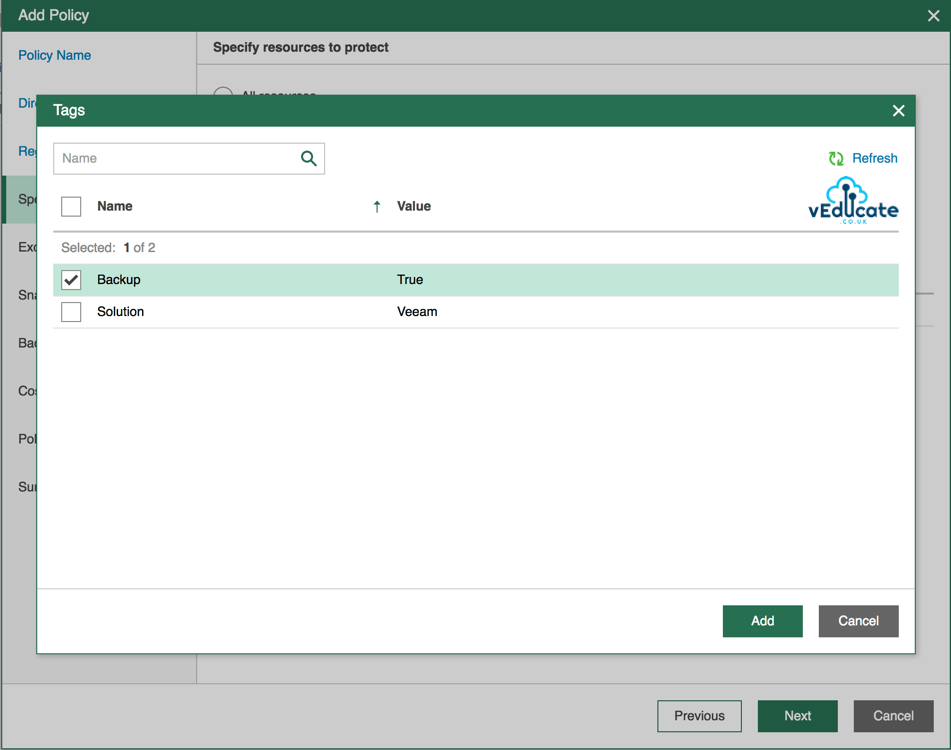
- Select your workloads to protect, you can do this by selecting Azure objects such as;
- Virtual Machines
- Resource Groups
- Subscriptions
- Tags
A legacy screenshot referenced here was not present in the WordPress backup.
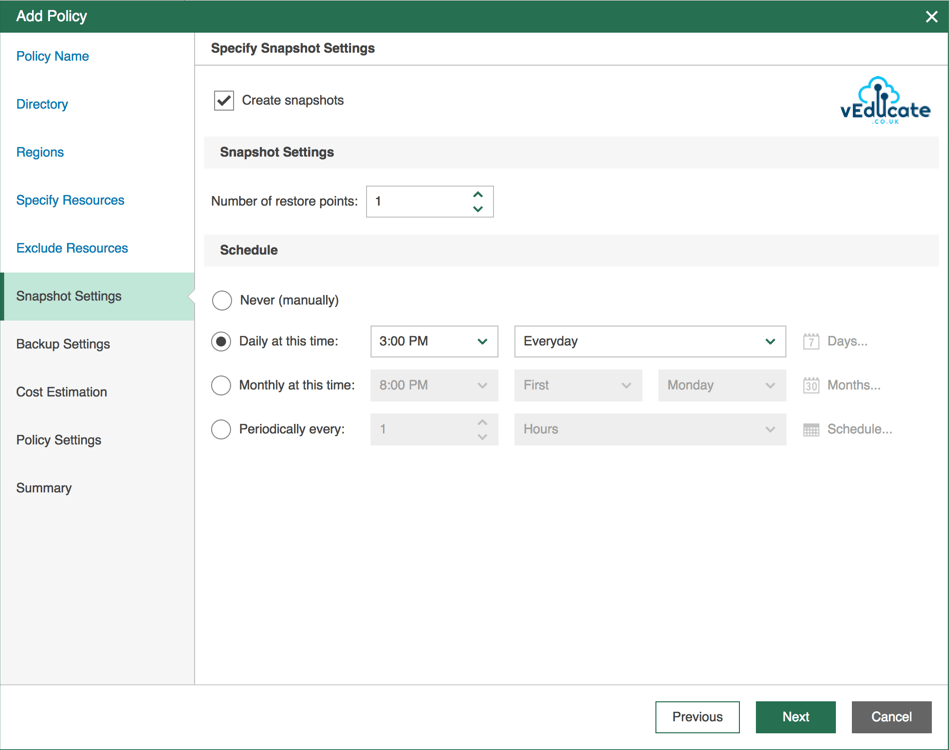
- Specify the snapshot settings for your selected workloads
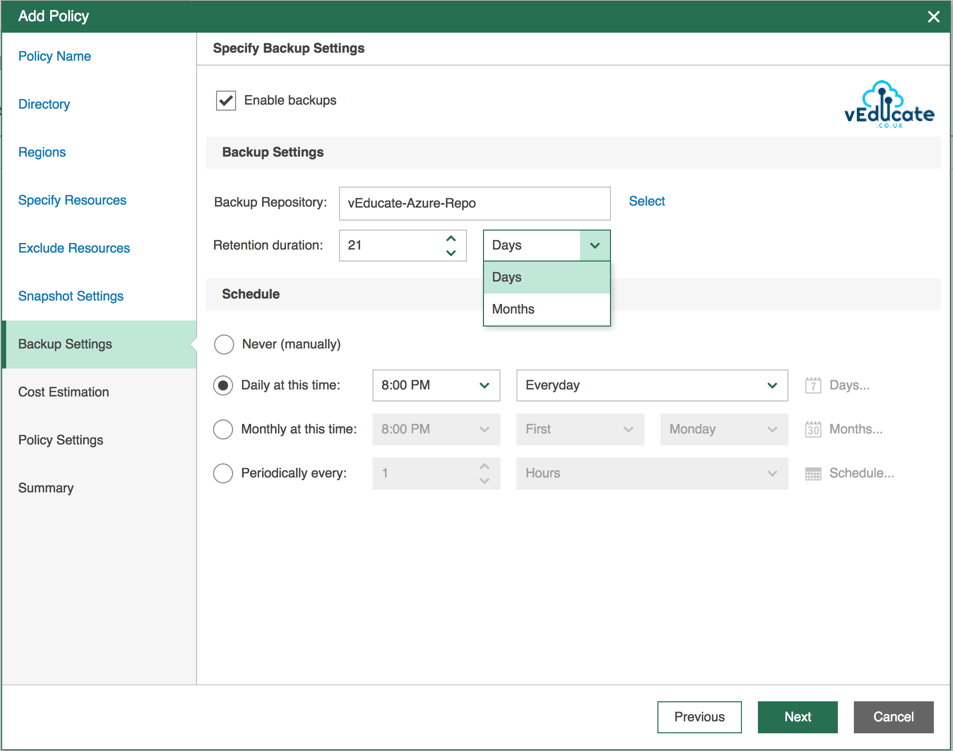
- Specify your backup settings.
- The backup retention can be set to Days or Months.
- Schedule settings are just as flexible.
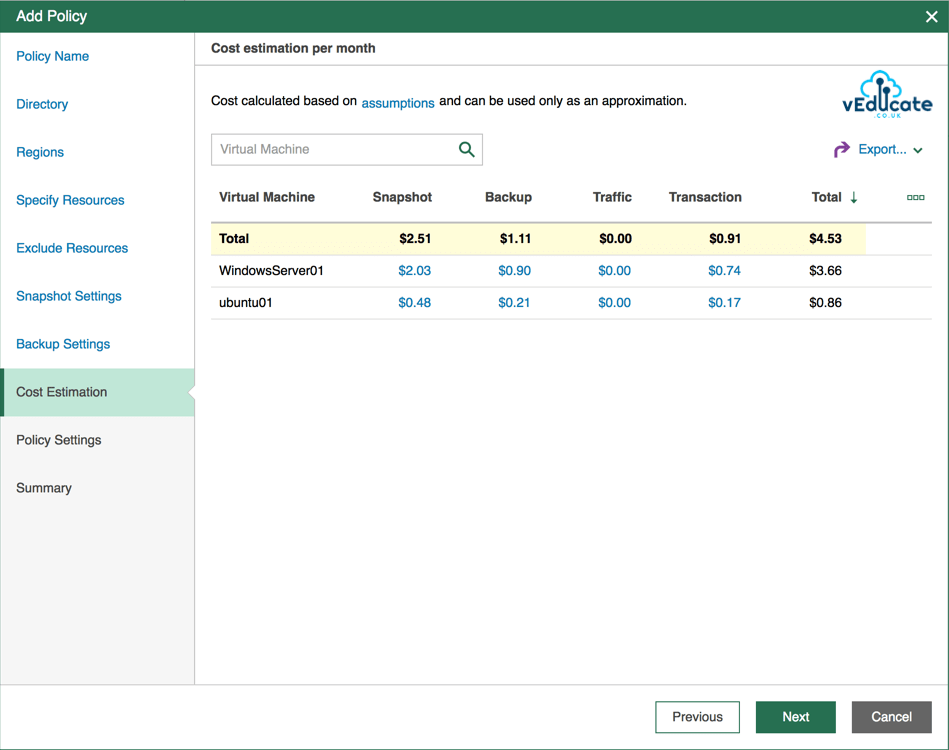
- You will see a cost estimation for the backup policy you have created.
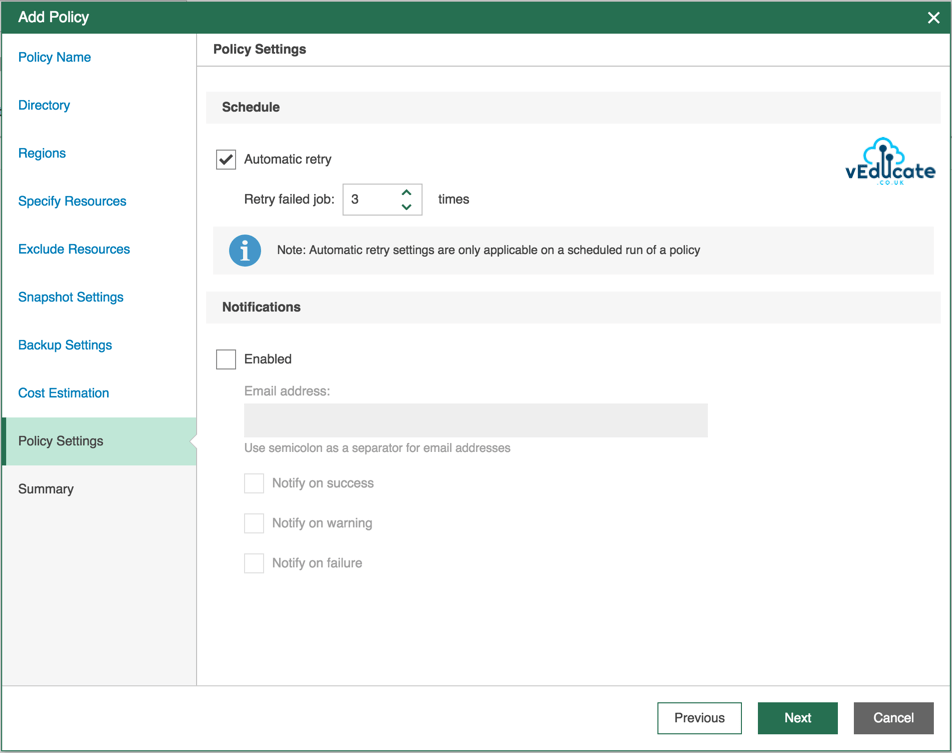
- On the final policy settings, select the retry policy, and any additional notification settings.
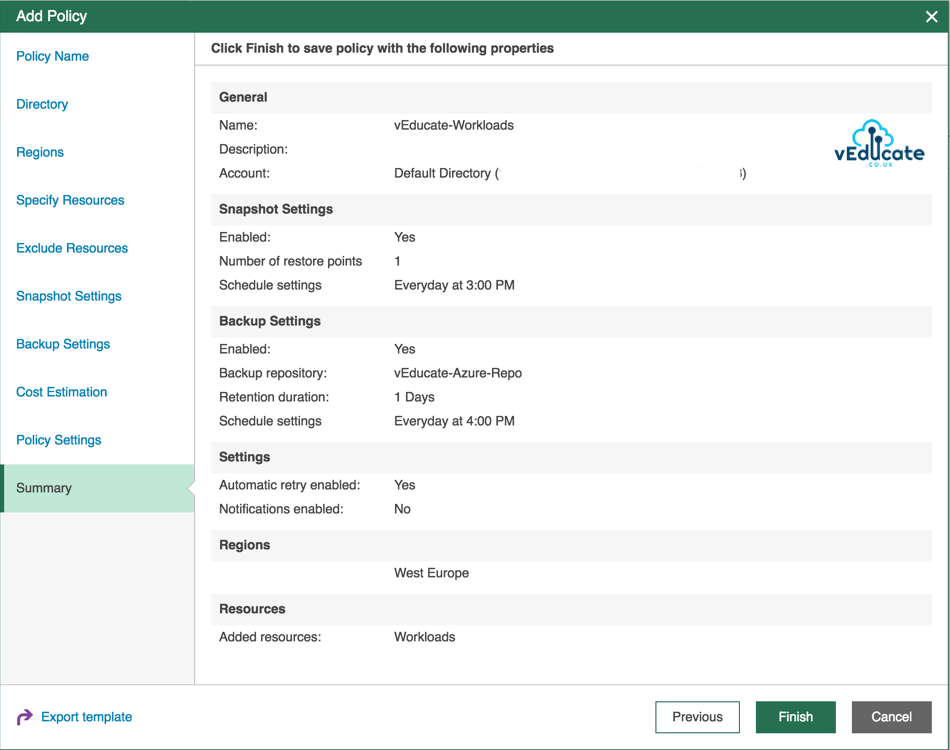
- Final summary tab confirming the policy configuration.
Viewing and Running a Backup Policy
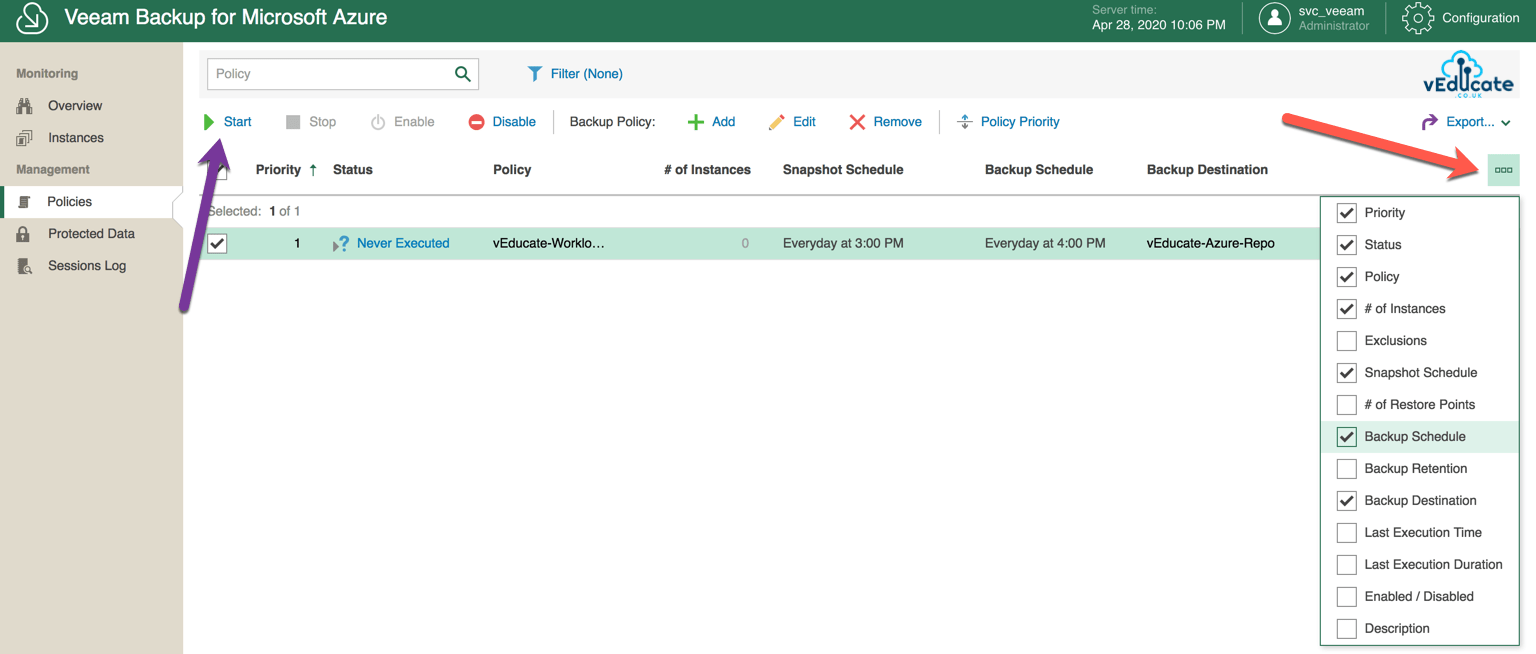
To view your policies, click the policies tab in the left-hand navigation bar.
You can increase the level of detail showed for your policies listed (Red Arrow).
Finally, select your policies and click start, to manually run a policy. Alternatively, you can wait until the policy starts automatically as per your schedule.

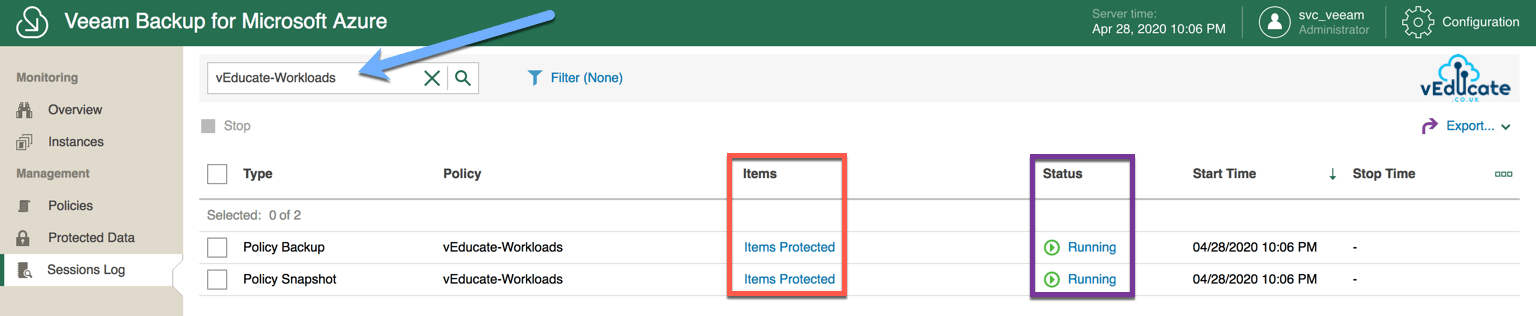
You will see the status of your policy change to running, you can click this status to see more information about the active policy.
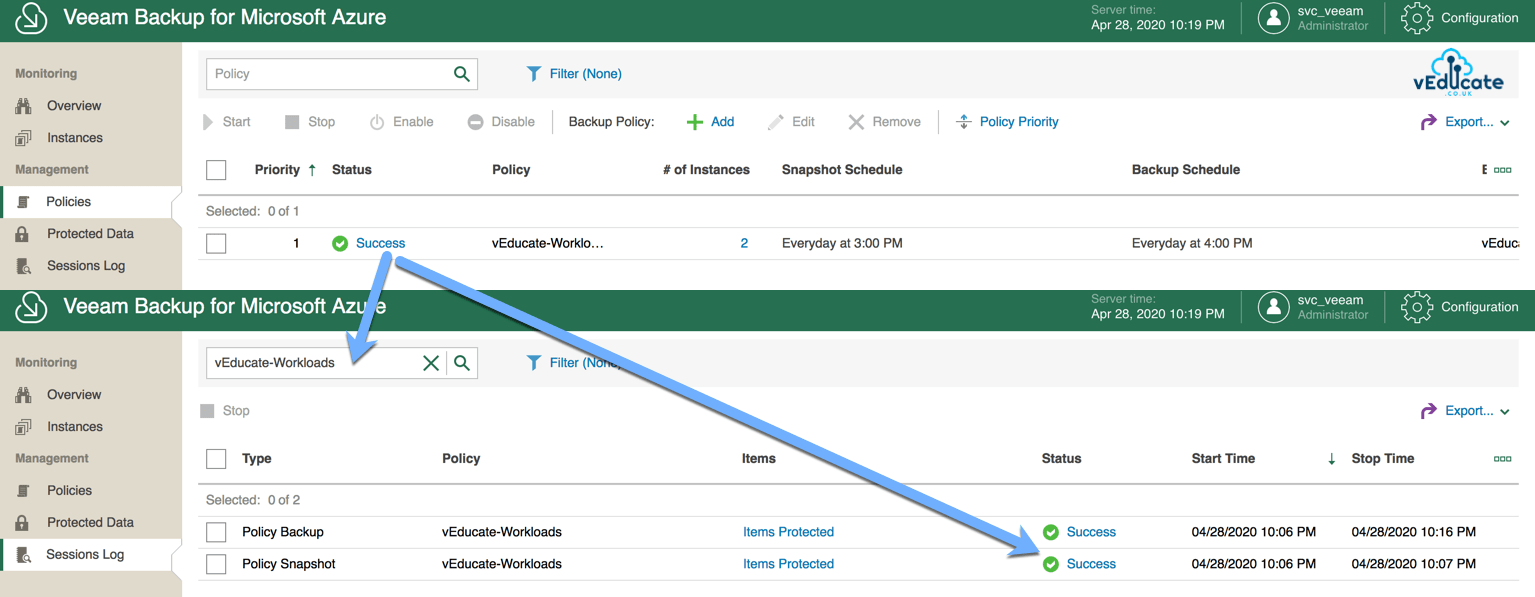
Clicking the running status, will take you to the Session Log screen, with a filter of your policy name set.
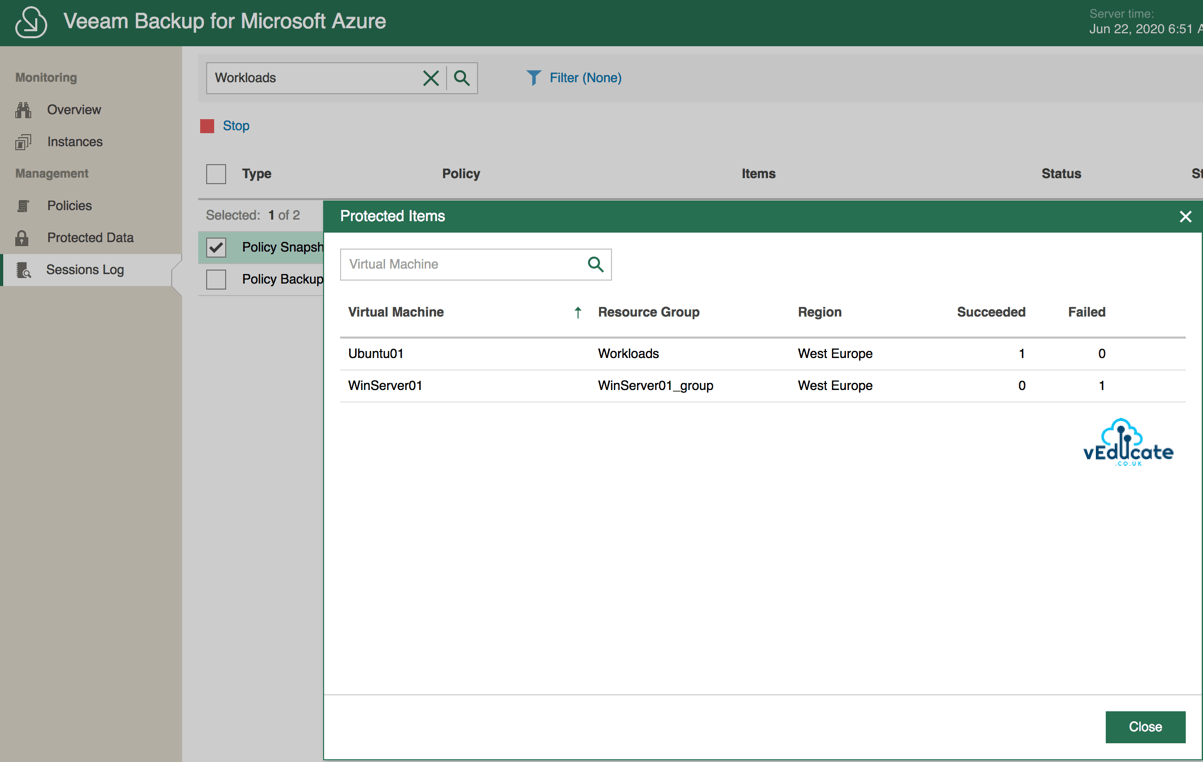
Under the Red Box, you can see which Azure objects are protected as part of the policy.
Under the purple box, you can see the actual session information of the type of backup running (Backup/Snapshot).
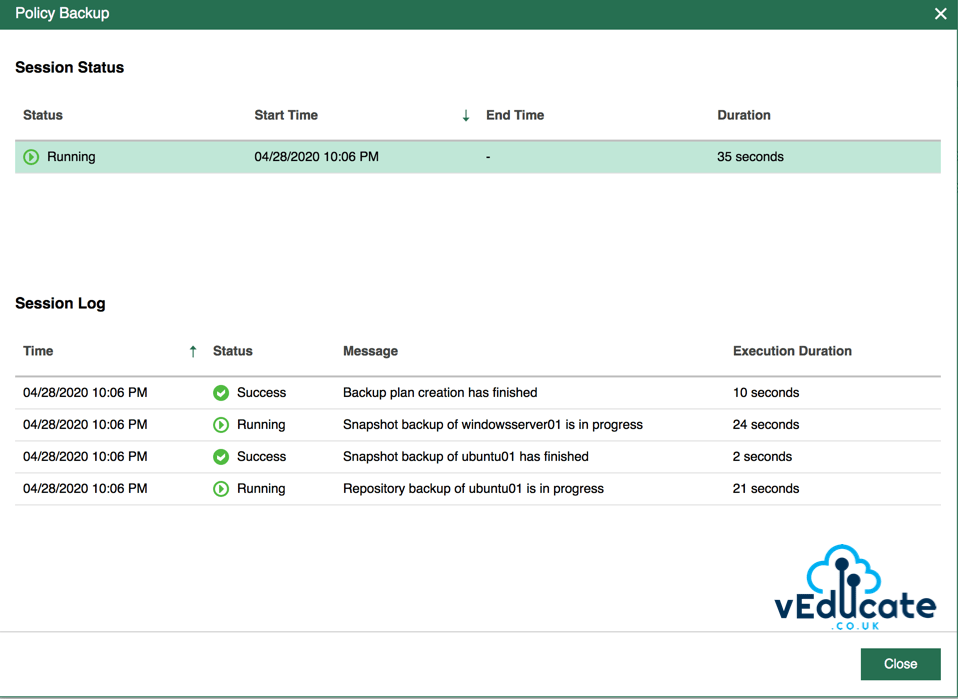
The below screenshot is from the Policy Backup running in my example. For those of you familiar with Veeam Backup, will notice that the session information is very clean and clear in the tasks being performed, making it easy for troubleshooting.
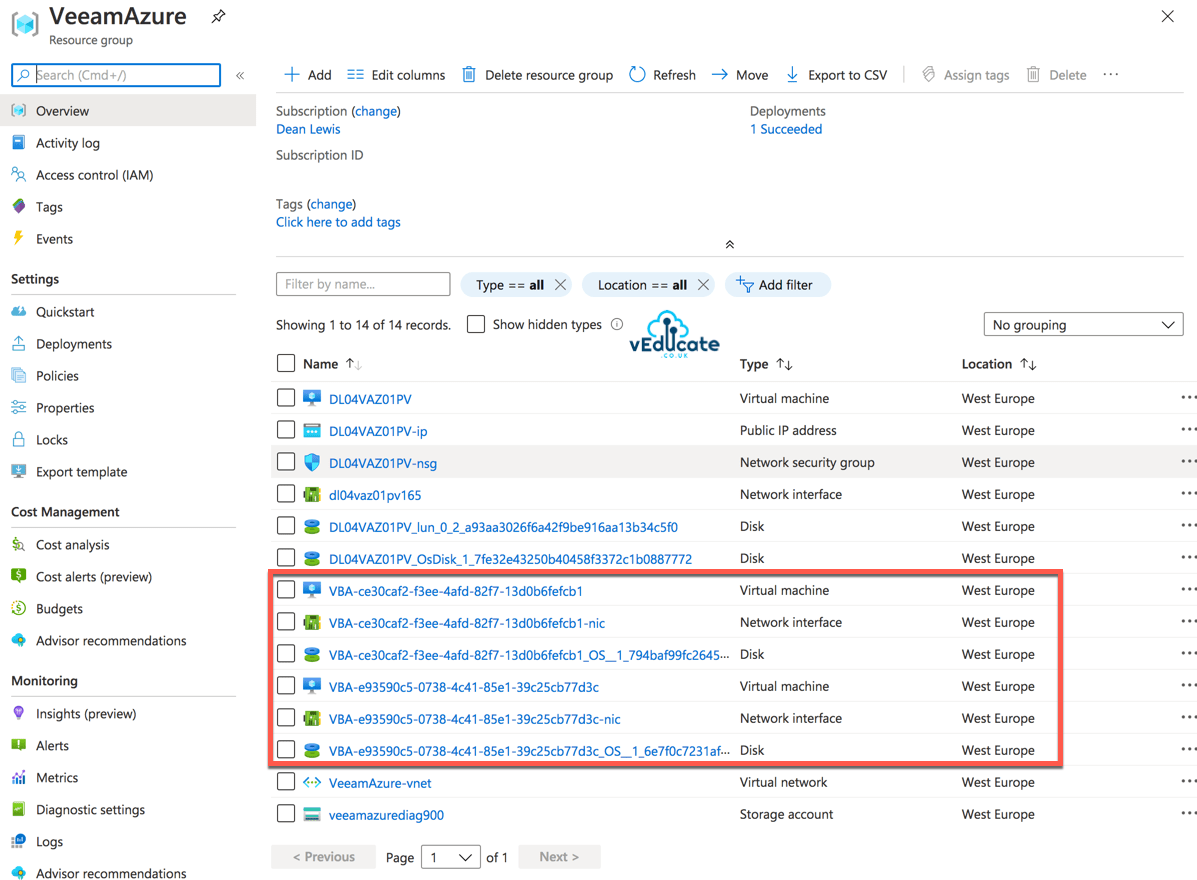
Whilst my job is running, I know my Worker Configuration is set to have a maximum of two instances, which means I can process two VMs at the same time. When I log into my Azure Portal, I can see that another Worker Instance has been spun up automatically. When no jobs are running only the minimum number of worker instances will be present.
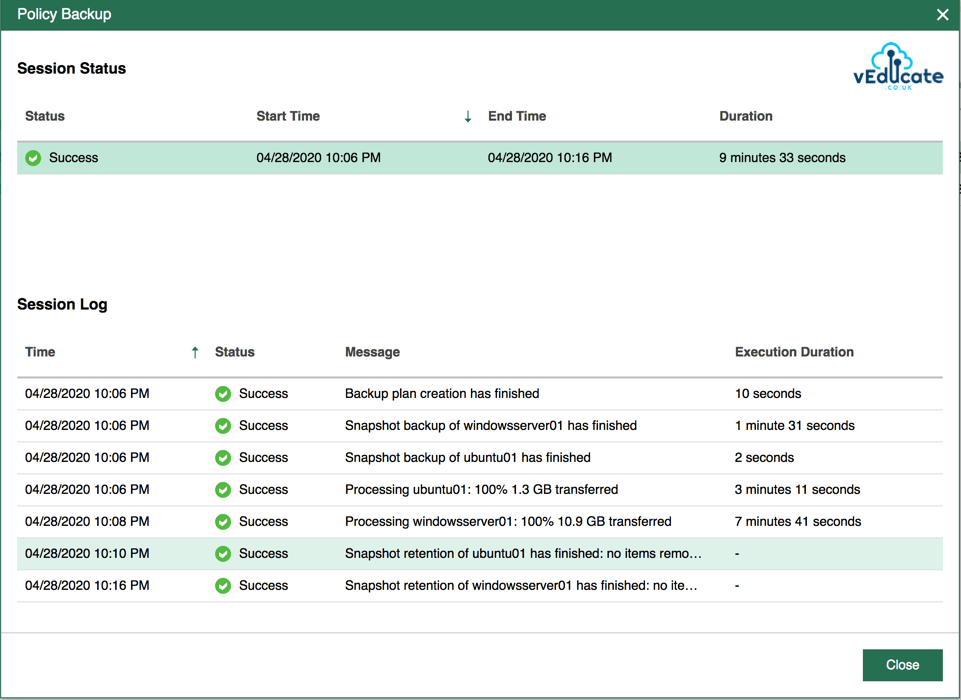
Here is my policy showing success in both the policies and session log navigation screens.
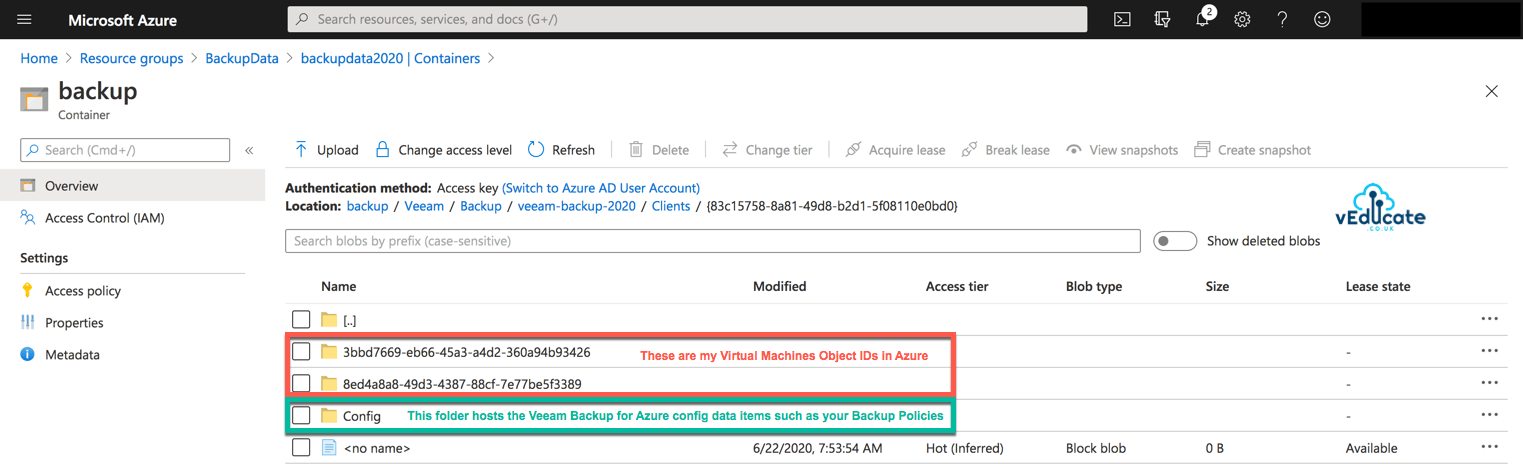
If I manually browse my storage account, I will see under my backup folder within the container folders listed as the unique object ID's of my protected workloads.
Summary and next steps
In this blog post, I went through step by step configuring a policy to protect your workloads, this is wizard driven and very simple to use, if you don't read the manual before-hand, you won't go far wrong configuring things blind. This has always been one of the great things about Veeam products.
Next steps are to view your backed-up data and restore files and virtual machines. Then how to integrate with an existing Veeam Backup and Recovery environment.
- Getting started with Veeam Backup for Azure
- - Configuring the backup infrastructure
- - Monitoring
- - Protecting your installation
- - System and session logs
- Restoring a backup
- - Viewing protected data
- - File Level Recovery
- - Virtual Machine Disk Restore
- - Full VM Restore
- Integrating with Veeam Backup and Replication
- - Adding your Azure Repository to Veeam Backup and Replication
- - Viewing your protected data
- - What can you do with your data?
- - - Restore/Recover/Protect
Regards