In this blog post we will cover the following topics
- Restoring a Backup
- - Viewing protected data
- - File Level Recovery
- - - File Level Recovery Session Log
- - Virtual Machine Disk Restore
- - Full VM Restore
The follow up blog posts are;
- Getting started with Veeam Backup for Azure
- - Configuring the backup infrastructure
- - Monitoring
- - Protecting your installation
- - System and session logs
- Configuring a backup policy
- - How a backup policy works
- - Creating a Backup Policy
- - Viewing and Running a Backup Policy
- Integrating with Veeam Backup and Replication
- - Adding your Azure Repository to Veeam Backup and Replication
- - Viewing your protected data
- - What can you do with your data?
- - - Restore/Recover/Protect
Viewing Protected Data
Once you have a successful backup policy run, you will find that by navigating to “Protected Data” in the left-hand navigation pane, you will find details of your protected workloads and the backups stored.
Highlighted in the purple box above, we are able to click on each of our protected virtual machines and see the details of the restore points held.
The available restore options are;
- VM Restore
- Restore a full virtual machine to the same or a different location. This restore uses both the VM configuration and VHD backups.
- Disk Restore
- Restore only a virtual machines hard drive to the same or a different location, these will not be attached to any virtual machines when the restore is complete.
- File-Level Recovery
- Restore of files and folders from protected instances, which are available to download to your local machine.
Below, we can see the available restore points for my “Ubuntu01” virtual machine. As the backup policy has only run once, I have a single snapshot held with the VM itself, and a single backup of the full virtual machine (VHDS and VM configuration, which are located in my configured Repository.
- Backups – Both managed/unmanaged VHDs are saved to the configured Backup Repository.
- Snapshots
- Managed VHDs – snapshot saved to resource group of source VM,
- Unmanaged VHDs – snapshots saved to Azure Storage Account of source VHD
From this view, we can select to restore the Full VM, the individual VHDs, under the Restore option, or we can perform a file-level Recovery under the second self-named option.
File Level Recovery
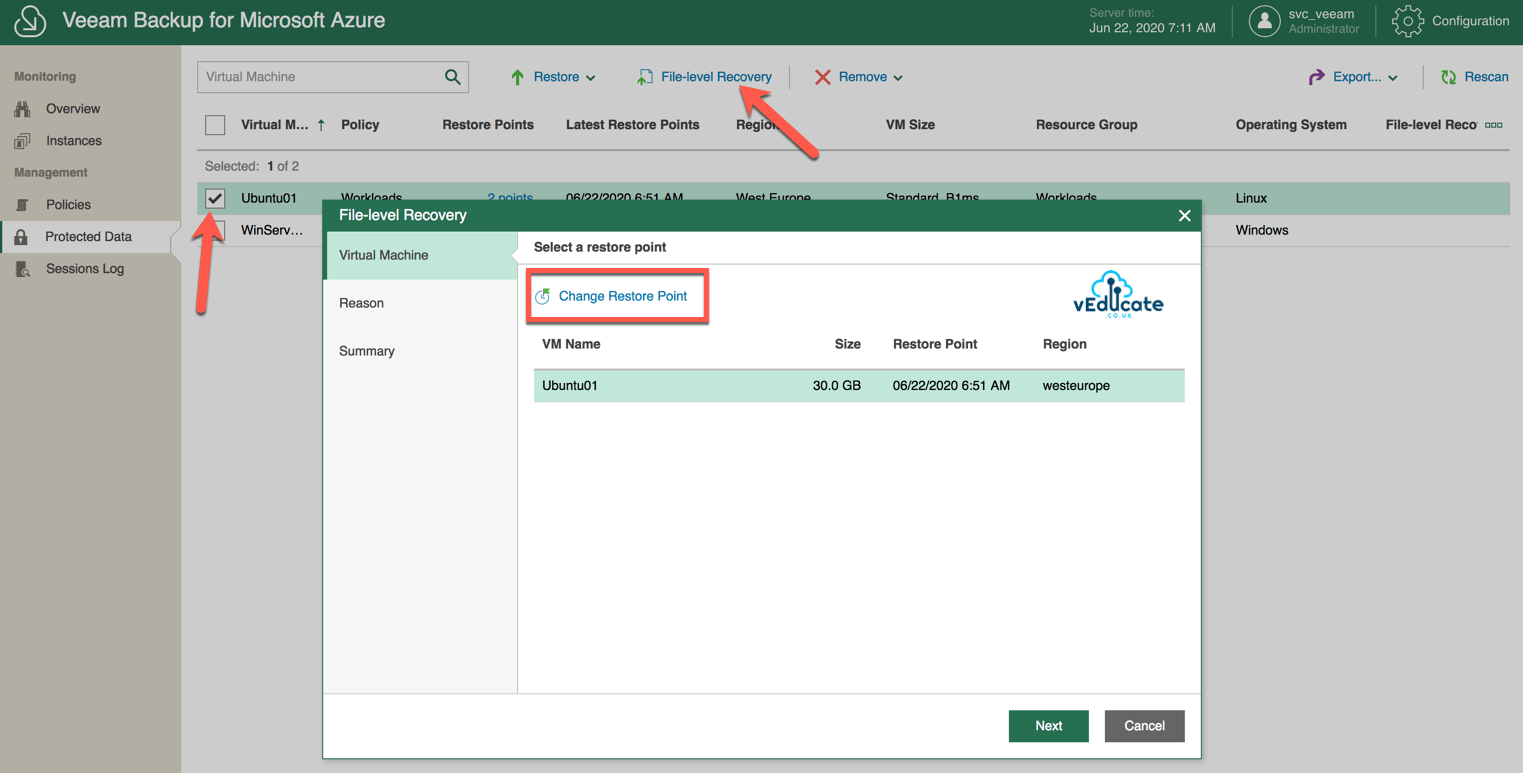
You can enter a file level recovery as per the above screenshot, or from the main screen by highlighting your protected VMs and clicking file level recovery.
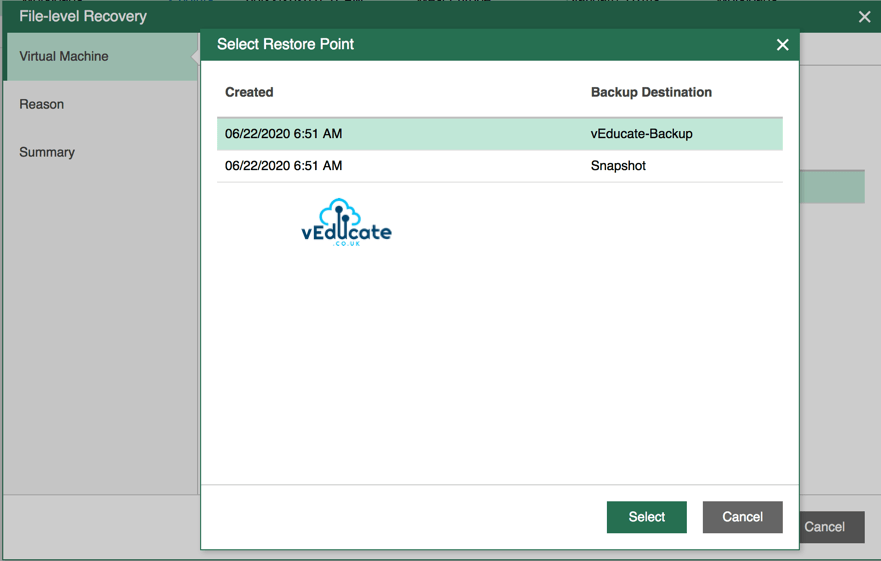
By clicking “Change Restore Point” you will of course see the various points in time available.
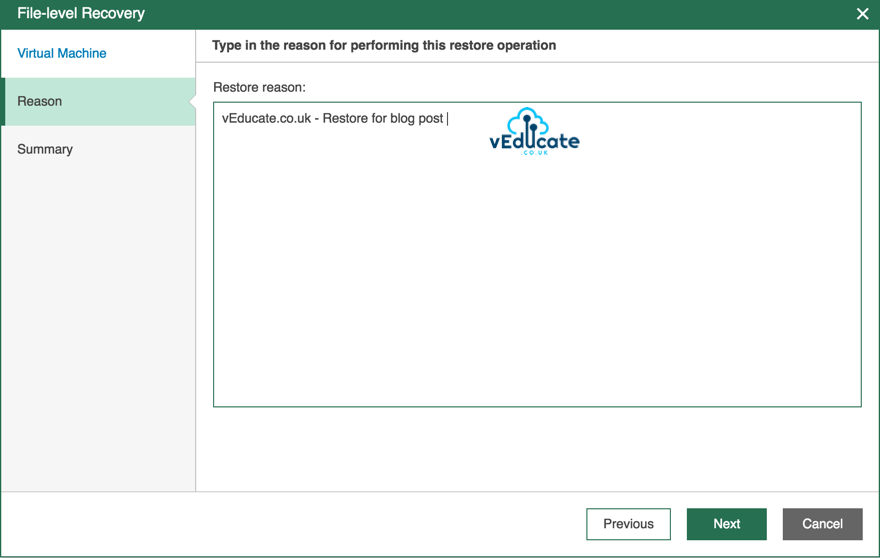
Provide you restore reason; you will see this listed under the session log activity.
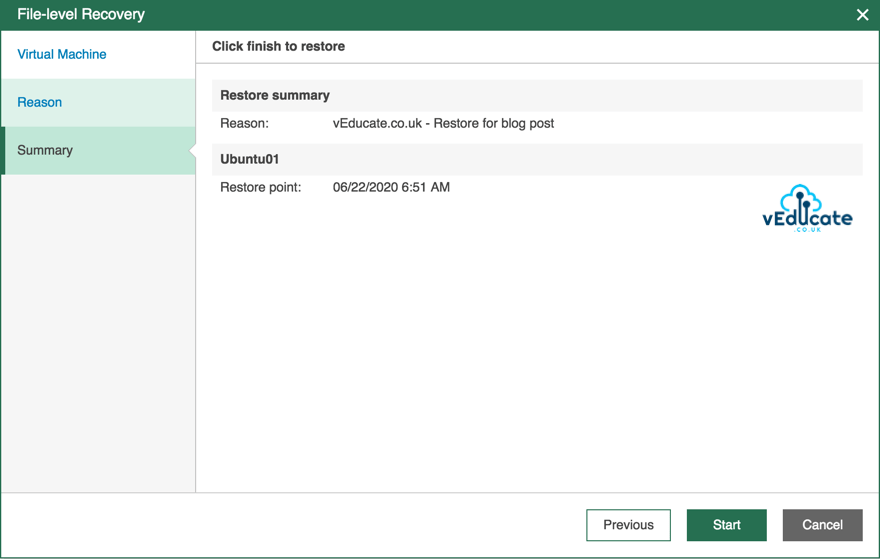
Finally, a summary screen, clicking “Start” will kick off the restore.
You will have a separate session window launched for the restore, clicking close will not end the recovery. (Although file level recovery tasks will time-out if there’s no interaction).
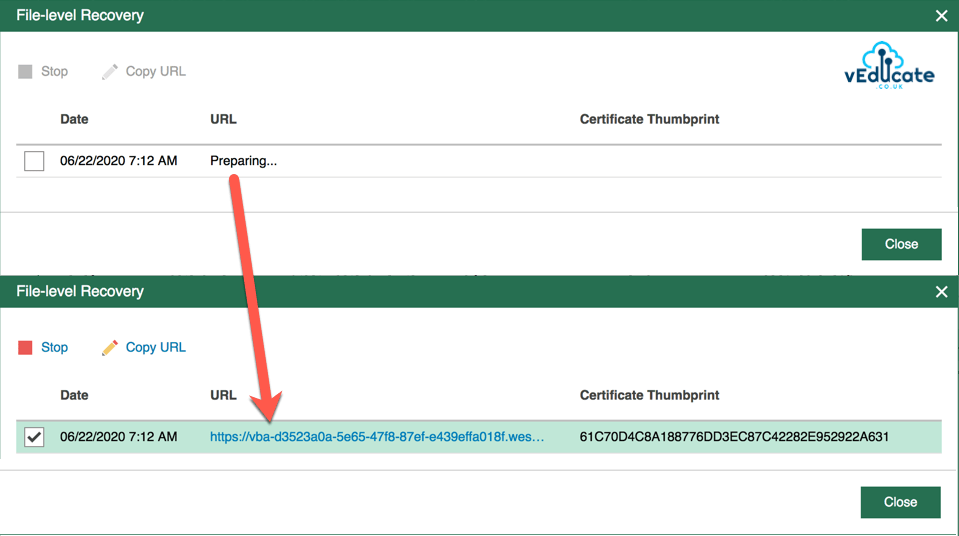
When the FLR is available, you will be provided a link to access the restore, which you will notice is a link for one of your Worker Instances. Once finished you can select your restore session and click “Stop”.
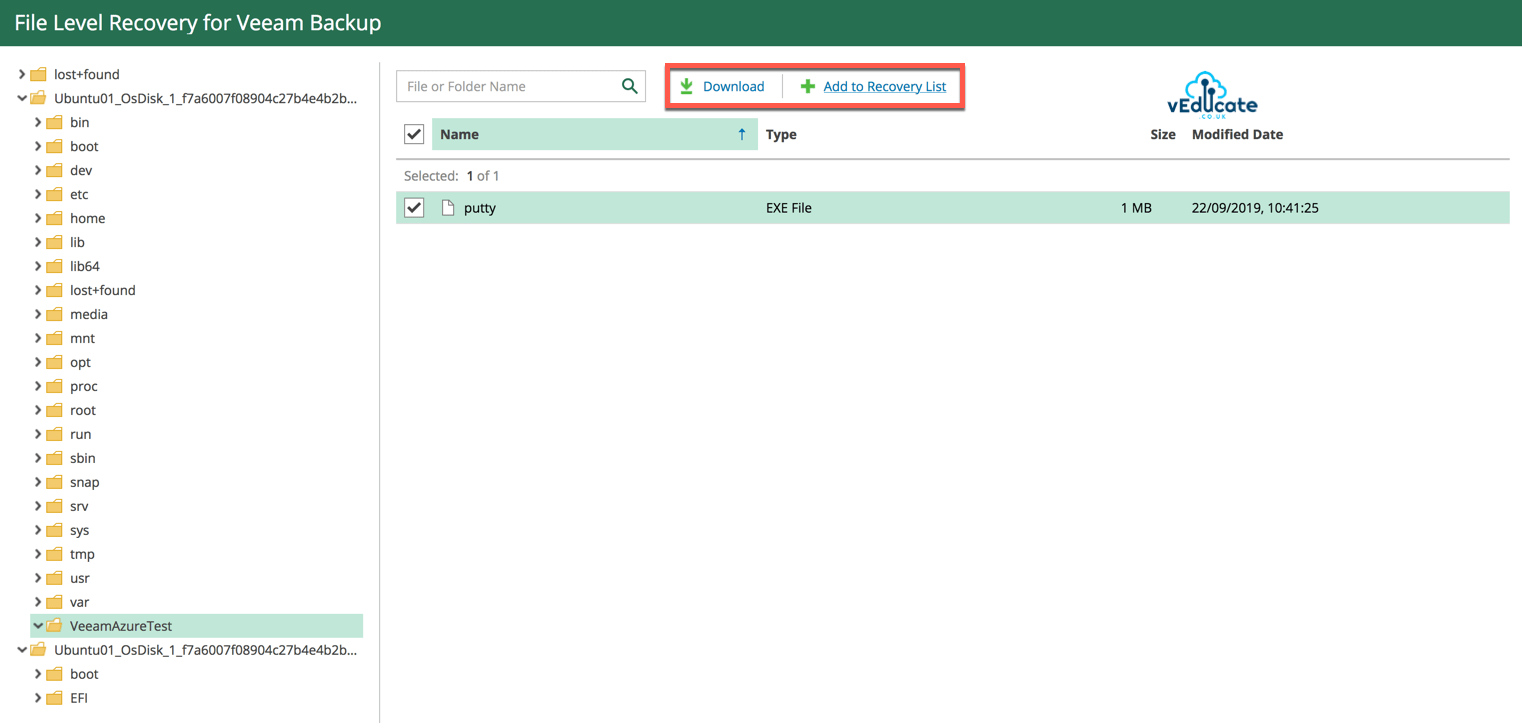
Opening the URL will take you to the webpage which acts as a File Level explorer. You have the ability to search each hard drive of the VM, download selected files and folders to your local machine, or add selected files and folders to the recovery list, of which you can download your full list when ready.
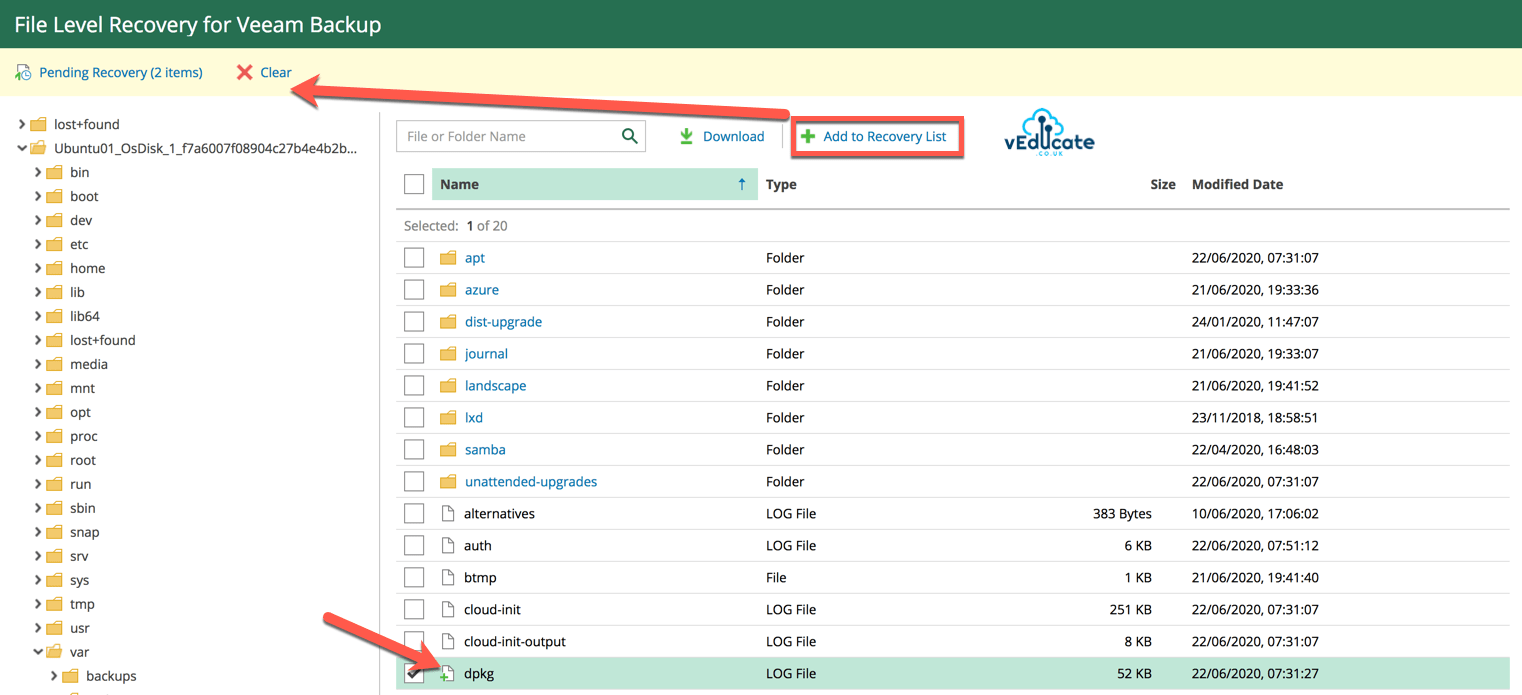
In the below screenshot, you can see that by adding files to a recovery list, gives the top notification box to view that list, or clear it. In the explorer view, files and folders added to the list have their icon altered to include a green + symbol.
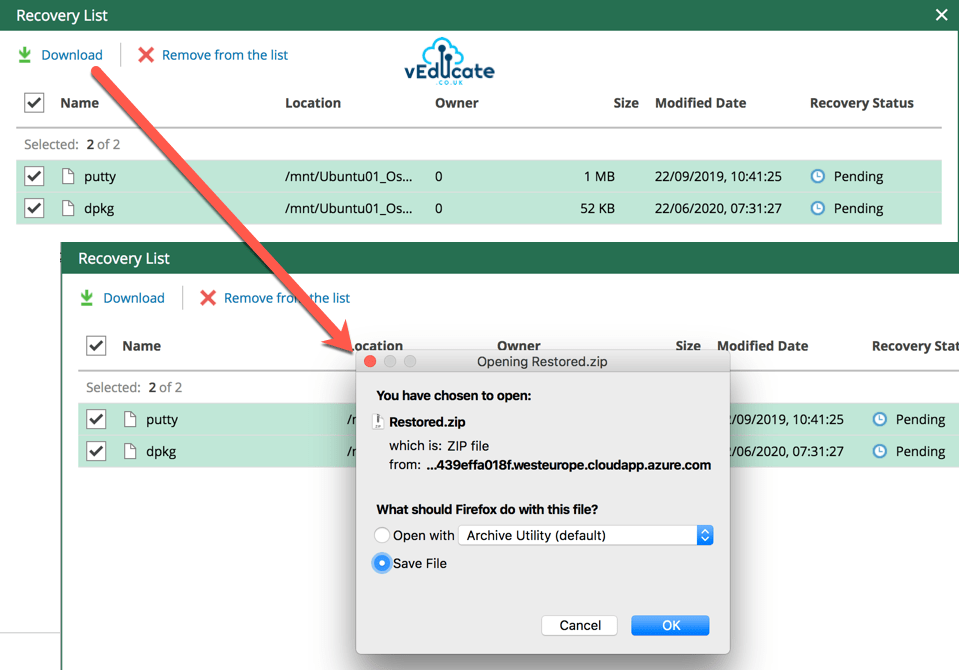
Viewing the recovery list itself, I can download individually from the list, or multi-select. These will always be downloaded to your local machine in a zip file.
There is currently no option to restore files back to the original location.
Once downloaded, if you need to restore the back to the original virtual machine, you will need to do this using SCP, FTP or whatever your transfer option of choice is.
File Level Recovery Session Log
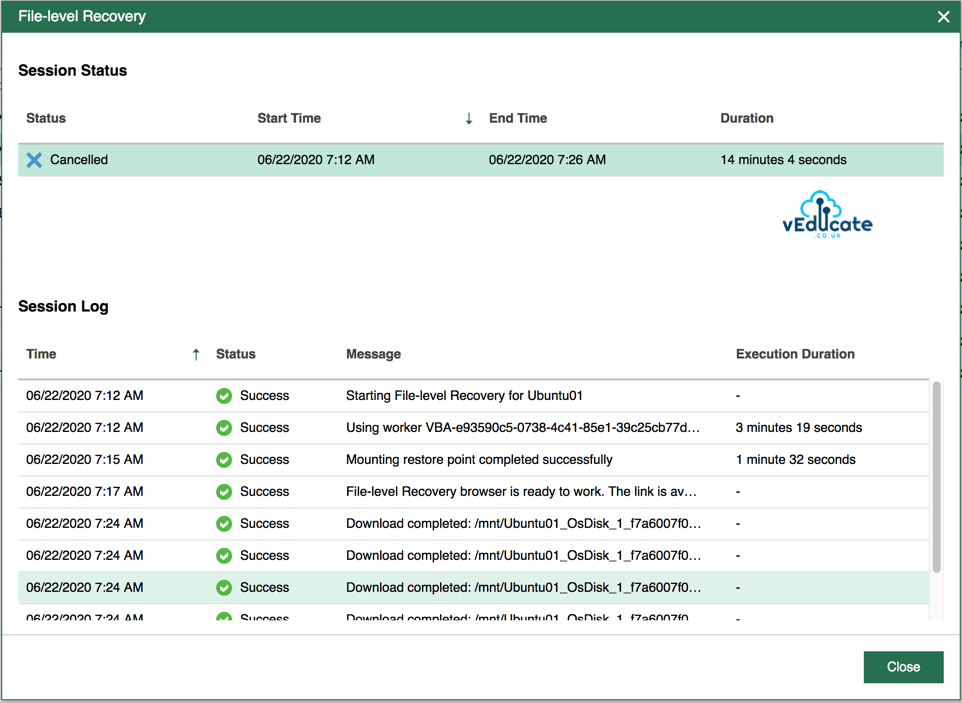
To view our File Level Recovery history and audit information. We can do this in the Sessions Log on the left hand navigation pane. If a session is still running, you can also stop this from this screen.
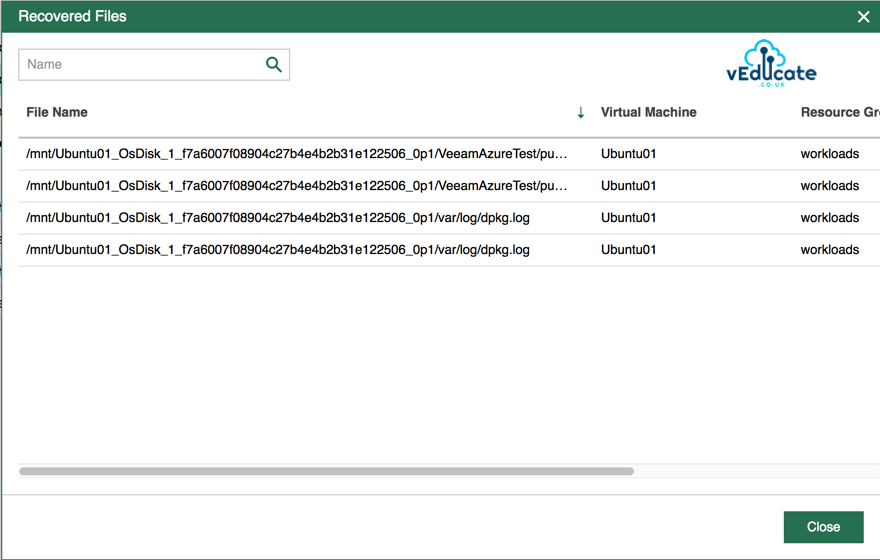
We can see which items are considered Files Restored (1), from which virtual machines, and ability to search if needed.
In the below Session Status (2), you can see which virtual machines were recovered also, which worker instances were used, and again confirmation of data recovered.
Virtual Machine Disk Restore
To restore a virtual machine disk, select your virtual machine under the protected data navigation pane > Restore > Disk Restore.
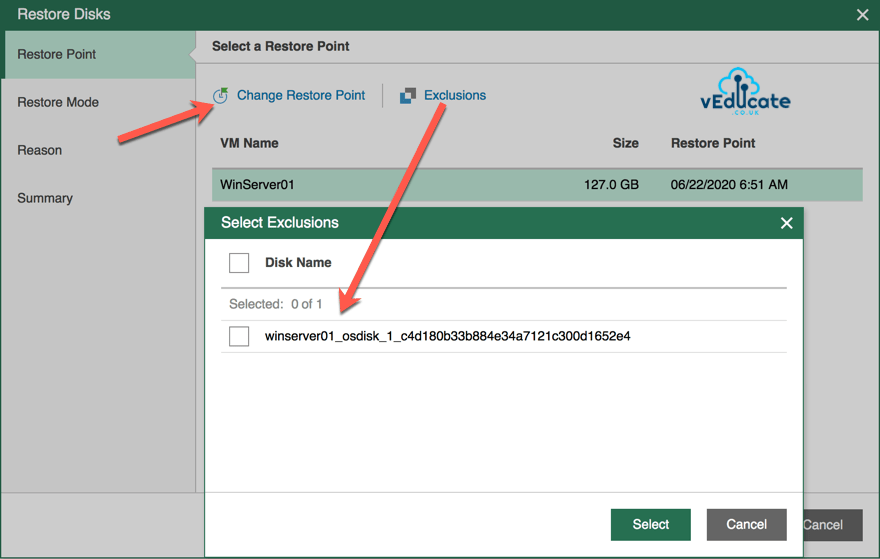
As with file level recovery, you can select your restore point, and in this option also have the ability to exclude disks from the restore.
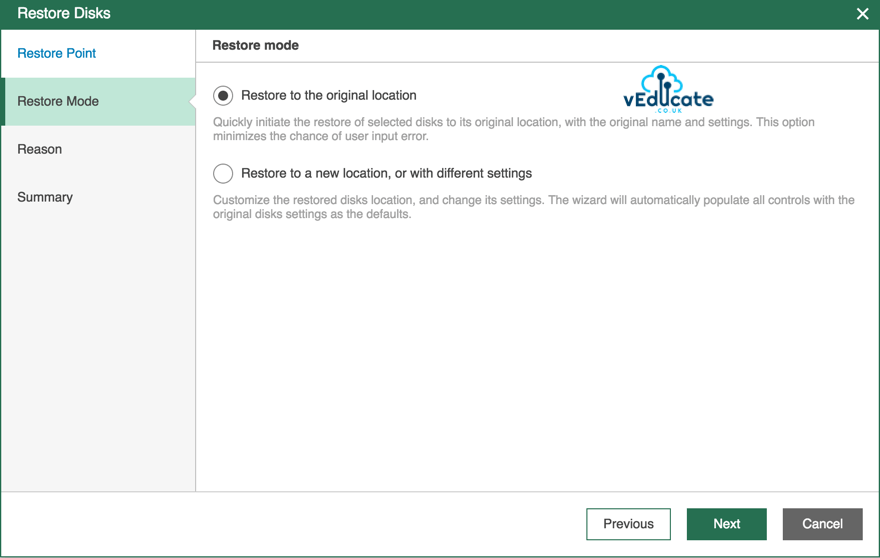
For those of you use to using Veeam products, it’s probably no surprise to you for the next options.
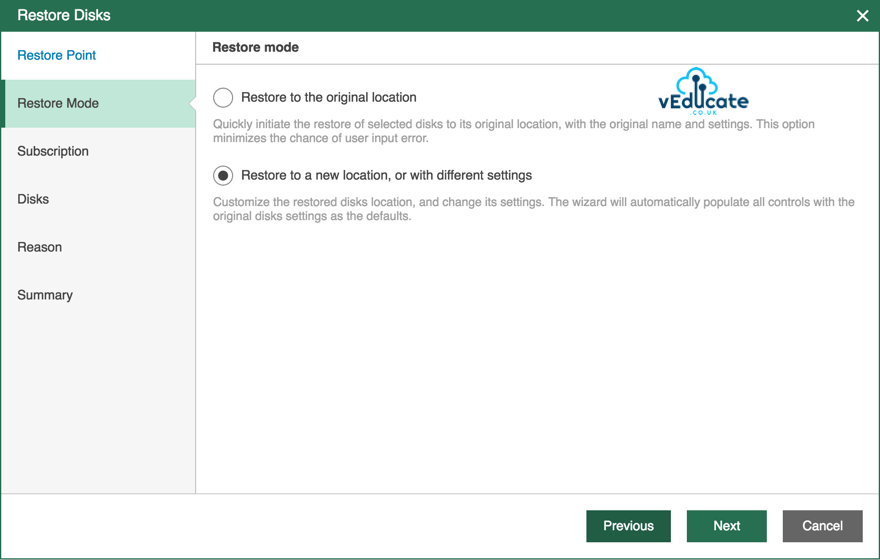
- Restore Mode
- Original Locations – Do you want to restore the hard drive to the original location with the same name and settings
- New location or with different settings – self explanatory really
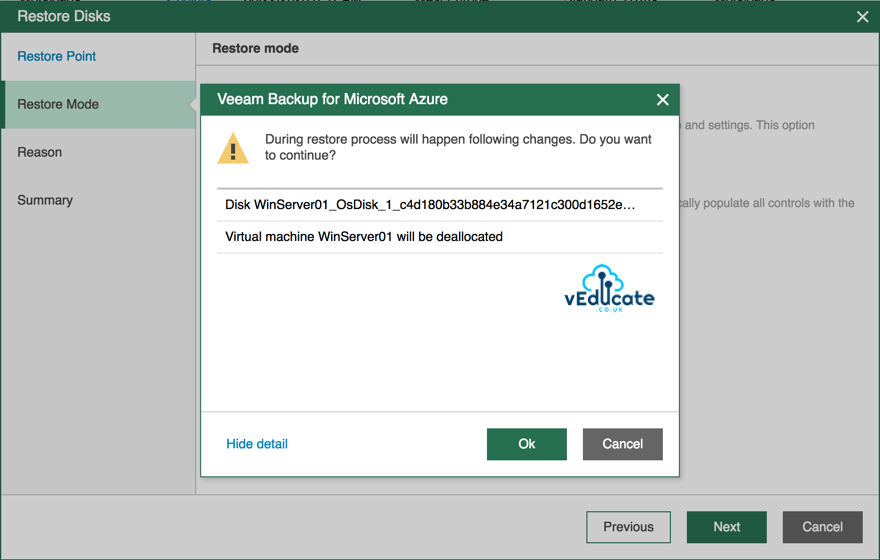
If you select the Original Location option, and your VM or rather its virtual hard drives are still present, you will be presented the below warning.
To proceed, your virtual machine will be deallocated, which can be problematic, if you have a public IP address directly attached to this virtual machine, it could be lost and a new one issued during next boot.
Clicking OK, you will be asked for a restore reason and summary of your selections.
If we choose “Restore to new location, or with different settings”, then you will be presented with the following options.
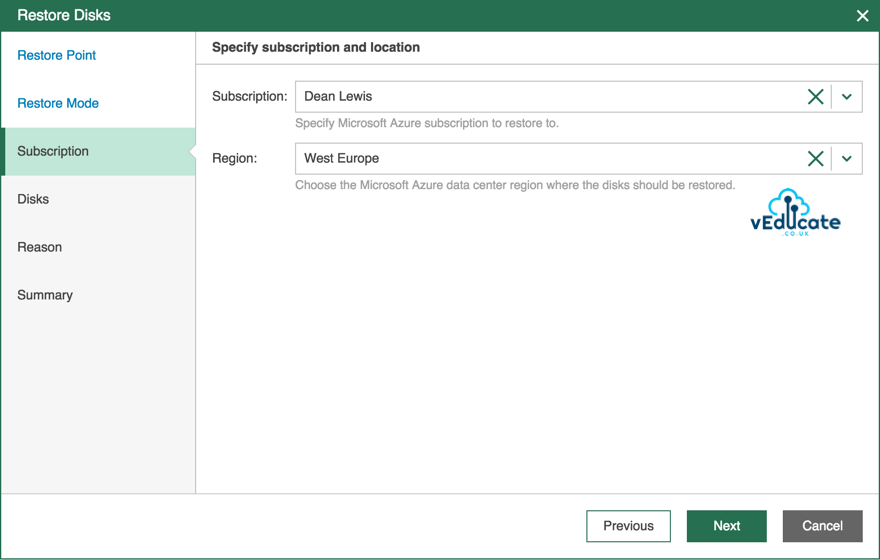
Select your subscription and the region which you want to restore the disks.
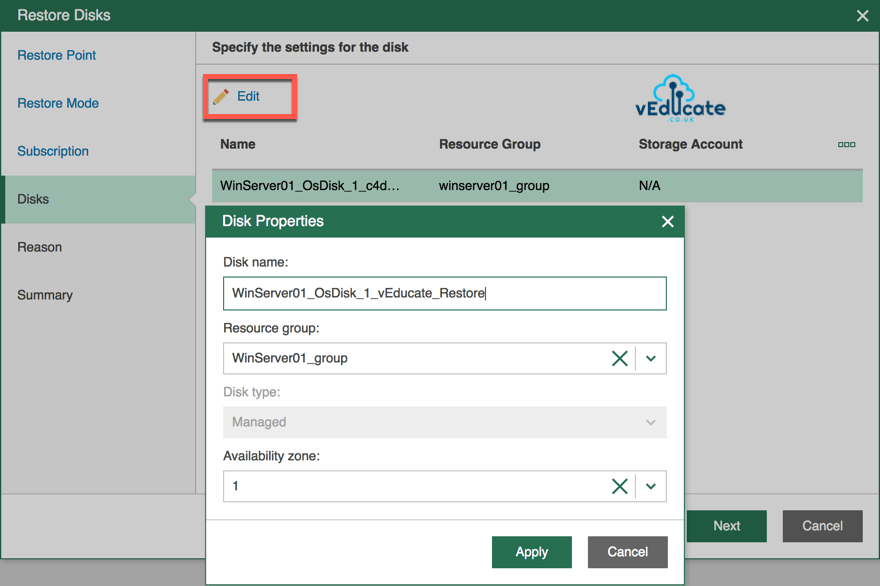
Specify the settings for the selected virtual machines disks that will be restored;
- Disk Name
- Resource Group
- Disk type will be set as managed and cannot be changed in this current release of Veeam Backup for Azure
- Availability Zone option
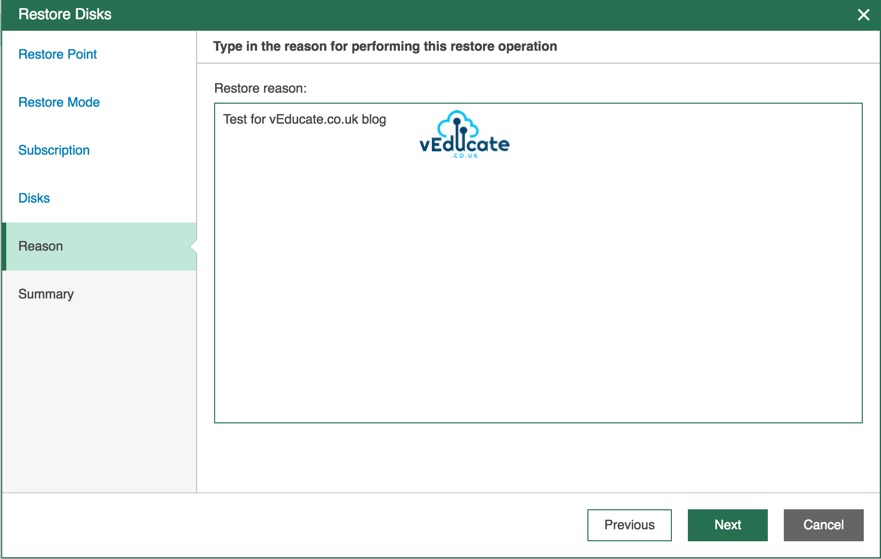
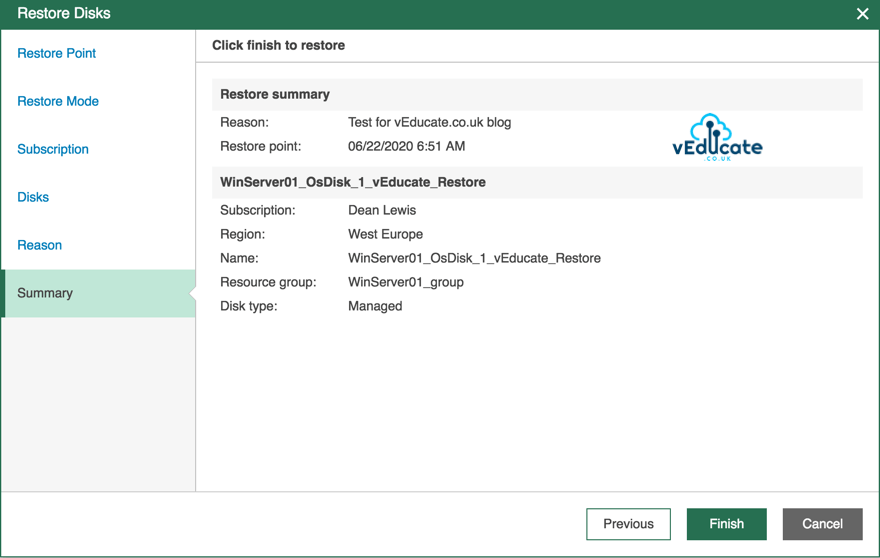
Finally enter your restore reason, and review the summary, click finish to kick off the restore.
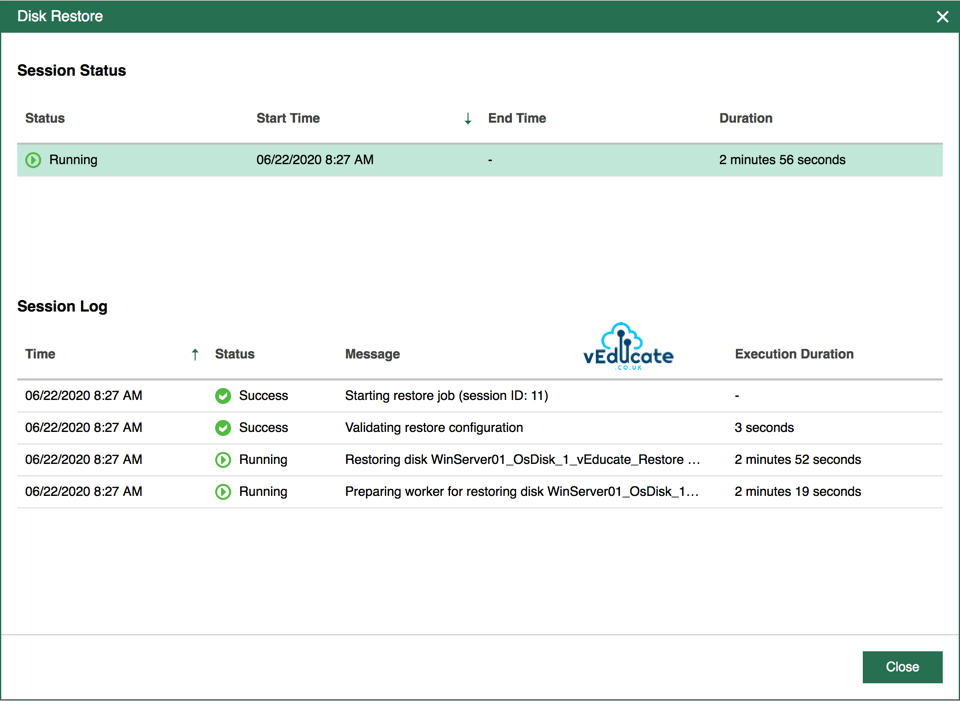
You will then be shown the Disk Restore Session Status window, which you can also navigate to by clicking Sessions Logs on the left-hand side.
As with our earlier run through of FLR, you can see the “Restored Disks” under the Items column, and you can stop a restore by highlighting the session and clicking the “Stop” button on this page also.
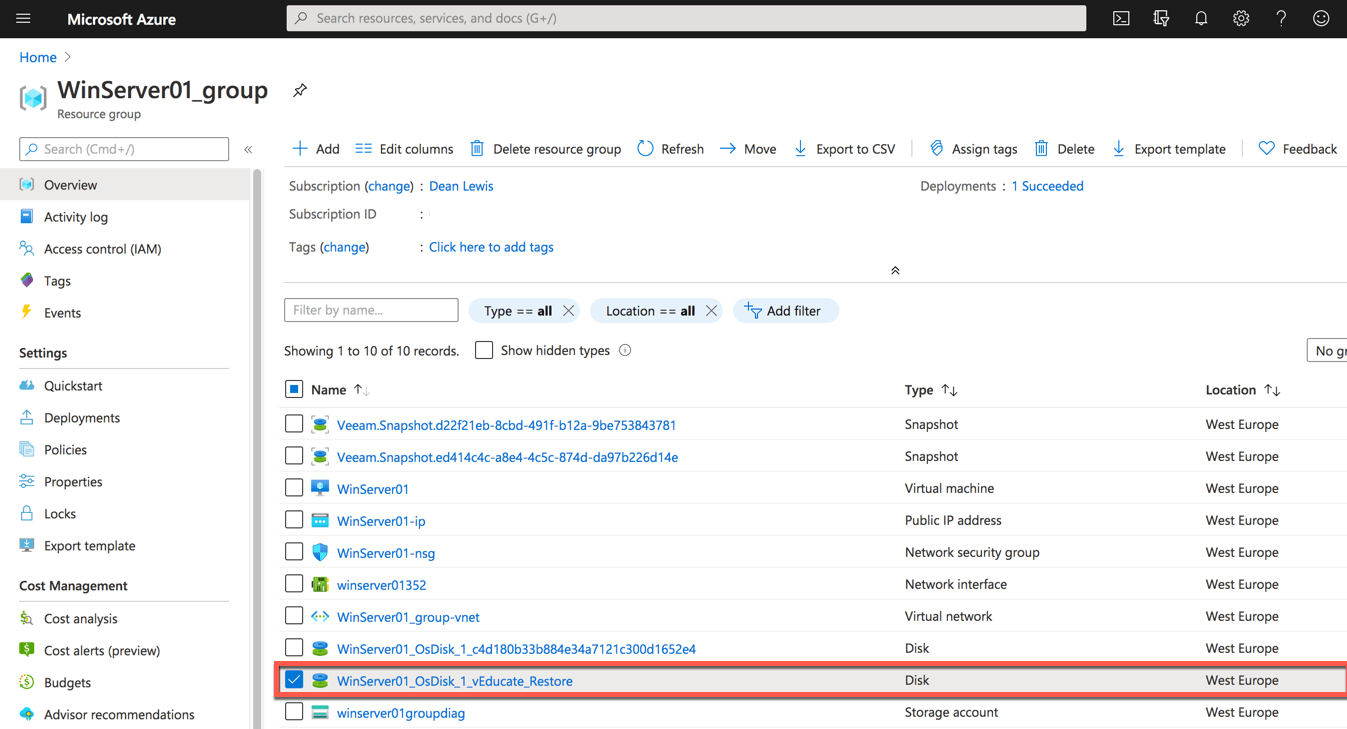
In my Azure Portal, under my resource group, I can see the Disk object.
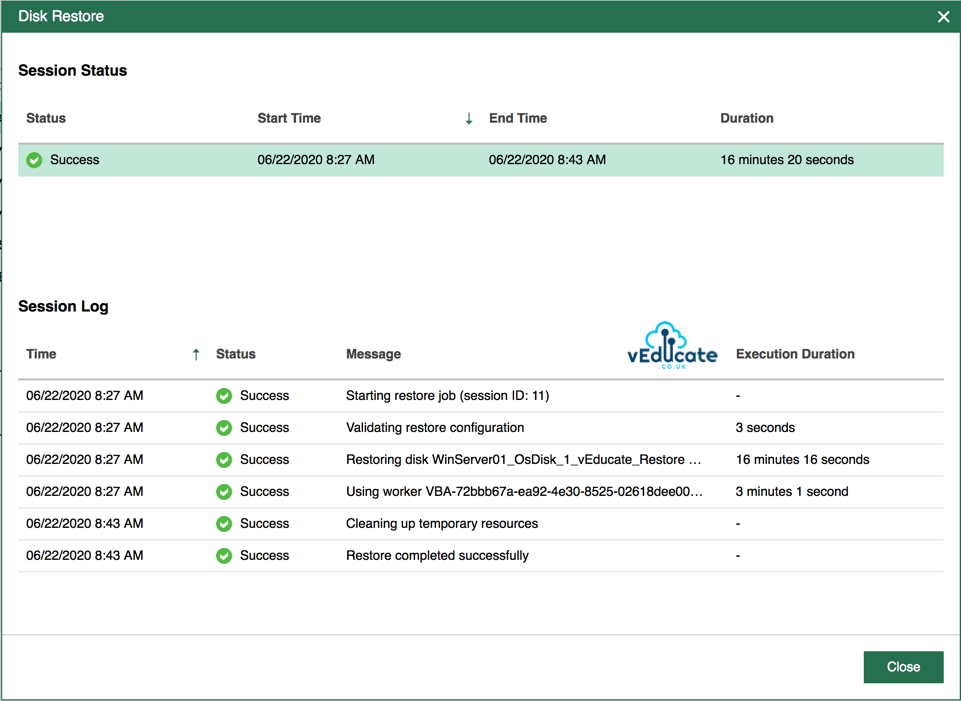
And just for completing this part of the run through, here is my status log once the disk restore is completed.
Full VM Restore
The final recovery option is a Full Virtual Machine restore.
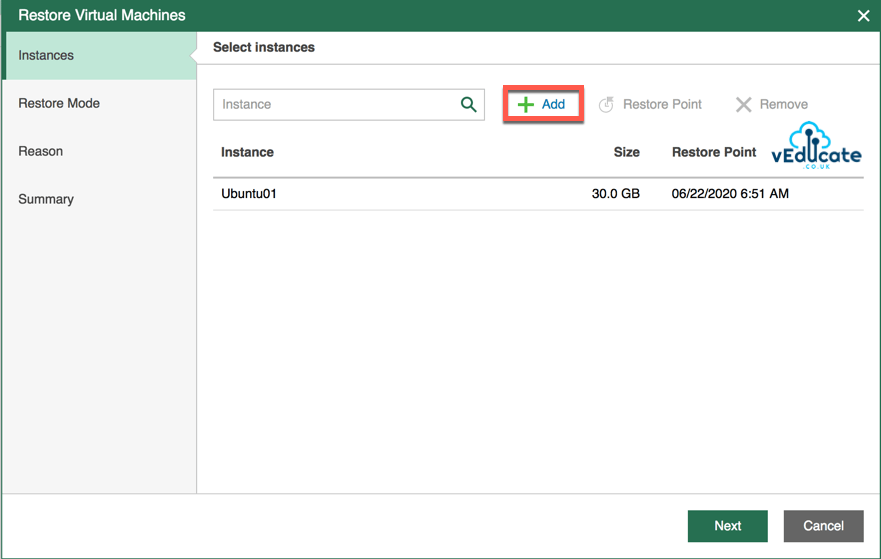
On the first page of the restore dialog, you can select further instances (virtual machines if needed).
Highlighting your instances in the list will give you the option to select the restore point and remove them from the list if needed.
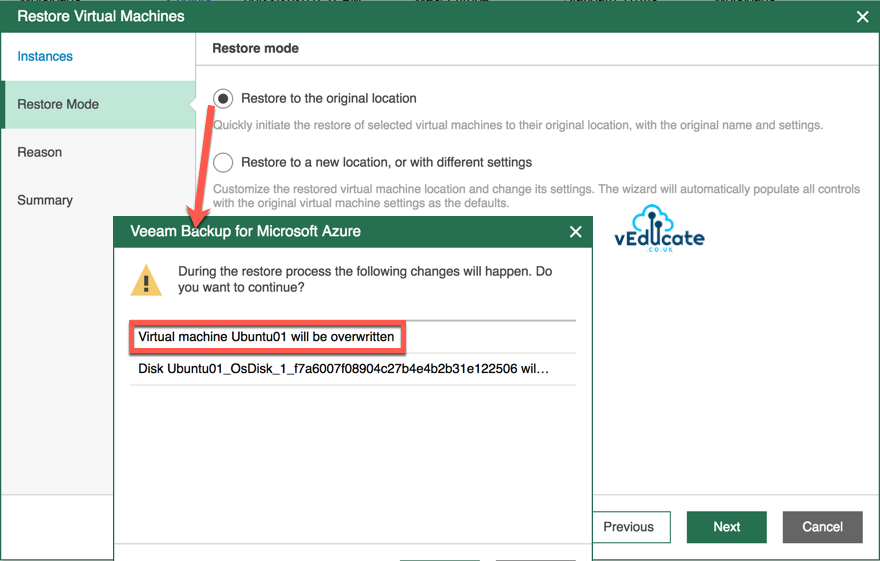
Like restoring Virtual Machine hard disks, selecting the restore mode of “Original Location” will present a warning that your existing VM will be overwritten. If you choose to accept this mode, then you can input a restore reason, review the summary and kick off the restore.
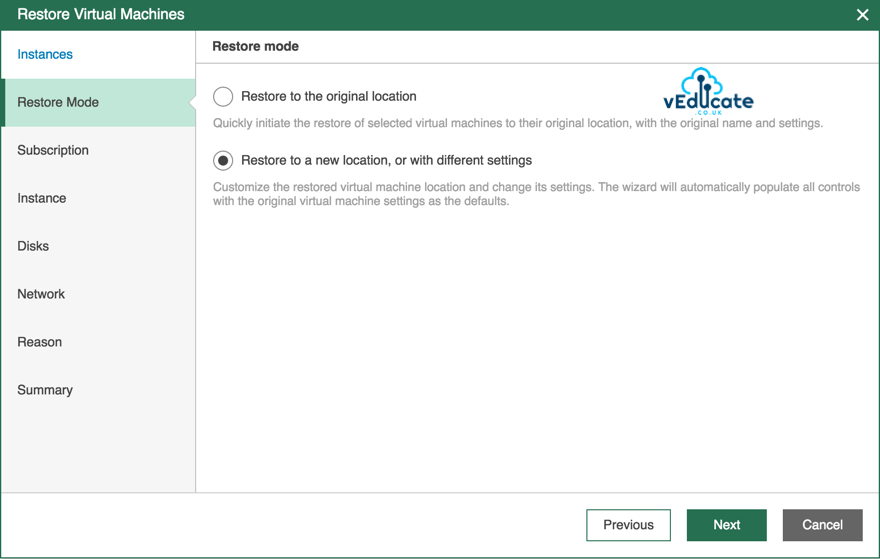
Selecting “Restore to a new location, or with different settings”, is going to give you similar options as when restoring a virtual machine hard drive as well, but you’ll also get to set the virtual machines instance size in Azure as well.
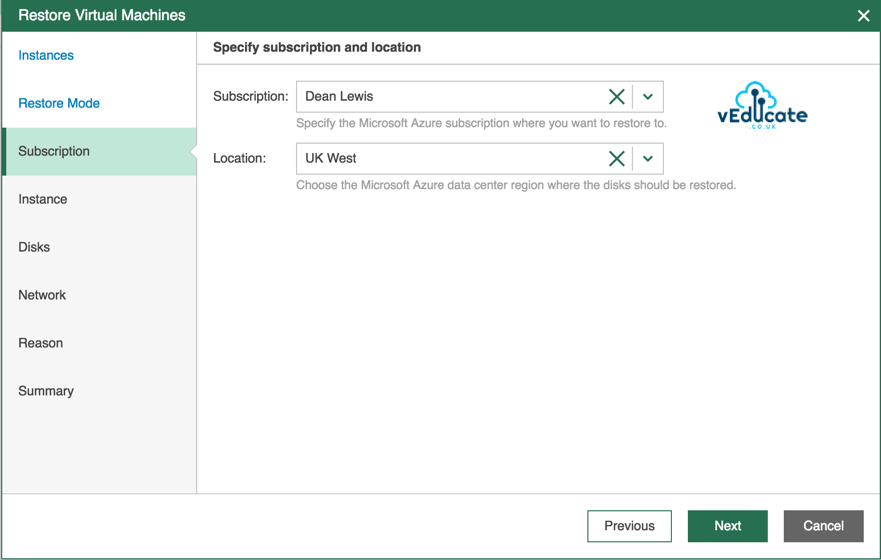
Select your subscription and Azure Location.
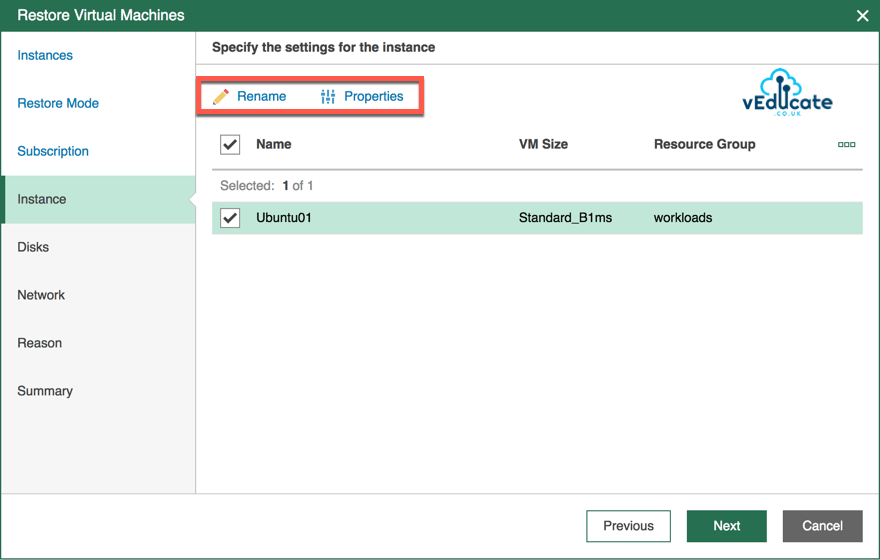
Then on the Instance page, you have the ability for each instance to set the name of the virtual machine as it is restored into Azure, and the properties of that instance;
- Virtual Machine Size
- Resource Group
- Availability Type
- Availability Zone
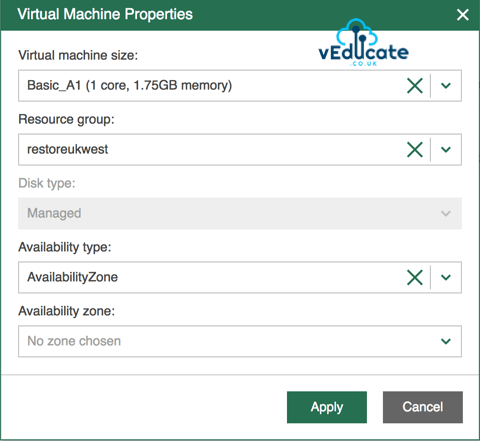
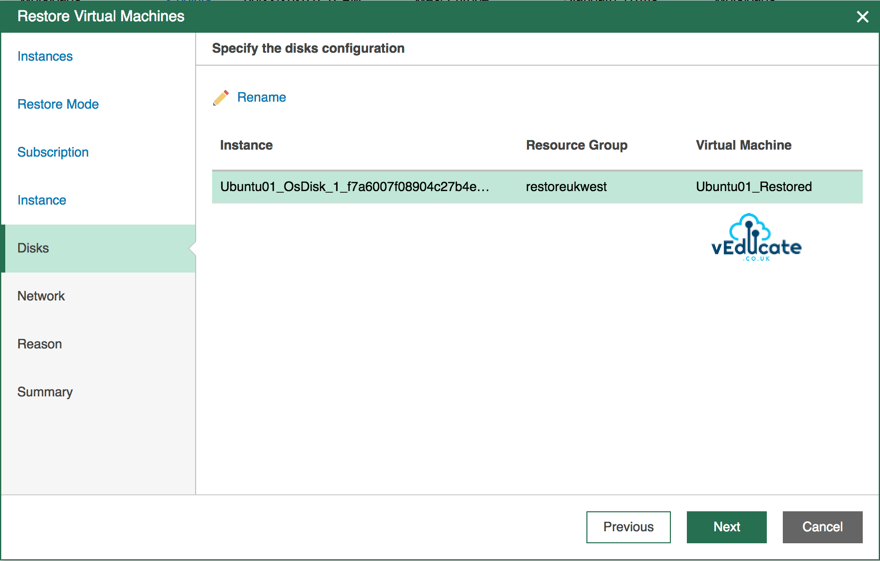
Specify the disks names for each instance. You will notice that the disk name stays the same during the restore even though I’ve renamed my virtual machine. So, I’d recommend you change the disk name to make it easier to identify.
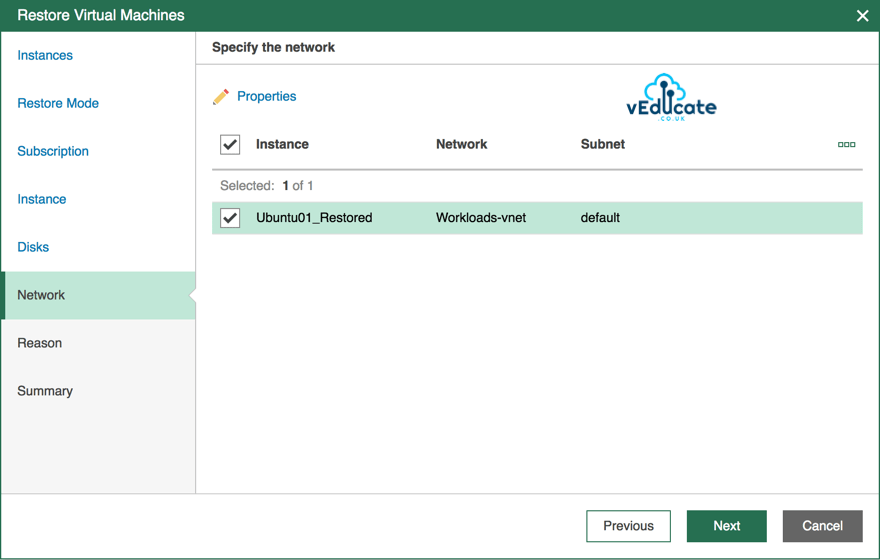
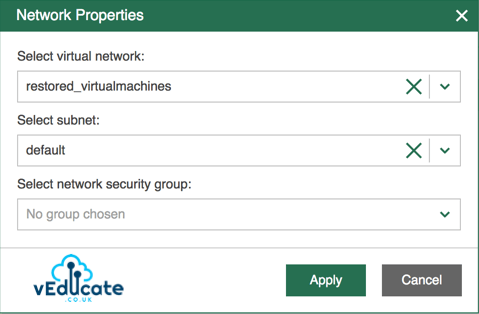
Specify the network that you want your virtual machines to be connected to;
- Virtual Network
- Subnet
- Network Security Group (if applicable)
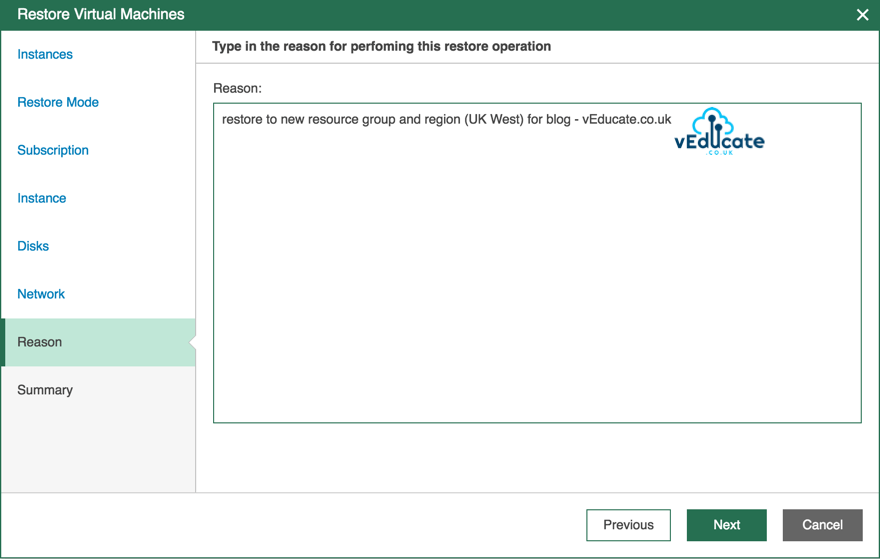
Finally specify a restore reason.
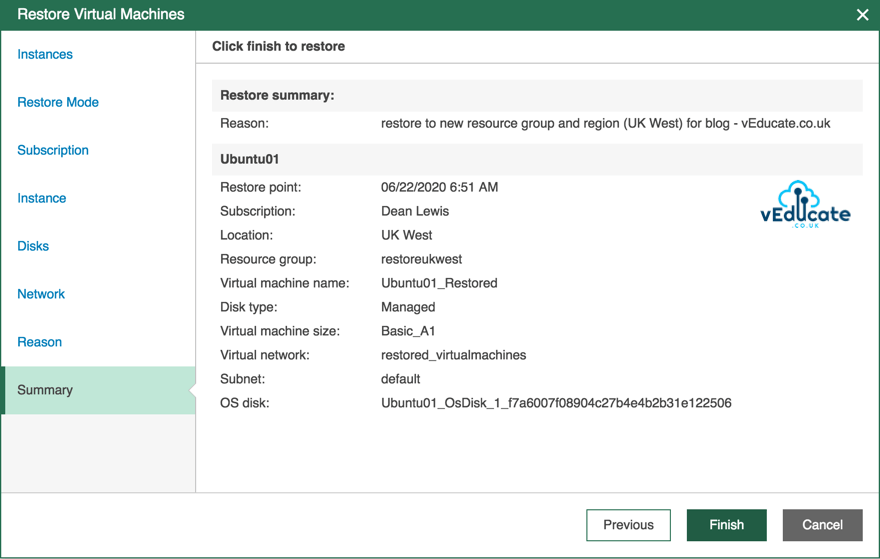
Summary page > click finish to start the restore session.
You can view your restore session on the Session Logs page, as well as the restored virtual machines.
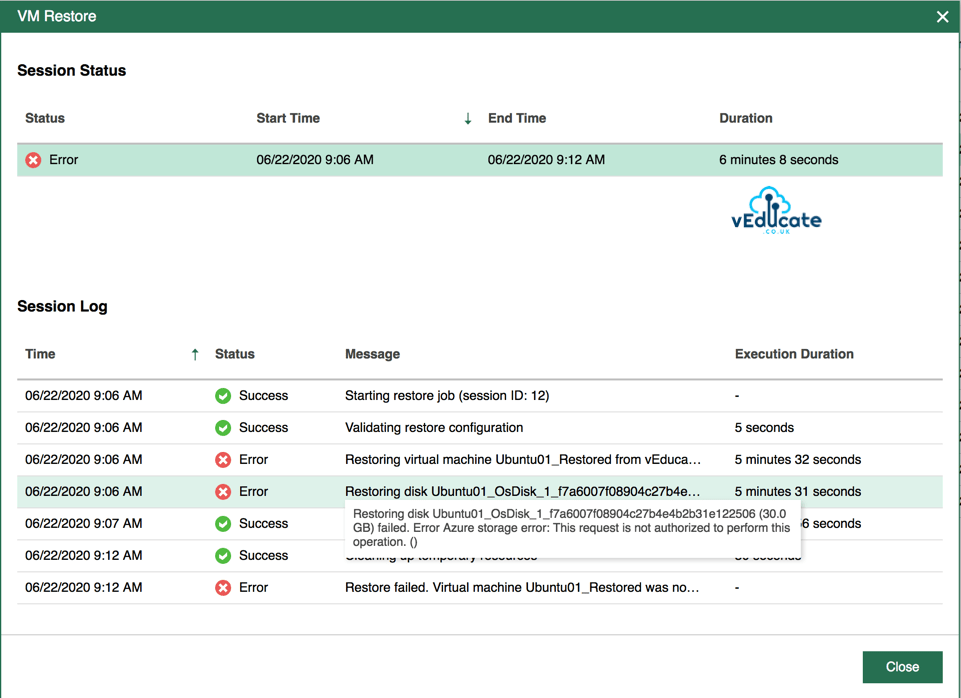
Below I’ve included screenshots for a failed restore instead, rather than the usual, everything completed successfully. This failure was caused by trying to restore to another Azure Storage Account in a different region which my Azure Service Account and Worker instances did not have access to.
Summary
In this blog post, we looked at the three restore options available once you’ve protected virtual machines in Azure.
In the next blog post we will go through;
- Integrating with Veeam Backup and Replication
- - Adding your Azure Repository to Veeam Backup and Replication
- - Viewing your protected data
- - What can you do with your data?
- - - Restore/Recover/Protect
The other blog posts in this series are;
- Getting started with Veeam Backup for Azure
- - Configuring the backup infrastructure
- - Monitoring
- - Protecting your installation
- - System and session logs
- Configuring a backup policy
- - Viewing and Running a Backup Policy
- - Looking at Session logs
Regards


