One of the most common questions I’ve come across in previous years is how do I get the VM notes held in vCenter into vRealize (Aria) Operations?
Great news, in vRealize Operations 8.10 and later, you can now collect those properties for the virtual machines simply by enabling the property to be collected in your Policy.
Enable the Notes property on your Policy
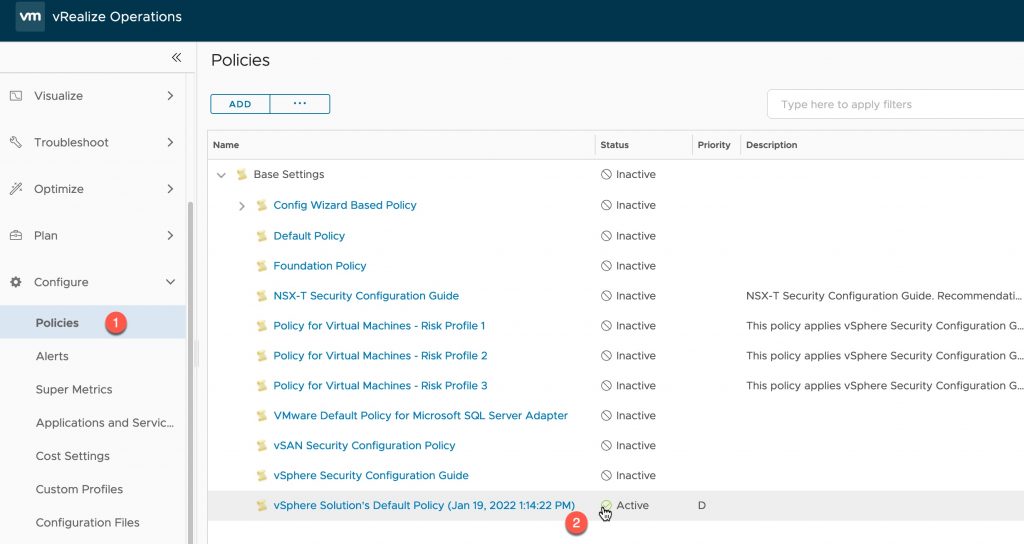
- Click on Policies under Configure in the left-hand navigation pane
- Select your active policy that you want to alter
- You may need to change multiple policies due to inheritance settings
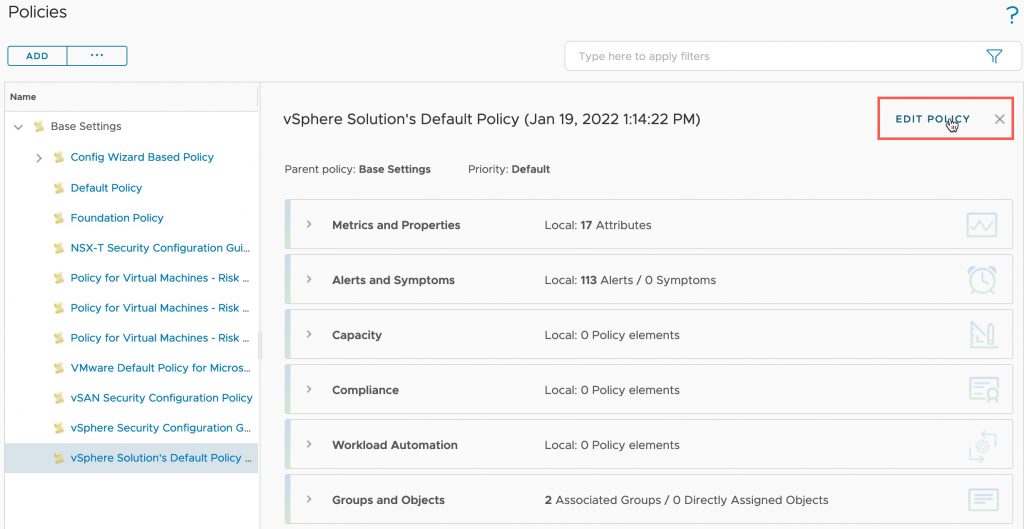
- Select the Edit Policy in the far right-hand side
- Set the object type as “Virtual Machine”
- Search “note” to curate the list to show just the property we are interested in
- Expand Properties > System
- Highlight Notes and click on “Deactivated” and change to “Activated”
- Click Save
Viewing the VM notes and adding them to a view and reports
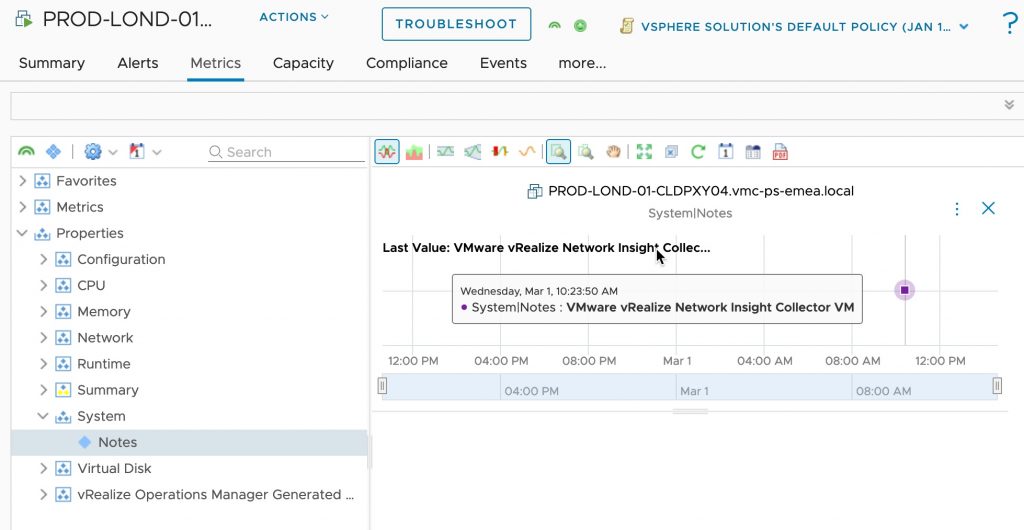
Now it’s a case of wait for the collection cycle of your vSphere environment, below you can see an example of a virtual machine which is configured with a note. Any note changes will also be captured.
Now let’s look at adding this property to an existing report as well.
In the below, I’m going to edit the view “Virtual Machine Inventory” which is used to power the out-of-the-box report “Inventory Report – Virtual Machines”
- Under Visualize on the left-hand navigation, click on Views
- Click Manage Views, find your view and click to edit
- Go to Step 2 – Data
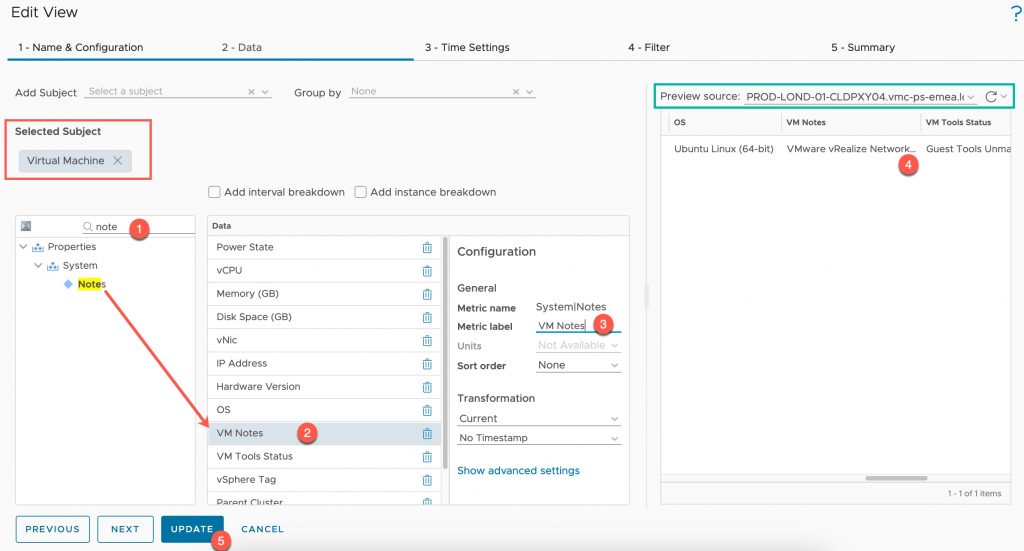
- The Selected Subject will already be Virtual Machine (red box)
- Search for Note (1)
- Drag the note property to the data column (2)
- Set a vanity name for the property (3)
- Set a preview source (green box)
- Ensure that the VM note displays as expected (4)
- Click Update
Now let’s check this updated view is reflected in our report:
- Under Visualize on the left-hand navigation, click on Reports
- Click to edit your chosen report
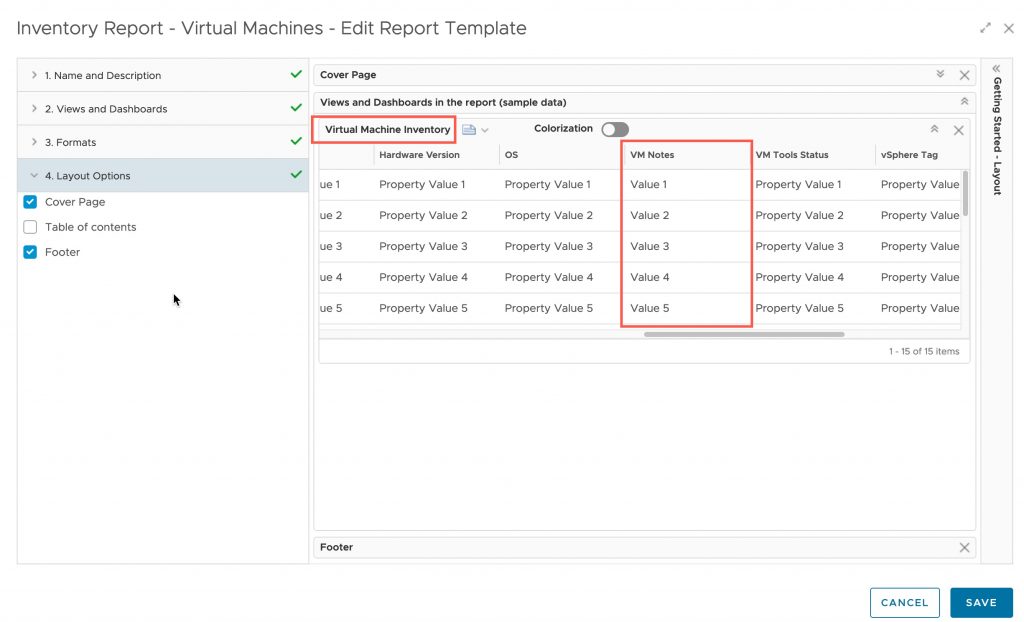
- Expand the Views and Dashboards section in the report
- In the red boxes you can see the matching name of the view I edited in the above screenshots, and the VM Notes Column is present
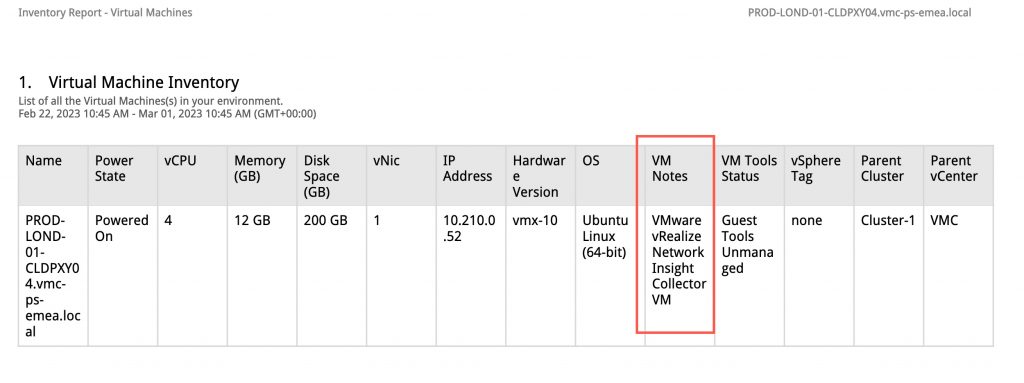
Finally, when I run this report, I can see the additional VM note data added to the report.
Hopefully this new simple but much asked for feature will help in the ongoing management of your environments.
Regards

