VMware vRealize LifeCycle Manager 8 released earlier this week, 17th October 2019.
Note the official name and abbreviation, its a long one!
- vRSLCM (vRealize Suite LifeCycle Manager)
You can find the supporting official documentation here;
What's New Blog Link:
What's New Blog Post

Download Link:
Product Download

Release Notes:
Release Notes

Documentation Link:
Resources
Migration Process
The best news about this release is the "easy installer", which also allows you to migrate from older versions. In this post, I've documented the screenshots in steps for you, as I know many of you out there like to see the end to end process before you undergo an update yourself, so you know what to expect.
During this migration process the following will happen;
- New LCM virtual appliance deployed
- New IDM appliance deployed (unless you select to link to an existing environment)
- Existing LCM settings and content will be migrated
Migration Process Screenshots
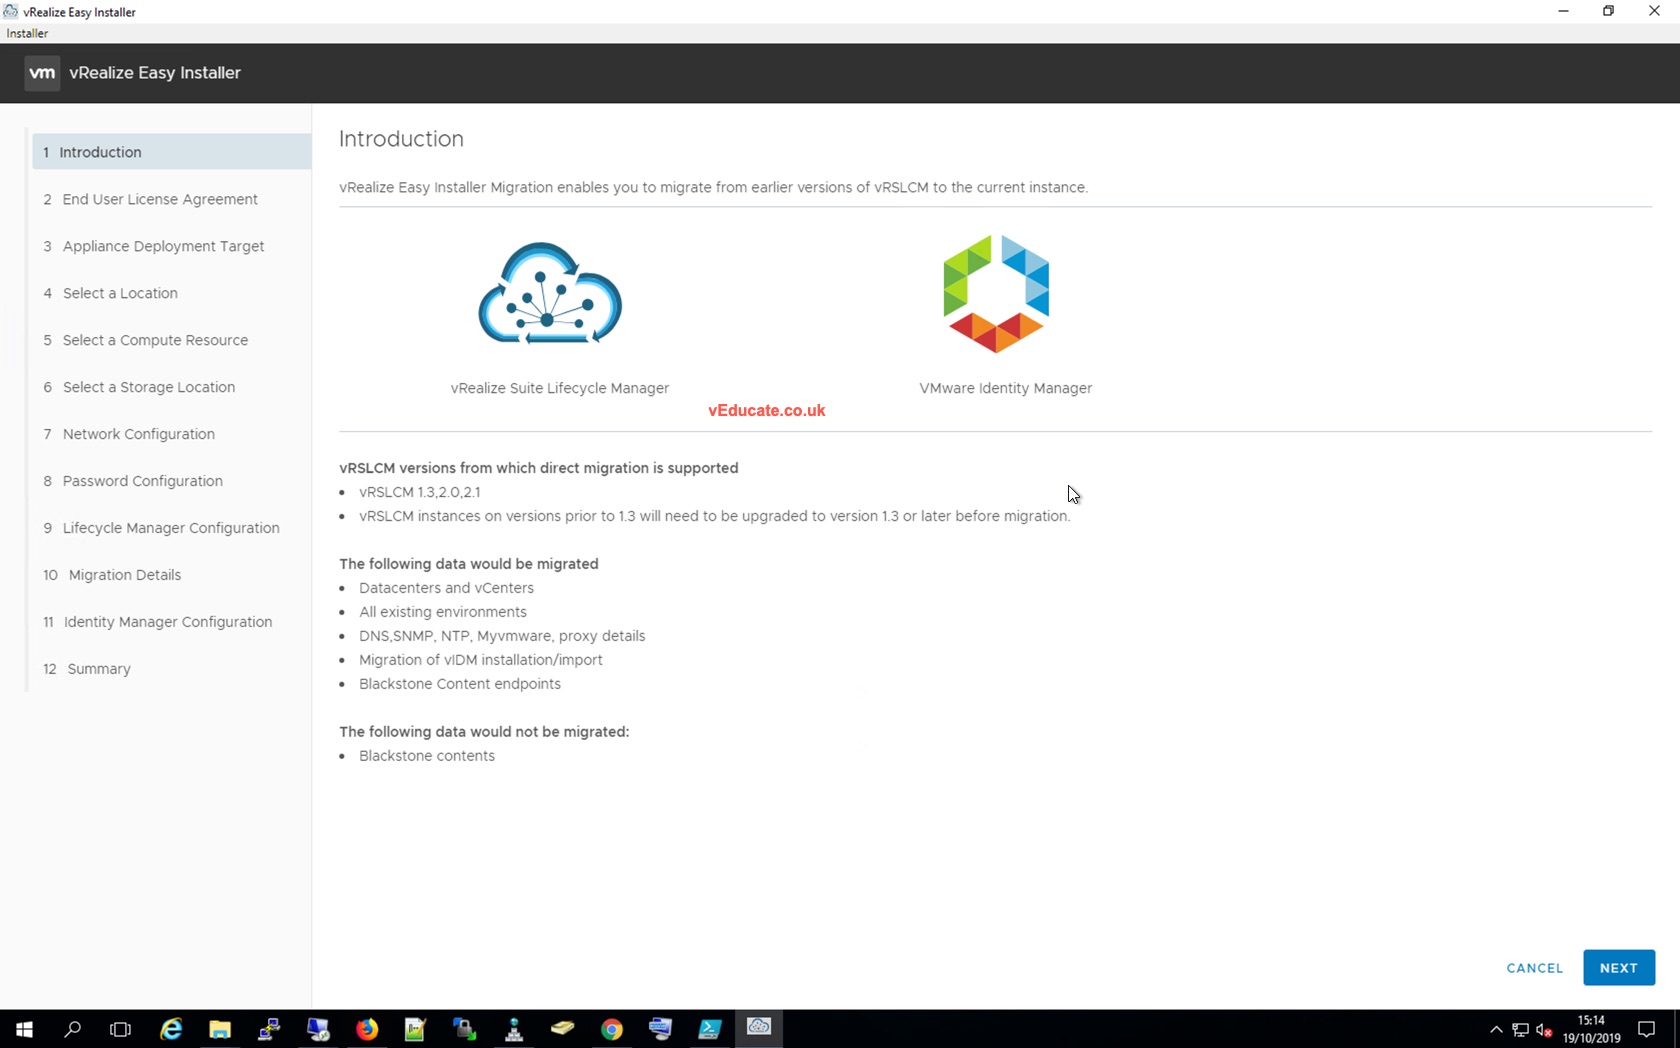
1. Load up the Easy Installer UI and select the Migrate option
Procedure
1. After you download the file, mount the vra-lcm-installer.iso file.
2. Browse to the folder vrlcm-ui-installer inside the CD-ROM.
3. The folder contains three sub-folder for three operating systems. Based on your operating system, browse to the corresponding operating system folder inside vrlcm-ui-installer folder.
4. Run the executable as per the correct steps for your OS.

2. You'll get the below introduction page explaining the Migrate option, and some pre-req info.
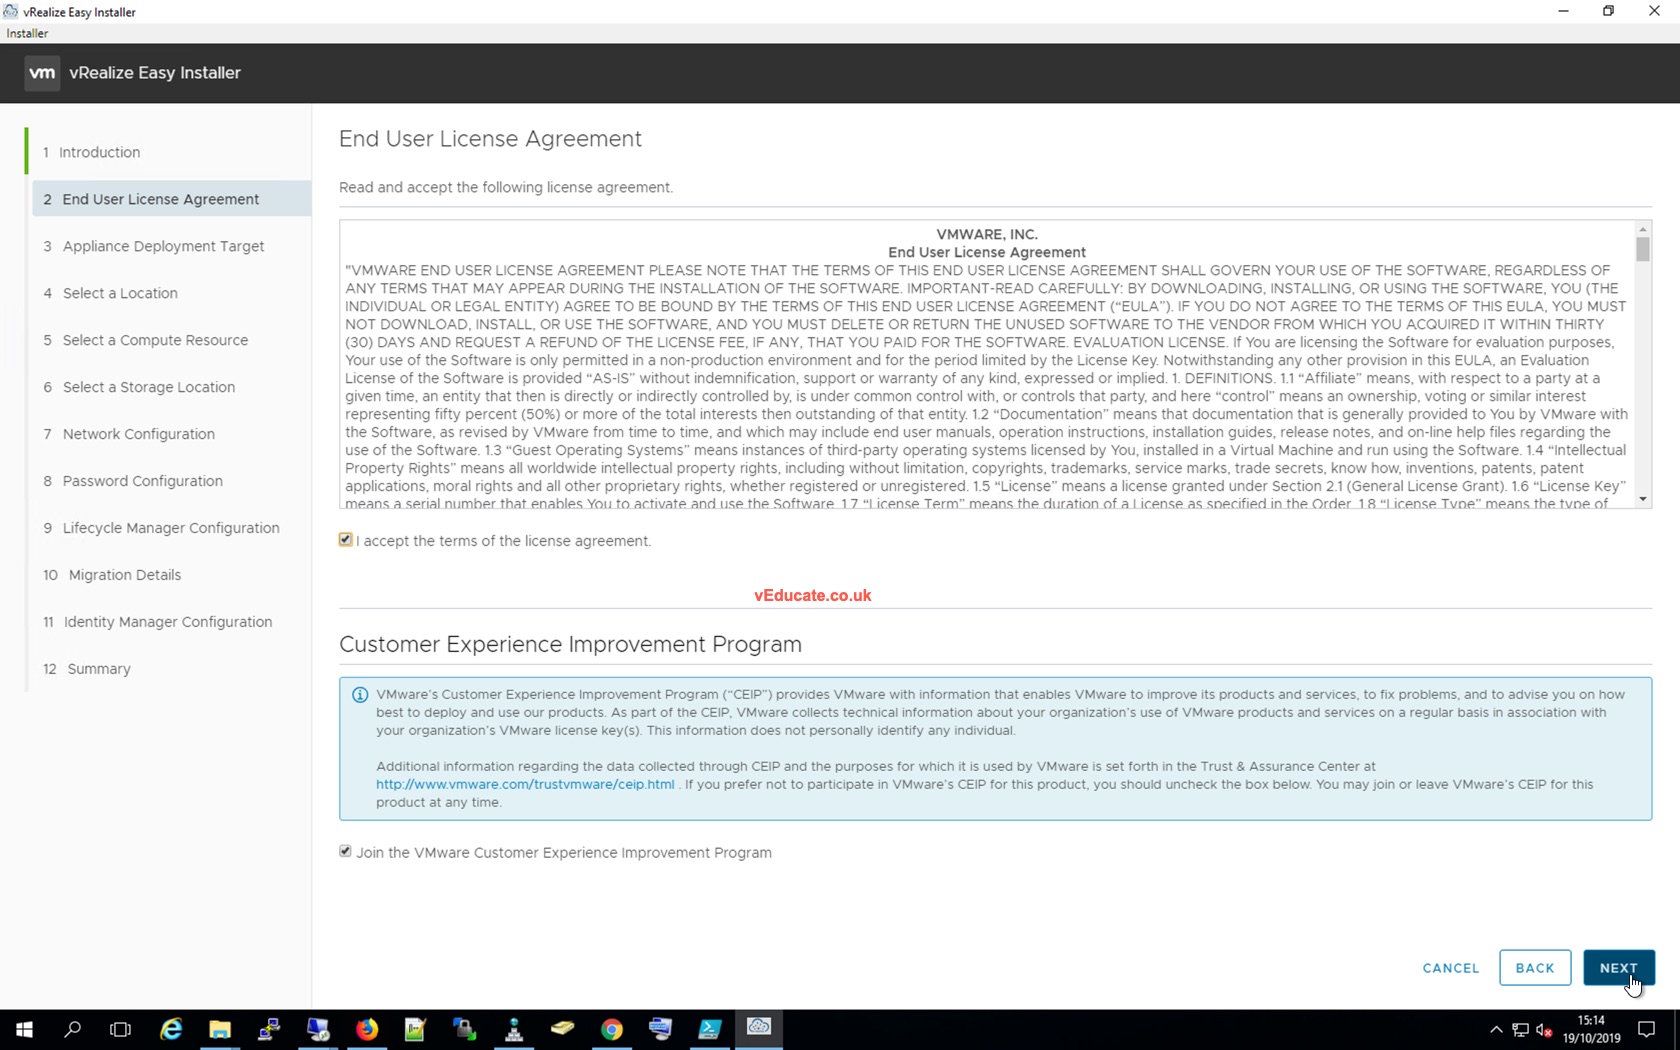
3. As with every software, there is a EULA to accept.
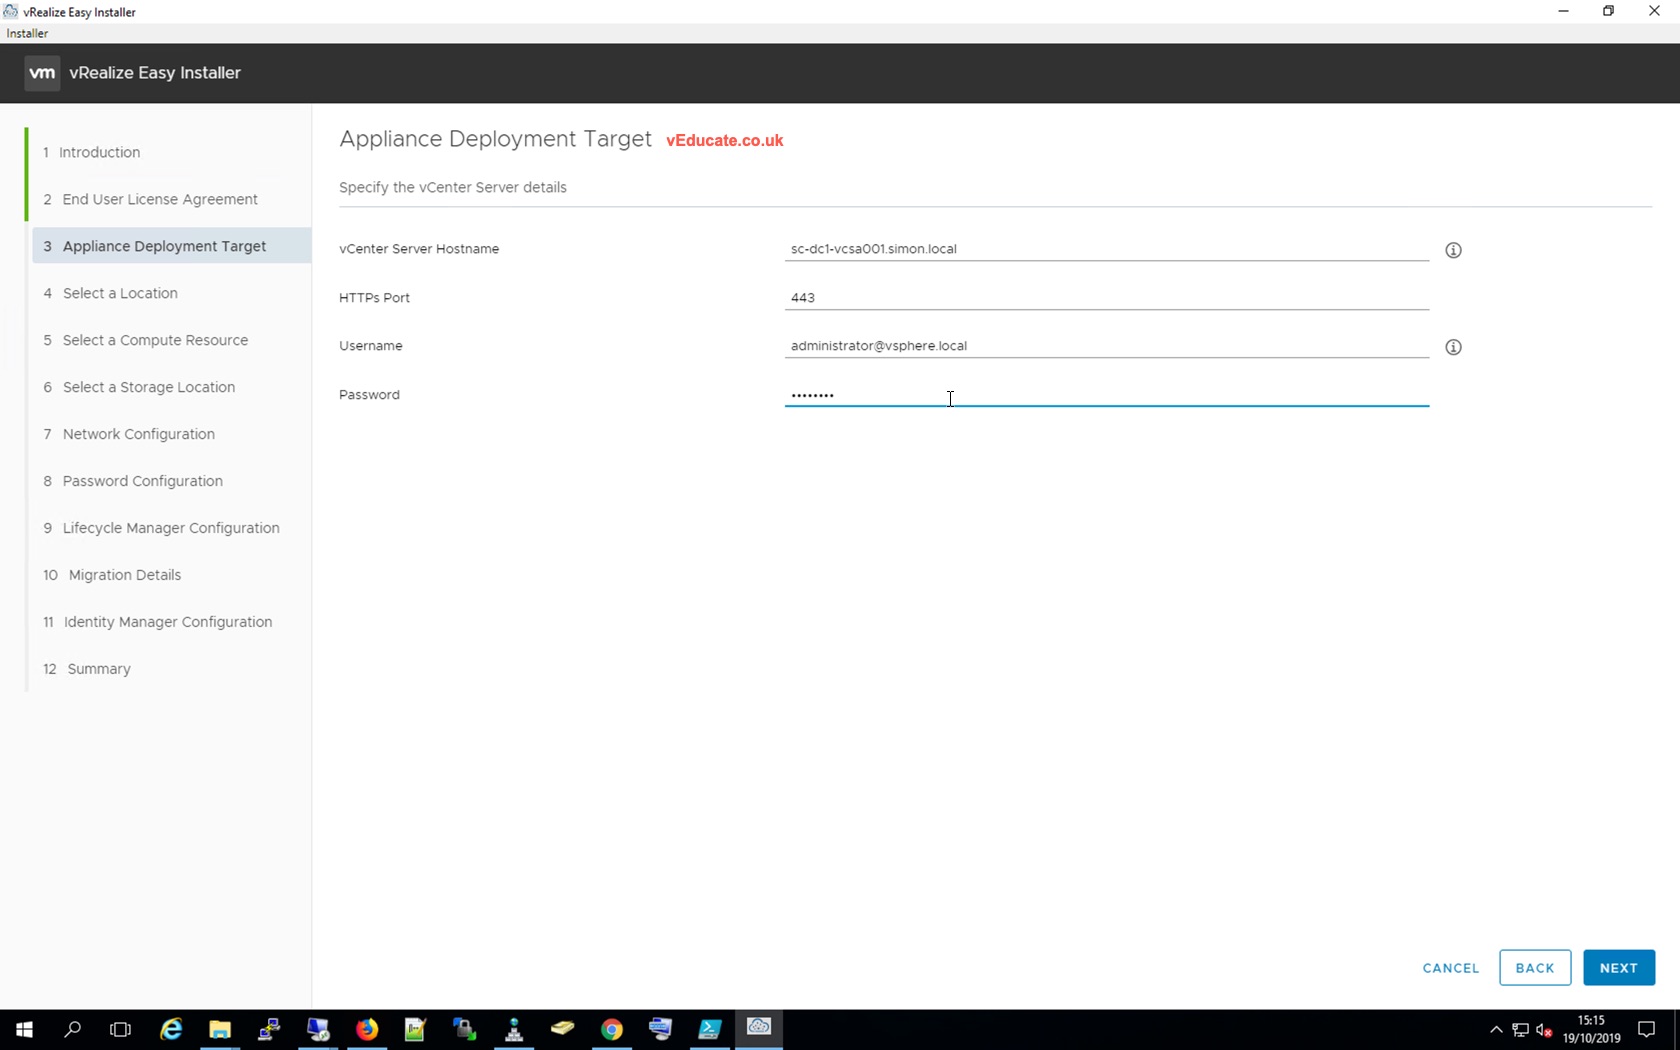
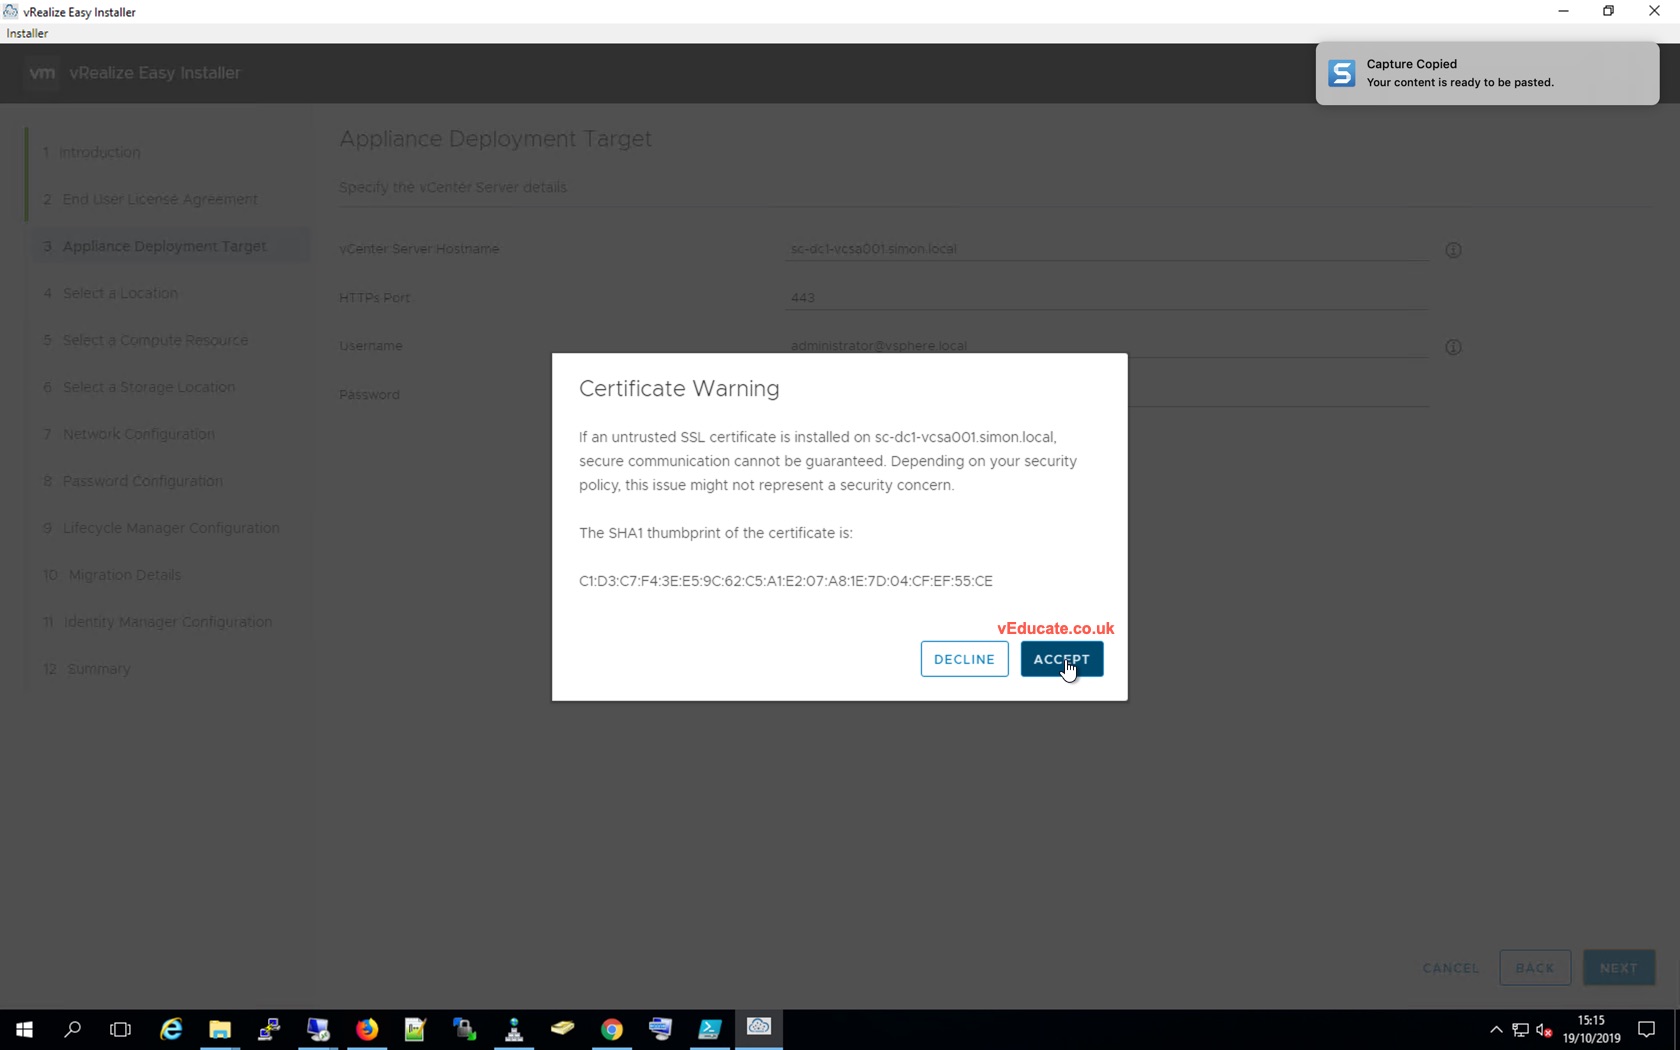
4. Select the target vCenter environment where you want the LifeCycle Manager and Identity Manager (if needed) appliances to be deployed.
You will be asked to confirm the connection SSL Thumbprint for the vCenter provided.
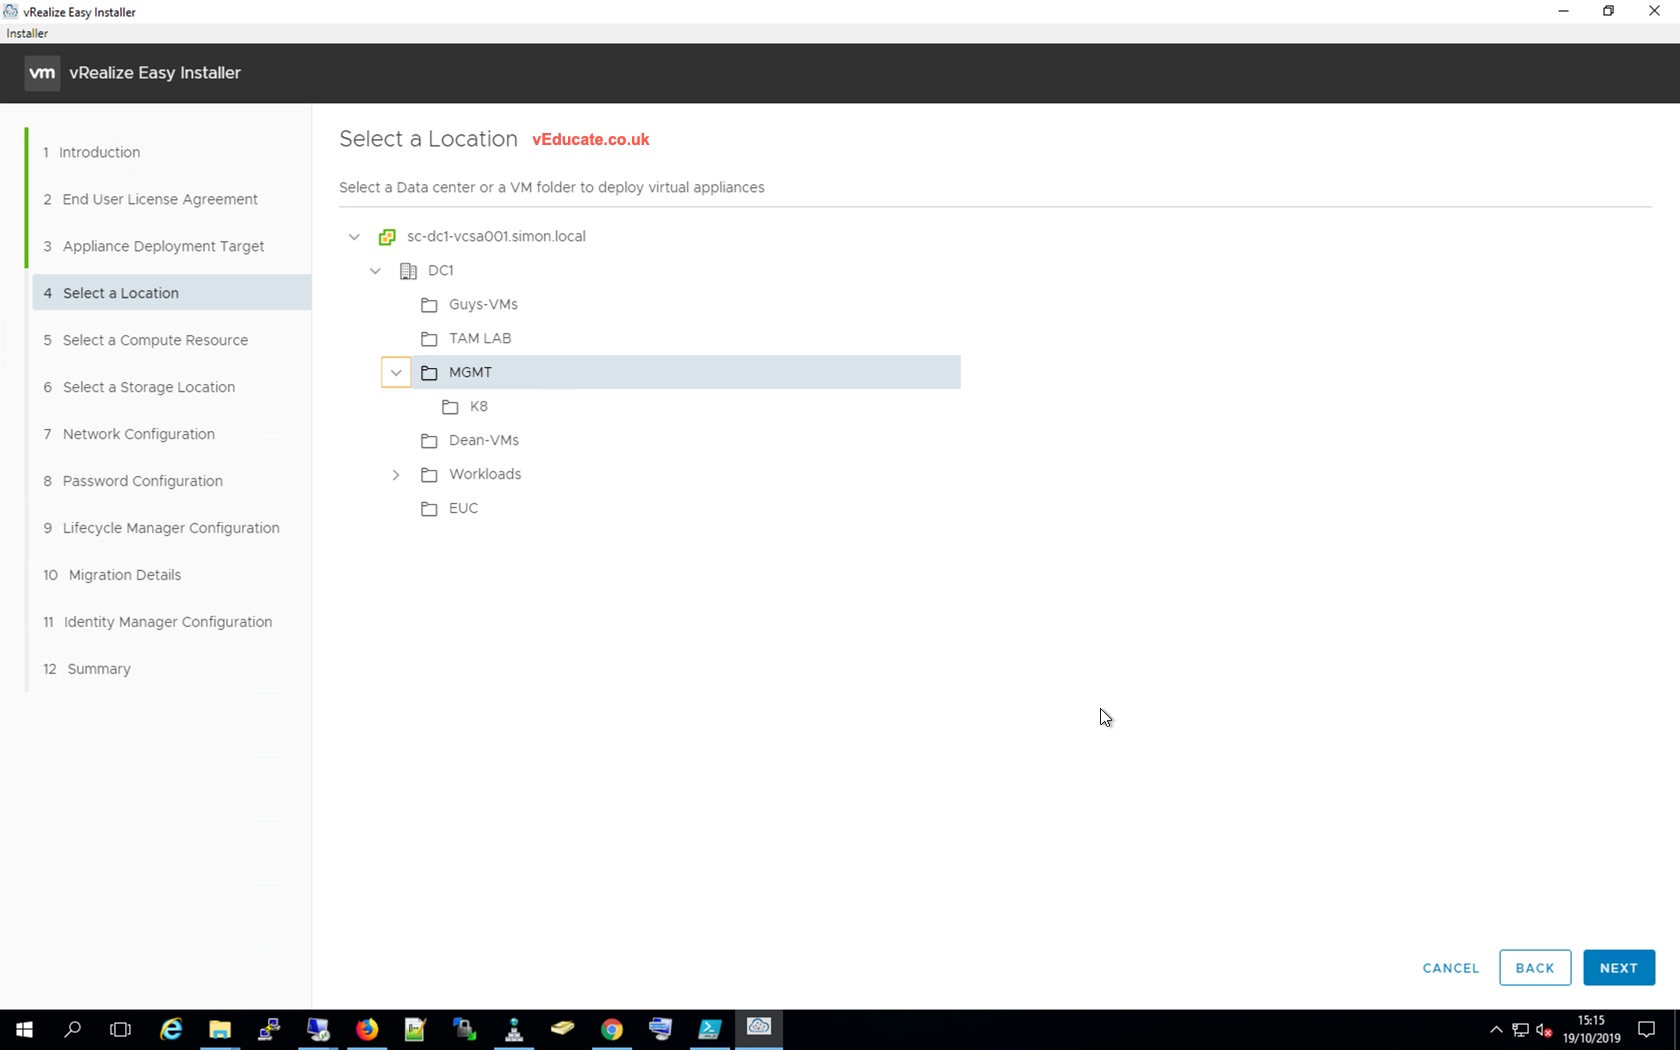
5. Select the Datacenter or VM folder within your target vCenter that you want to deploy the Virtual Appliances.
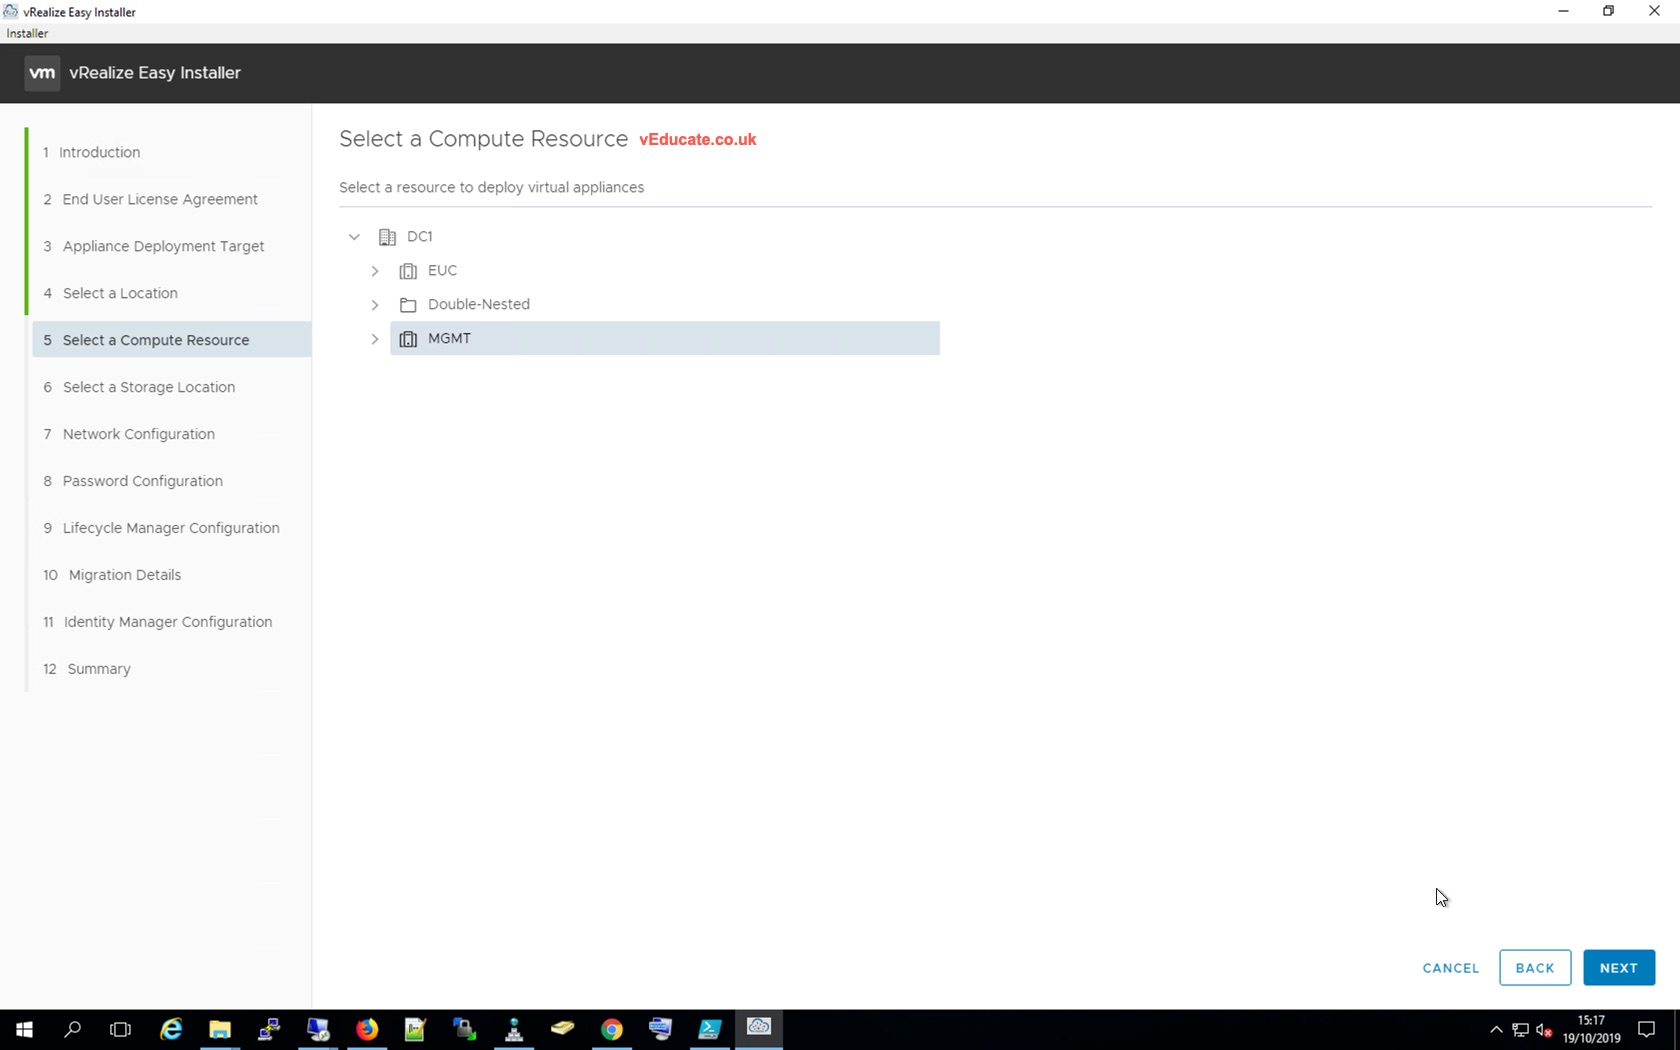
6. Select the compute resource within your target vCenter to deploy the Virtual Appliances
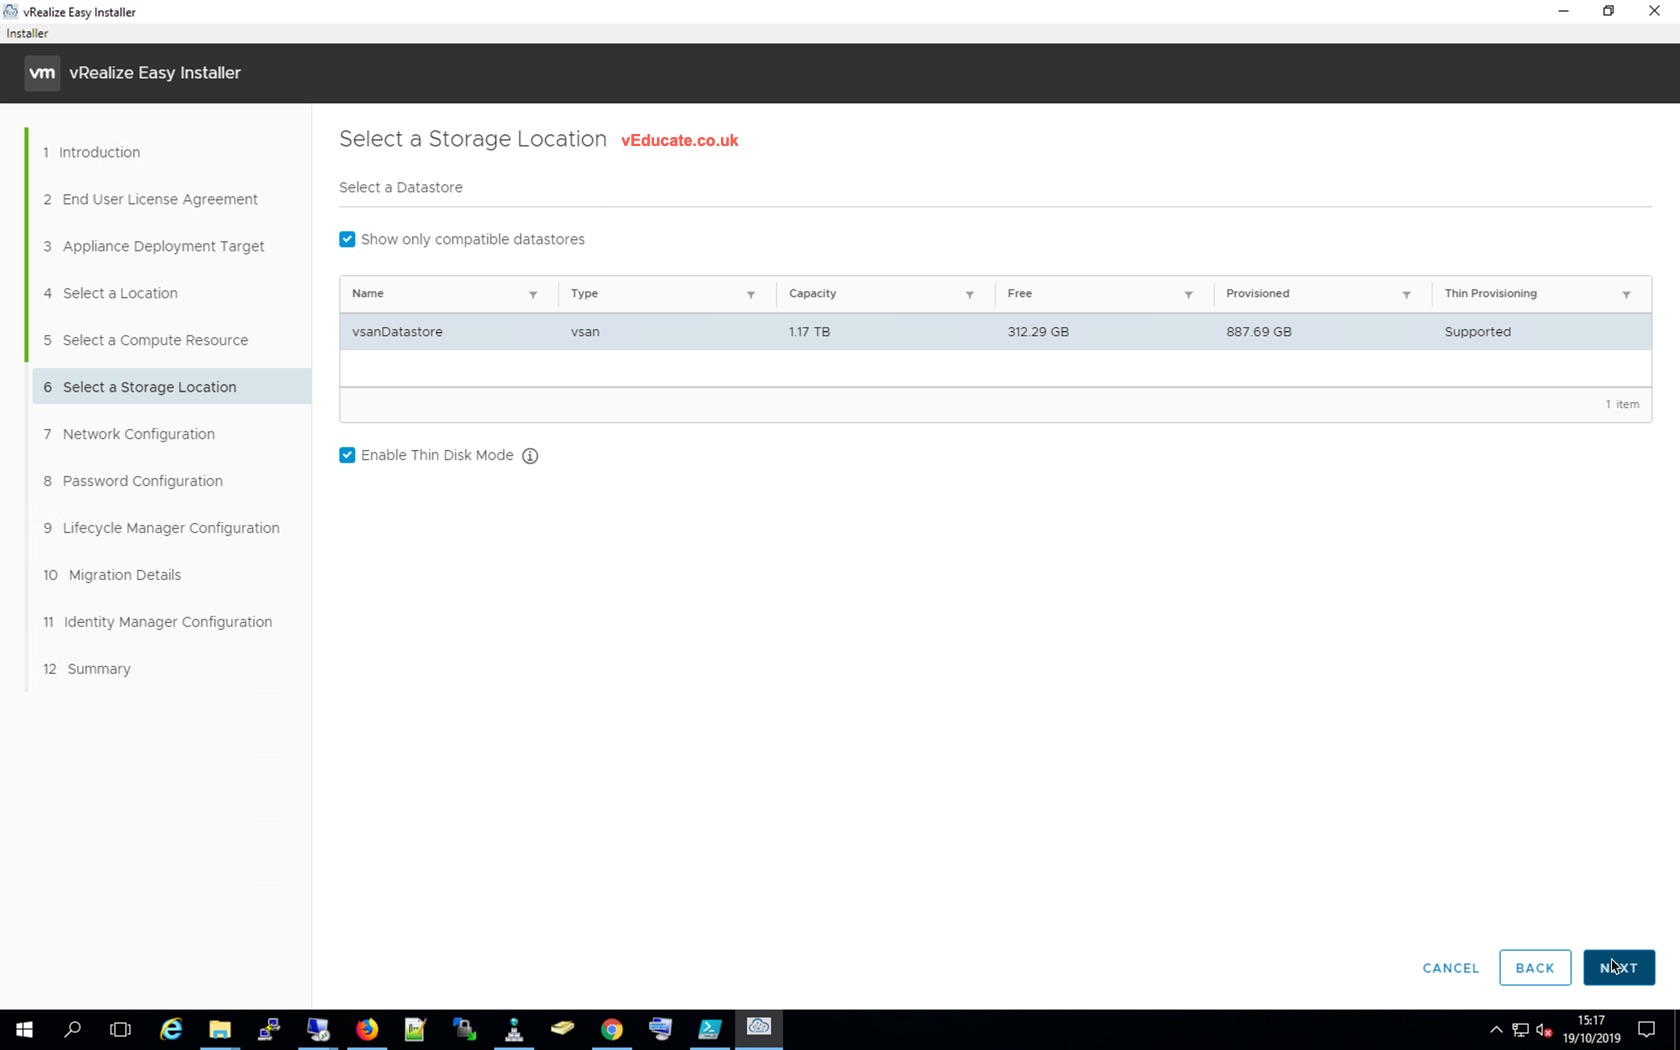
7. Select the storage location for your virtual appliances, at this stage I am unaware if you are able to select different datastores for each Virtual Appliance.
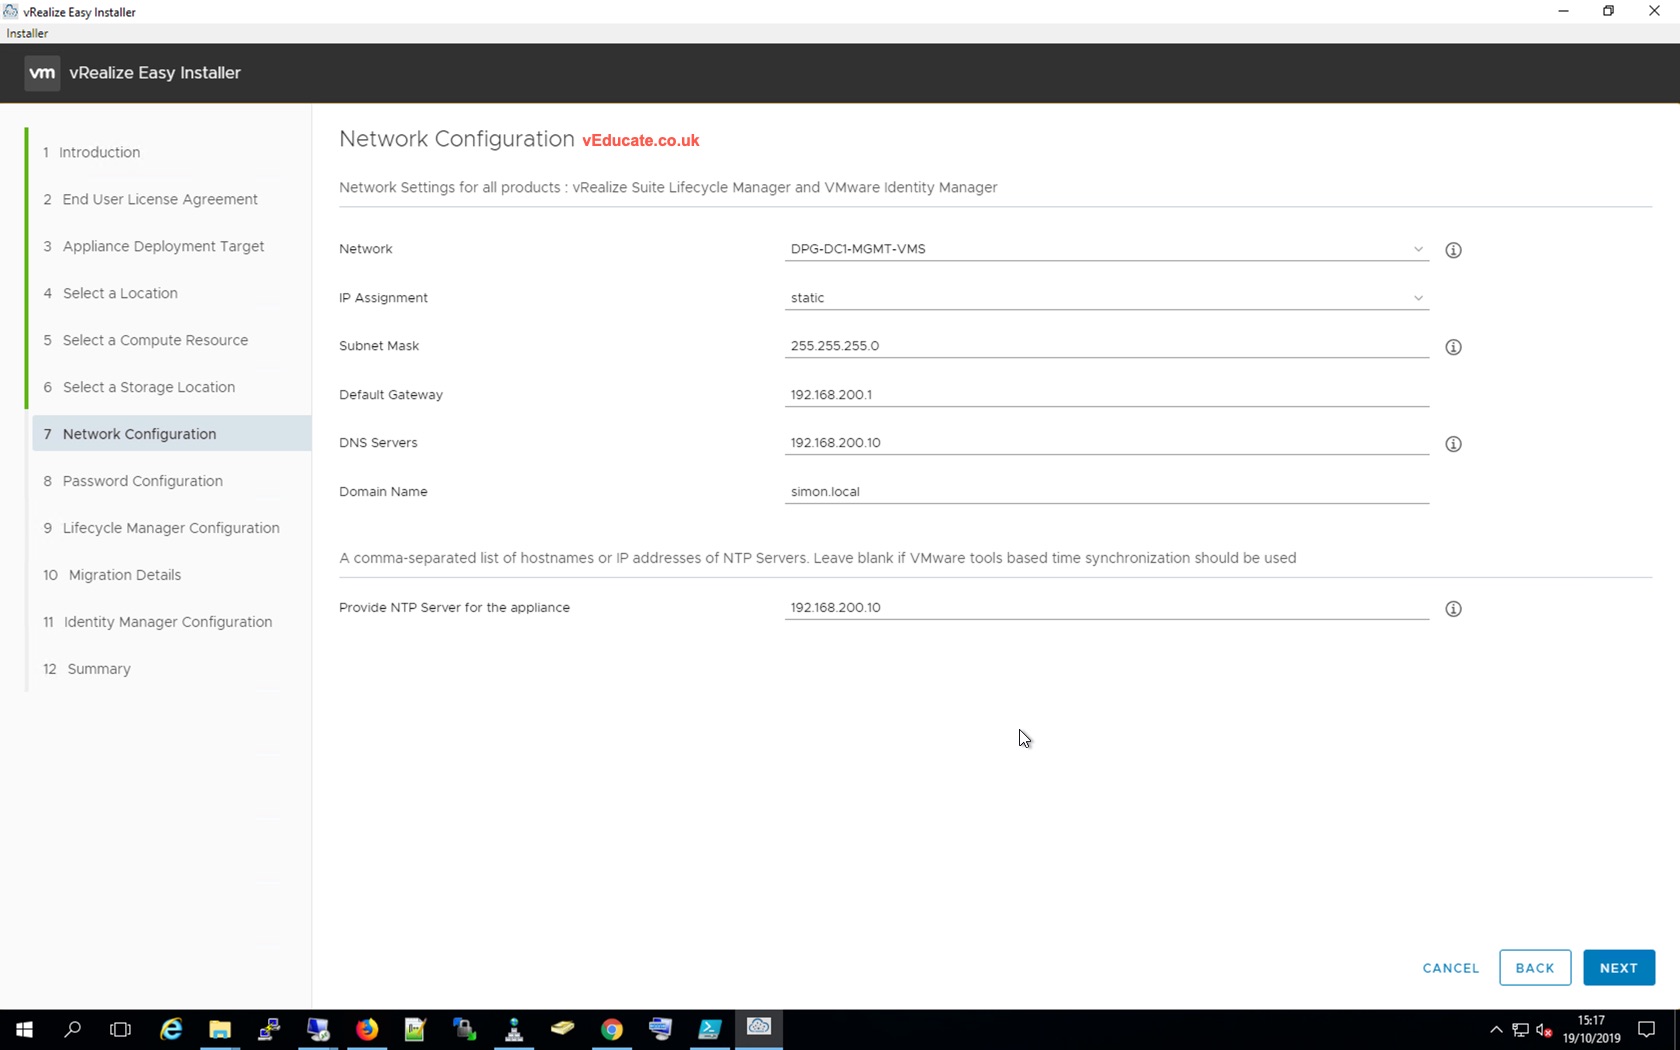
7. Provide details for the Network configuration for the new virtual appliances. For the easy installer it is assumed you will be deploying both to the same network subnet range.
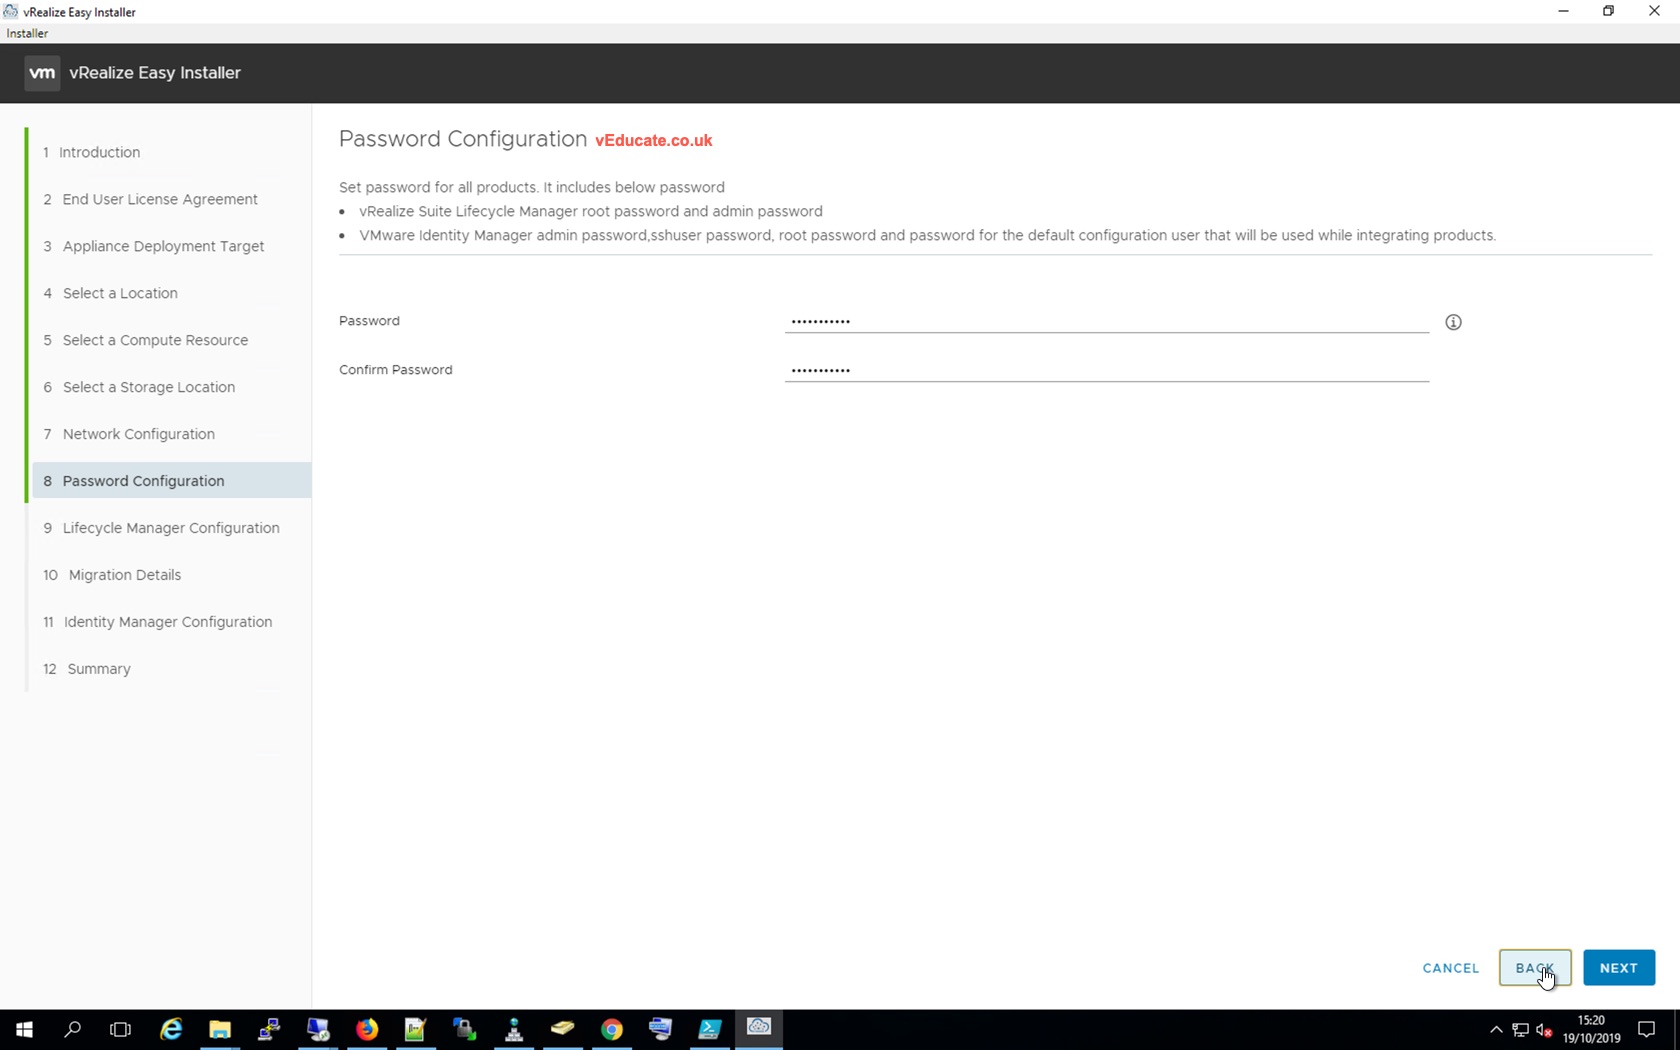
8. Provide the default passwords for both virtual appliances, this password will be used for the following accounts;
- vRealize LifeCycle Manager
- Root Password
- Admin Password
- VMware Identity Manager
- Root Password
- Admin Password
- sshuser password
- Default Configuration User Password (You will configure the name of this account later)
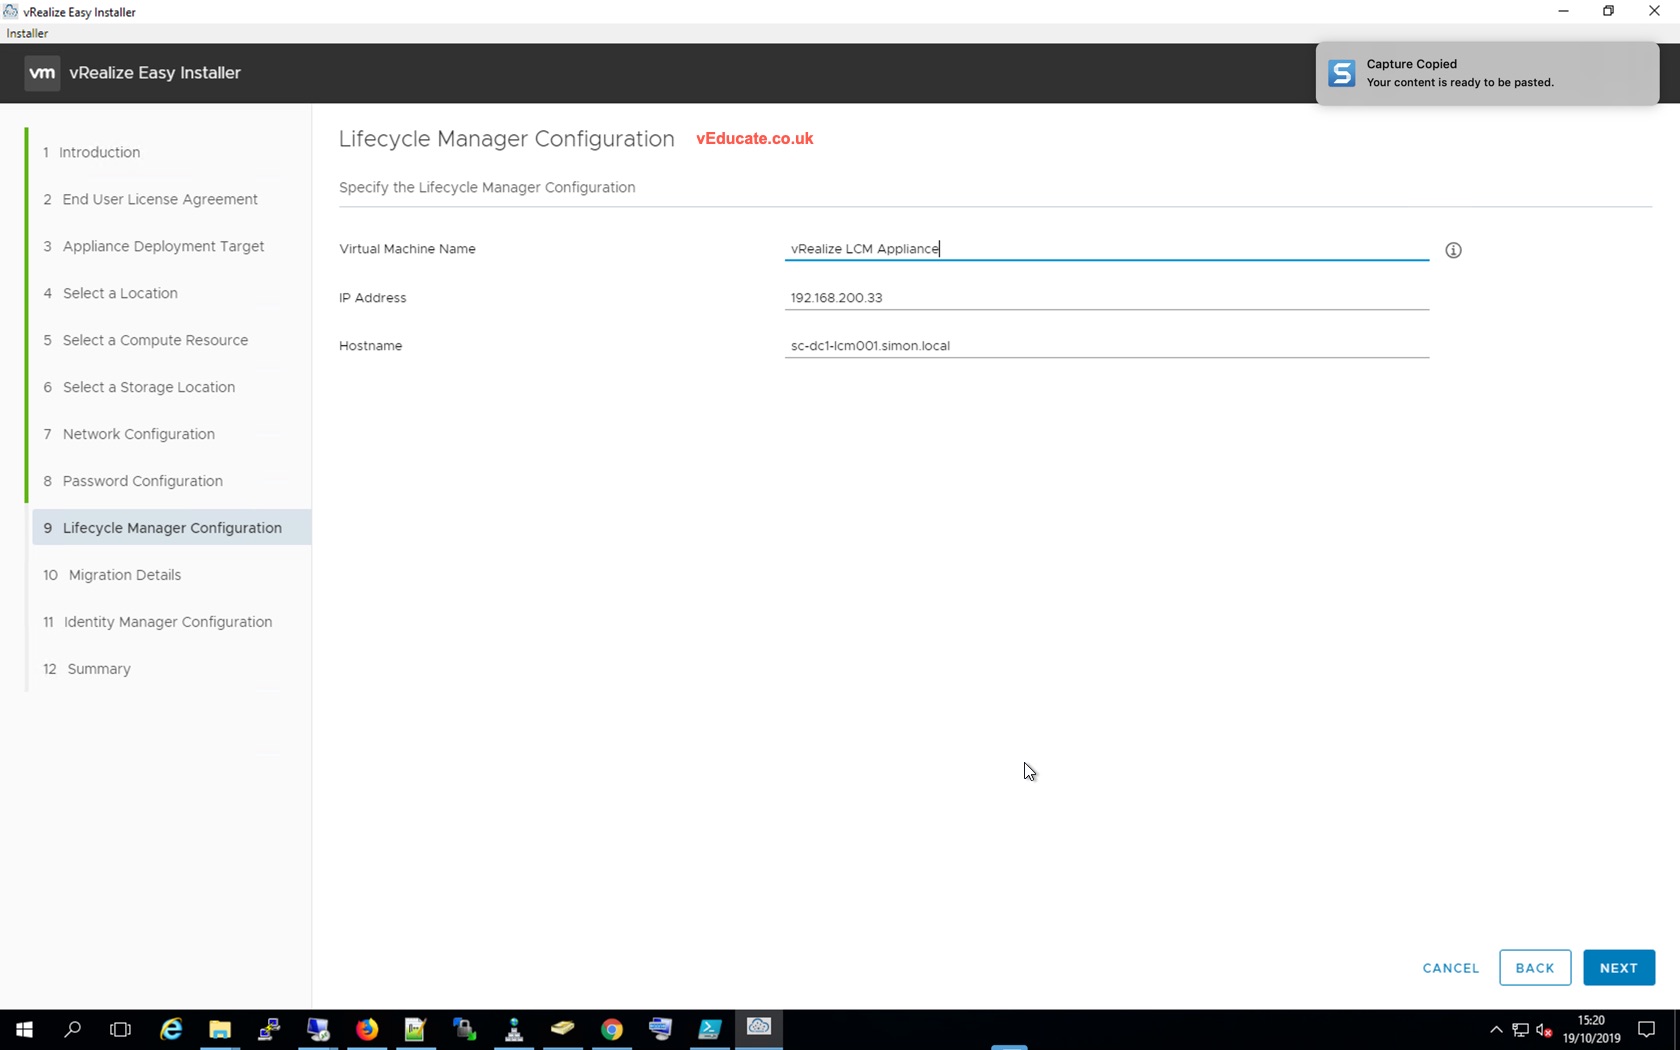
9. Configuration of the LifeCycle Appliance deployment
- Name of VM in vCenter
- IP address
- Hostname (FDQN as in DNS)
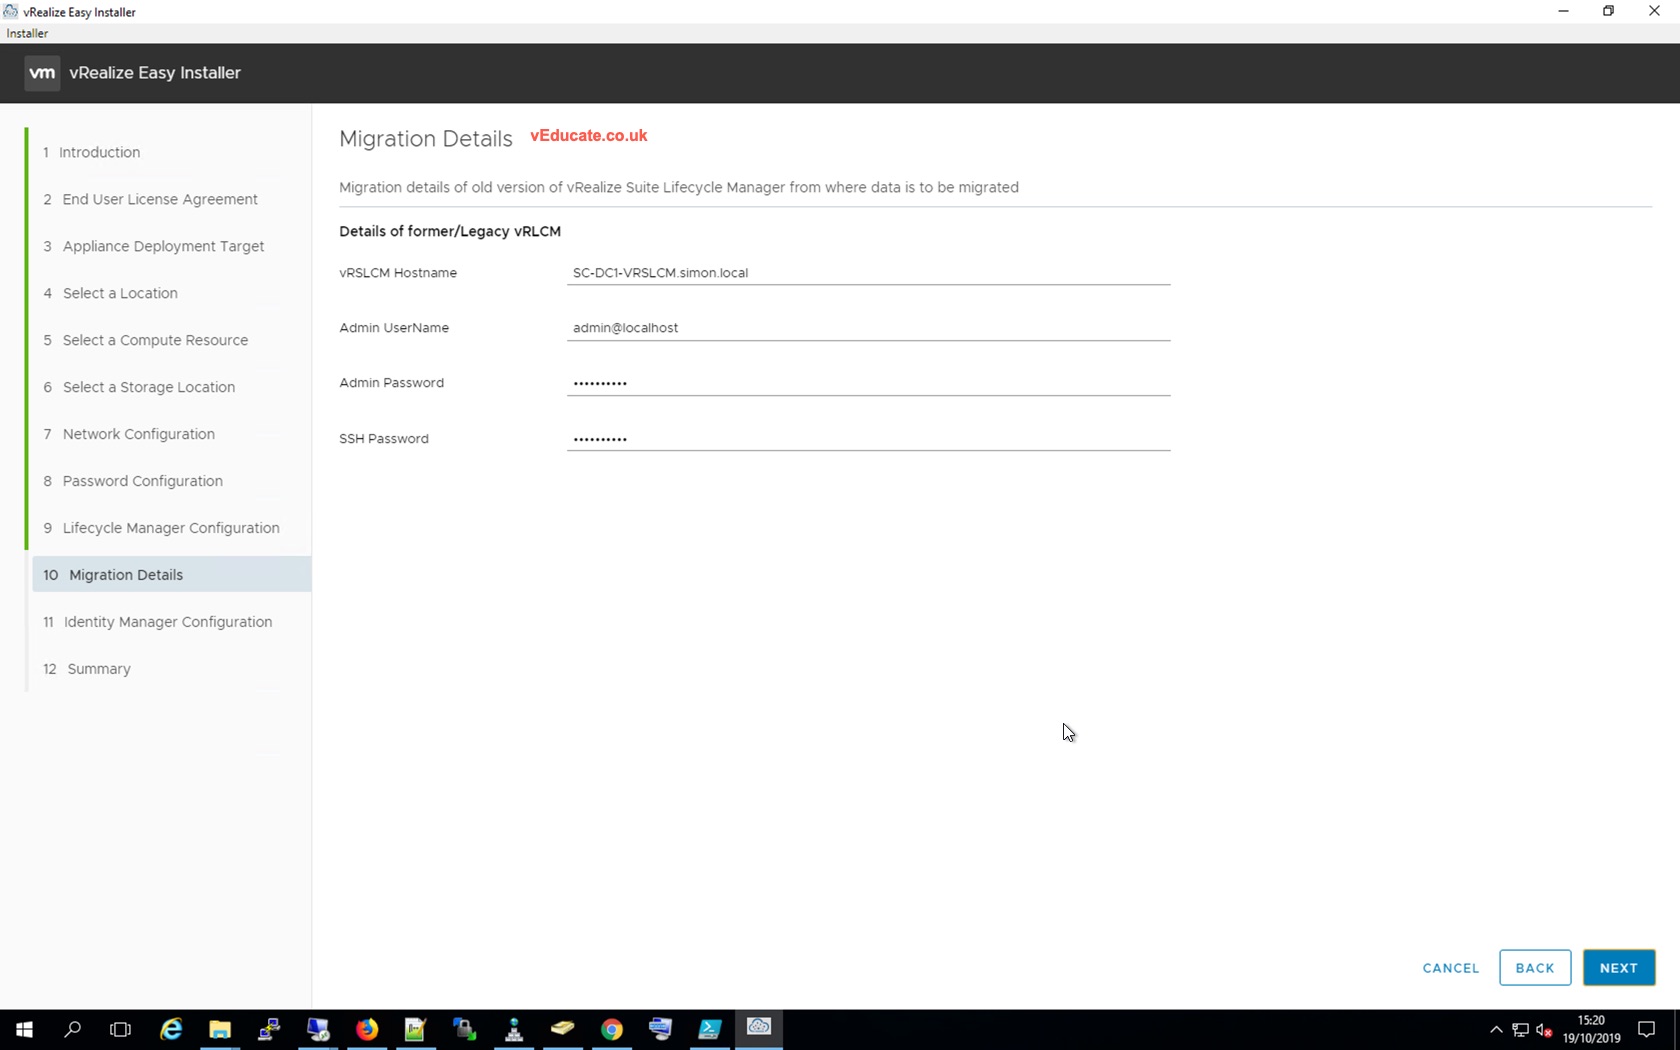
10. Next you will provide the details of the existing LifeCycle Manager you are migrating from. The wizard does not seem to do any prechecks of the information provided, like it does when you connect to vCenter at the start.
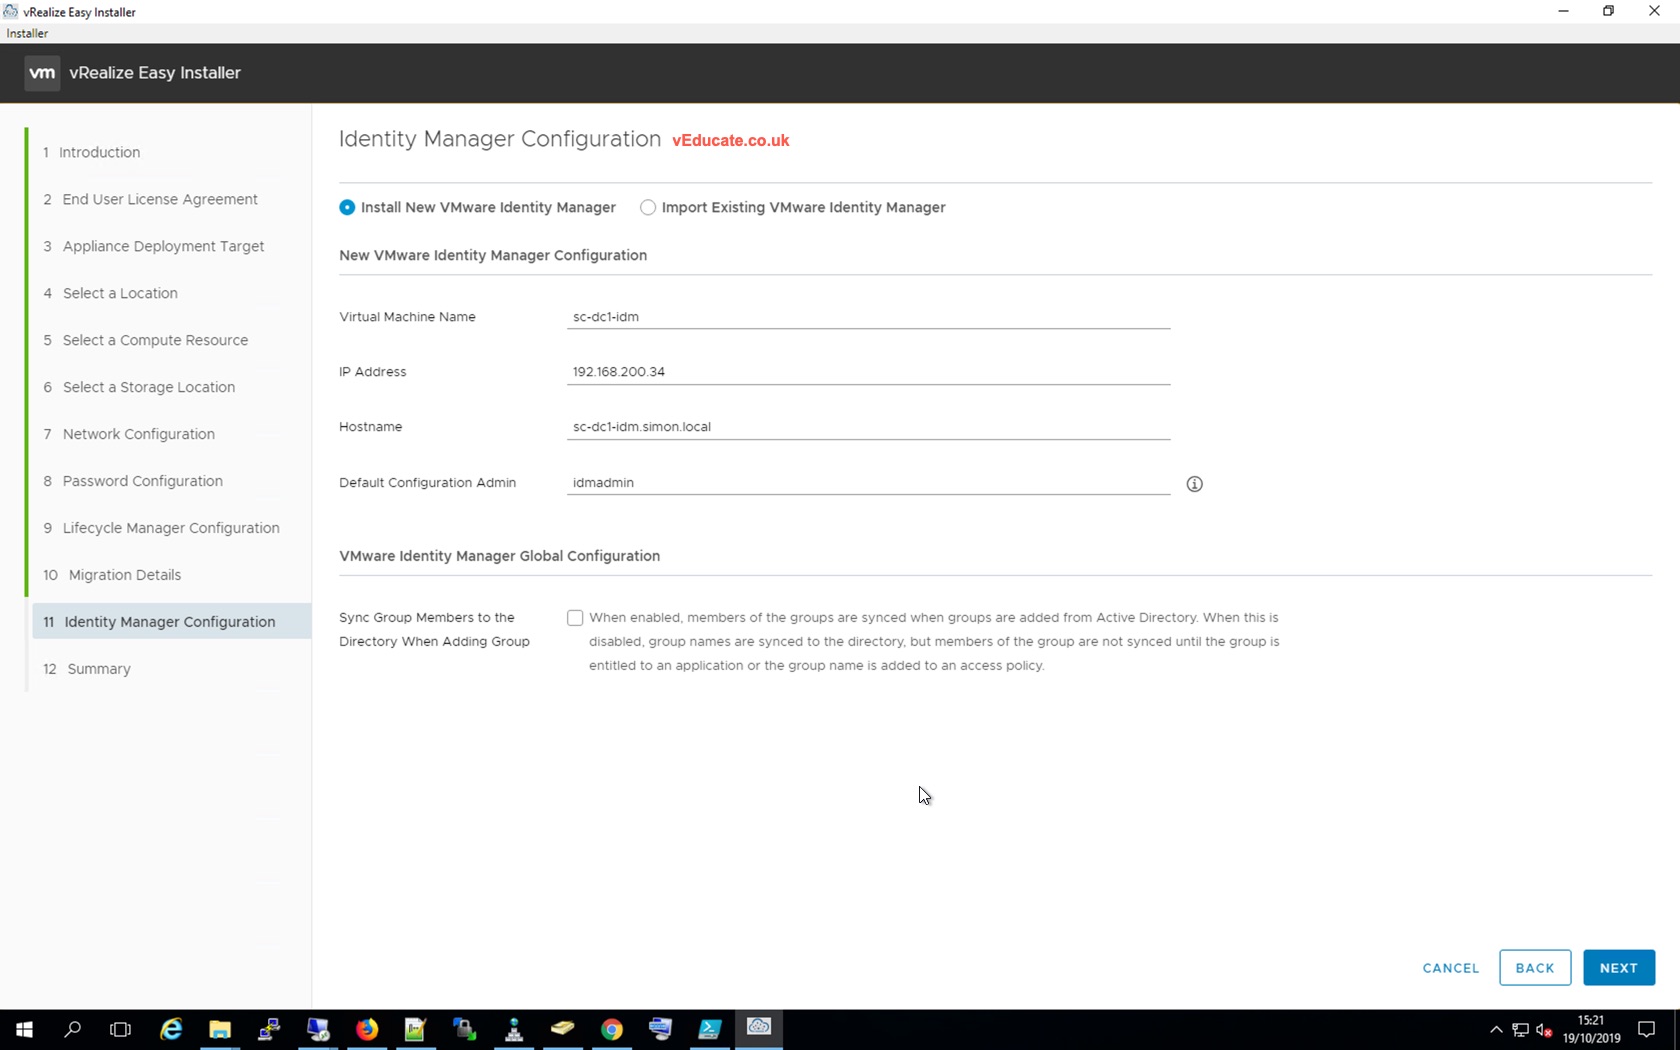
11.Configuration of the VMware Identity Manager appliance
- Install a New Identity Manager
- Name of VM in vCenter
- IP address
- Hostname (FDQN as in DNS)
- Default Configuration Admin (Provide a name that is not root or admin)
- Import Existing VMware Identity Manager
- No configuration necessary, it will be pulled across from the existing LCM environment.

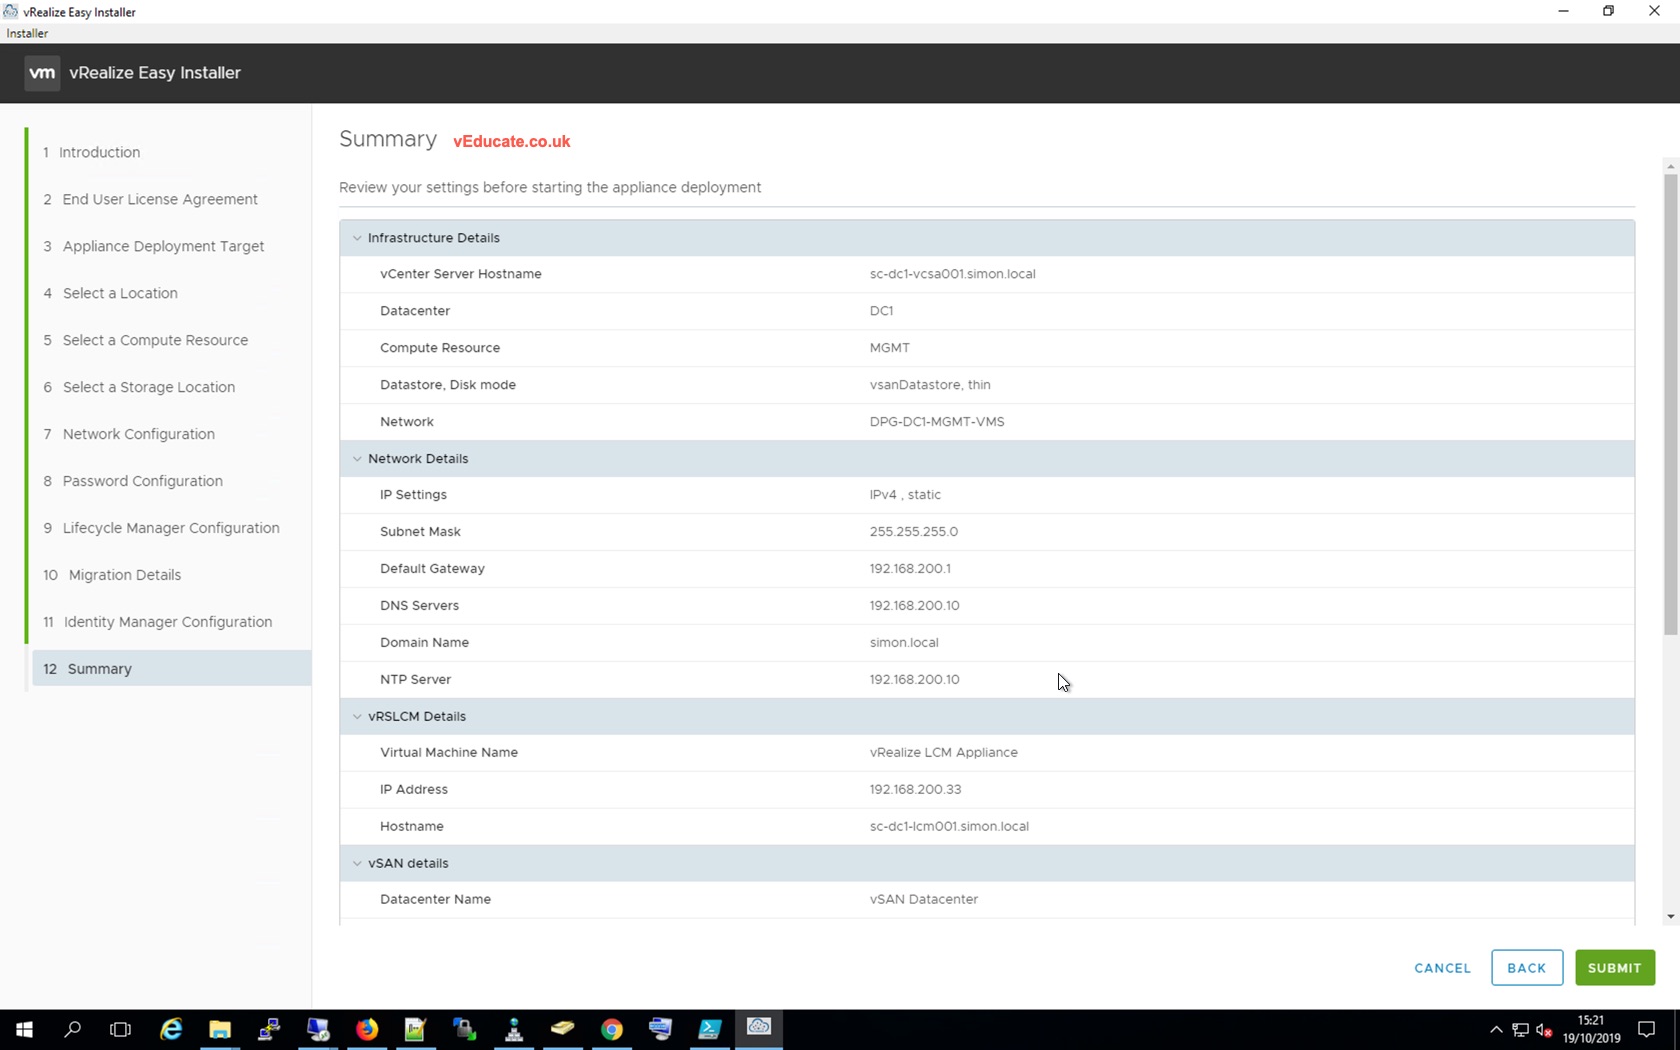
12. The usual Summary page of all the options you have selected/configured.
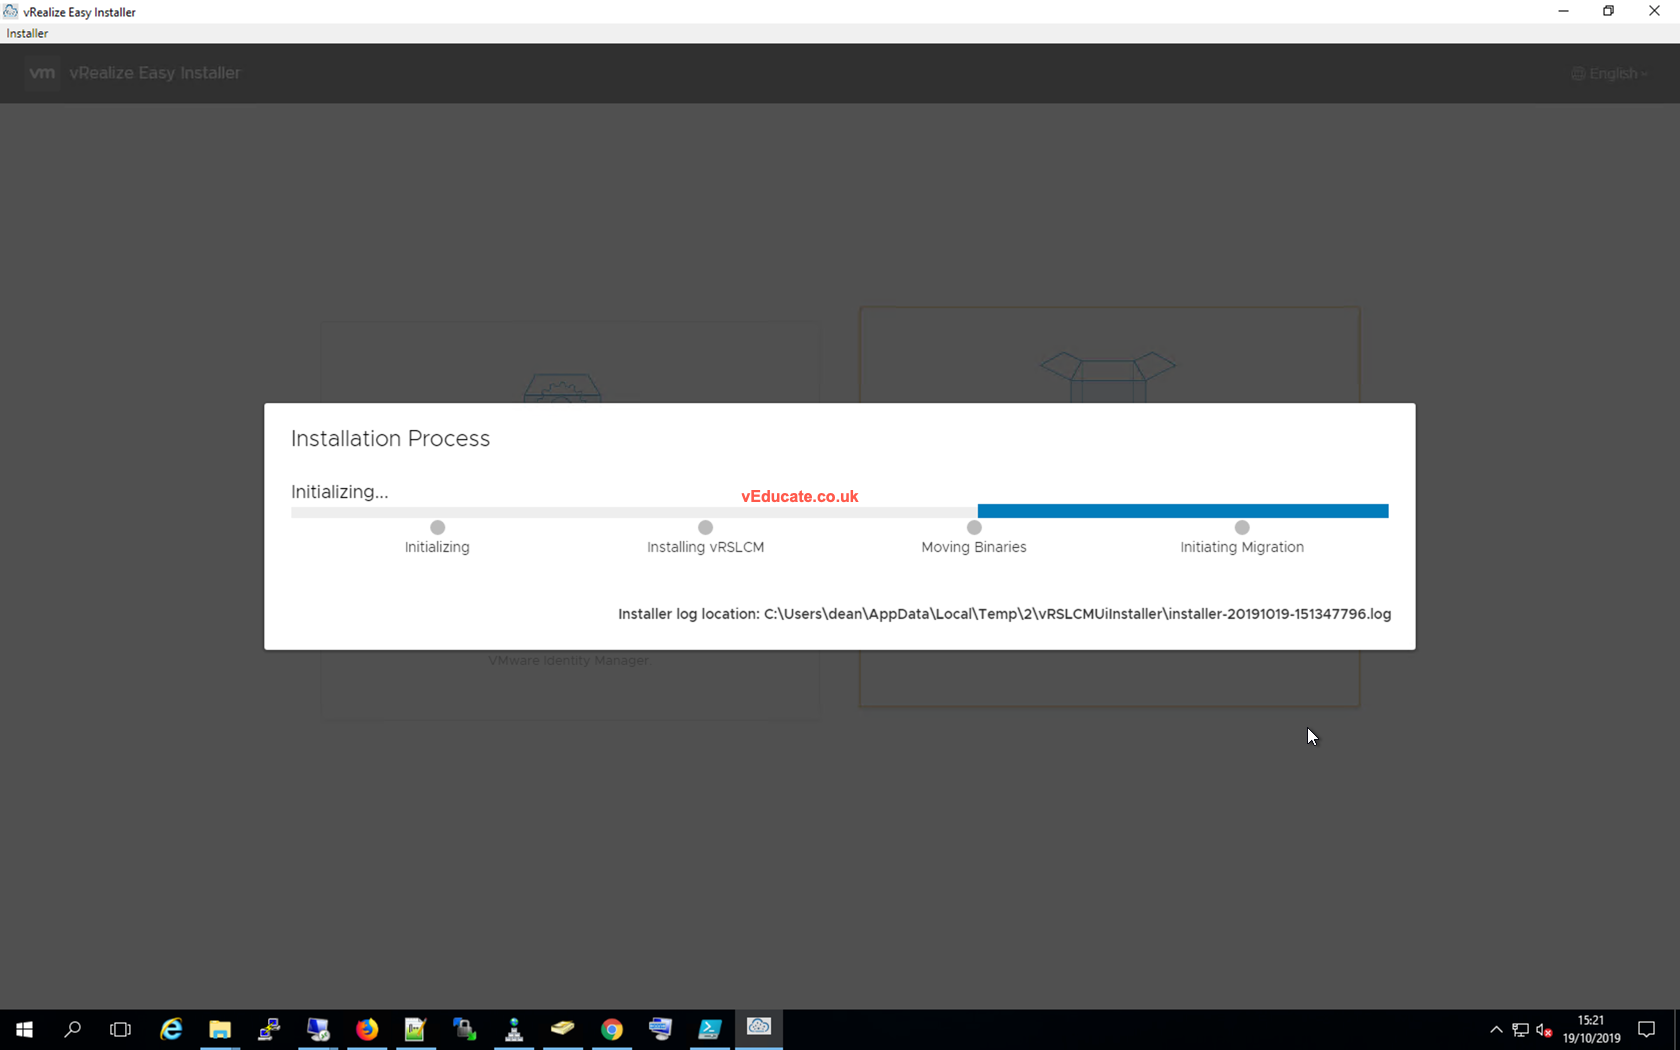
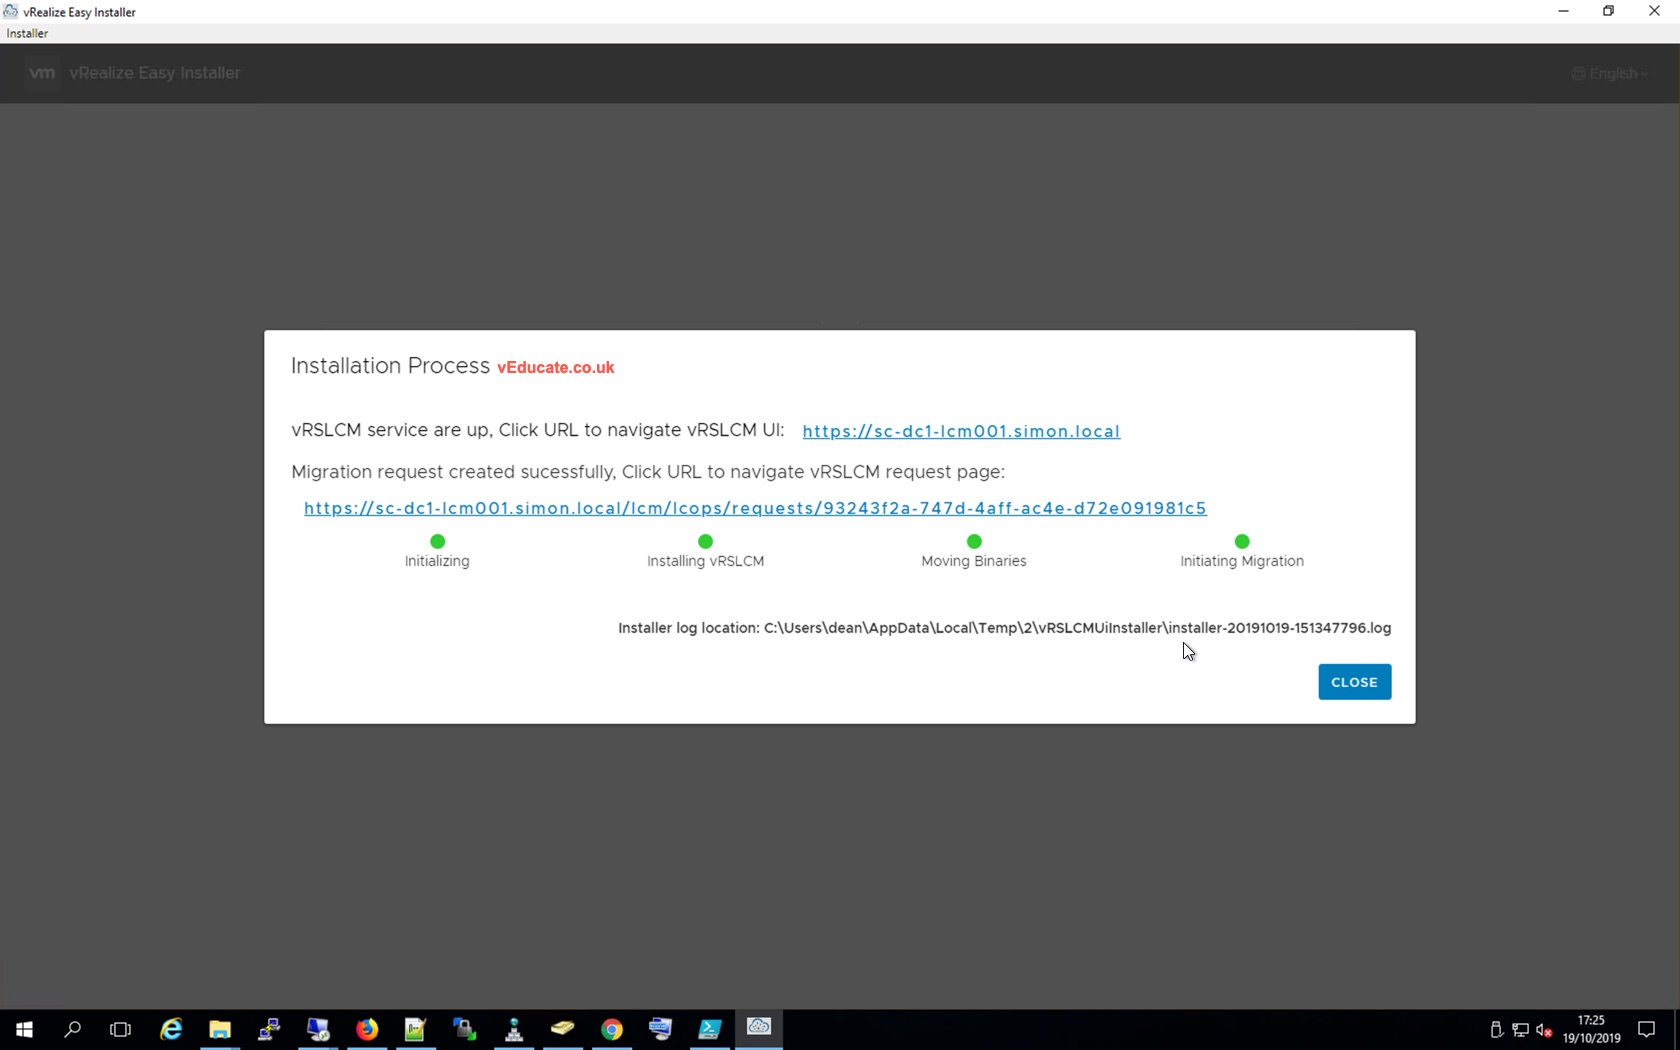
13. Finally as the process runs, you will get a progress bar with the various stages. And then once complete, a link to the new vRSLCM (vRealize Suite LifeCycle Manager) UI and the request that's created to migrate the data from the old vRSLCM environment.
So this concludes the post!
Regards
Dean