- Part 1 – Setting up Fabric Interconnect, and UCS Manager settings
- Part 2 – Configuring Connectivity & Setting up the policies and Service Profiles
- Part 3 – Deploying ESXi via KVM onto FlashFlex (SDCard)
- Part 4 – Upgrading the Firmware
In my first post, we got as far as setting up the management interface of the Cisco UCS Platform. In this second part, I’ll be covering;
- Setting up the connectivity
- Configuring the VLAN connectivity
- Setting up Port Channels
- Setting up the Appliance connectivity
- Configuring LAN policies
- Configuring VNIC Templates
- Creating Server Policies
- Building a Service Profile Template
- Deploying a Service Profile from a Template
Setting up the connectivity
Log into your Cisco UCS Chassis.
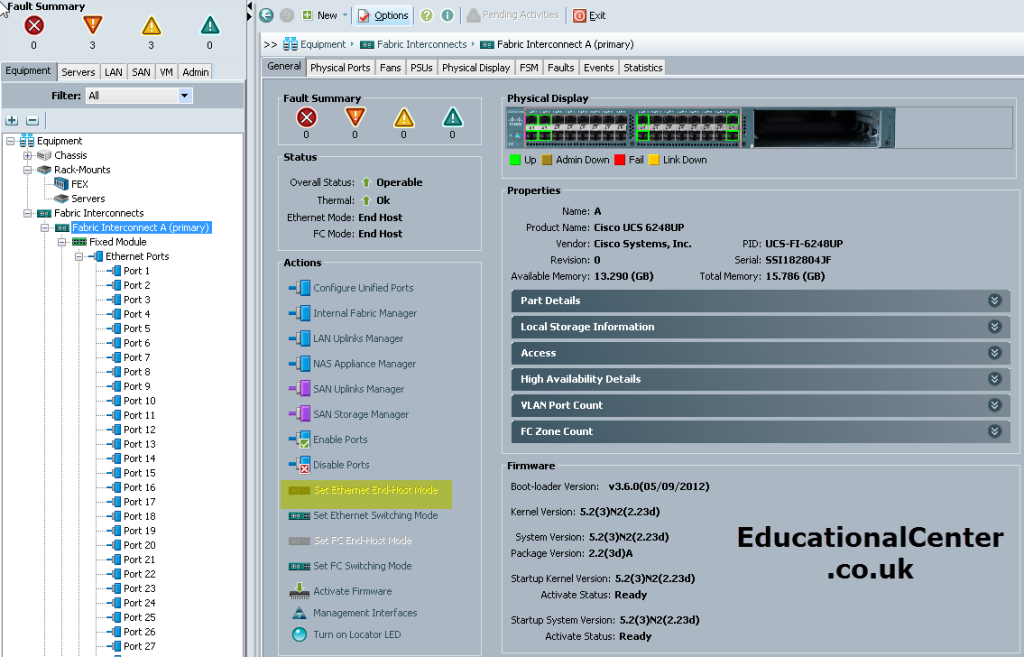
- Select Equipment view, and then your first fabric interconnect
- Ensure that ethernet mode is set to “End Host” (you can read more about the options here).
- On the left hand side expand your fabric interconnect to see all the ports
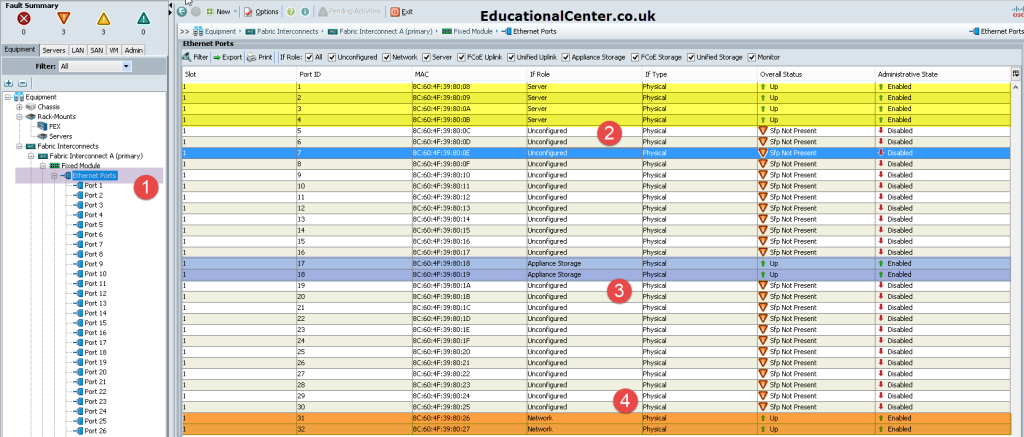
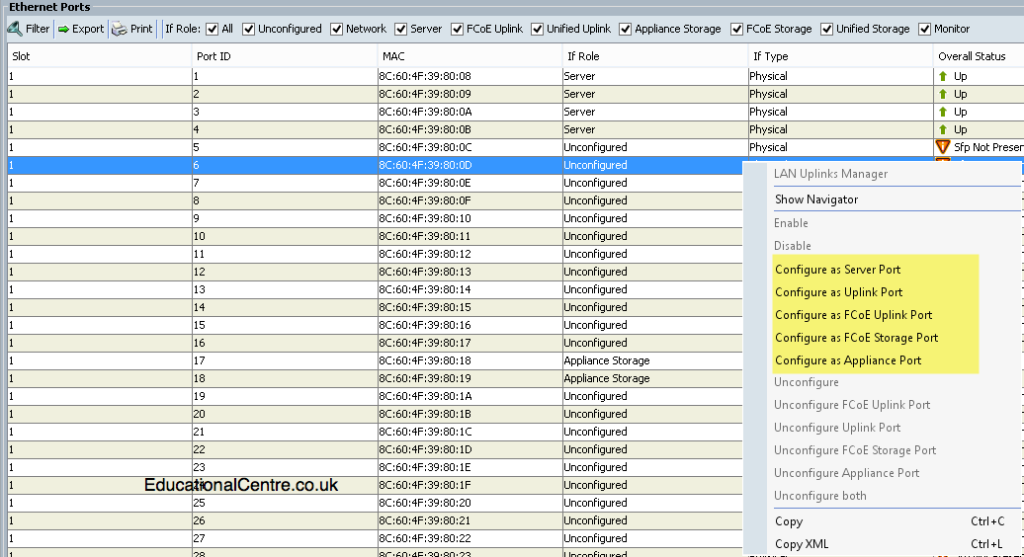
- Select the ports that are connected from the FI to the Chassis and select “Configure as Server Port”
- Select the ports connected from the FI to the Nimble (or any other iSCSI SAN) and select “Configure as Appliance Port”
- Select the ports connected from the FI to the LAN Switches and select “Configure as Uplink Port”
Below you can see screenshots of how I’ve setup my UCS FI’s, the config for the port allocation is the same on both FI’s
Configuring the VLAN connectivity
Click LAN on the top left tab, then Expand LAN > LAN Cloud. You will see your Fabric’s as well as other options. For my environment, we are using VLAN 1 (default), so a very uncomplex setup. However you can assign VLAN’s from your external switches to be accessible into the blades here. You are able to create VLAN’s that are shared across both Fabric Interconnects, or separate for both FIs. Below you can see the different options. 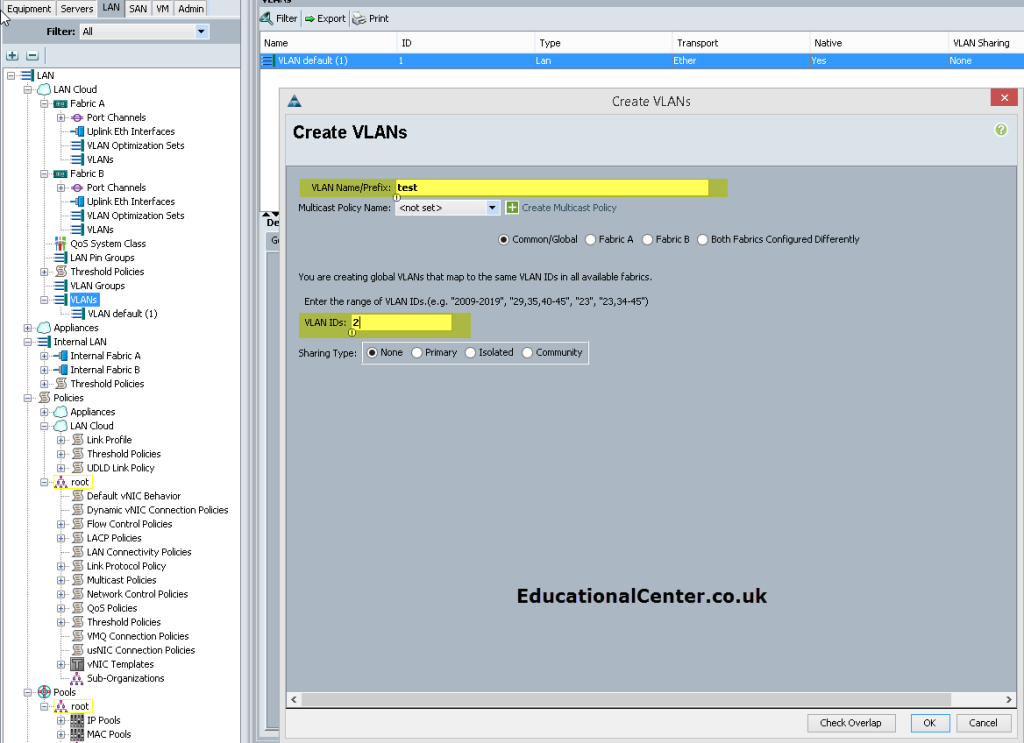
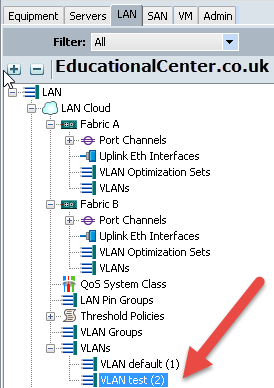
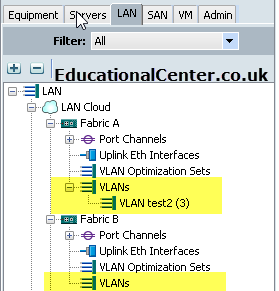
Above here, is where I’ve select for the VLAN to be present only on Fabric A, so you know see it appear under the Fabric Interconnect drop down.
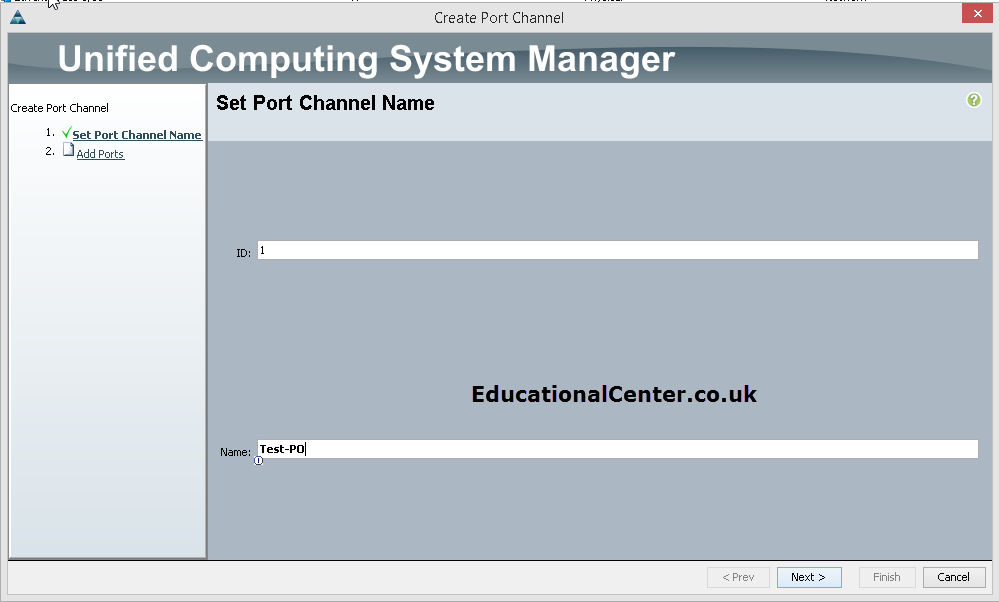
Setting up Port Channels
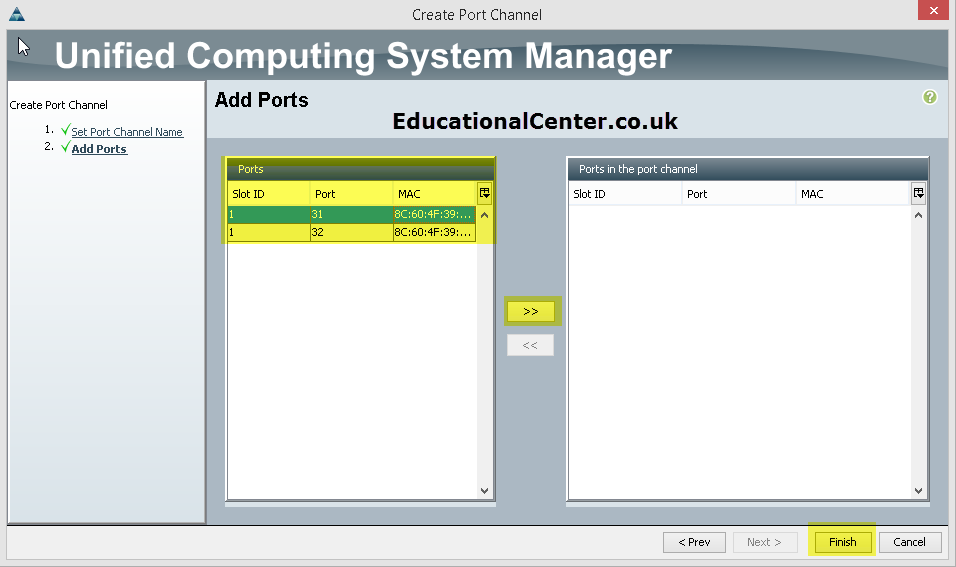
Setting up port channels is as simple as selecting the ports available (the ones you configured as LAN ports earlier). On your switch side, you need to configure the ports in LACP.
Setting up the Appliance connectivity
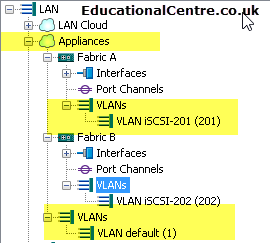
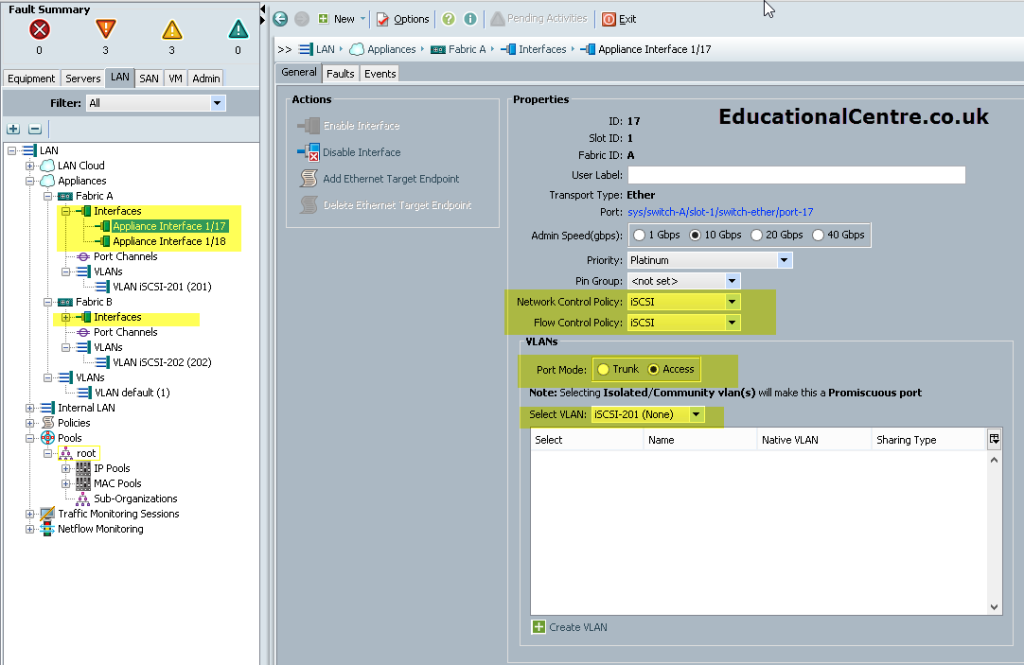
As the FIs are physically separate from one another, the Nimble SAN which I have used in this setup needs to have its Controller connected to both FI’s, these connections need to be on separate IP addressing schemes. Therefore similar to above, I’ve setup a separate VLAN per FI. Expand each interface under the FIs and set them to be access ports and on the VLAN you have created.
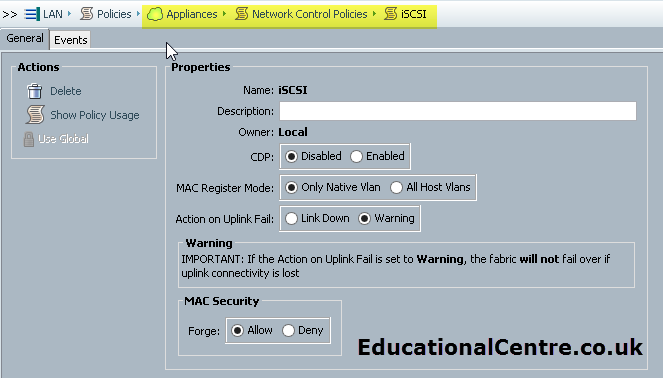
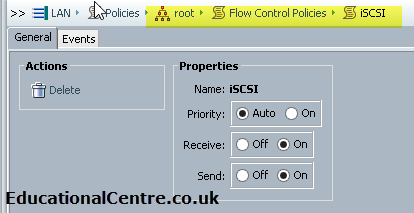
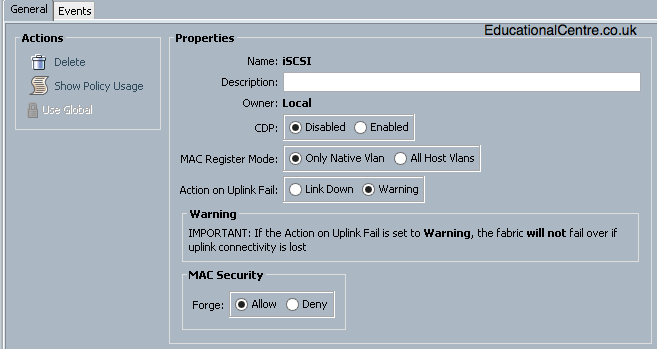
The settings for Flow Control and iSCSI are configured under the Policies section’s 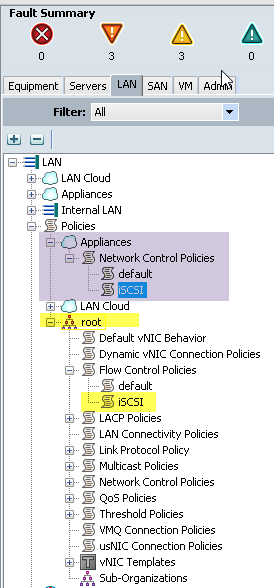
The settings implemented for this environment are from the best practice guide when setting up a Nimble device with Cisco UCS.
You can simply select these settings on each interface under the appliance heading.
Configuring LAN Policies
Here we are setting up IP address pools for the KVM of blades, MAC addresses for virtual NIC adapters mapped to blade servers, and QoS settings. There is further options that I implore you to explore, such as Network Control Policies. So first off, lets create the IP address pool, under the LAN navigation pane;
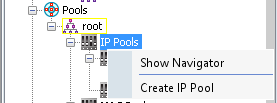
- Go to the bottom under Pools > Root > IP Pools.
- Right click on IP Pools and select “Create IP Pool”
- Input the name for your IP pool
- Add your information about your IP address range
Note: The assignment order selection is important, if you select default, IP’s from the list will be randomly distributed. When selecting your IP addresses, the From box is where you want your range to start, and the Size will then increment that, so you could have, 192.168.3.34 with size of 10, giving you 192.168.3.34 to 192.168.3.44 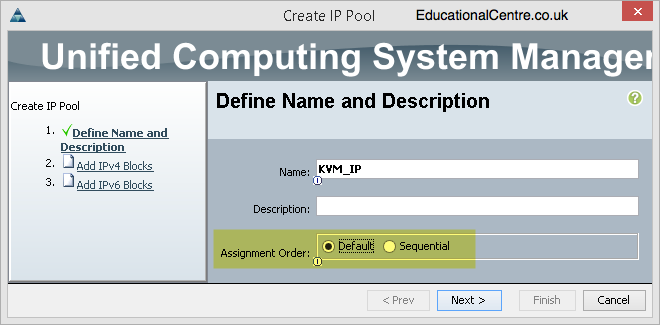
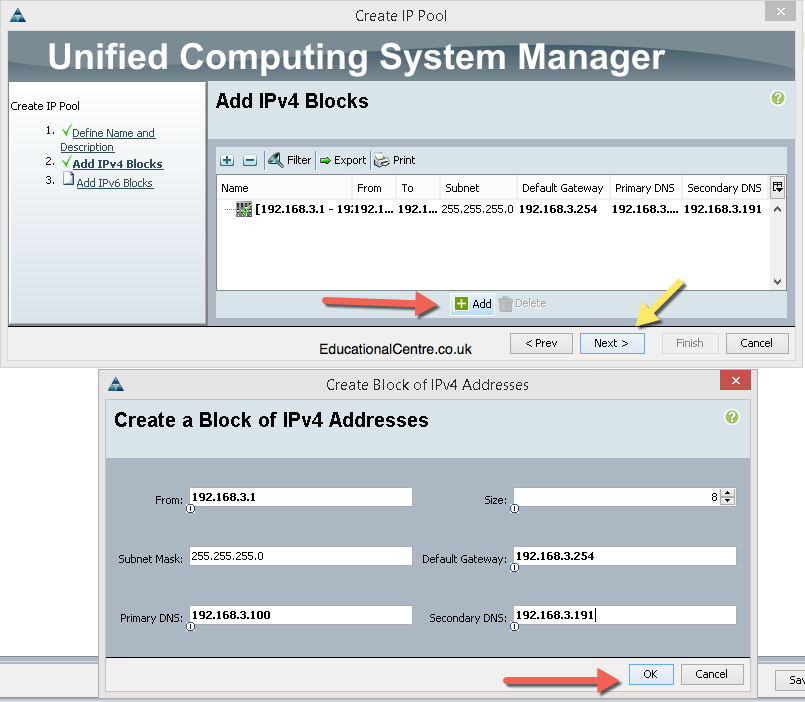
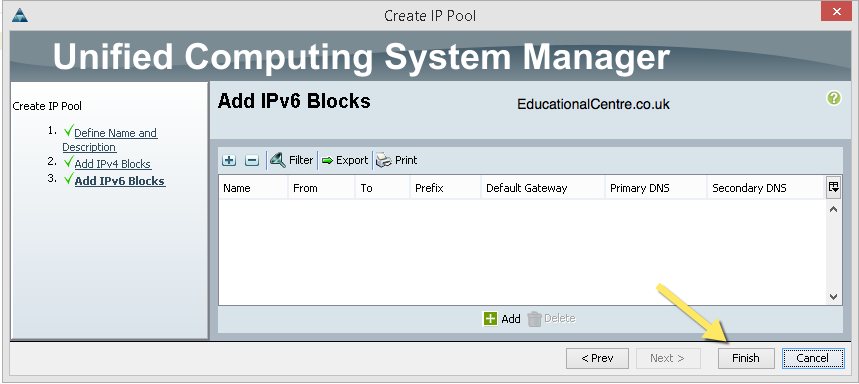
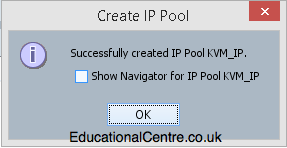
- You’ll receive a message to say the task was successful
Looking in the main window, you can see a summary of the IP addresses available and assigned. And by selecting individual pools, you can see how these are assigned. Below in the second screenshot, you can see a gap in the middle of the pool, this is due to selecting default assignment order. 

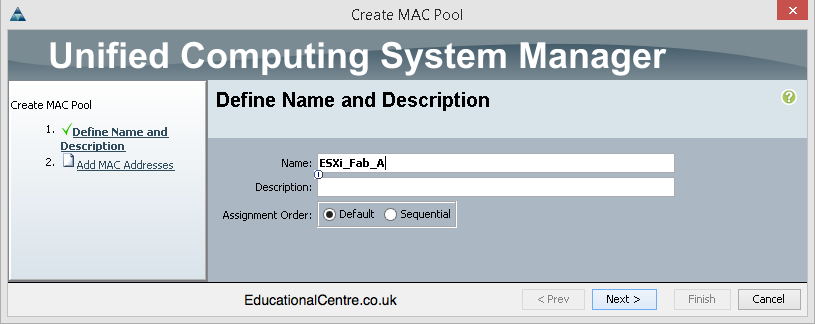
Next we need to configure MAC Address pools for any virtual network card added to the blade servers. You will more than likely opt to have adapter pairs, one adapter per fabric interconnect. So it’s considered best practise to give yourself a way of identifying which adapter is linked to which fabric interconnect.
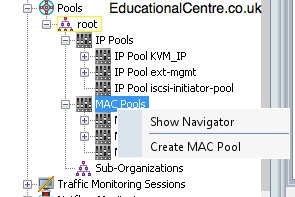
- Right click on MAC Pool
- Create Mac Pool
- Give the pool a name (look out for the assignment setting)
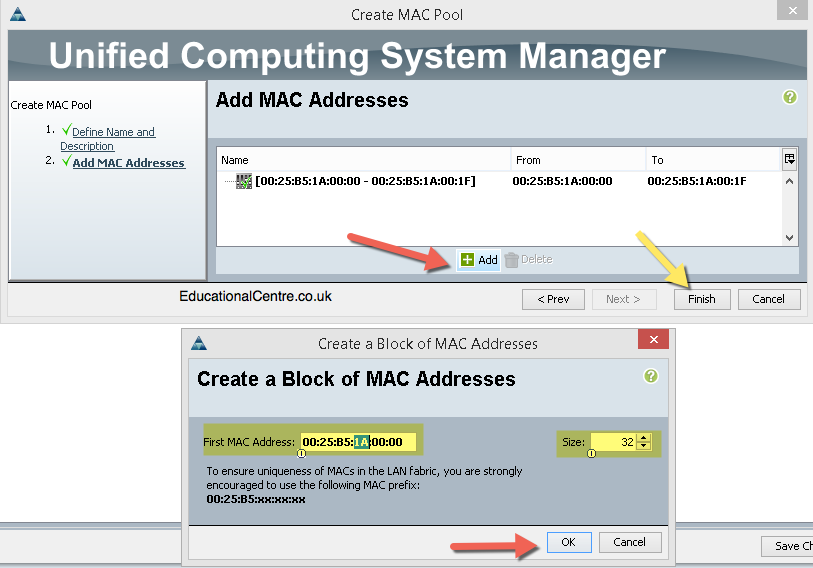
- Configure your MAC address range, the default Cisco Allocation is 00:25:B5
- Notice how I’ve set this one for fabric A, by changing part of the MAC address for 1A
When setting up the VNIC templates, you’ll choose which Fabric they connect to and which MAC pool they get their address from.
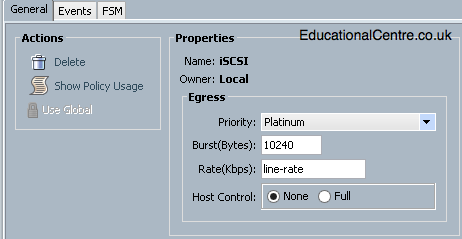
Now for the QoS Settings, these for me, were setup according to the best practices for using iSCSI Nimble configuration in the environment.
- To to LAN Cloud and QoS System Class, to set up the global QoS Settings
- Here I enabled and configured the Platinum Policy
- Never drop packets and 9000 MTU Size
- Go down the Policies level to create QoS Policies tobeappliedtoVNICs
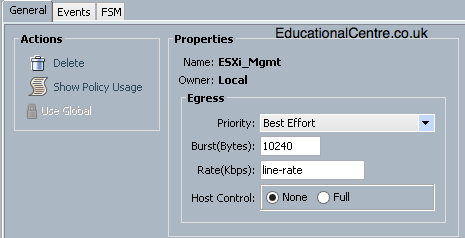
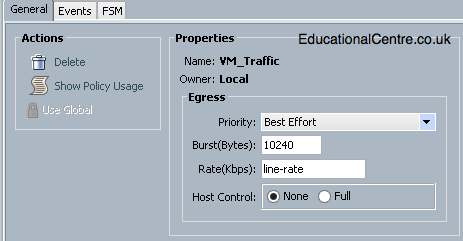
- Right Click > Create QoS Policy, choose your Name and Priority
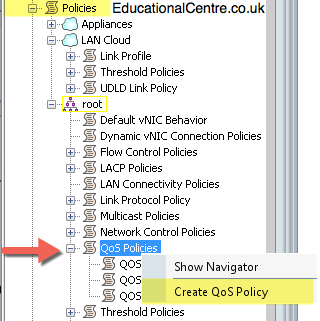
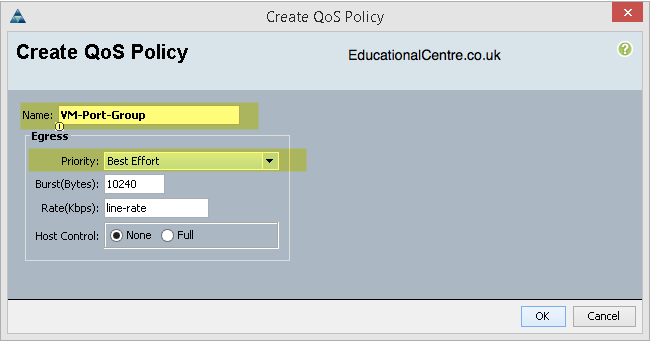 In my environment, I create 3 policies
- ESXi Management Traffic
- Virtual Machine Port Group Traffic
- iSCSI VMKernel Traffic
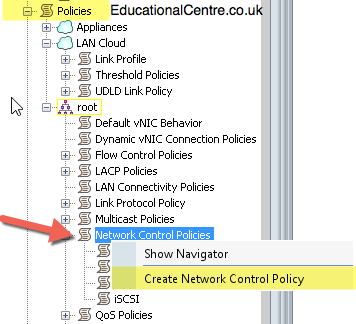
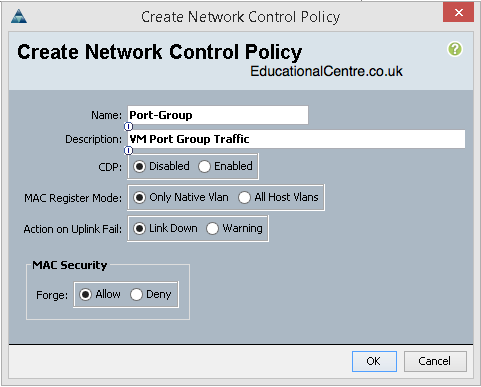
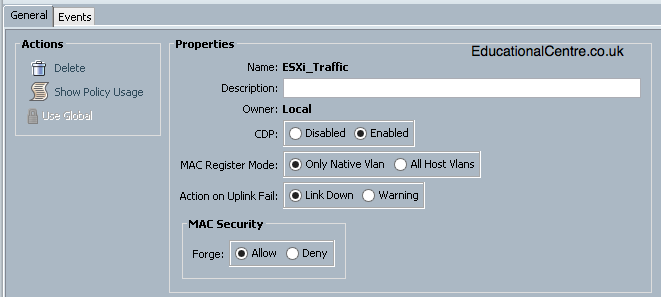
Finally lets create some Network Control Policies to be used for each type of traffic as well.
- Right Click Network Control Policies > Create Network Control Policy
- Select your settings and give it a name/description
Once again, I created three policies as above,
- ESXi Mgmt Traffic
- VM Port Group Traffic
- iSCSI VMKernel Traffic
Configuring VNIC Templates
Here we are setting up the basis structure of the virtual NICs that will be added to each blade server. As this is going to be a VMware environment, I have named my templates similar to what I expect to see within VMware. If you were configuring for Windows hosts, then you may opt for a method that supports your configuration better. For this VMware based environment, I created 6 vmnics, 3 per Fabric Interconnect.
- ESXi Management Traffic and vMotion
- Virtual Machine Traffic
- iSCSI Traffic
Kind of mimicking what you’d expect in a rack mount server.
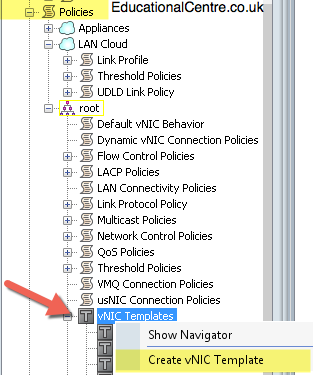
- Right click on VNIC Template and Create VNIC Template
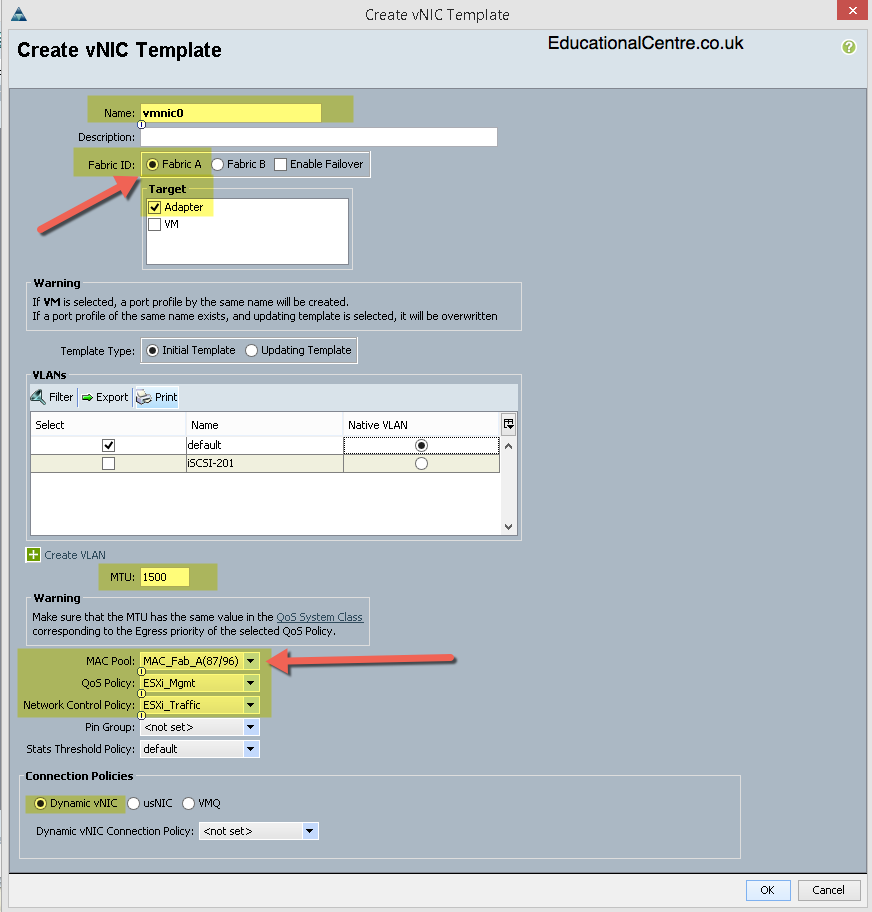
- Input your settings
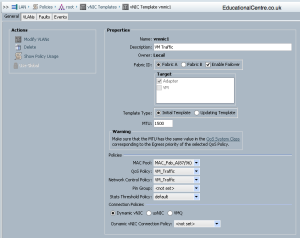
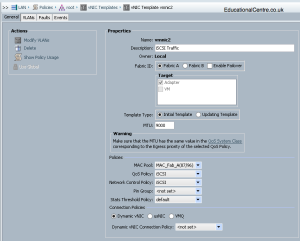
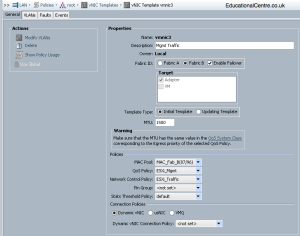
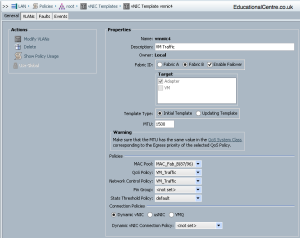
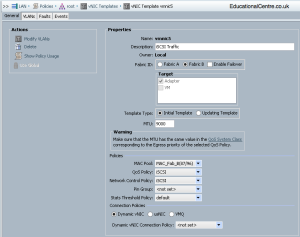
In the below example, it’s my first vmnic, so I’m going to be using that as management, this is set to only use Fabric A, therefore the MAC address pool is the one I’ve created for using Fabric A, as mentioned earlier in this post. The MTU size set here needs to match the MTU size in the QoS Policy selected.
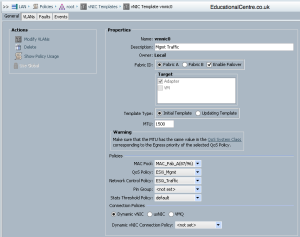
My VNIC templates are created as;
- vmnic0 – ESXi Management – Fabric A
- vmnic1 – VM Traffic – Fabric A
- vmnic2 – iSCSI Traffic – Fabric A
- vmnic3 – ESXi Management – Fabric B
- vmnic4 – VM Traffic – Fabric B
- vmnic5 – iSCSI Traffic Fabric B
Below are the screenshots of each.
Creating Server Policies
Head over to the Server Tab on the left hand side, and first we need to set up the policies that will be selected in the Server Profile Template.
- Create a BIOS Policy for your ESXi Host > Each setting will be platform default
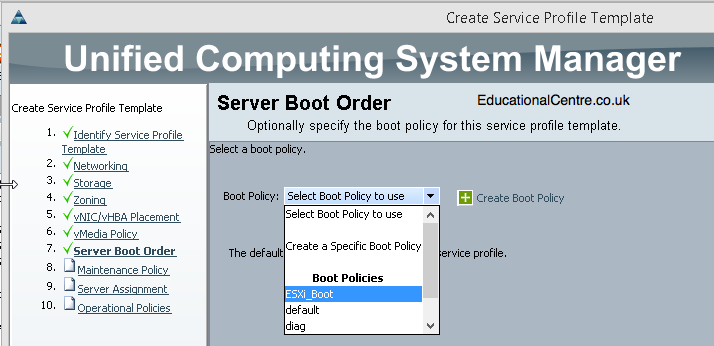
- Create a Boot Order Policy, in my environment, we will be booting from SD Cards, but I’ve added CD devices as well to make life easier when building the hosts.
- You can select the different devices to add from the left hand drop downs
- Create a Host Firmware Package, here I’ve selected the simple option and using the latest firmware available on the system.
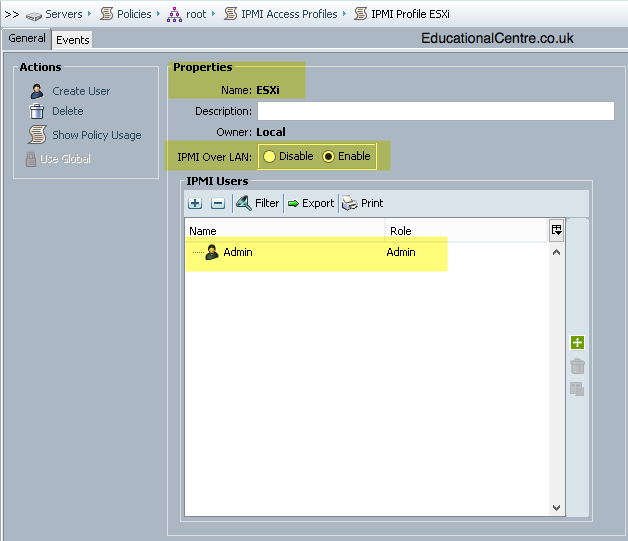
- Create an IPMI policy if needed, and a user within that policy
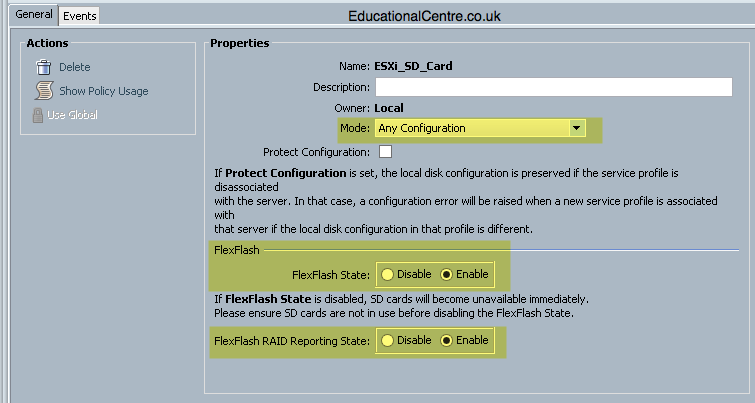
- Create a Local Disk Config Policy, here I will be using SDCards, so enable the flex flash states, the mode is set to “any config” as we are not RAIDing disk drives
- Create a Maintenance Policy, this is important and not to be missed out, as it controls what should happen when you make changes to a blade/rack server. Basically with this setting a user should acknowledge any changes and therefore reboots needed.
Building a Service Profile Template
Ok now we have the policies created that we need, lets setup our Server Profile Template
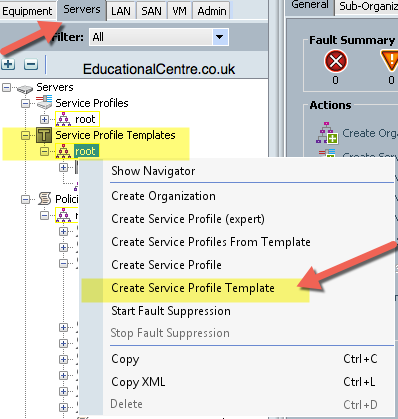
- Server tab > Right click Service Profile Templates > Create Service Profile Template
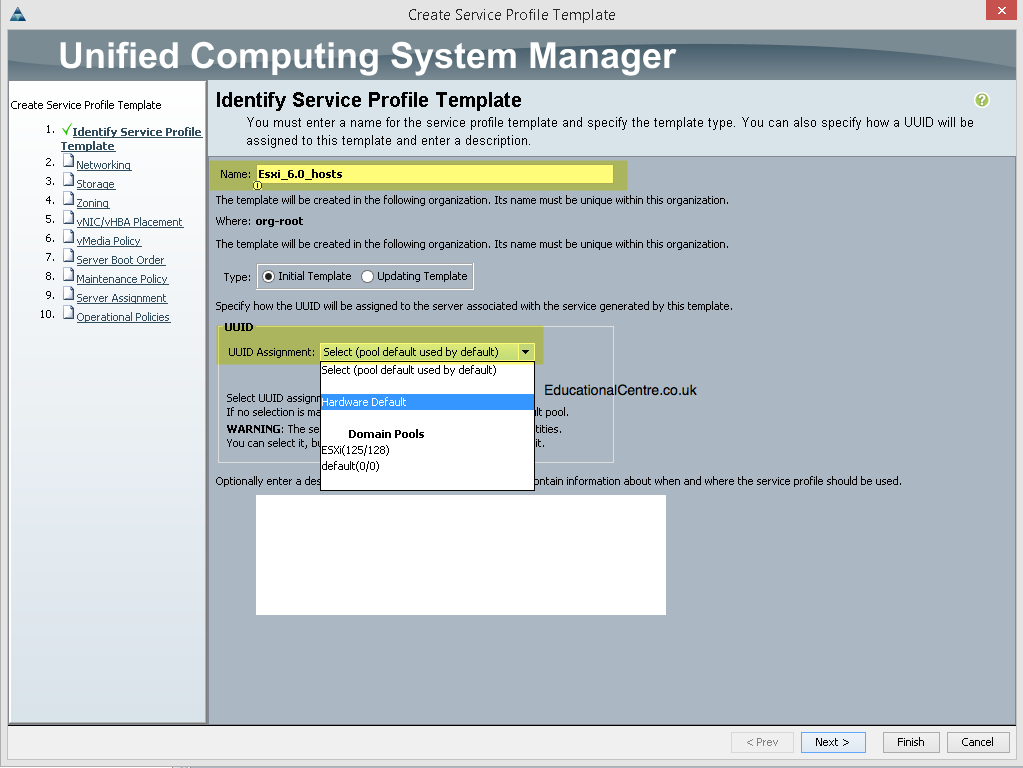
- Select a Name and select UUID Pool to choose from
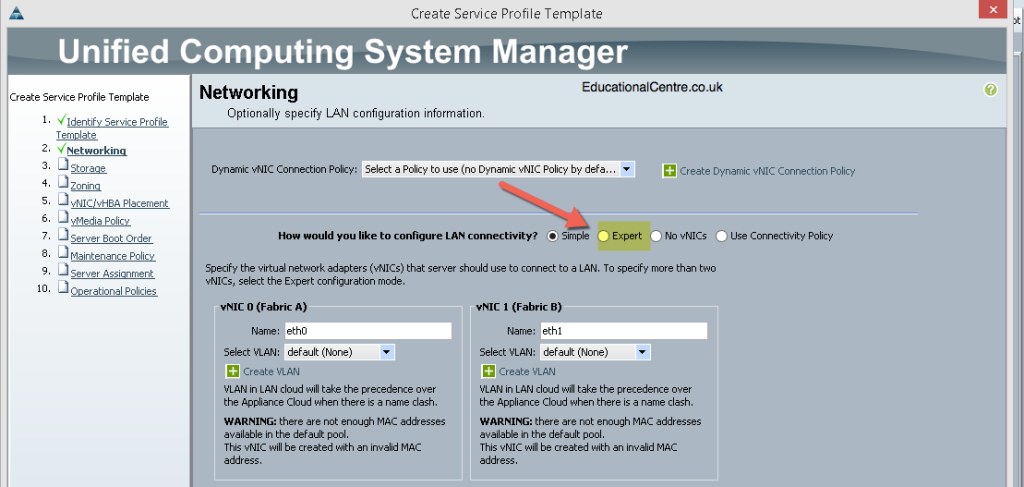
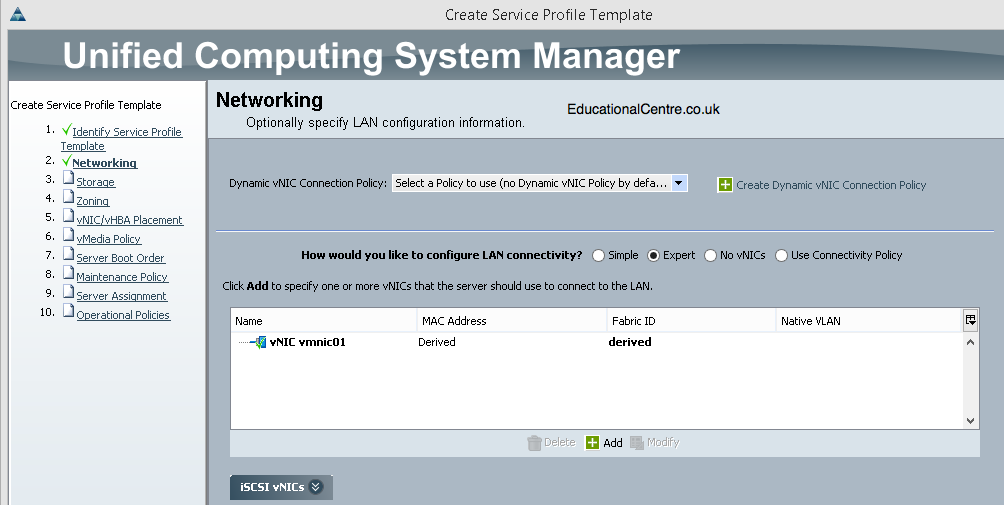
- Next up is Networking, and this is whereweusetheVNIC templates
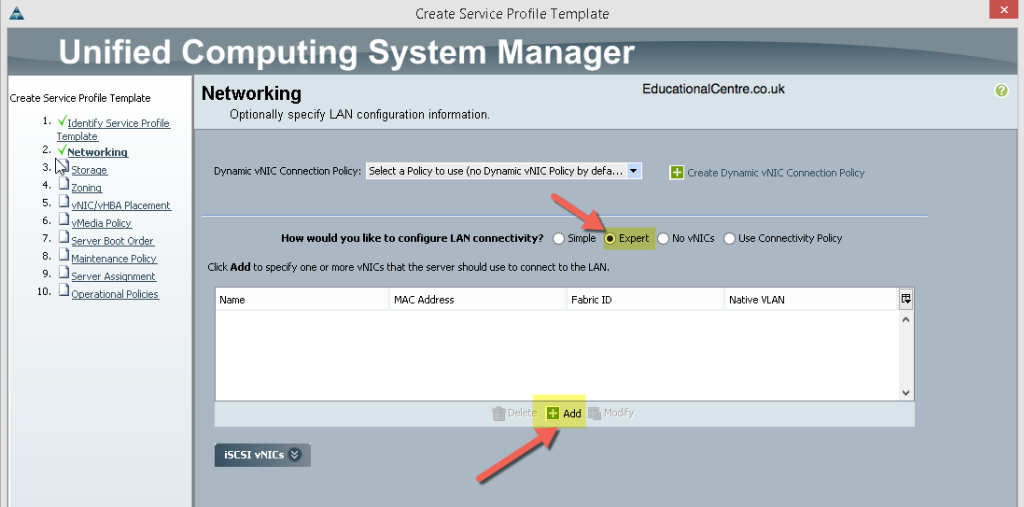
- Select Expert for configuring Network Connectivity
- Then click add
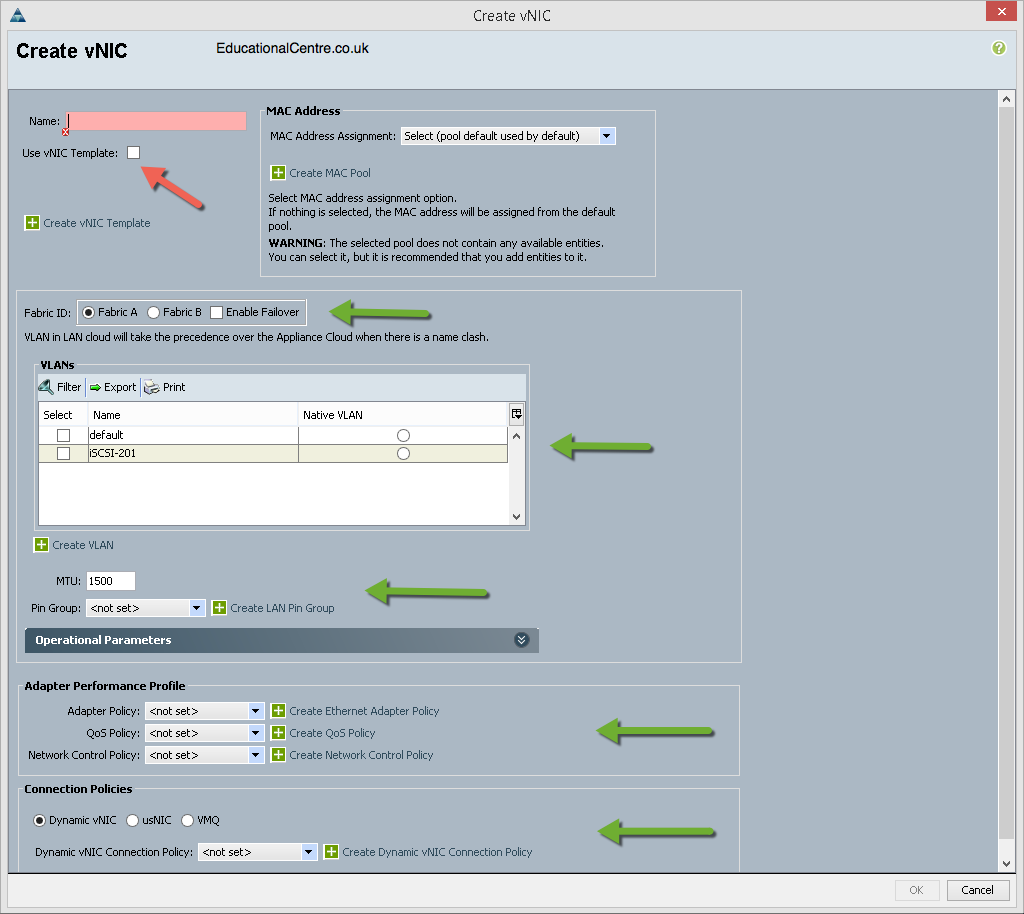
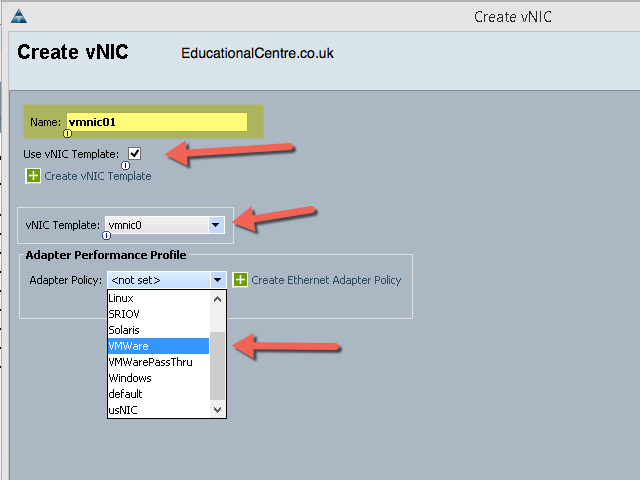
- A separate dialog box will appear for the network adapter, I have selected to use the template I created earlier, but you can notice if you do not select this option, then all the setting available as the same as those in the template.
- I have selected the adapter policy as the VMware pre-defined policy
- Repeat until you have all your necessary VNICs added
- Click next to configure the storage
- Select your storage policy, (settings displayed for you on the right hand side once selected)
- Set the SAN connectivity to no HBAs
Note: If you are looking to configure Fibre Channel, please see this blog post. 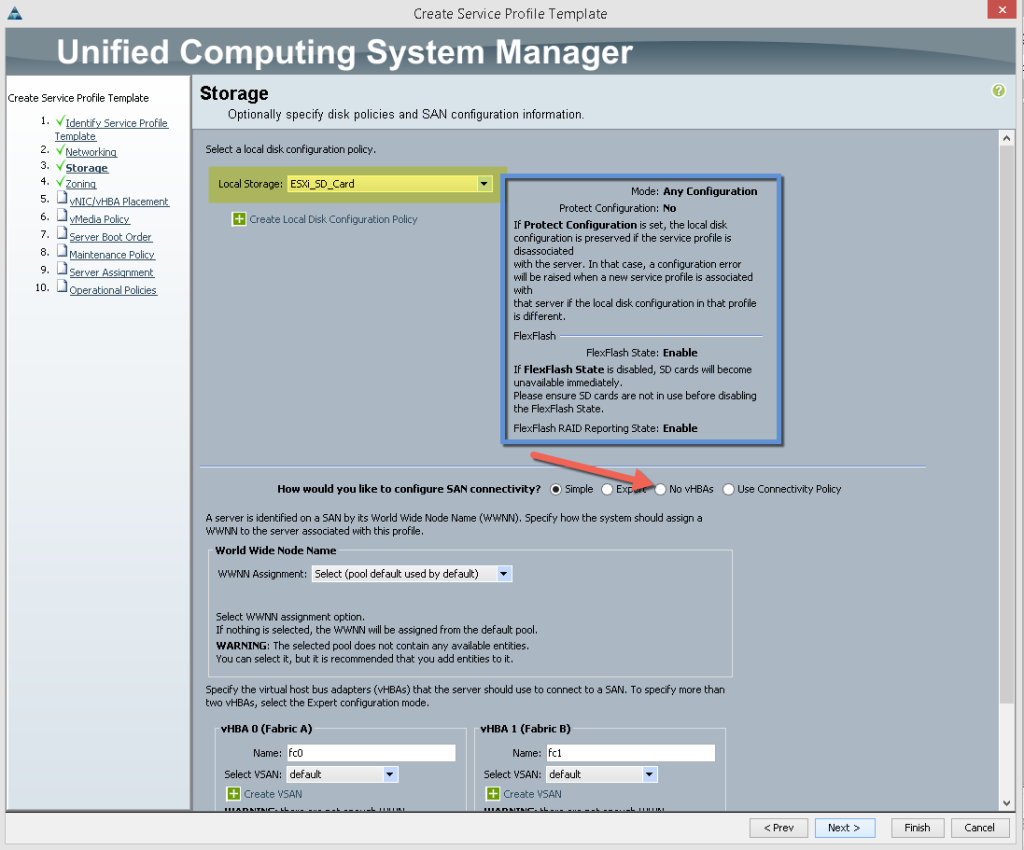
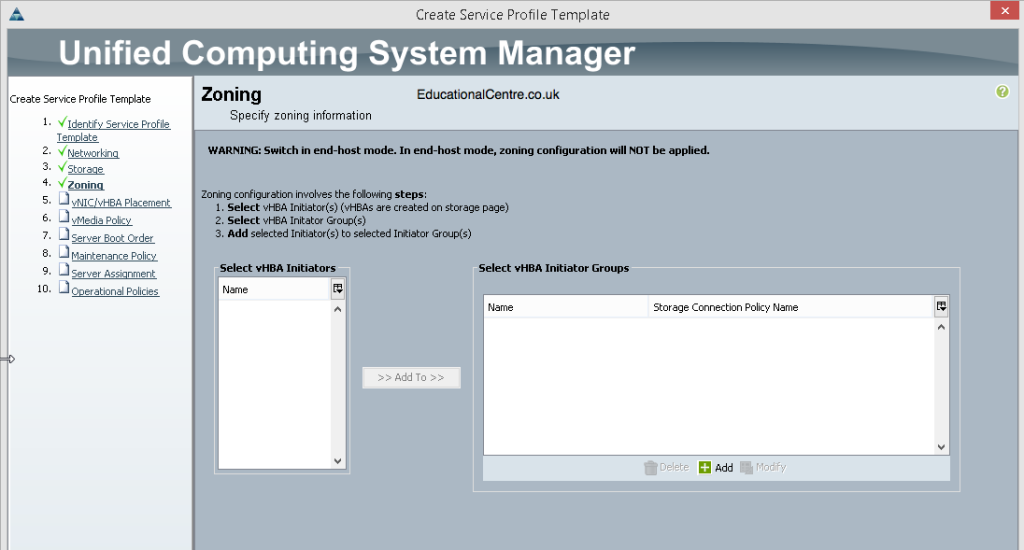
- There will be no Zoning to configure, as there is no Fibre Channel in use. So just click next.
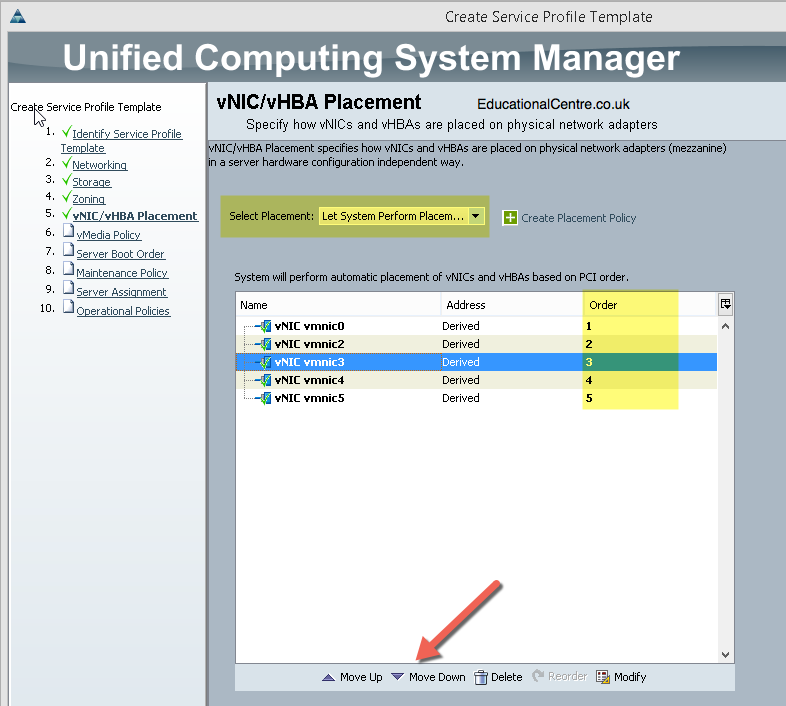
- Next up, you can configure the VNIC order as they will appear within the server OS, so you can correct any placement needed.
- I havent created a virtual media policy, as the only configurable option is for encrypting the media communication. But you can set it here if needed.
- Select your boot order policy
- Select the maintenance policy
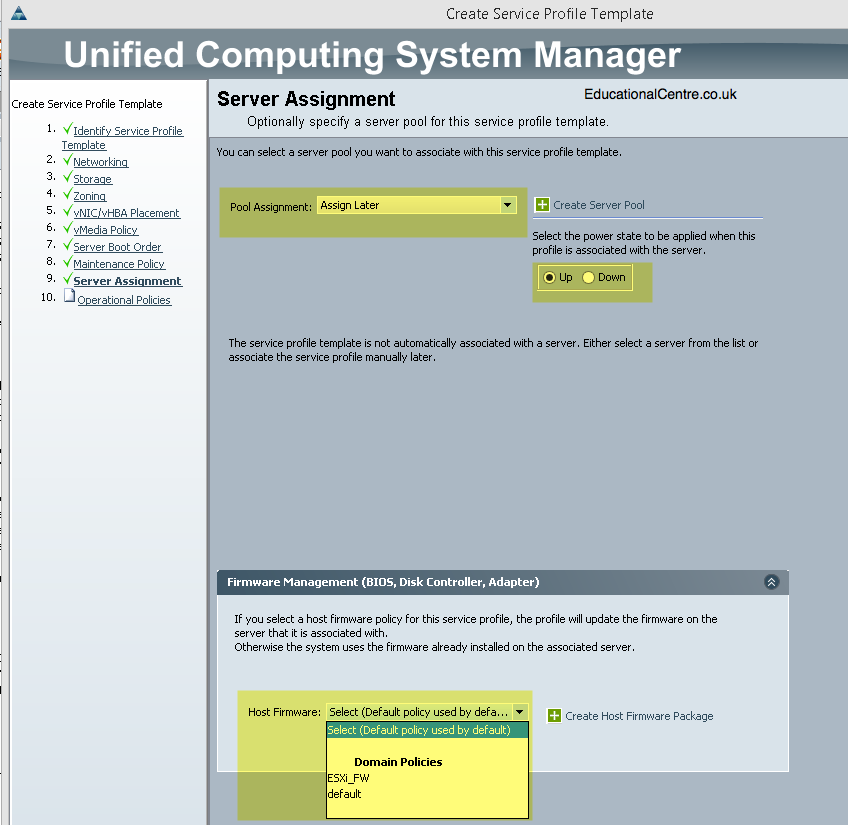
- Select the server pool, I have left this to assign later, to allow for granular control of which servers will have this profile applied. Also you set the firmware policy here as well.
- On the final page set the last of the operational policies, such as BIOS Config, Management IP Addresses, KVM settings and so forth
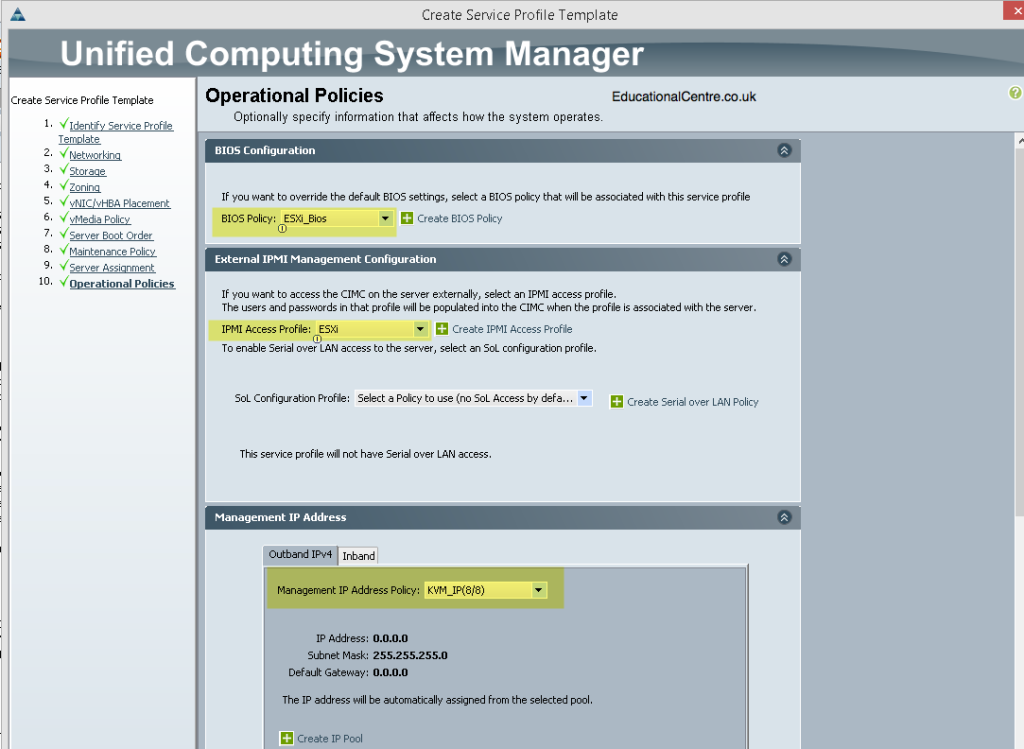
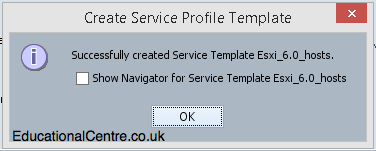
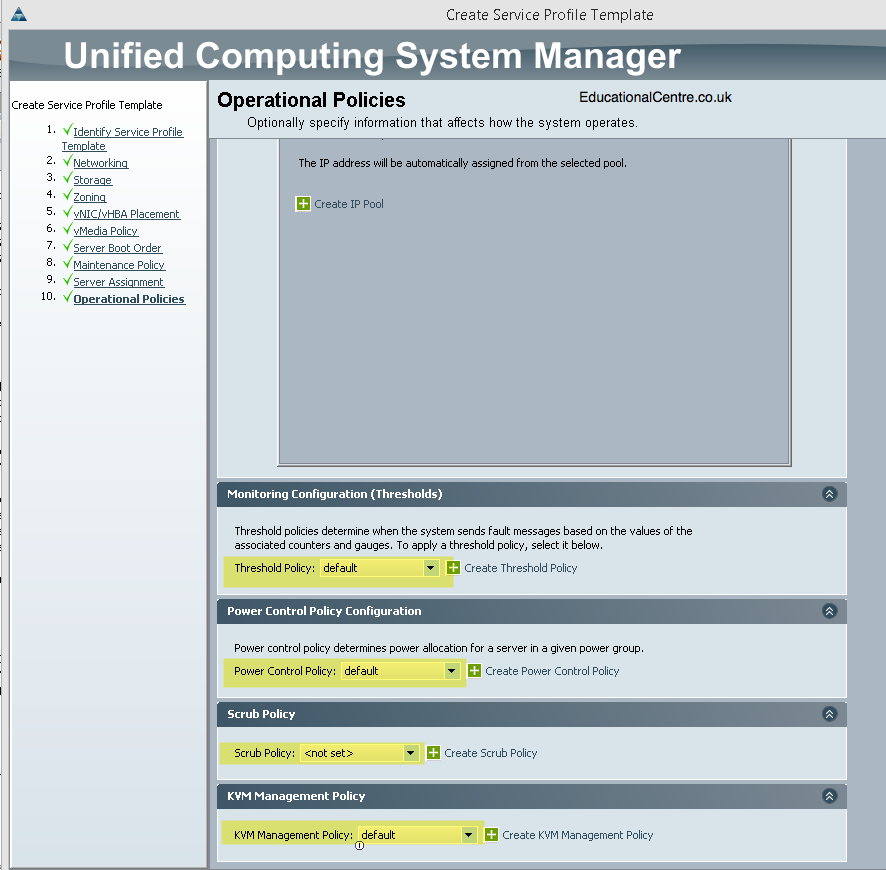 When you click finish you’ll be presented with a successful dialog box
Deploying a Service Profile from a Template
We now need to deploy the actual Service Profile, which will then be assigned to a set number of servers to give them their “personality”. These Service Profiles will all have the same settings as the template, but then can be changed individually as needed. There is nothing stopping you from creating all your Service Profiles from scratch, but this can lead to human error and lack of consistency. I have opted for creating a service profile per blade server as the environment is small, and any changes needed can be made to one blade server first and not affect the others. For larger solutions, you would have multiple servers assigned to one service profile.
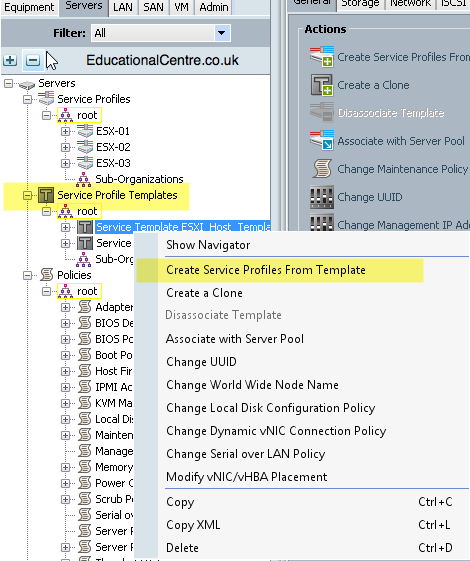
- Click on the Servers tab on the left hand side > find your Service Template > Right click and deploy Service Profile from template
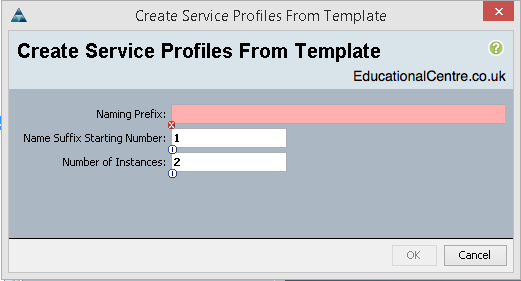
- Set your name, the starting number to be appended and how many profiles to create
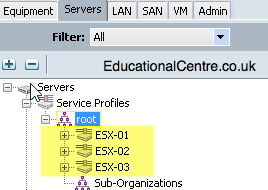
- So for my output I chose the name “ESX-0”, starting number 1, and 3 instances
- This gave me three copies of the profile
We now need to associate these service profiles with the blade servers or pre-provision the empty slots ready for the hardware to be inserted into the chassis
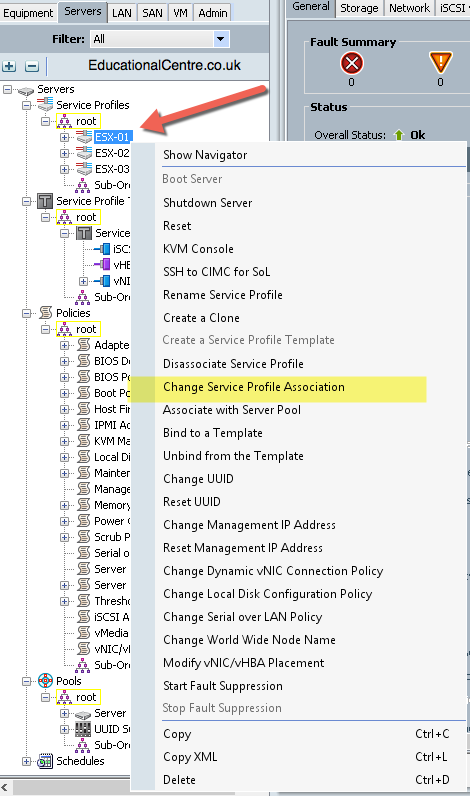
- Right click your Service Profile > Change Service Profile Association
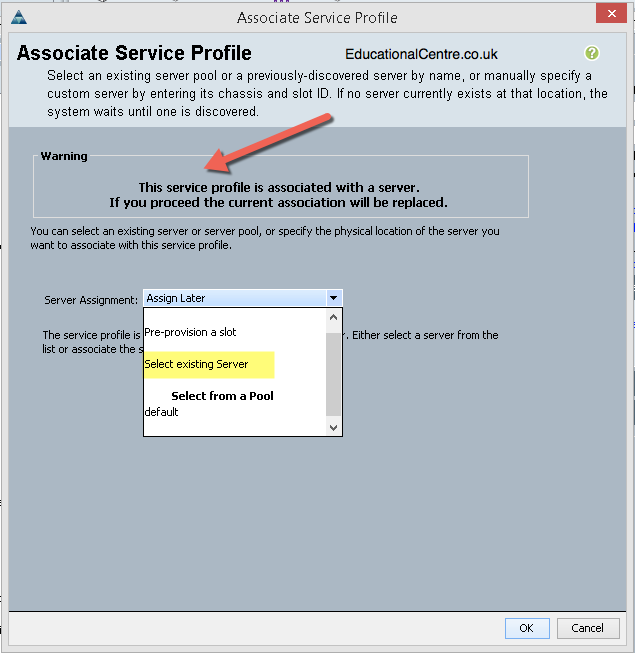
- If the profile is already associated you will receive a warning as in the screenshot
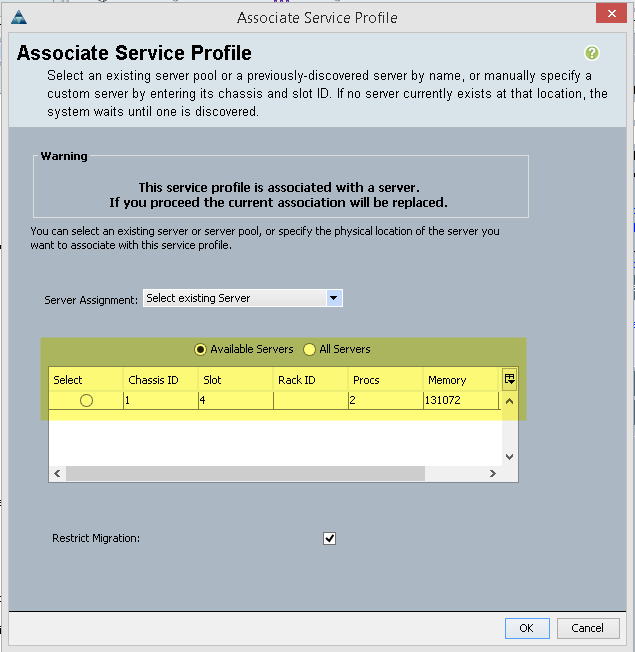
- Select whether to assign to a server or pre-provision an empty slot
- Select the server/s or slots
Head over to part 3, which covers configuring the SDCards for FlexFlash and deploying ESXi.
Regards
Dean Follow @saintdle

