In my first blog post, I covered the prerequisites and how to deploy the components for the Data Management for VMware Tanzu platform.
In this blog post we will cover using this new infrastructure for Self-Service Database-as-a-Service deployment and configuration.
Configure Database Templates and Instance Plans
- Log into your Provider Appliance as the Provider administrator account.
The last actions to configure are publishing the database templates and configuring Instance Plans. (If you have setup your Organisation to use instance plans).
- Click Templates from the left-hand navigation pane
- Select your Template which has been sync’d from the Tanzu Net (Or repo as air-gap configuration).
- Publish the Template
- Click Instance Plans from the left-hand navigation pane
- Click “Add New Plan”
- Configure as necessary
Configure additional Org Users
Configuring users is the same process as previously adding an Admin user to the Org. You just select the Org User role instead. So, I won’t repeat that here.
You do also have the option to synchronise with an LDAP server as an identity provider instead of configuring local users.
Adding new Organisations to an existing Agent
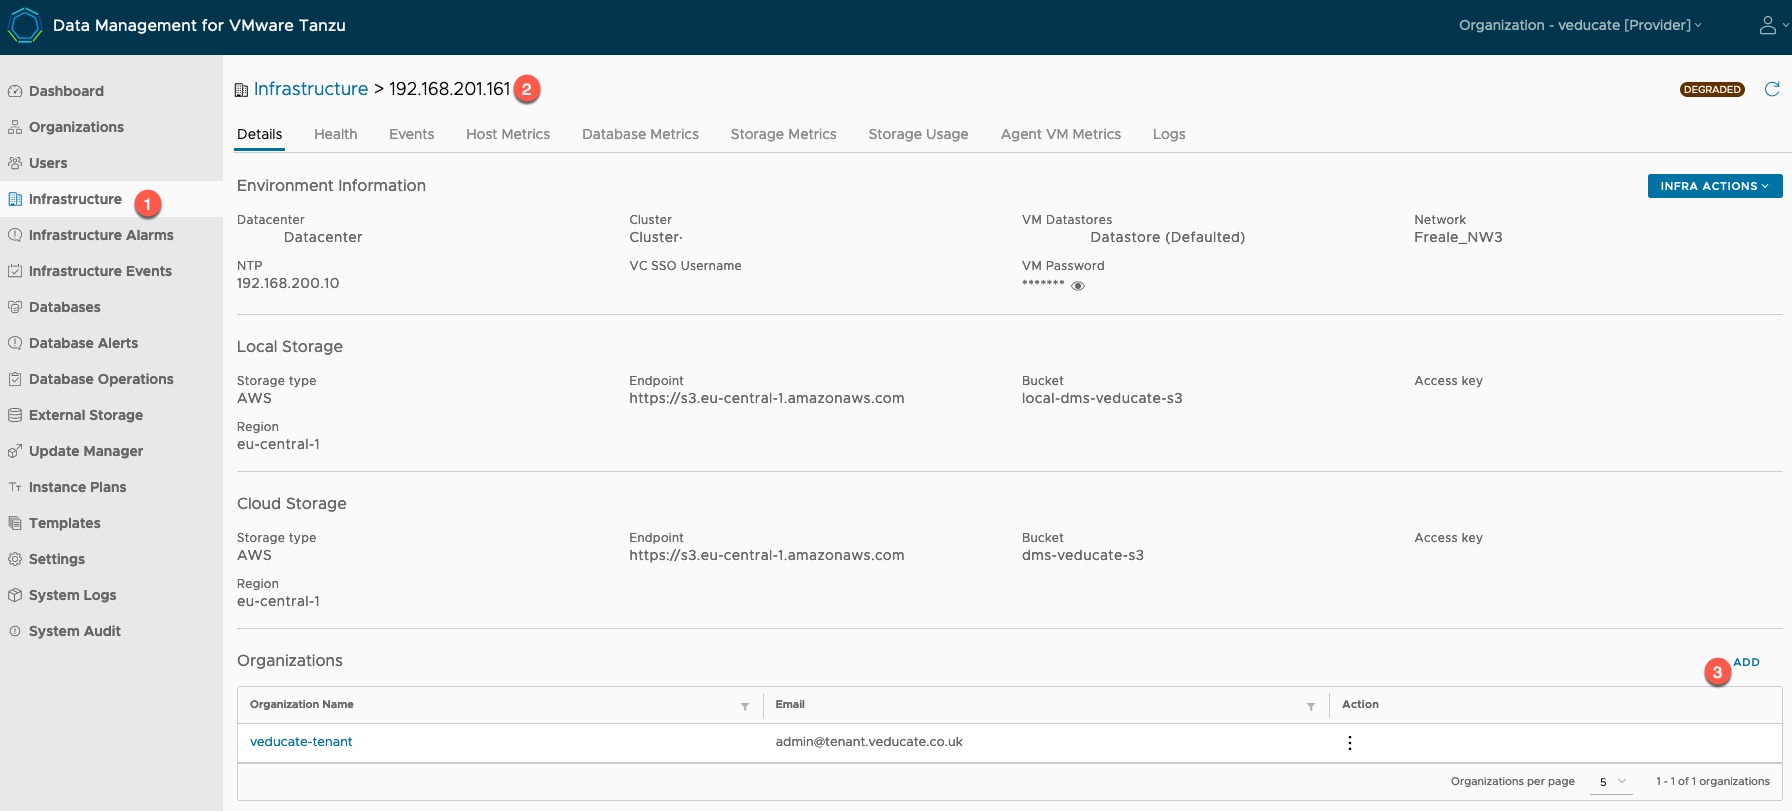
- Click on the Infrastructure tab on the left-hand navigation pane.
- Select your Agent
- On the bottom right of the Agent’s Details pane, you can add additional organisations as needed.
Creating a Service Instance (Database VM)
OK, now we are ready to consume the platform and request a Database instance to be deployed so that I can use it to store data for my application.
- Log into the Provider Appliance as an Organisation Admin or User (these screenshots will show myself using a Org User account, but the view is the same as an admin)
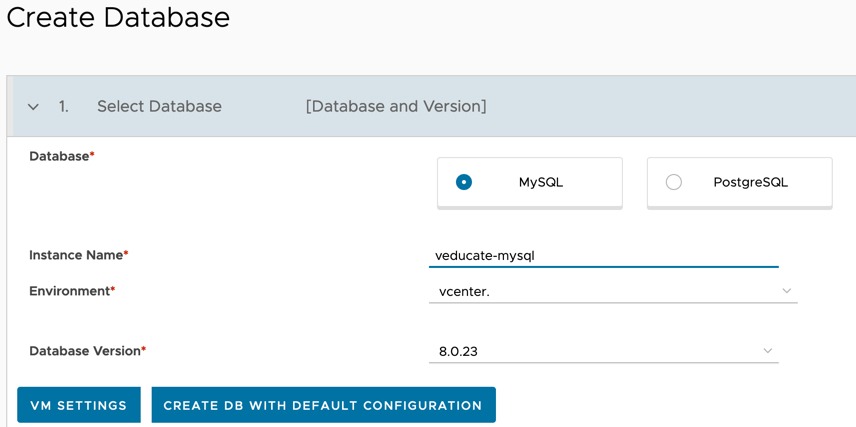
- Click Databases on the left-hand navigation pane, and then “Create DB”
- Select the Database Software you want to deploy
- Either use the name provided or provide your own
- Select the environment (vCenter) you are deploying to
- Select the Database version
Now you have two choices, you can provision this DB the really easy way with the default configuration.
- You can review the default configuration parameters here
Or you can specify all the settings yourself by clicking “VM Settings”, which is the path I’ll take in this blog post.
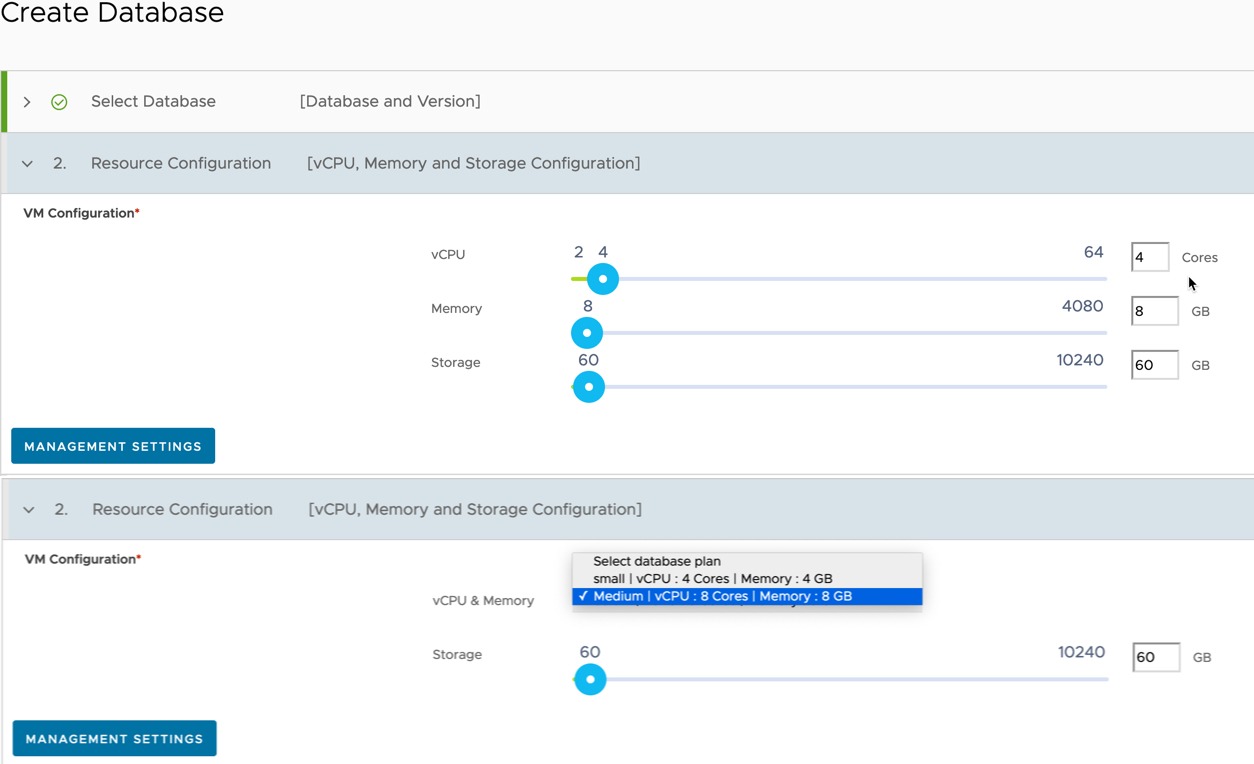
- Select your Virtual Machine Resources
- I’ve shown the options for both Free Plan and Instance Plan modes
- Set your monitoring configuration
- You can find more details about the two options here.
- Enable or disable Data Protection
- Enable or disable if you want to have your database instances updated automatically for minor versions
- Enable or disable the Maintenance Window
- DMS applies Service Instance updates that require a service or VM restart only during the maintenance window configured
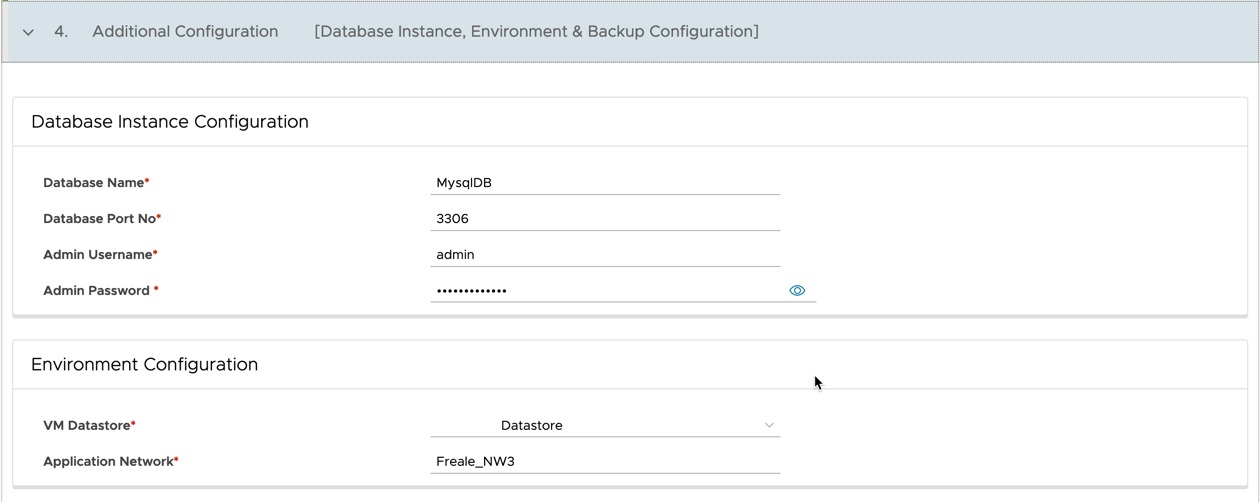
Under Additional Configuration, we can configure a number of options for our Database instance.
- Set the Database Name, Port, Admin User + Password
- Configure the Datastore and Application network to deploy the Virtual Machine too
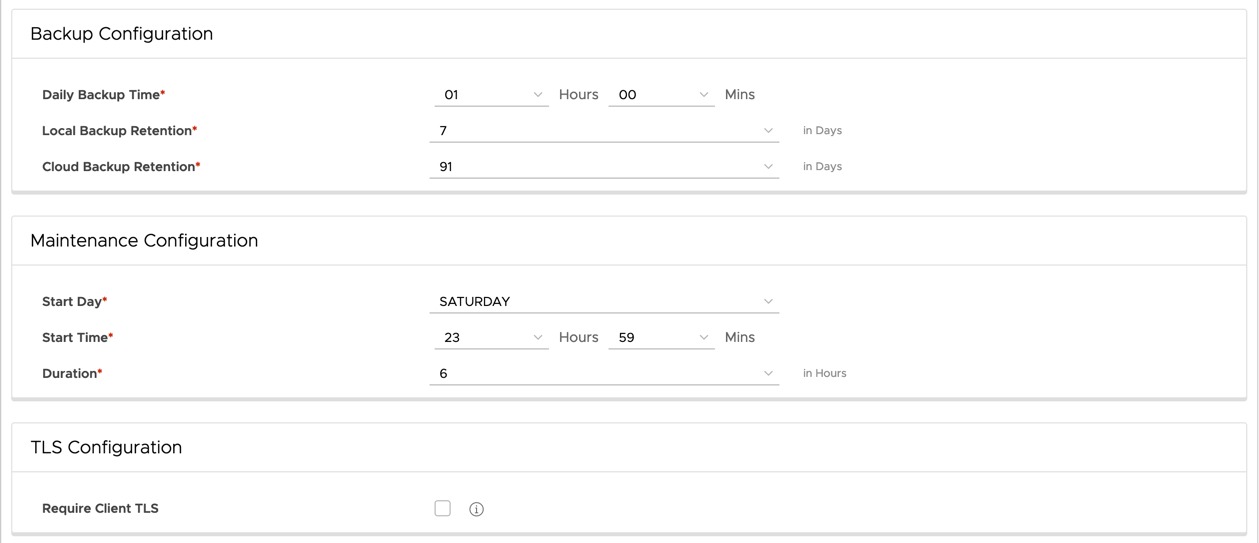
- Set the Database Backup Schedule and Retentions
- Set the maintenance window for any upgrades
- Set if TLS is to be configured for connectivity to the Database instance
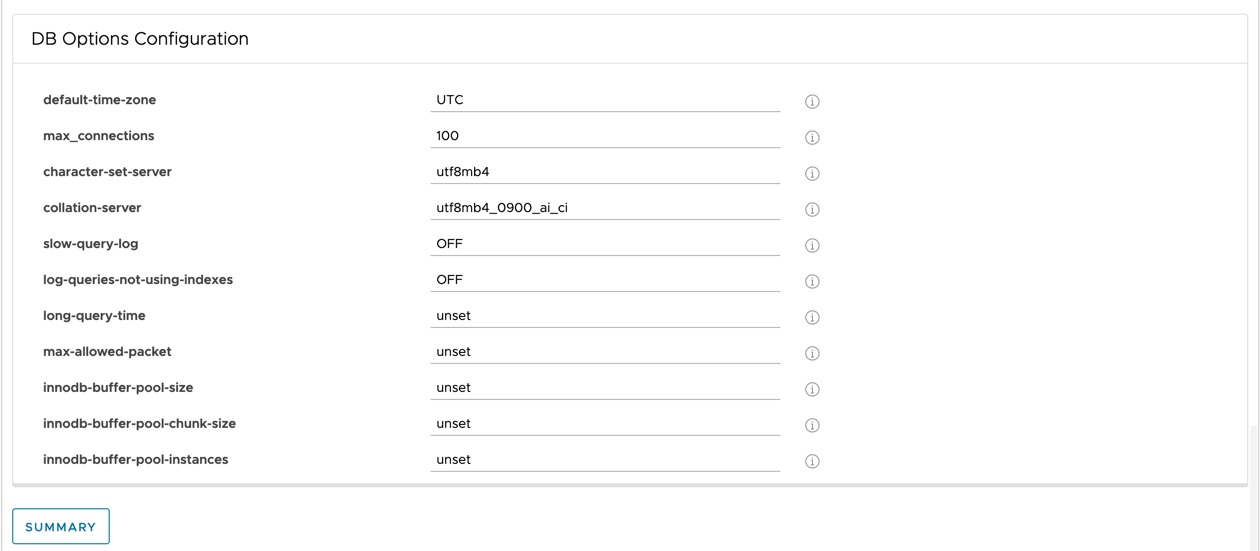
- Configure your specific DB Options
- DB Options Configuration – Configure database engine-specific options:
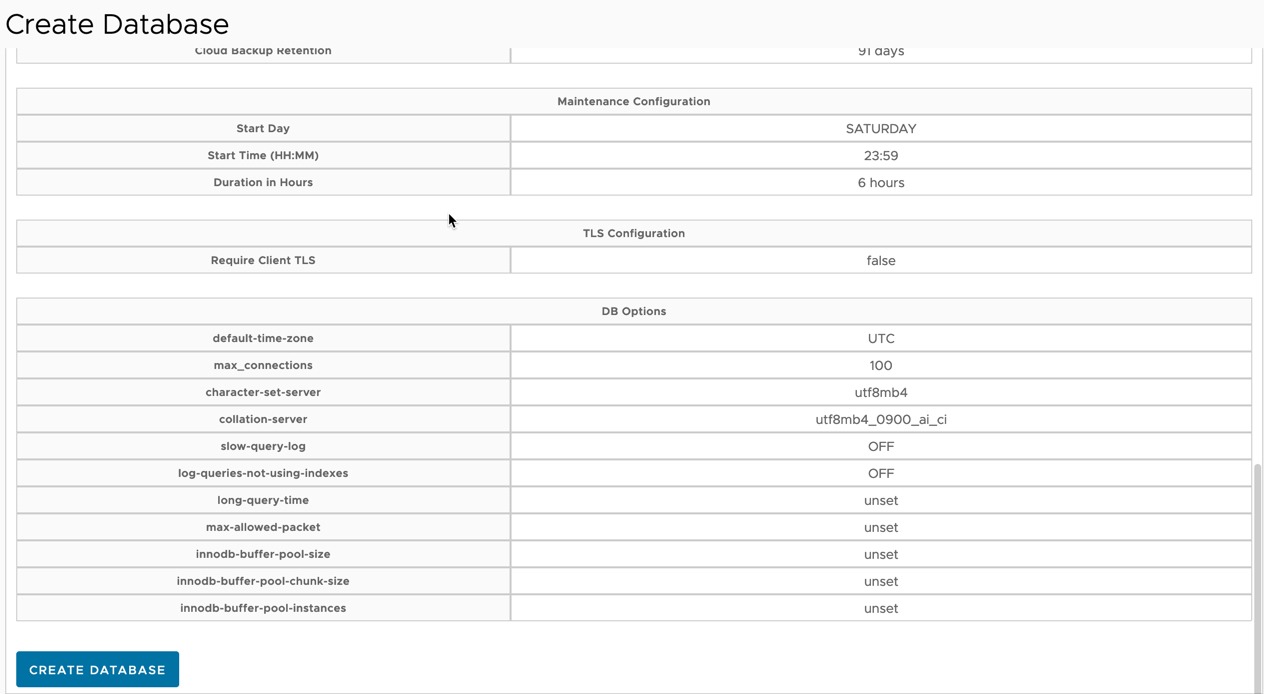
Clicking summary will present you with a total summary of all the options selected. Finish by clicking “Create Database”.
You’ll be taken to the Databases UI again. You should see the new DB instance listed and the status as Init.
You can click the DB instance object to be taken to the UI with more information. If you click the vCenter name in blue this will take you the infrastructure page instead.
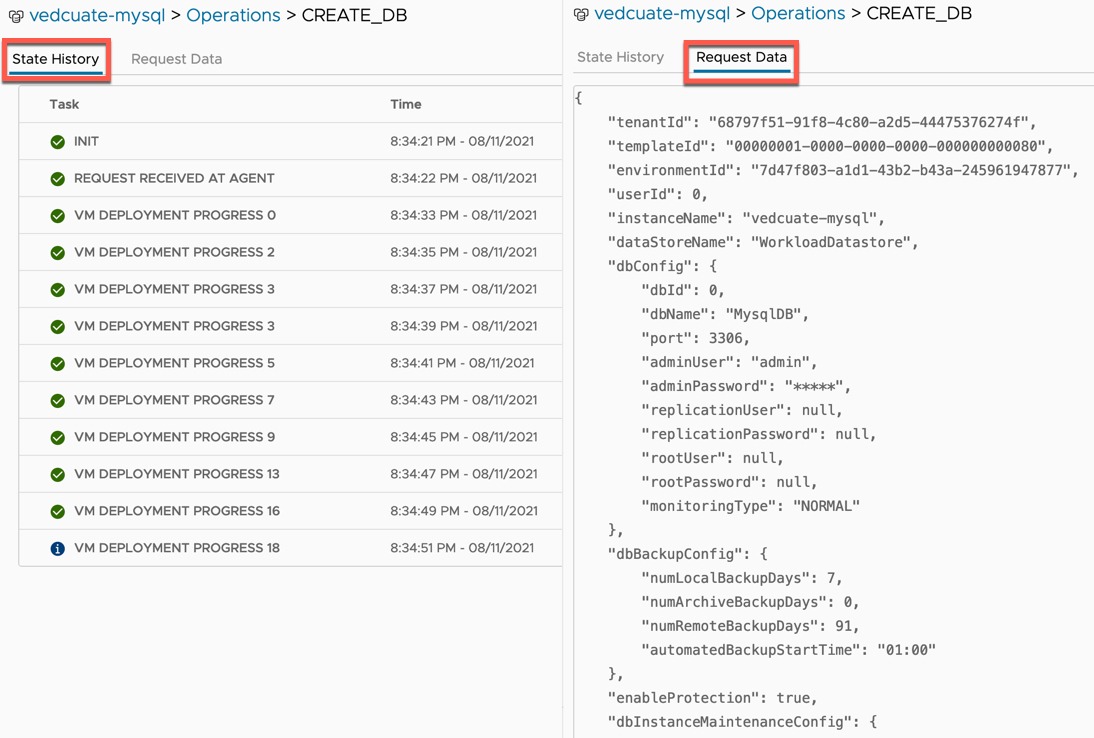
Clicking the Operations tab will show you the progress of the deployment, and you can click this task to find further information.
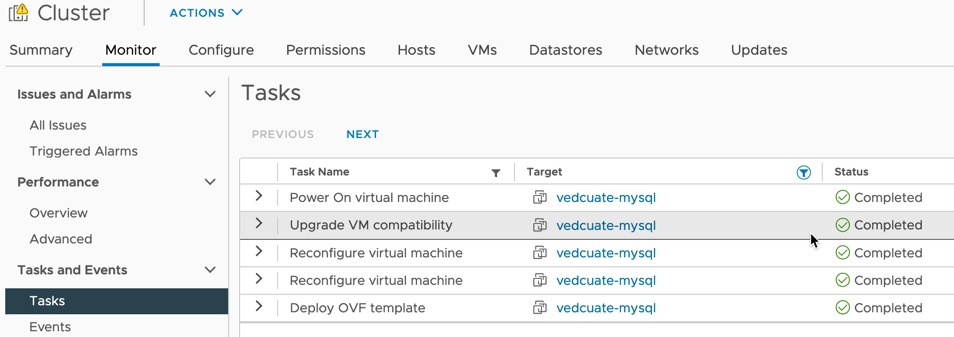
Below we can see the vCenter tasks of the Virtual Machine deployment.
Once the Virtual Machine has been successfully deployed, run its initialisation scripts and reported back to the Agent Appliance, the status will change to Online in the UI.
Managing your Deployed Database
Clicking into the Database instance, you can now see a details screen populated full of information.
Calling out some of the items on the details page:
- In the purple box you can see the details you’ll need to connect to the database instance using your preferred SQL client tool of choice
- You’ll notice the FQDN is that of the DNS suffix provided when you register the agent. If we run an NSLOOKUP from my client machine, we’ll see my main DNS server forward the request to the Agent Appliance for the lookup.
- Database actions include cloning the DB Instance, power off or delete.
- You can configure the TLS setting if not already configured, access the SSL certificates, and regenerate the SSL Certificates.
- Enable SSH access to the Database Instance Virtual Machine
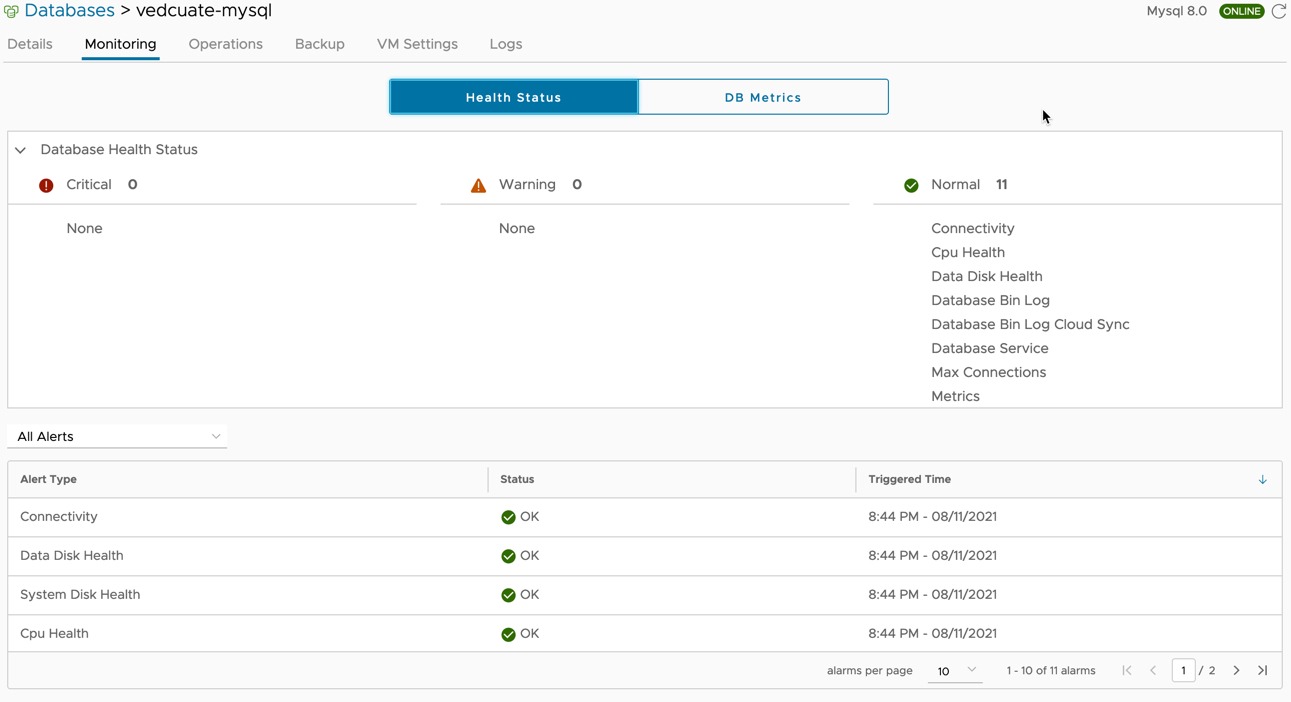
Under Monitoring Tab, you will see the Health status of the Instance appliance and status updates and alerts.
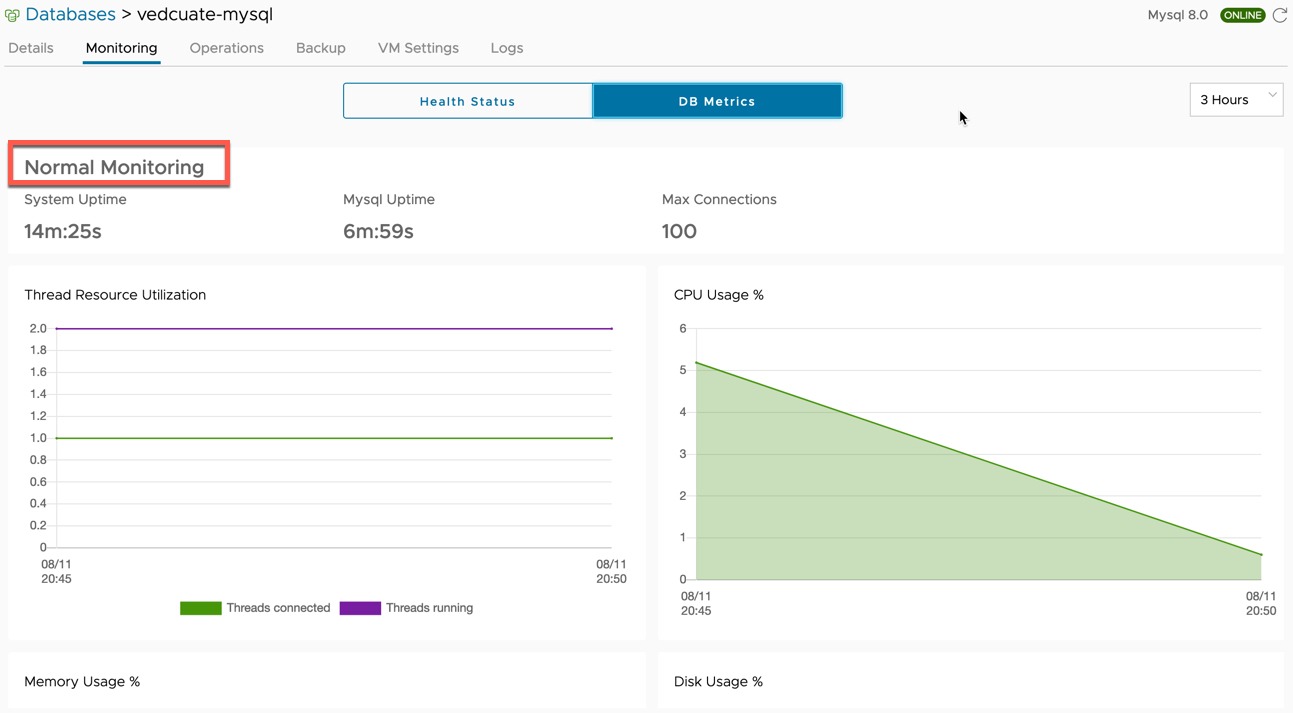
Clicking DB Metrics will show you exactly as the name suggests. You will also see the monitoring configuration (Normal/Enhanced).
Further details of the Service Instance Status details can be found here.
I’ll skip over the Operations Tab as we’ve already looked at this whilst deploying the instance, however for a new instance, an immediate backup will occur to the local S3 bucket and Cloud S3 bucket configured for the Agent Instance.
On the Backup Tab, we can see the schedule.
- Ability to perform an immediate backup
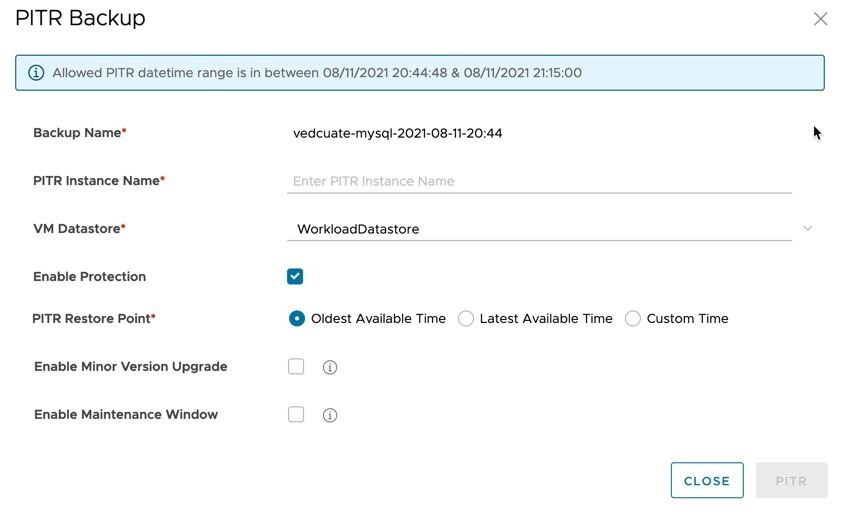
- Ability to perform a full restore of the latest backup or a point-in-time restore
On the VM Settings tab, you can change the compute resources and also extend the disk of the appliance as well.
On the logs tab, you can generate a logs bundle from the Service Instance appliance and download it.
Cloning or Restoring a Database Instance
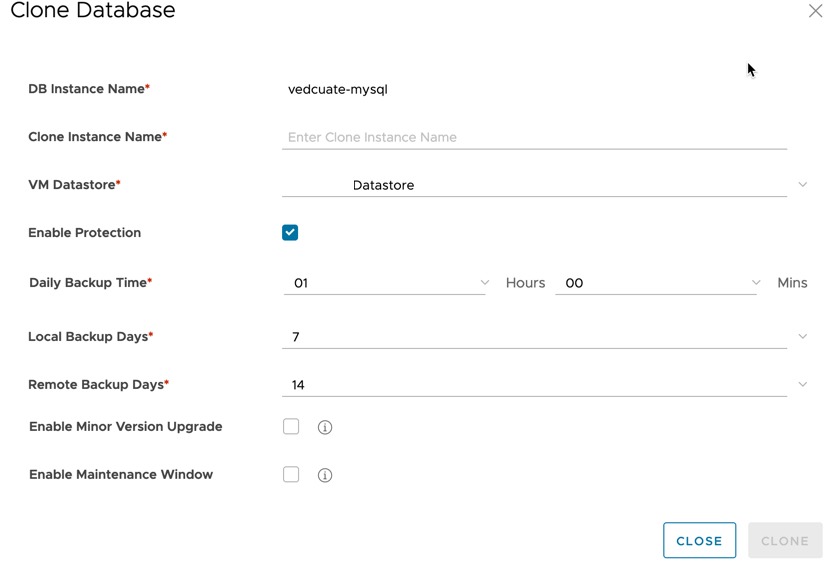
You can clone a new instance of an existing database.
Provide the details as requested, and a new Service Instance Virtual Machine will be created in the vCenter.
The same can be said by selecting one of the restore options as well. A new instance will be deployed.
You can view the events on the Database Operations tab from the left-hand navigation pane.
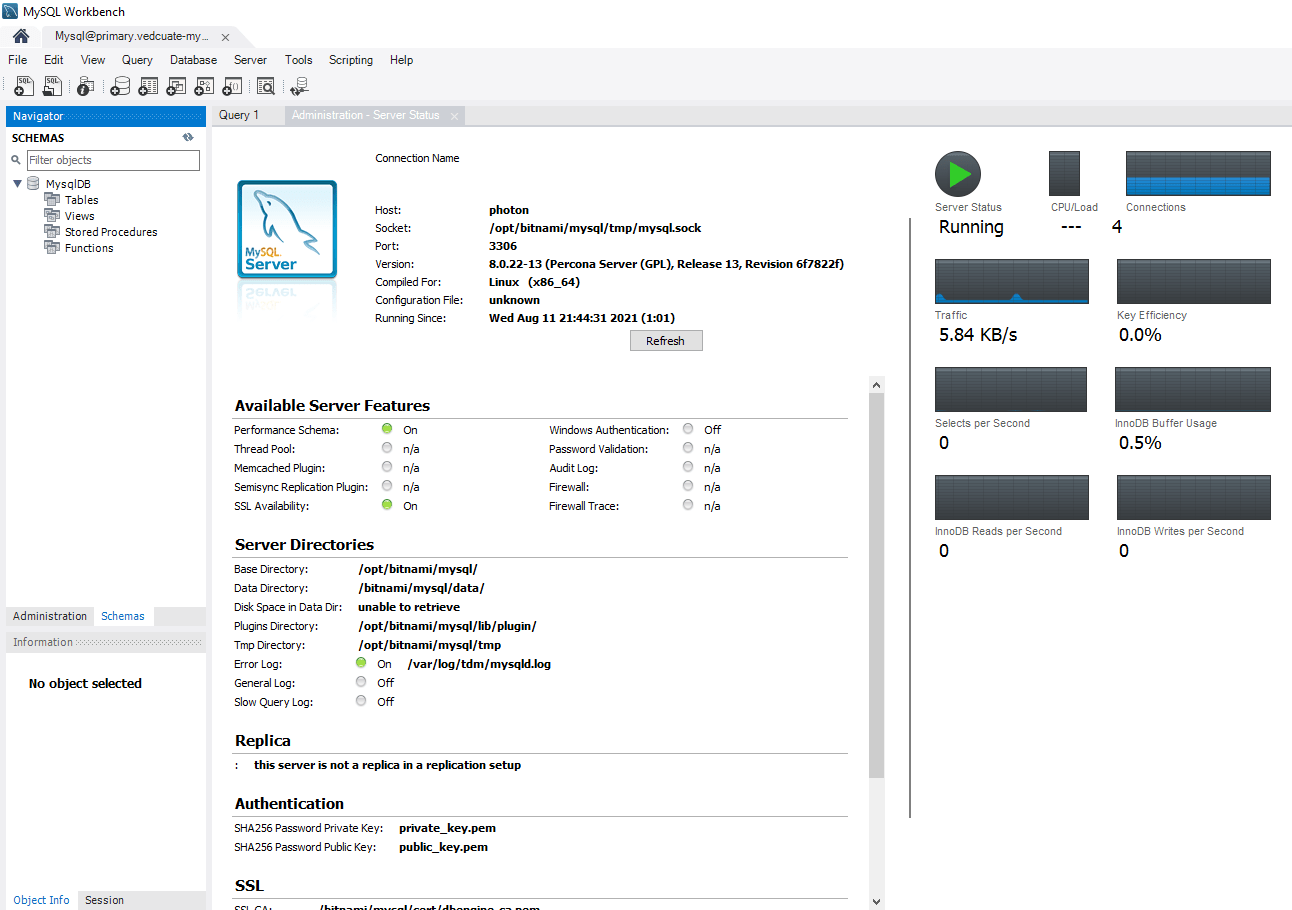
Connecting to a Database Instance
The last piece of the puzzle is connecting to a Database instance. You can do this using the details from the Database Details page and your chosen client.
Wrap-up
Over both blog posts, we have cover how to deploy the Data Management for VMware Tanzu infrastructure, configure the minimum requires to enable the platform to be used by a user to deploy a Database Service Instance on demand. And then as a user use the platform to request a database instance.
I’ve also published a Postman API Collection for the product which you can find below:
This is the first GA release of the offering, so of course there are features we will need to wait for, and the documentation even states platforms such as Kubernetes will be supported to deploy to in the future.
I’m very much looking forward to seeing this product develop in the future.
Regards
