This blog post will cover deploying the infrastructure and components for Data Management for VMware Tanzu.
My second blog post will cover using this infrastructure for Self-Service Database-as-a-Service.
What is Data Management for VMware Tanzu?
Data Management for VMware Tanzu (DMS) is a newly released solution from VMware (July 2021) providing data-as-a-service toolkit for on-demand provisioning & automated management of MySQL and PostreSQL databases on vSphere platforms.
DMS is accessible as both a Graphical UI and via REST API, to meet the needs of administrators and developers and their consumption needs.
With DMS, it provides the ability to create and manage data services through a centralized platform in a self-service fashion, with the following features:
- Simplified management for admins, acting as a Database fleet management tool; presenting a view of the organization’s database instances running on multi-cloud infrastructure.
- Database users have the ability to consume self-service capabilities to create new database instances, or to operate on existing instances safely and securely, without requiring infrastructure or database expertise.
- DMS also provides full automation for provisioning data service instances, backups, security patches, and periodic updates of the data service engine.
Understanding the components
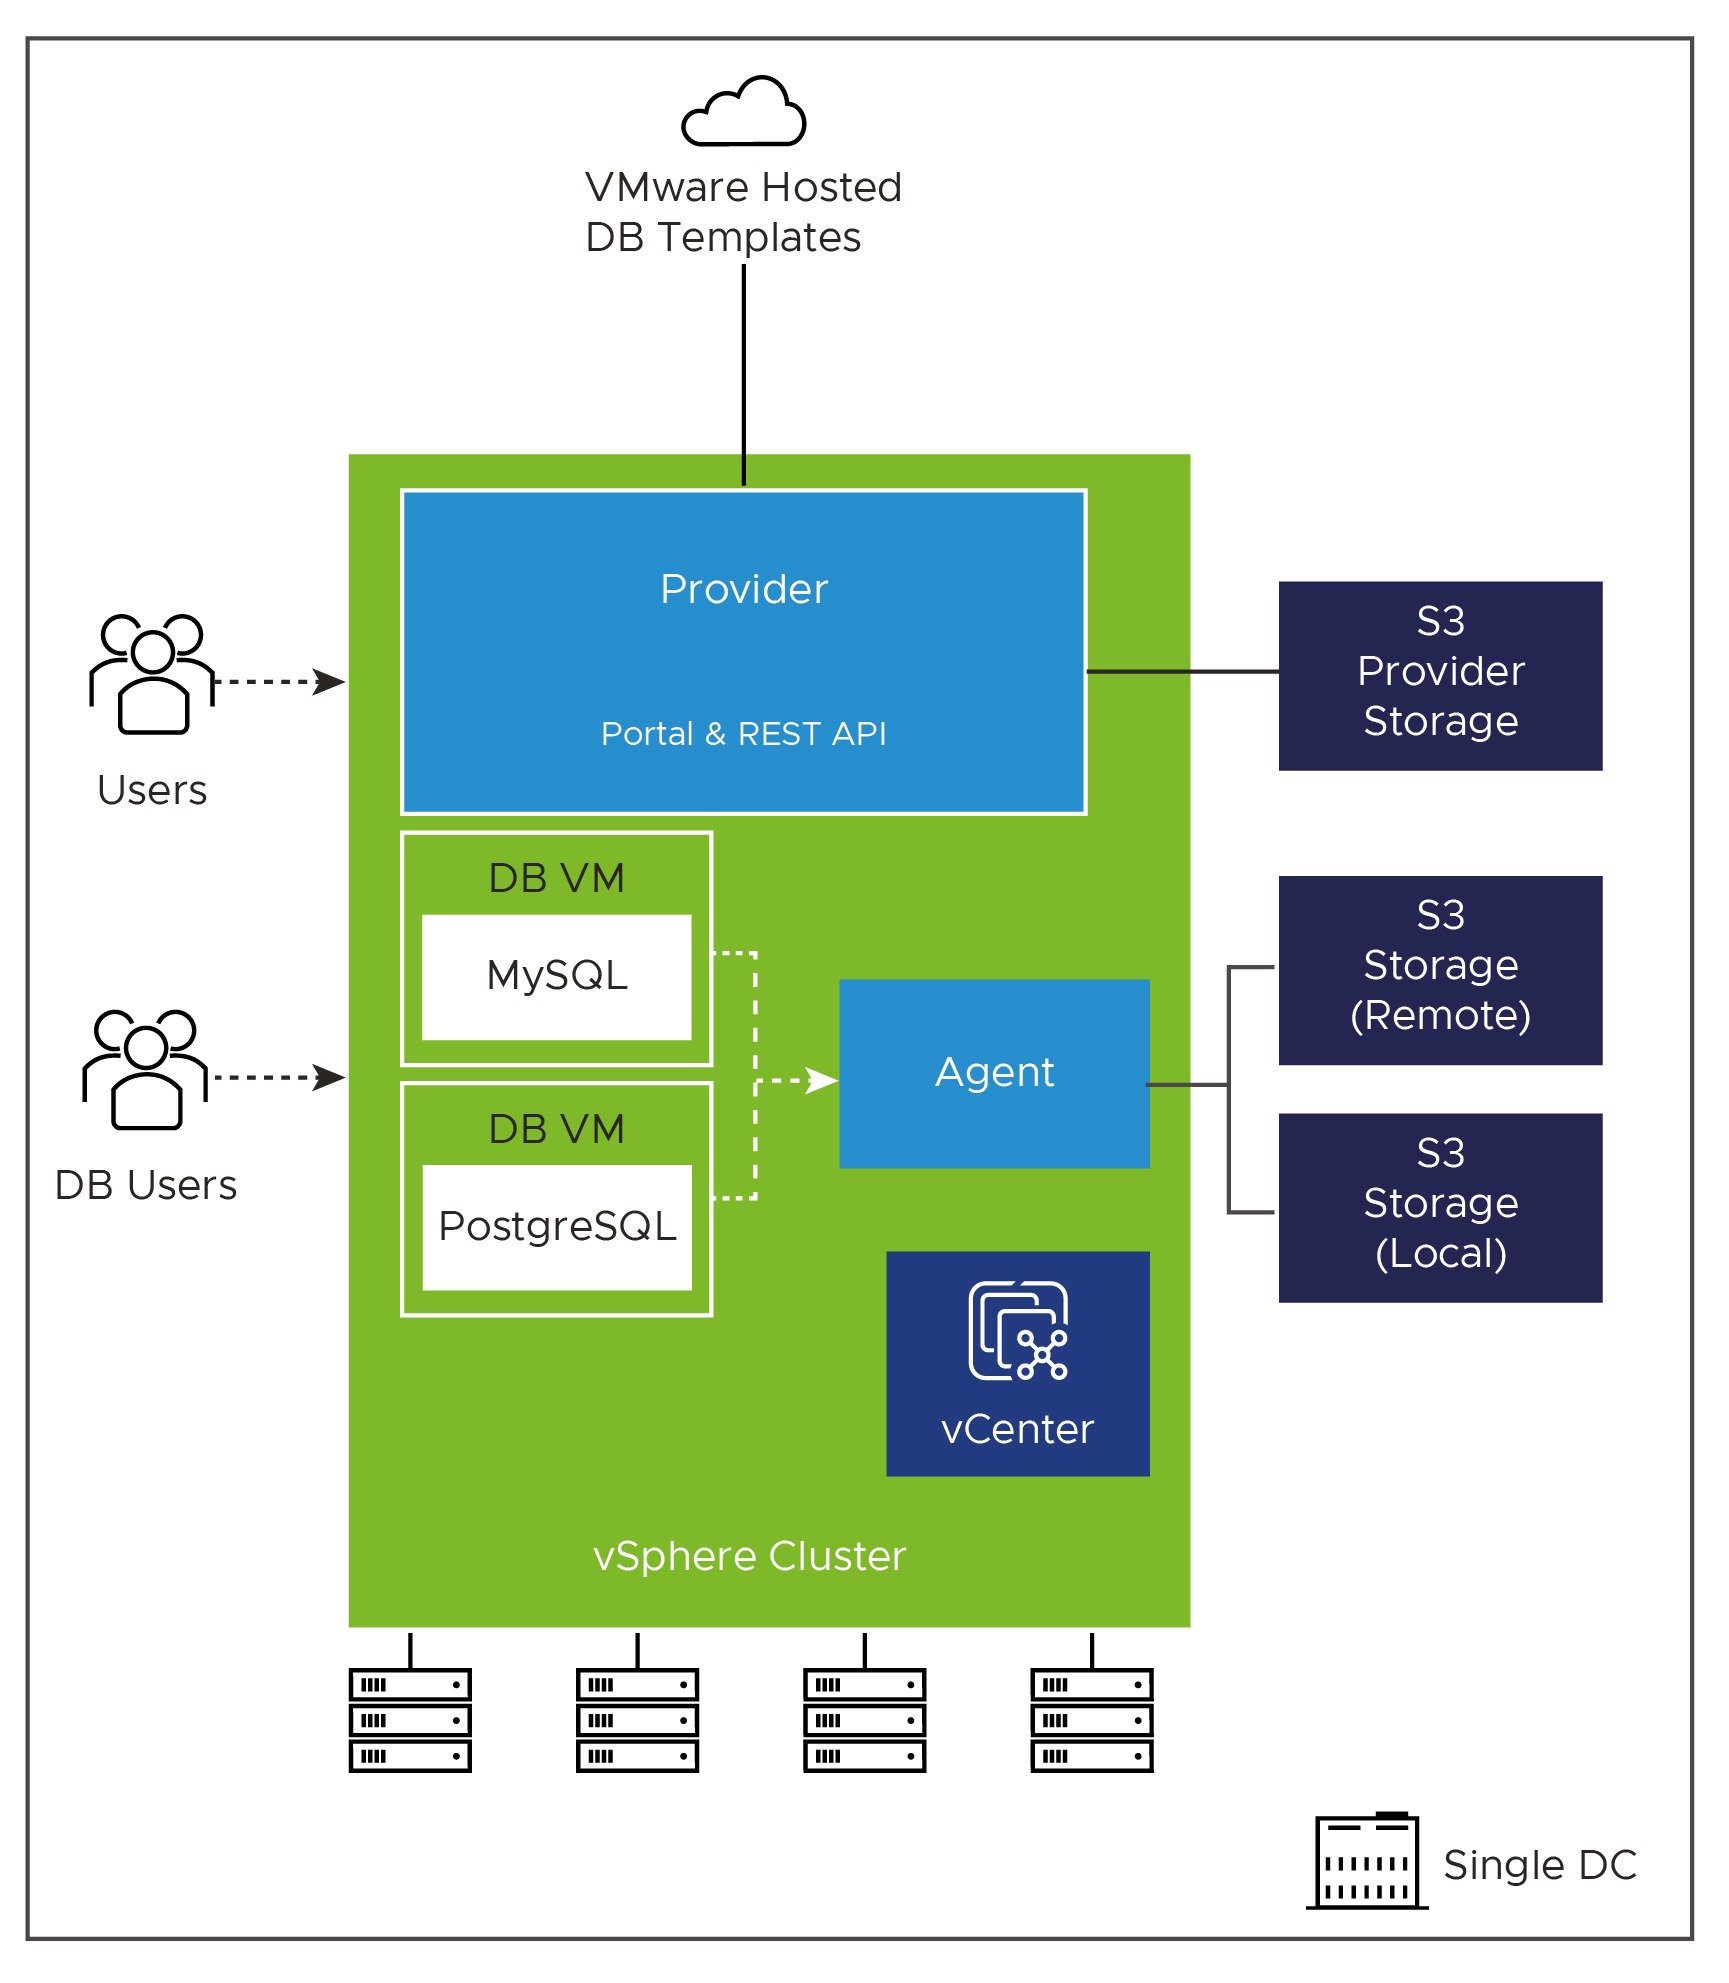
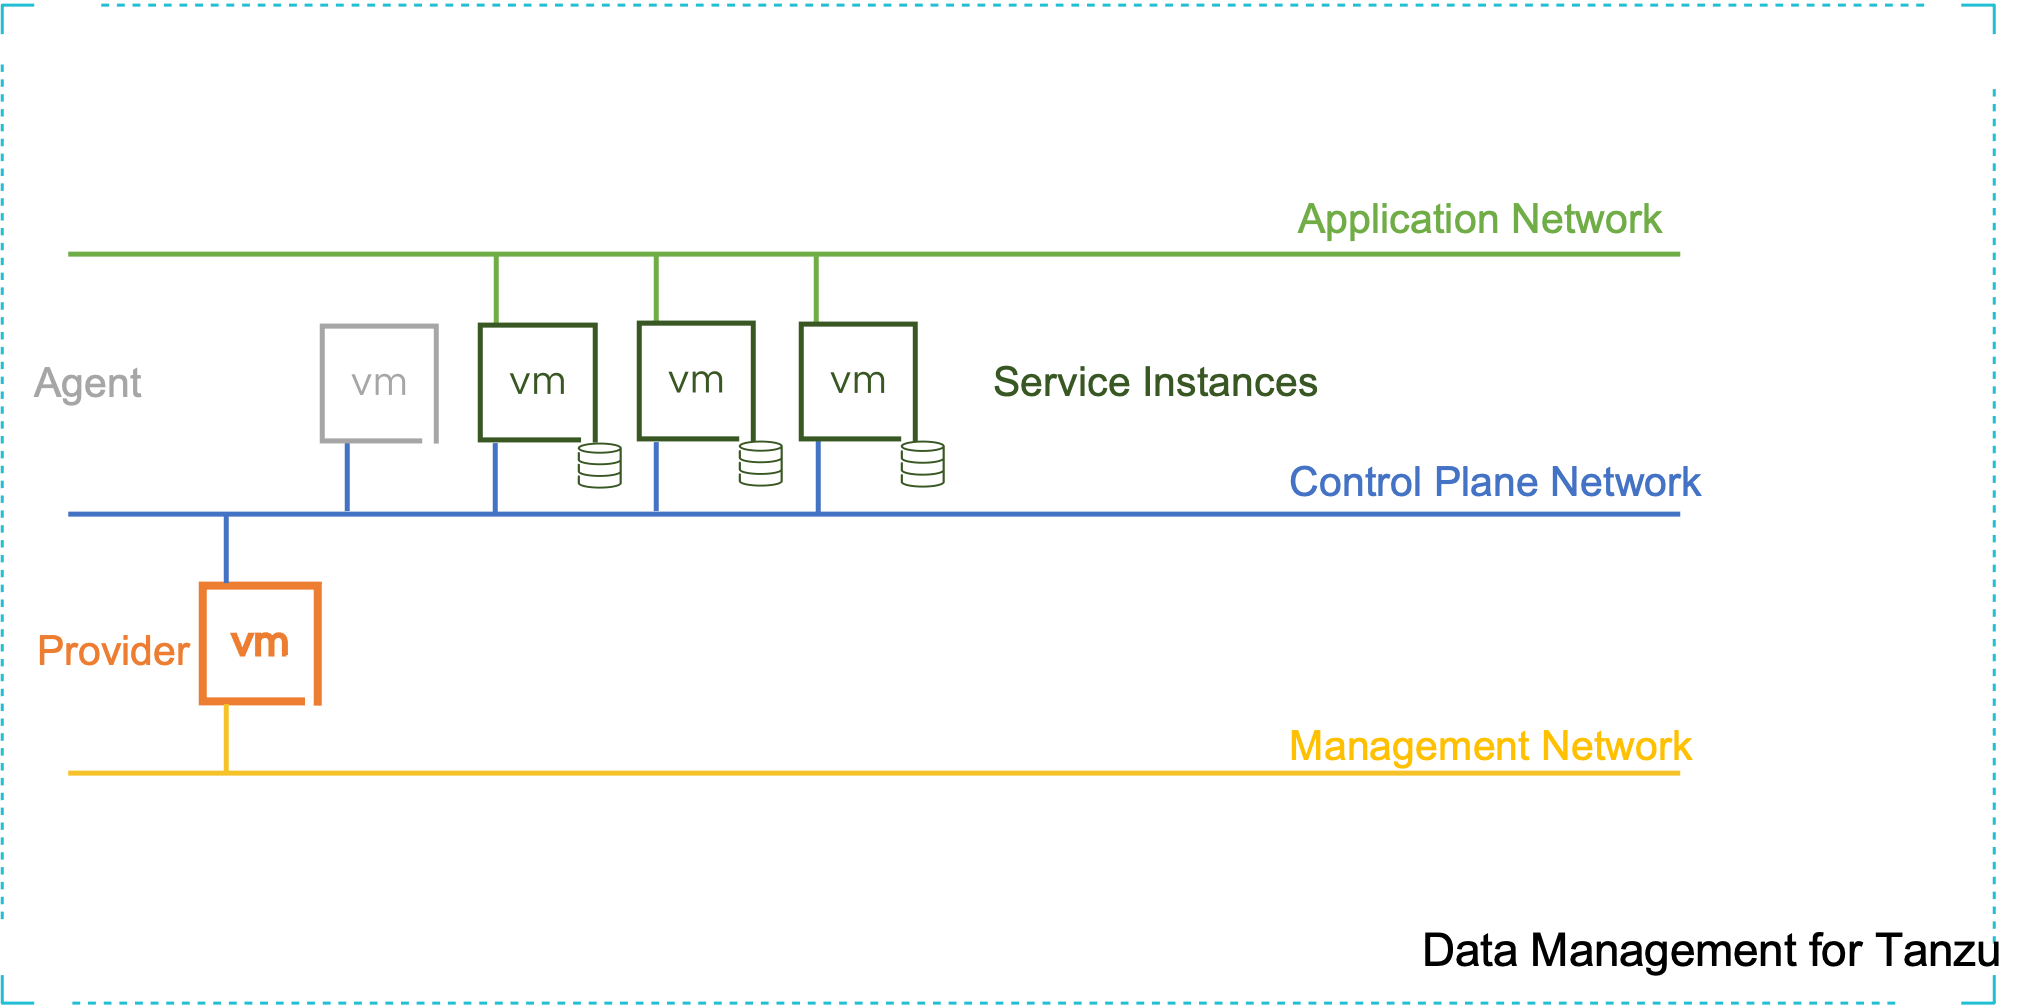
DMS is made up of the following architectural components:
- Provider – this is the core appliance you will deploy, which offers the central UI and API for all users to interact with the Data services and functions. It acts as the control plane to the other components.
- Agent – These appliances are deployed to extend the control plan into the various vSphere environments, providing a point of presence for provisioning and management operations of the Services deployed.
- Service – These are photon appliances which host the deployed instance of the data service (database). They communicate with the Agent that deployed them, via a private API. DMS supports the deployment of MySQL and PostgreSQL currently.
- Template Repo – publishes a set of Data Management for VMware Tanzu Database Templates on Tanzu Network. The provider will poll the Tanzu Network periodically for new templates. There is also a method to handle air-gap environments.
S3 storage is required to be used for several items such as location to store the templates, database configurations and database backups.
Full deployment models for the components can be found here.
Understanding Organisations and User Access
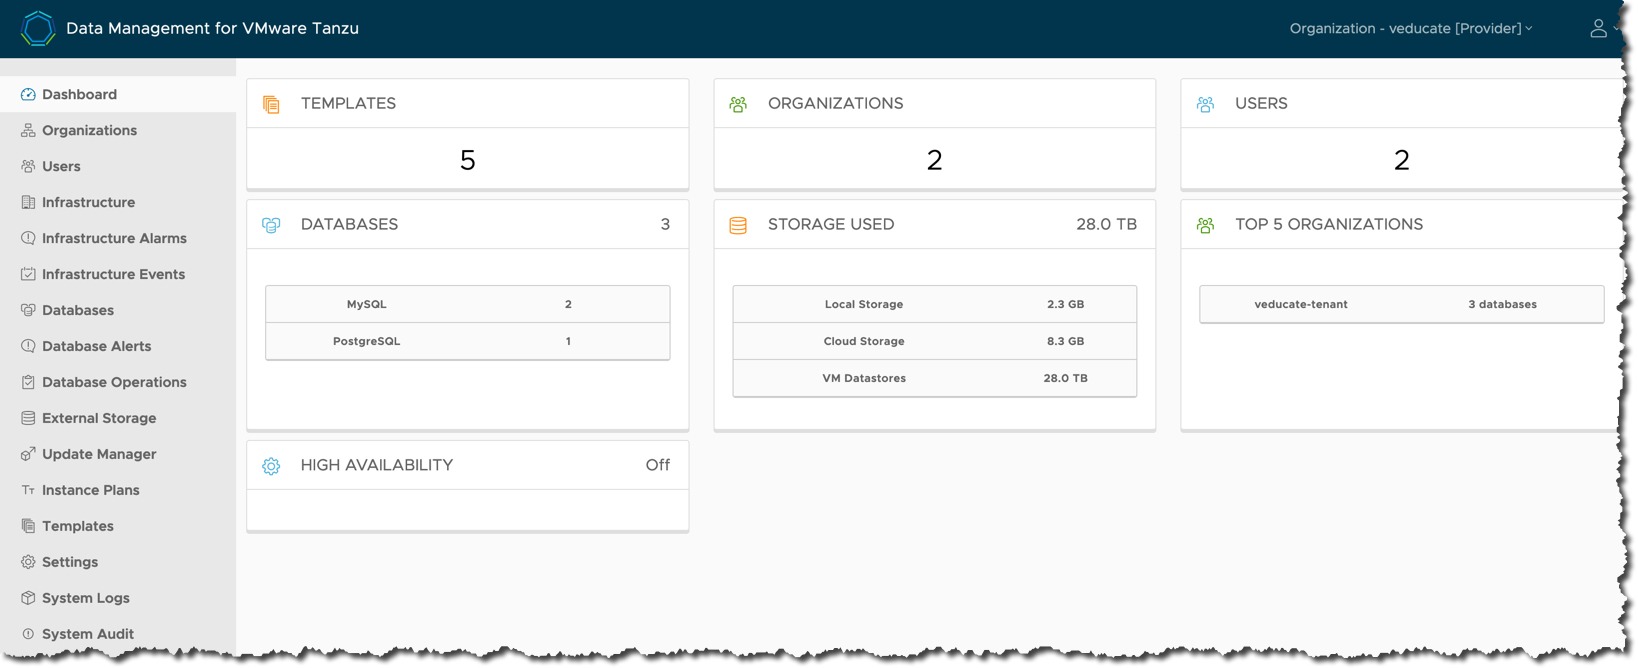
DMS implements the concept of Organisations to provide a logical grouping of users. There are two types:
- Provider Org – A type of organization to which one or more Provider Administrator user belongs.
- One provider org can exist in a single DMS installation.
- This is automatically created during the deployment of the Provider Appliance
- The Provider Org name is the company name specified at deployment.
- Agent Org – A type of organization with one or more Organization Administrator or Organization User members.
- These orgs are created via the DMS UI/API once the Provider appliance has been deployed and can be created at any time.
DMS pre-defines these three user roles:
- Provider Administrator
- This is the single Provider Role in the installation
- Among other tasks, users in this role can import additional Provider Administrator users, create organizations, and create and import organization users
- Organization Administrator
- Organization User
The Provider Administrator user will assign a role to each DMS user that they create or import in an organization.
A user that is assigned the Organization Administrator role can manage all services in the organization to which they belong. A user assigned the Organization User can manage only the services that they provision.
More detailed information on the User roles and responsibilities can be found here.
Getting Started
Now first and foremost, I’ll point you towards the official documentation to use as a reference to review alongside this blog post.
Prerequisites
There are always several things to get sorted before you ever dive right in! The official requirements are detailed here, I’m going to call out some of the more finicky pieces you need to be aware of.
Networking
You will need to have three network segments available to be deployed to:
- Management Network
- The Provider Appliance management interface will sit on this network. This will be the subnet that the Agent Appliance contacts the Provider on. A static IP is required for the Provider.
- Control Plane Network
- The Provider Appliance will have an interface in this subnet, so that the RabbitMQ services can interface with the Agent Appliance.
- The Service Instances (Database VMs) will also connect to this network to be managed by the Agent Appliance.
- DHCP and Reservation/Static IP allocation is needed on this network.
- Application Network
- This is the subnet which the Database Appliances (Service Instances) are deployed to, and the DB users will access the Database services
The Provider and Agent require access to certain external components to function completely and correctly:
- The Provider requires access to Tanzu Network, S3-compatible object storage, and an NTP service. You can optionally configure the Provider to access an LDAP server, SMTP server, and Elastic Search.
- The Agent requires access to the Provider, vCenter, S3-compatible object storage, an NTP service, and Telegraf (monitoring).
DNS + NTP
This is quite a key one, as ever. You need DNS to be accessible for the provider and the agent appliances.
The Service Instances are a little more “interesting”. They will use the Agent appliances as their DNS, and run under their own domain suffix, for example, “db.local”.
Therefore, on your main DNS servers you need to create a forwarder to the agents to resolve these domains. As your DB users will be connecting to something like, “mysql.db.local” potentially.
More details can be found here.
Deploying the Provider and Agent VMs using Terraform
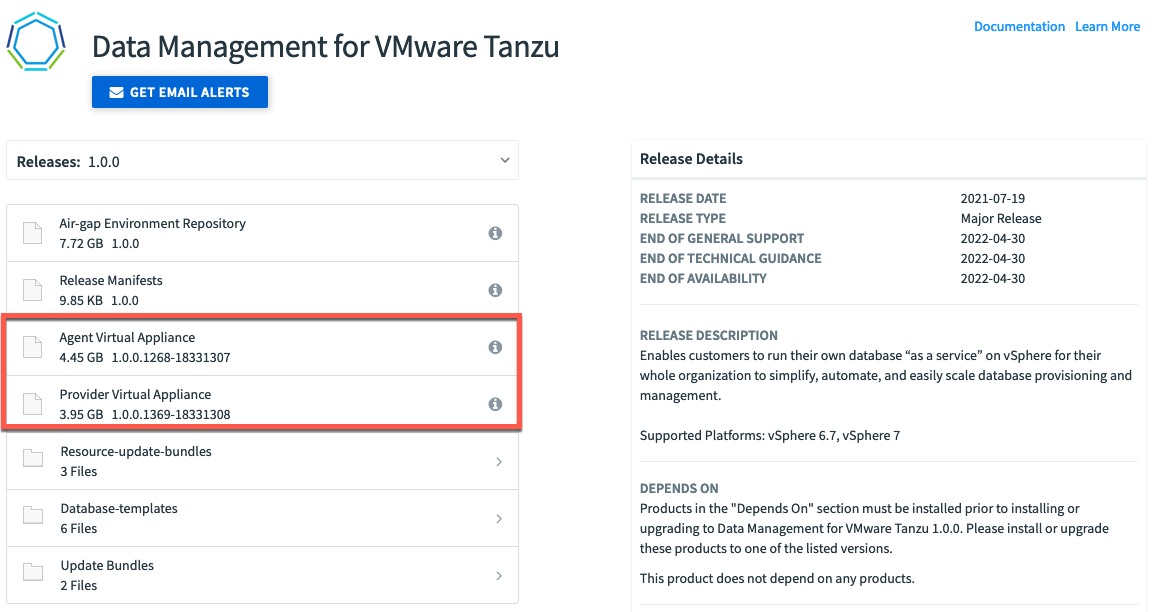
Download the necessary files from the Tanzu Network. At minimum you’ll need the two OVA files. If you’re looking to use this in an Air-Gap environment, see this documentation.
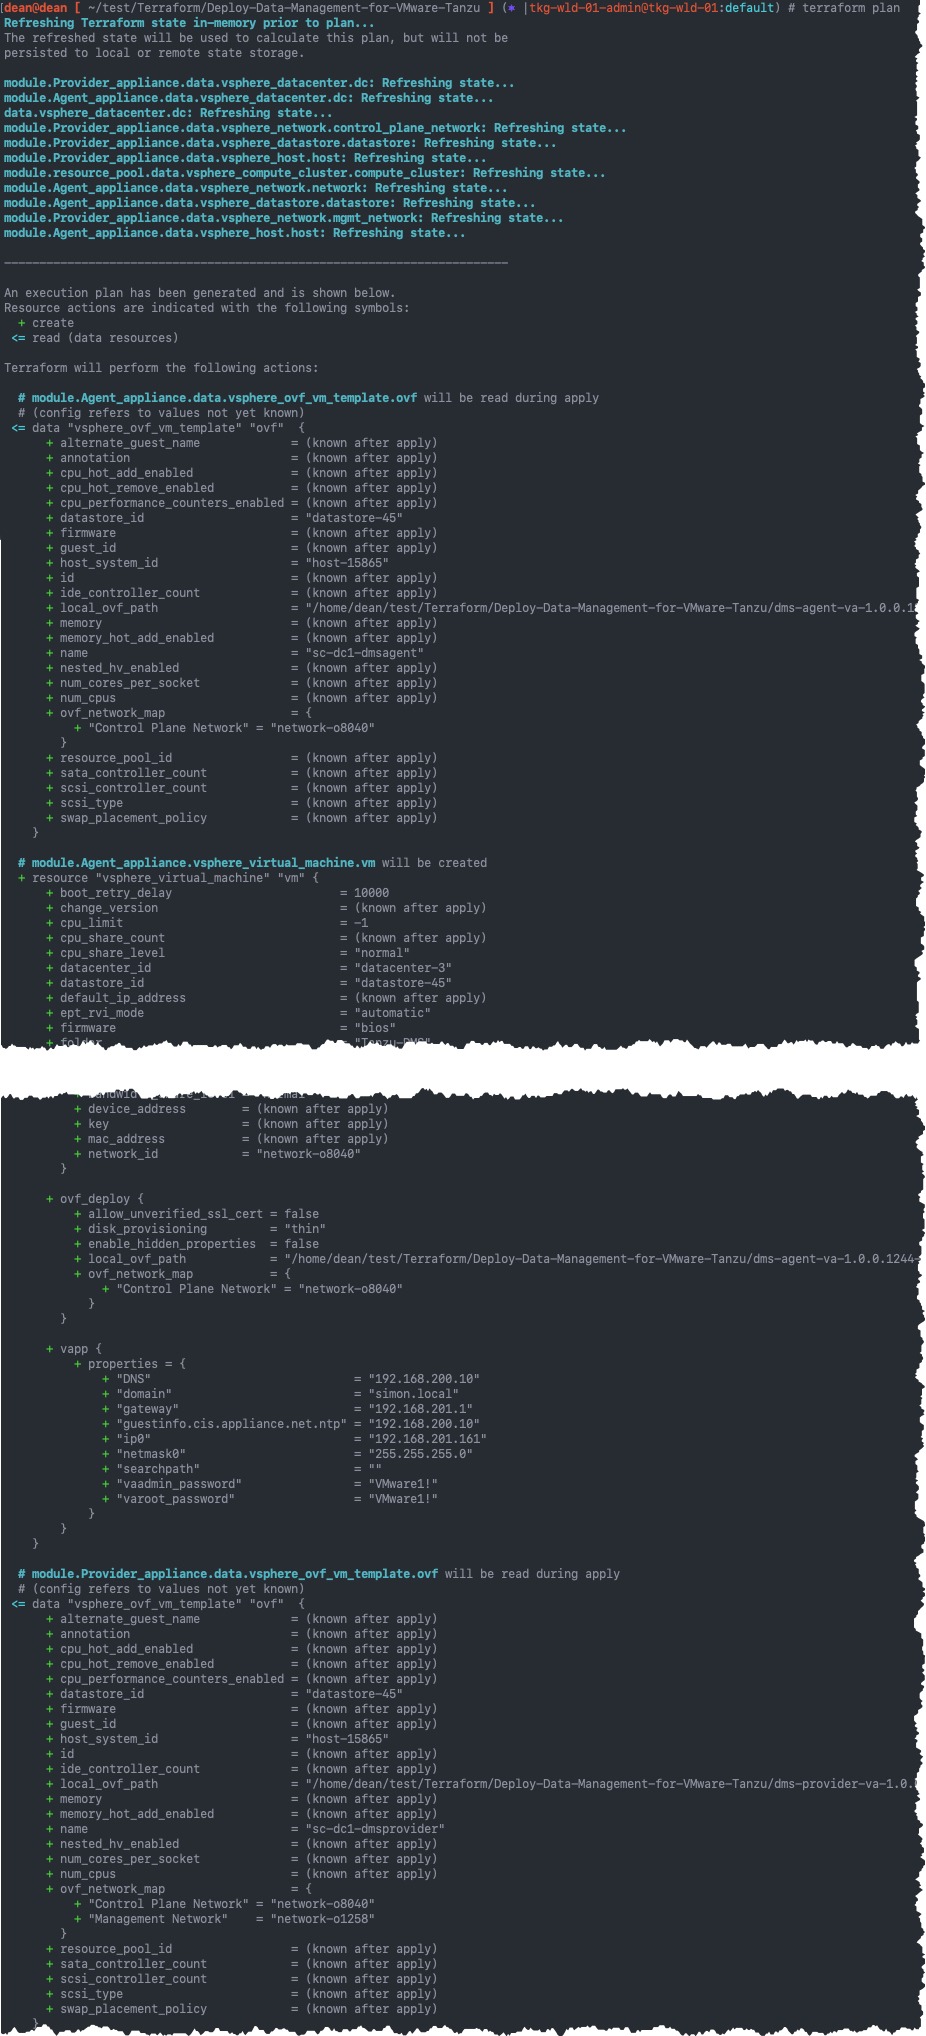
To deploy a single Provider Appliance and Agent Appliance (or VMs if you prefer), I created a terraform script to do this to make it a repeatable easy process. You can deploy the OVA files directly in the vCenter UI or using alternative tooling if you wish.
The process is simple enough. From a bastion host which can access your vCenter environment, run the terraform module after filling out the variables in the “terraform.tfvars” file.
If you have never used Terraform before, then I recommend this link to get started. Below is a shortened output of the “terraform plan” command showing the Virtual Machine that will be created.
Configuring the Provider VM
Here I am going to configure the bare minimum setup for the Provider so that I can onboard an Agent Appliance and then deploy a Service Instance.
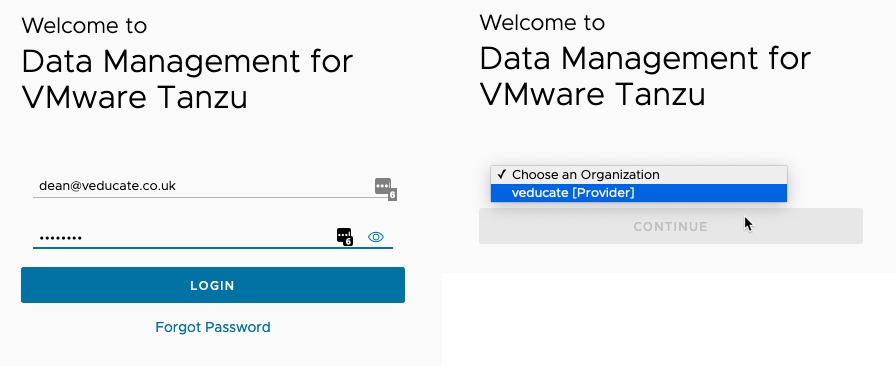
- Log Into the Provider UI via FQDN or IP address
- The Username is the email address you set for the OVA during deployment.
- Choose the Organisation (Company name provided when deploying the VM) and continue
- Select Organisations > Create Organisation
- Fill out the details as needed
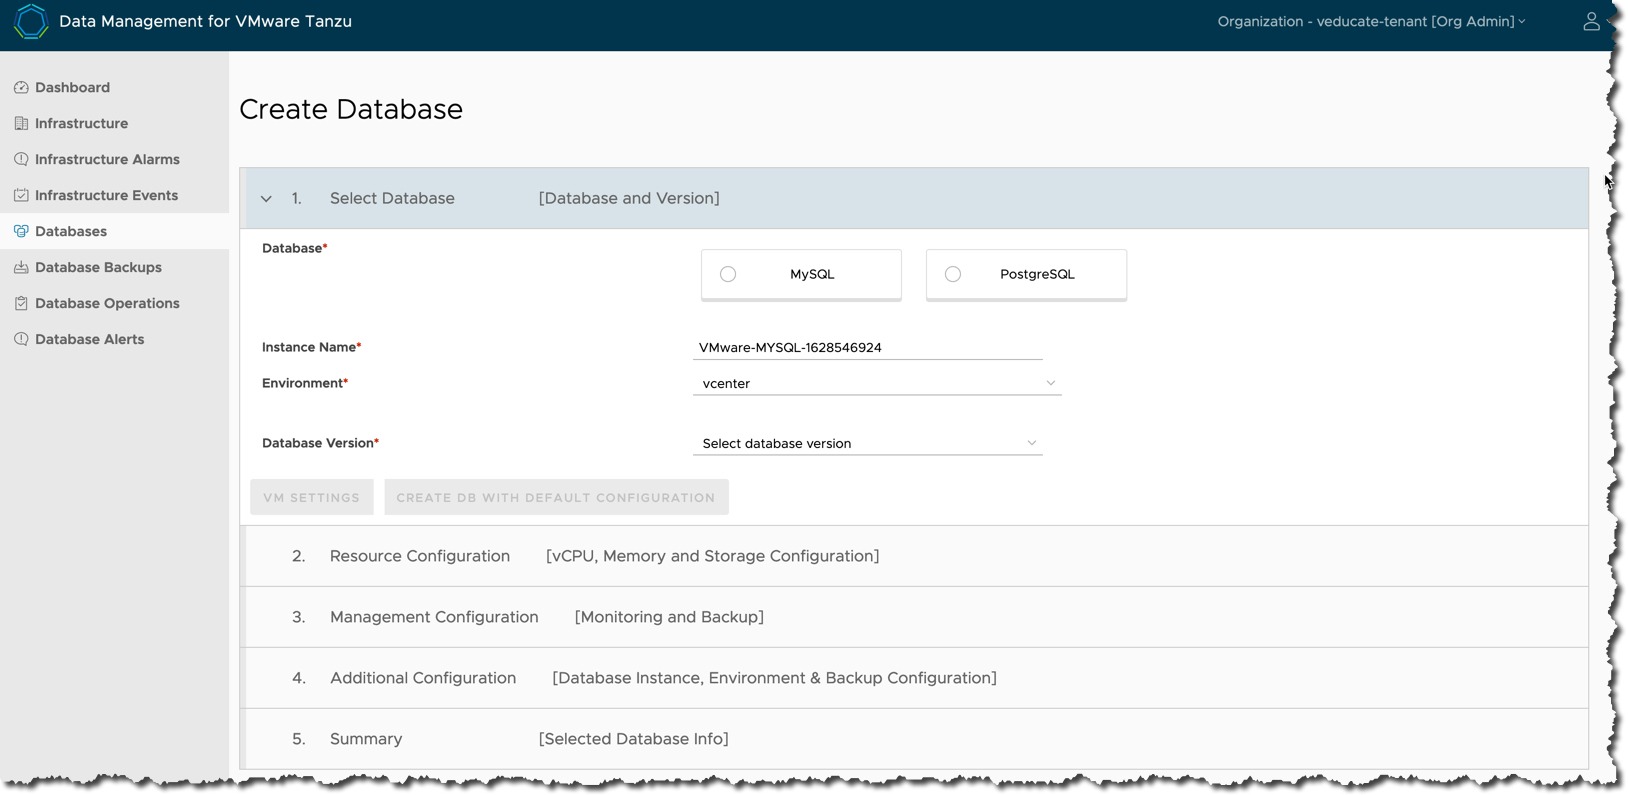
Let’s cover the “Instance Configuration Mode”. This is the options available to the Users who request a Service Instance to be deployed, can they specify the resources they want the instance to have (CPU, Memory, Storage), this is Free Mode. Or can they select only from T-Shirt sizes, this is Plans mode. You can change this configuration after an organisation has been created.
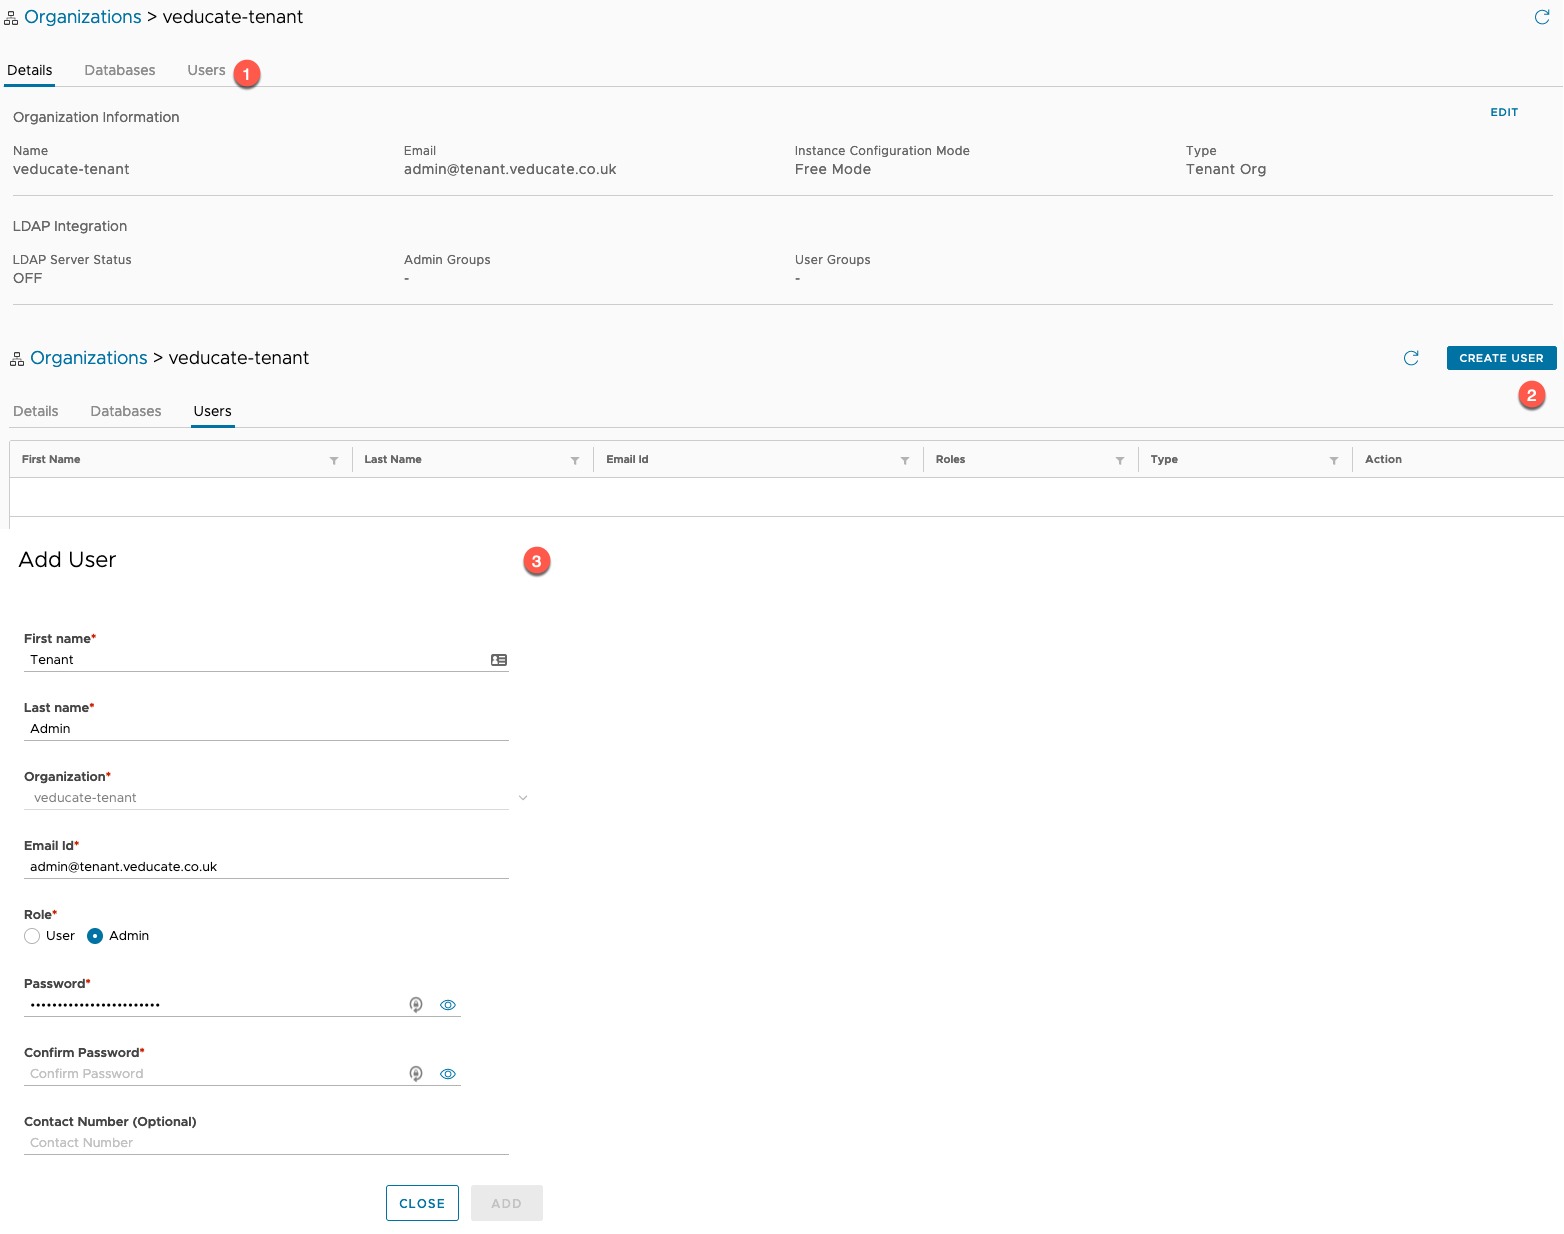
Now we will click into our newly created organisation and create a User.
Admin Users are the only role who can onboard an Agent Appliance to the Provider. So this is what we’ll be creating.
- Click on the Users Tab
- Click Create user
- Fill out the necessary information and click Add.
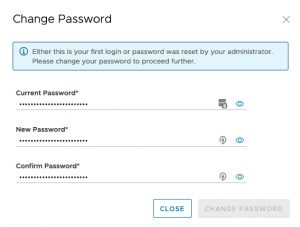
Before we can use this account, the User account password is set to “Change upon next login”. So, we’ll fix that when we move to the Agent onboarding steps.
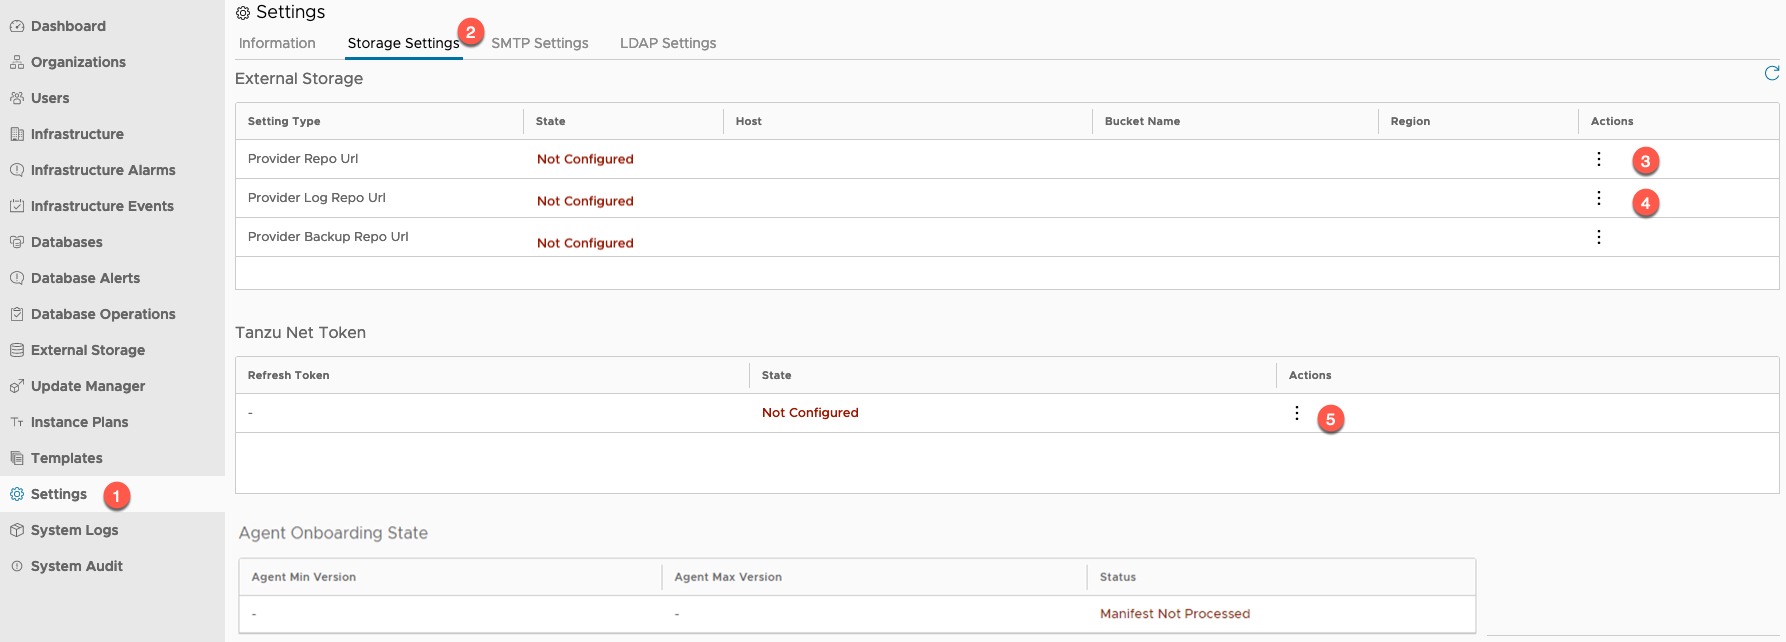
Next, we need to configure the Provider Storage settings, which will host the content and templates to enable an Agent Appliance to be on-boarded.
- Select Settings from the left-hand navigation pane
- Select the Storage Settings Tab
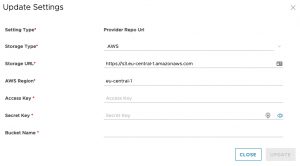
- Under External Storage at a minimum, you need to configure S3 storage for:
- Provider Repo URL
- Provider Log Repo URL
- I would recommend setting the Backup Repo as default anyway
- Configure the Tanzu Net Token so the SQL Templates can be downloaded from the online repository.
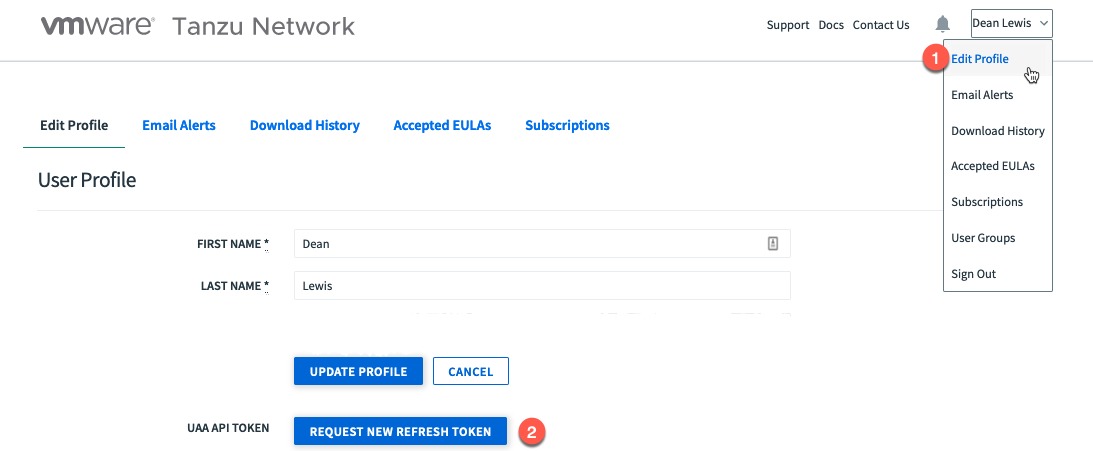
- Login to the Tanzu Network > Click your Name in the top right-hand corner > Edit Profile > Next to “UAA API token” Click “Request new refresh Token”
- If you are using an Air Gap environment ignore this step and follow these steps.
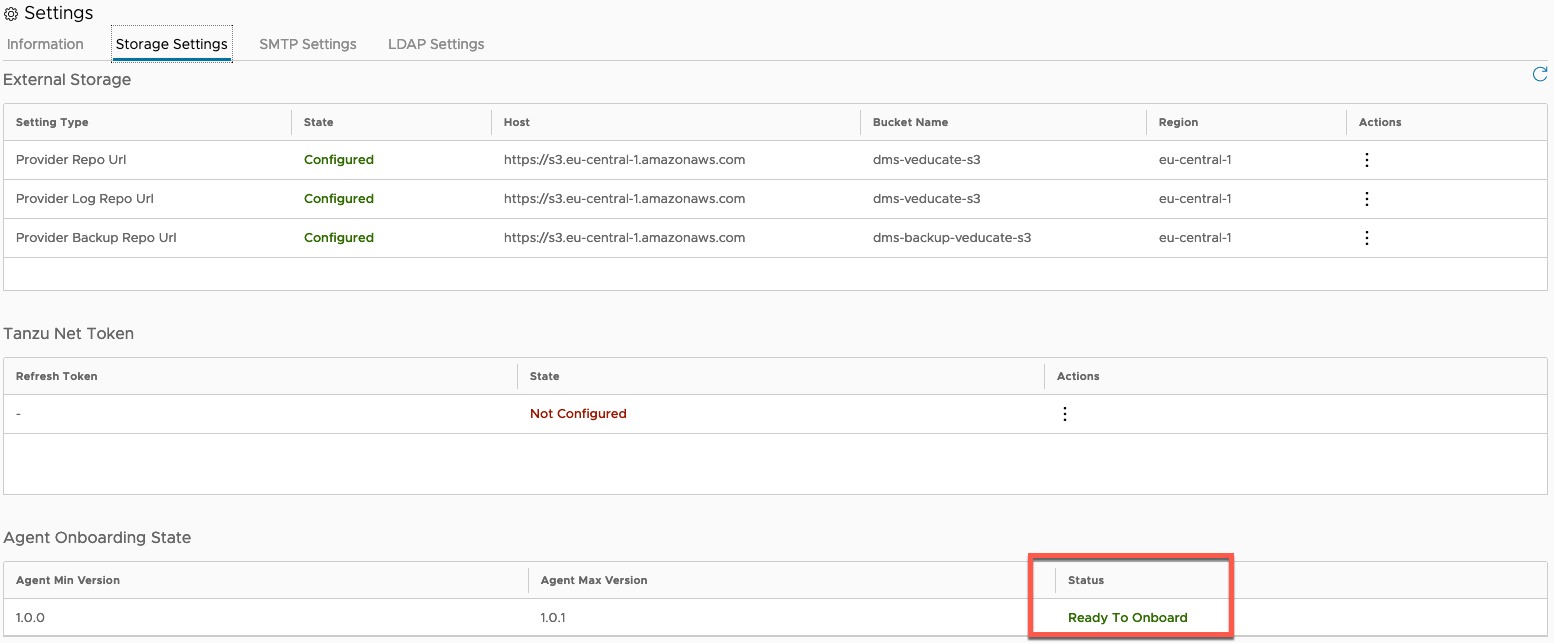
Once you’ve configured these settings, you need to wait for the Agent Onboarding State to change. This can take some time if the Provider is pulling down the data from Tanzu Network.
Below you can see my completed configuration with the Agent Onboarding State status showing as “Ready To Onboard”. (I used an air-gap setup; hence the Tanzu Net Token is not configured).
Configuring the Agent VM
First, we need to reset the Organisation Admin password for our new Tenant User we created earlier.
Log out of the Provider DMS interface, and log in as the Organisation Admin, you will be prompted to change the password straight away.
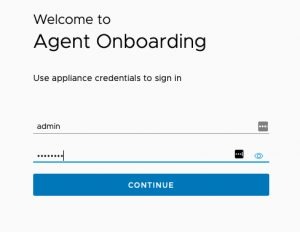
Now open a web browser tab to the Agent IP address or FQDN.
- https://{agent_ip/fqdn}
- Login with the username “admin” and password you configured during the OVA deployment.
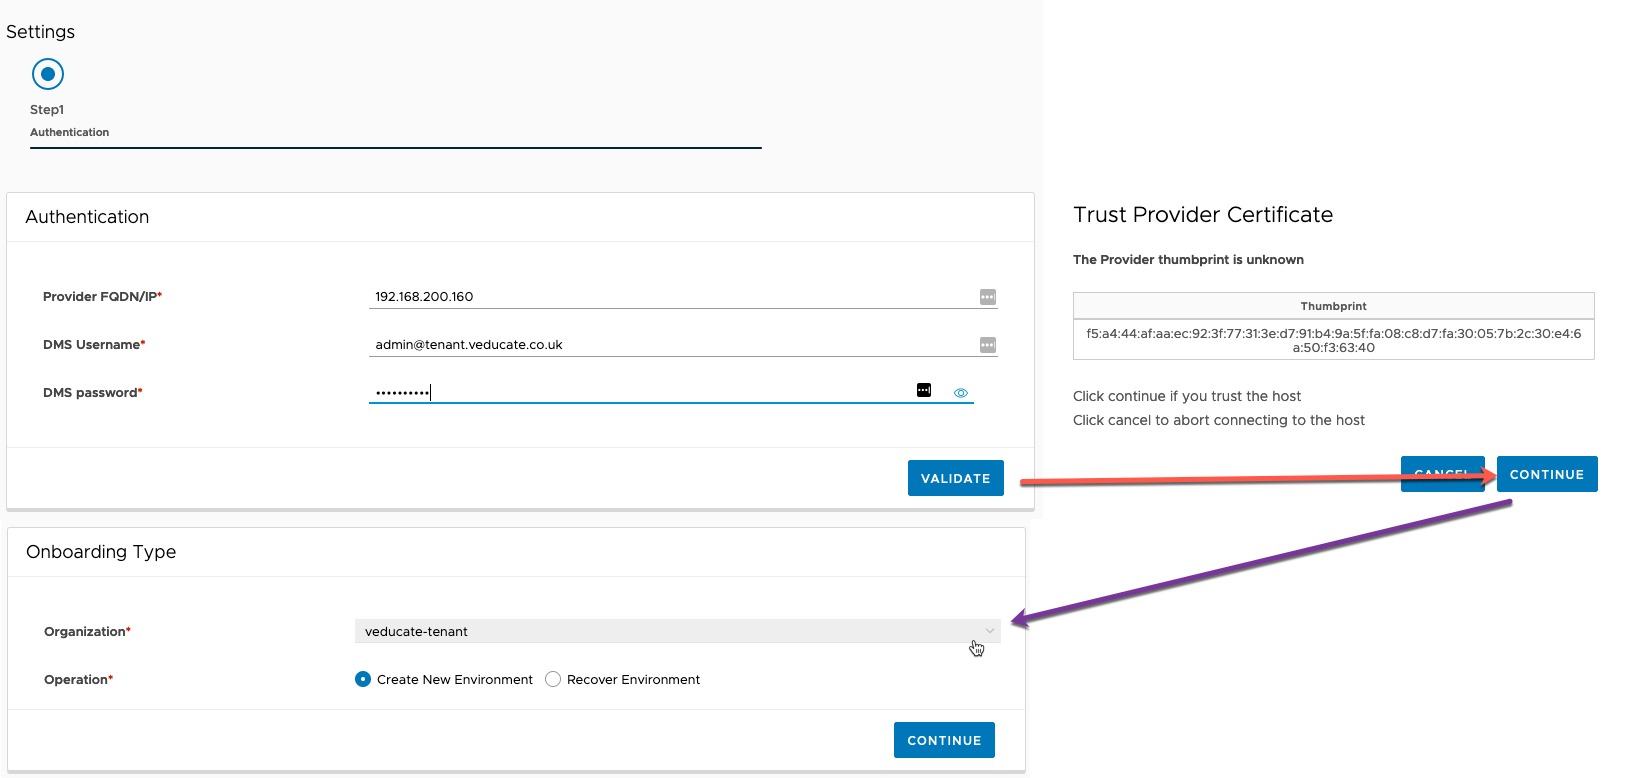
- Input the Provider details that the Agent connecting to.
- Accept the SSL Certificate
- Select the Organisation you want to register the agent against and select “Create New Environment”
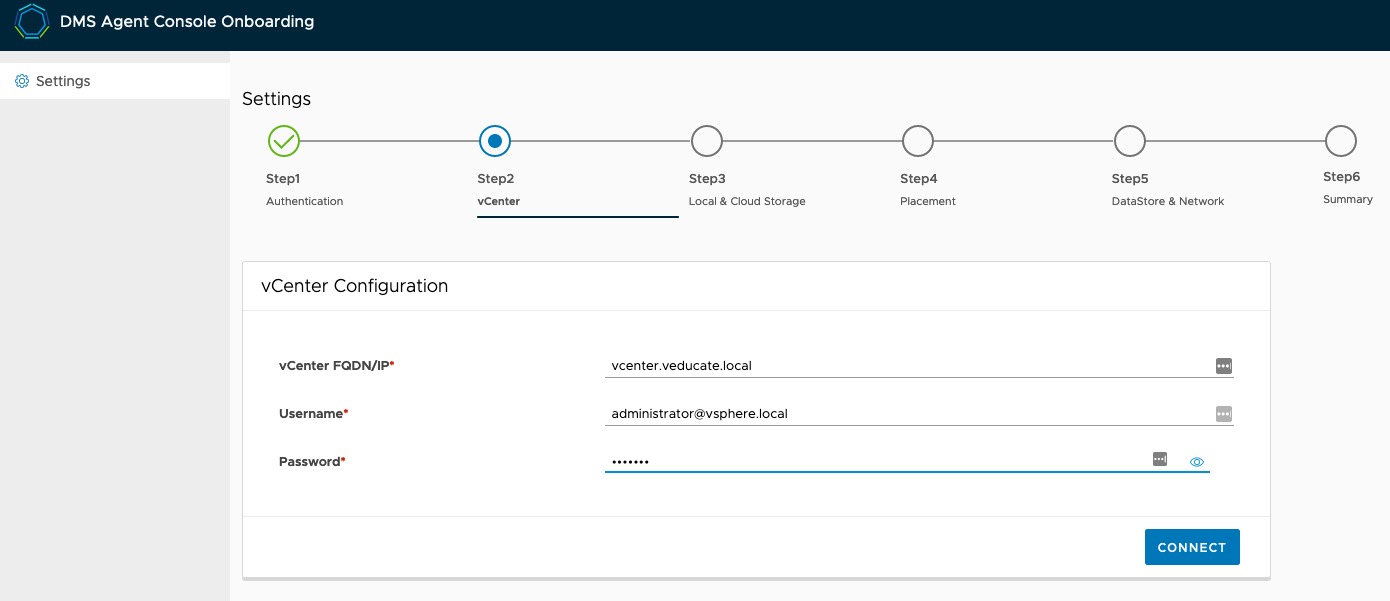
- Input the vCenter details that the Agent will be provisioning services to
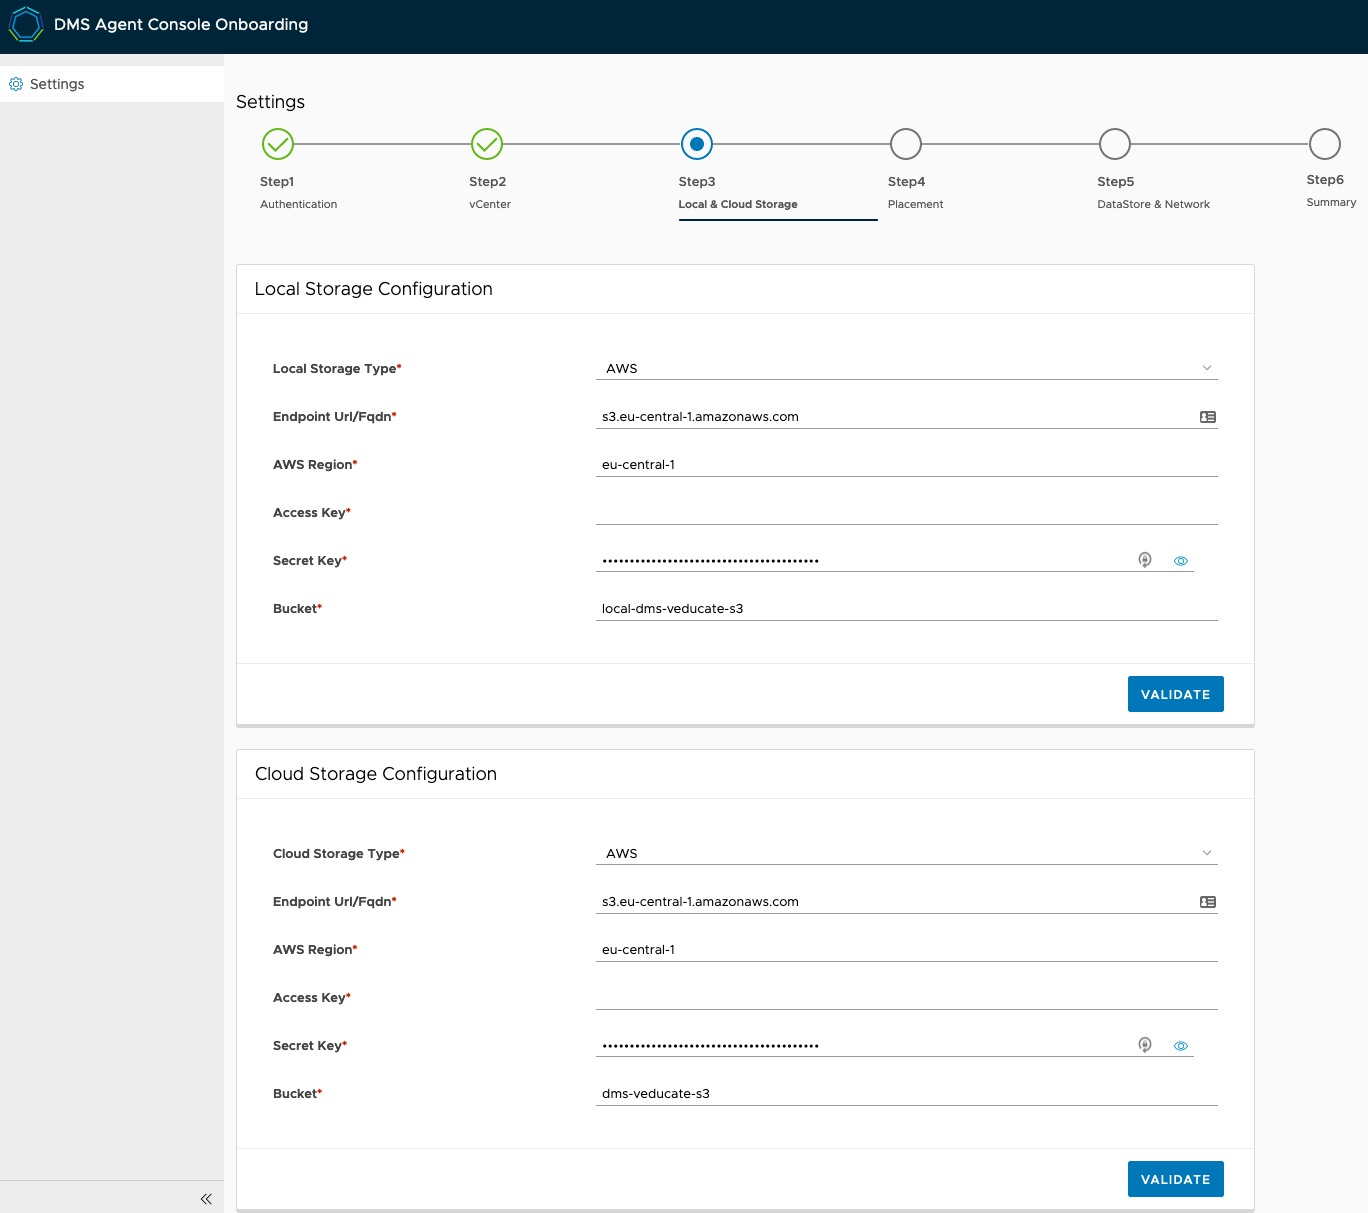
- Input the S3 details for the local and the cloud storage that the Agent appliance will use.
- Click Validate on both dialog boxes
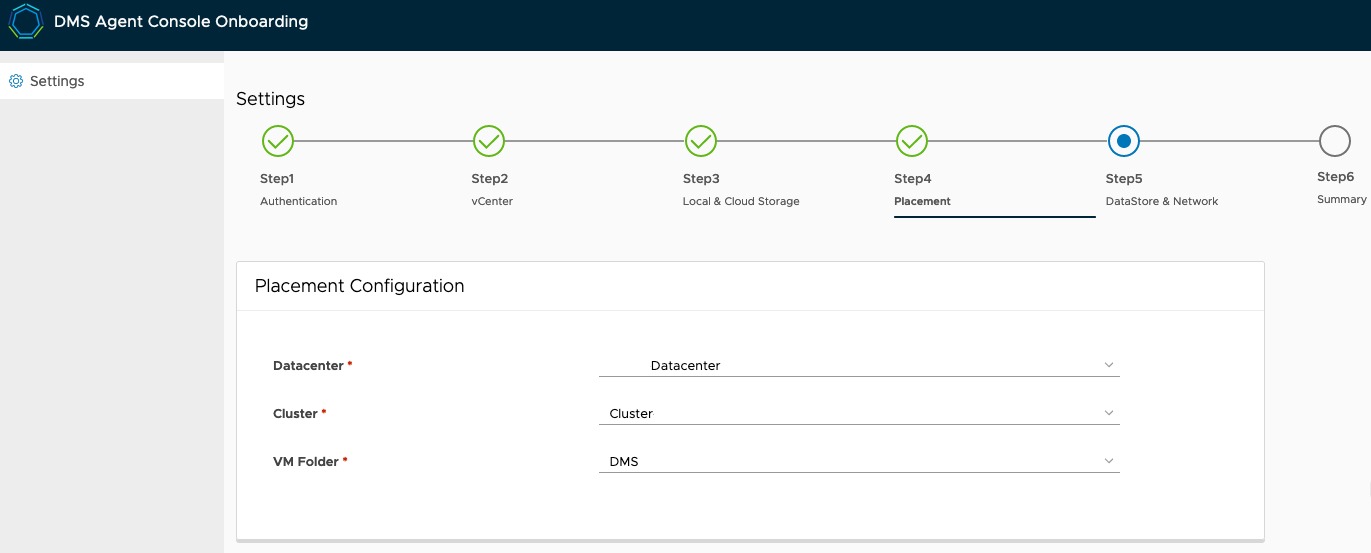
- Select the vSphere Datacenter, Cluster and VM folder that services will be provisioned too.
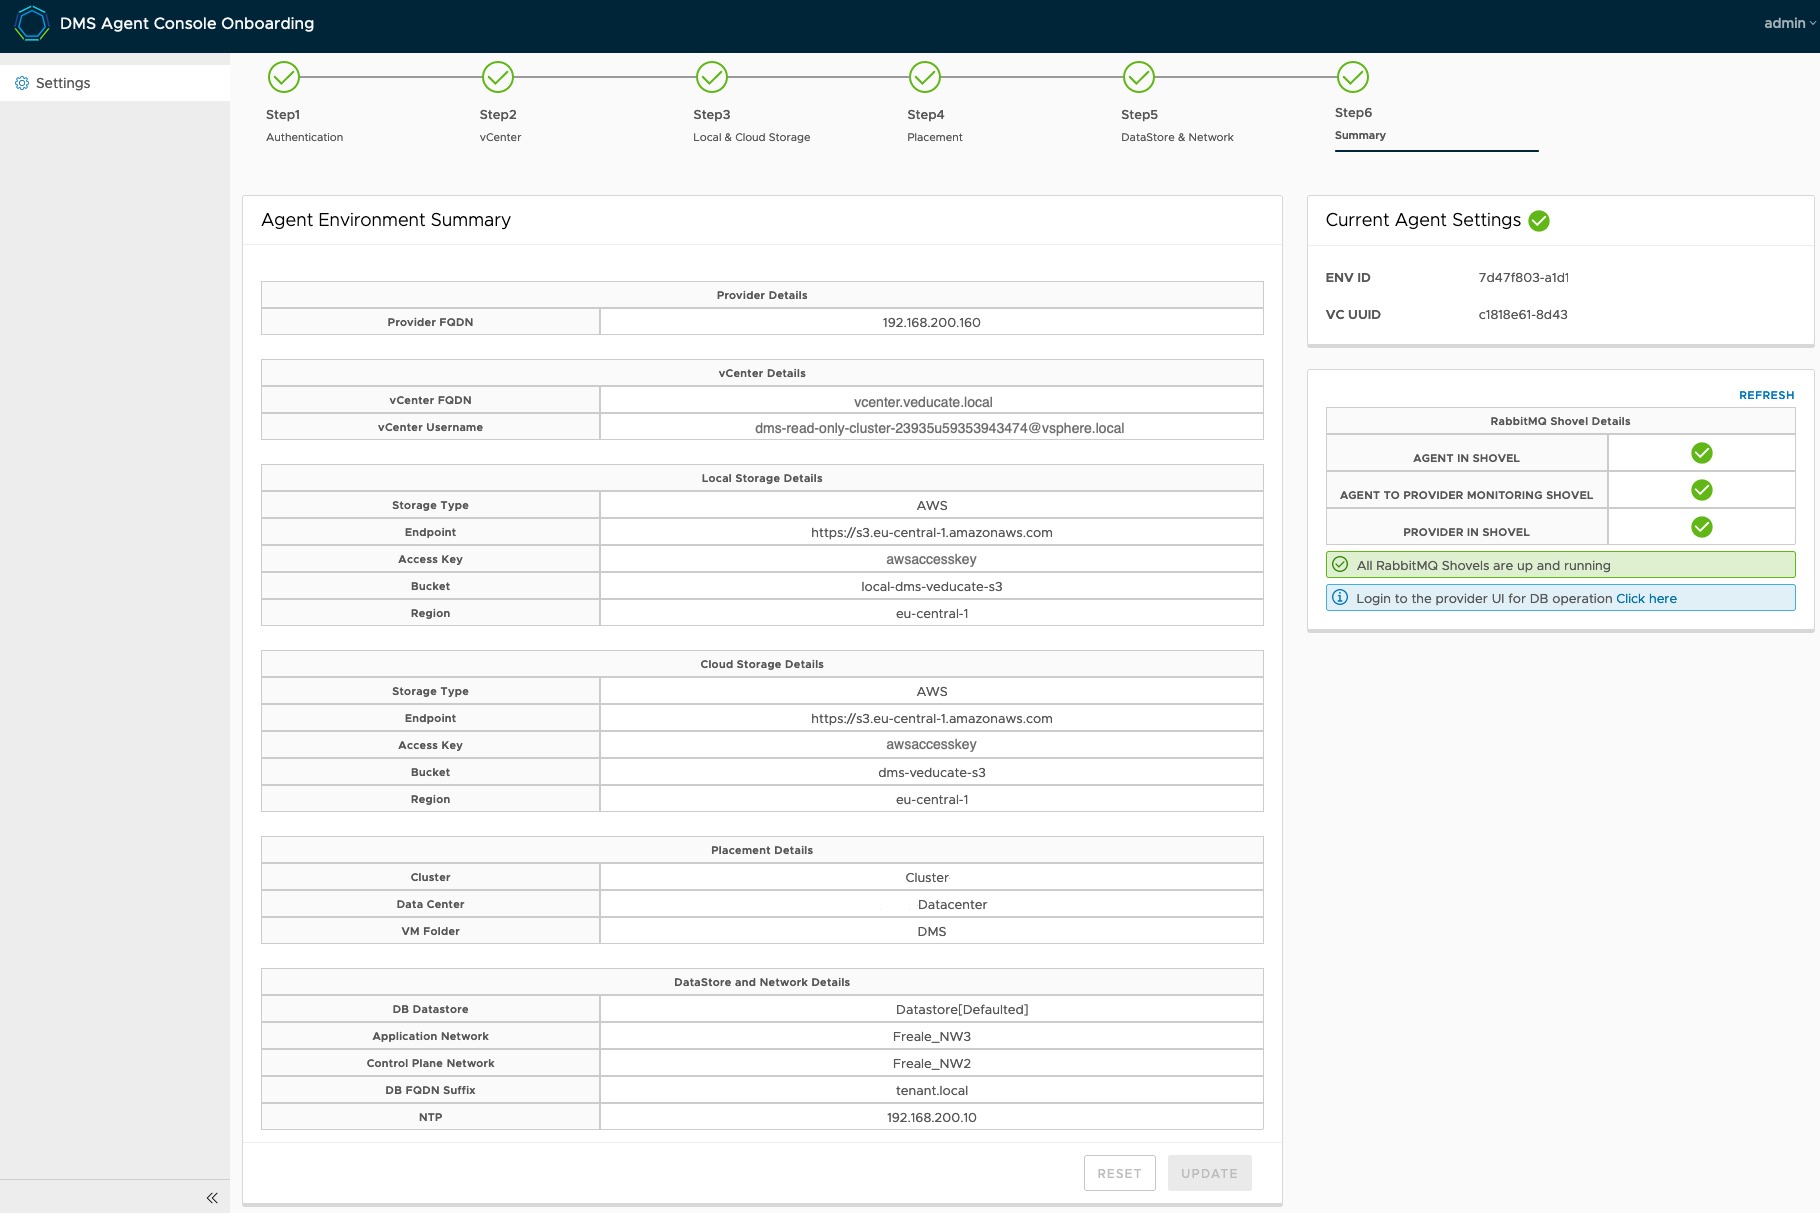
- On the final Summary page, review the details and click save.
- Once the configuration is finished you will have green ticks and a message on the right-hand side telling you to log into the Provider Appliance UI to continue operations.
Wrap-up and next steps
In this blog post we deployed the Data Management for VMware Tanzu infrastructure appliances to ready ourselves to provide Data Services to our users via self-service capabilities.
In the next blog post we will focus on how to consume the platform for Database-as-a-Service type actions.
Continue by following this link
- Data Management for VMware Tanzu – Self-Service DBaaS
- Data Management For VMware Tanzu – API Postman Collection
Regards


Hi,
I was trying to onboard the agent through the agent port but got below error.
Authentication Failed : Agent version is not compatible with the provider.
I am using Provider version 1.4.0.2690 and agent 1.4.0.2528
could you please advise to resolve the issue?
On the provider, you need to go to settings, setup the s3 storage under storage settings tab, add in your Tanzu network api token. Then the agent status at the bottom of the storage settings tab should change to say “ready” after a while. I believe it downloads around 15GB of files iirc, so depending on your link speed it could take a while before it says ready.