
If you've have been following any of my blogs that relate to Kubernetes, I am sure that you will have seen the use of my demo application Pac-Man, designed to replicate a small production application with a front end UI service, DB back end service and load balancing service.
If not, you can find it here:
In this blog post, I am going to cover how I create a Helm Chart package to install the application on a Kubernetes cluster, and then host it on GitHub so that it can be re-used as necessary between different clusters.
This was on my to-do list for quite a while, as I wanted to explore Helm in more detail and understand how the charts work. What better way to do this than create my own?
What is Helm and why use it?
Helm is a tool that simplifies the installation and lifecycle of Kubernetes applications. As an example, it is a little bit like Brew or Yum for Linux.
Helm uses a package format called charts; these charts are a collection of files that describe a related set of Kubernetes resources. These charts can range from the simple, deploy a single pod, deployment set, etc, to the complex, deploy a full application made up of Deployments, StatefulSets, PVCs, Ingress, etc.
Helm has become over the years one of the defacto client tools to use for simplification of deploying an application to your Kubernetes environment. Take Kasten for example, to deploy their K10 software, their guide gives you only the Helm commands to do so.
You can install Helm from the below script, for other methods please see their official documentation.
curl -fsSL -o get_helm.sh https://raw.githubusercontent.com/helm/helm/main/scripts/get-helm-3

chmod 700 get_helm.sh

./get_helm.sh
Creating a template Helm Chart
The Helm Client makes it easy to get started from scratch, you can create a template chart by running the following command, which creates a folder of the name you specify, with a number of example files you can use.
- Official Docs - Charts Template Guide
helm create {name}

# For this blog post I ran the following

helm create pacman-kubernetes
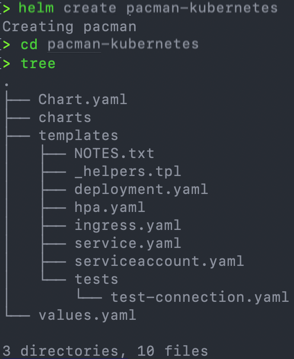
In more detail, this structure offers the following:
- Chart.yaml
- This is the informational YAML file that contains the metadata for the chart
- charts folder
- If you need to install additional components in an environment, and there is an available helm chart, you can pull it in here to this folder.
- templates folder
- This folder is the location of all the YAML artifacts that will be deployed into your cluster (aside from anything in the charts folder)
- NOTES.txt
- This is the output that will be shown when a deployment is successful
- _helpers.tpl
- This template file will help pull metadata or run functions for your deployment needs and can be very extensible.
- tests folder
- Here you can also write some tests for your deployed artifacts, these will always be run last by Helm, so Helm can validate that the deployment was successful
- values.yaml
- This is the values file in which you can specify default values to be used in the templates to make them dynamic but also consistent. These values can then be configured by the Operator when they deploy the chart into an environment.
- Values can set a configuration, such as a Port for a container, or they can be used to ensure a configuration is implemented or not based on a Boolean answer. There is a lot of flexibility here.
Configuring the Helm Chart with the Pac-Man application deployment configuration
Within the root of the Chart folder, I create a README.md file, to describe the charts and it's configurations and a ".helmignore" file that has the following contents:
# Patterns to ignore when building packages.
# This supports shell glob matching, relative path matching, and
# negation (prefixed with !). Only one pattern per line.
.DS_Store
# Common VCS dirs
.git/
.gitignore
.bzr/
.bzrignore
.hg/
.hgignore
.svn/
# Common backup files
*.swp
*.bak
*.tmp
*.orig
*~
# Various IDEs
.project
.idea/
*.tmproj
.vscode/
I fill out the Charts.yaml file with the necessary information. The name and version will be used to compute the archive file for the Chart.
apiVersion: v2
appVersion: 0.5.3.1
description: Pac-Man for Kubernetes
home: https://github.com/saintdle/pacman-tanzu
icon: https://veducate.co.uk
maintainers:
- name: Dean Lewis
name: pacman
version: 0.1.0
I clear out the Templates folder, except the following files:
- _helpers.tpl
- deployment.yaml
- rename this to pacman-deployment.yaml
- hpa.yaml
- NOTES.txt
I create files for the following artifacts as well:
- mongo-deployment.yaml
- rbac.yaml
- secret.yaml
- psp.yaml
- service.yaml
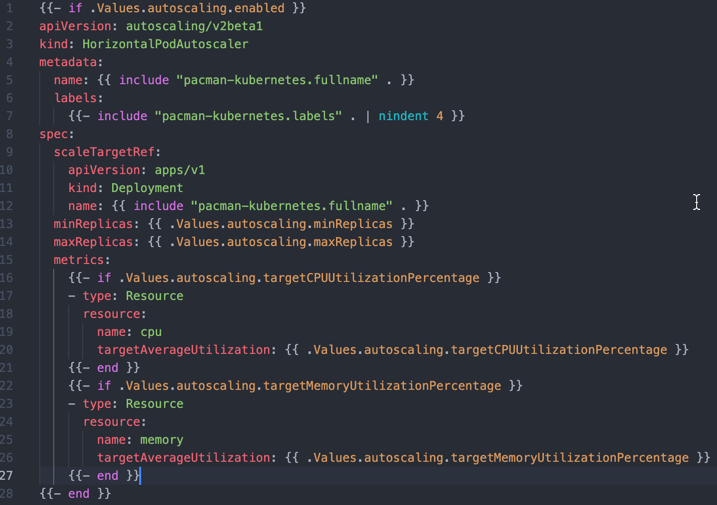
If we look at the hpa.yaml file, this was generated by Helm. You can see a number of values placed into the YAML file that follow a format of {{ something }}. This is a control structure that Helm uses when processing the Chart, based on the control, it will evaluate and perform an action, such as act out an If statement, or input a string from a values file.
- Line 1 - If Statement (ended on line 28) - If Boolean from values file is true, process the below lines
- Line 7 - Input Helm generated values - Control indent placement
Without making this blog post to long by explaining every single change I made here, I'm going to summarize some of the configurations I made. For your own learning, you can directly download the chart file by running the below command and then unarchive the file, so that you can explore my configurations. I did this with Kasten K10 application, so I could learn some of the more complex configurations.
helm repo add veducate https://saintdle.github.io/helm-charts/
helm fetch veducate/pacman
I first recommend configuring your Values file and thinking about what dynamic values you want the user to be able to configure. I removed most of the generated value content, and added lines to be used as Boolean for creating the RBAC configurations and PSP (PodSecurityPolicy) configurations in the cluster.
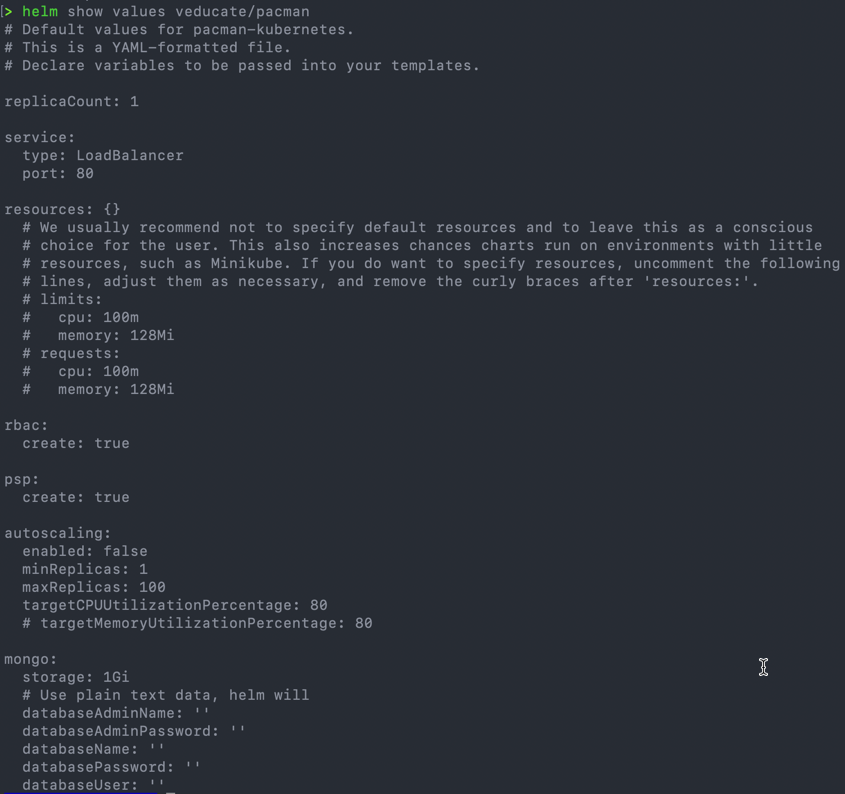
Below is my Values file. Within each template file, I can reference the data in the values file by using the control line of {{ .Values.text.text. }} for example {{ .Values.mongo.storage }}.
Helm has several Built-in Objects that you can reference within your files for metadata. I will describe some below, but also check the documentation for the full capabilities.
# Default values for pacman-kubernetes.
# This is a YAML-formatted file.
# Declare variables to be passed into your templates.

replicaCount: 1

service:
  type: LoadBalancer
  port: 80

resources: {}
  # We usually recommend not to specify default resources and to leave this as a conscious
  # choice for the user. This also increases chances charts run on environments with little
  # resources, such as Minikube. If you do want to specify resources, uncomment the following
  # lines, adjust them as necessary, and remove the curly braces after 'resources:'.
  # limits:
  #   cpu: 100m
  #   memory: 128Mi
  # requests:
  #   cpu: 100m
  #   memory: 128Mi

rbac:
  create: true

psp:
  create: true

autoscaling:
  enabled: false
  minReplicas: 1
  maxReplicas: 100
  targetCPUUtilizationPercentage: 80
  # targetMemoryUtilizationPercentage: 80

mongo:
  storage: 1Gi
  # Use plain text data, helm will
  databaseAdminName: ''
  databaseAdminPassword: ''
  databaseName: ''
  databasePassword: ''
  databaseUser: ''
I copied my Kubernetes Applications YAML files into each of the blank files I created earlier. And then started to go through each of the files, and alter them as needed, you will always need the following Labels to be set at a minimum, this allows Helm to set its labels so it knows it controls those deployments in the environment.
  labels:
    {{- include "HELMCHARTNAME.labels" . | nindent 4 }}

# Example that uses both the Helm generated labels, and additional labels I want in my configuration that includes something from the values file
  labels:
    {{- include "pacman-kubernetes.labels" . | nindent 4 }}
    additonallabel: {{ .values.mongo.db.name }}
First, for anything in your files that require the Namespace to be inputted, as you allow the user to create a namespace on the fly using helm argument "--create-namespace", you can use the following value in your files.
namespace: {{ .Release.Namespace }}
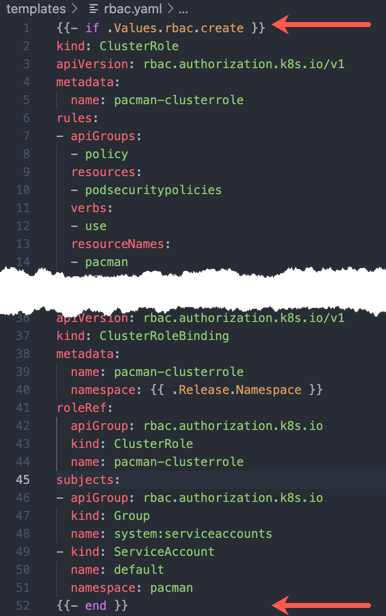
To create an If Statement needed for the Boolean of creating the RBAC if specified in the values file.
# Add at the start of the file, this reads in the value to the If statement
{{- if .Values.rbac.create }}
# Add at the end of the file, so that processing if the If statement is done. You do have the ability to use "else" as well.
{{- end }}
Now let's look at the Mongo Storage configuration. The first value is setting the Persistent Volume size, this is referenced in the mongo-deployment.yaml file as the below example.
We are using the control "default" to set a standard value if the user does not provide one. As we know in our deployment, if there is NULL value the deployment will fail.
storage: {{ .Values.mongo.storage | default "1Gi" }}
I have also allowed the user to provide authentication details to be stored in the secret.yaml file, which will create a Kubernetes Secret. The user can input the data in the value file as plain text, but Kubernetes needs the data to be base64 encoded to create the Secret object.
We can run a function within the Control Structure.
- Within your Double braces {{ }} add a brackets ()
- Use "printf" to print out the user input from the values file
- Pipe into a function "base64enc", to base64 encode the data
- Then provide a default value as necessary
# Example to follow from the above breakdown
{{ ( printf .Values.mongo.databaseAdminName | b64enc ) | default "Y2x5ZGU=" }}

# Full example from the secret.yaml file

data:
  database-admin-name: {{ ( printf .Values.mongo.databaseAdminName | b64enc ) | default "Y2x5ZGU=" }}
  database-admin-password: {{ ( printf .Values.mongo.databaseAdminPassword | b64enc ) | default "Y2x5ZGU=" }}
  database-name: {{ ( printf .Values.mongo.databaseName | b64enc ) | default "cGFjbWFu" }}
  database-password: {{ ( printf .Values.mongo.databasePassword | b64enc ) | default "cGlua3k=" }}
  database-user: {{ ( printf .Values.mongo.databaseUser | b64enc ) | default "Ymxpbmt5" }}
For the NOTES.txt file, I used the same method by taking Helm Built-in objects and specified Values to display the relevant information at the end of a successful deployment.
Those actions summarise the methods I used to replace my files and make them more dynamic as necessary. If you look at other Helm Charts, as I referenced earlier in this blog post, I looked at Kasten K10, you will see there is many more options and configurations you can go into, such as pulling files into the build, dynamically new generating files on demand for example.
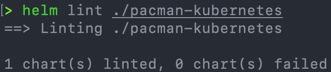
Once you are happy with your Chart files Helm has the "lint" argument that will validate each of your files and highlight any errors.
Then you can use the Helm Install --dry-run command to validate the Control Structures work as expected.
# This command validates your YAML files

helm lint ./pacman-kubernetes

# Using the --dry-run command you can see the output of running this helm install on your cluster, the debug argument will output the files including their configuration from any values passed
helm install pacman-helm --dry-run --debug ./pacman-kubernetes --create-namespace
The dry-run output including the debug is a large one, as it shows all the generated YAMLs used to apply to the cluster. Below is a concatenated version of the output.
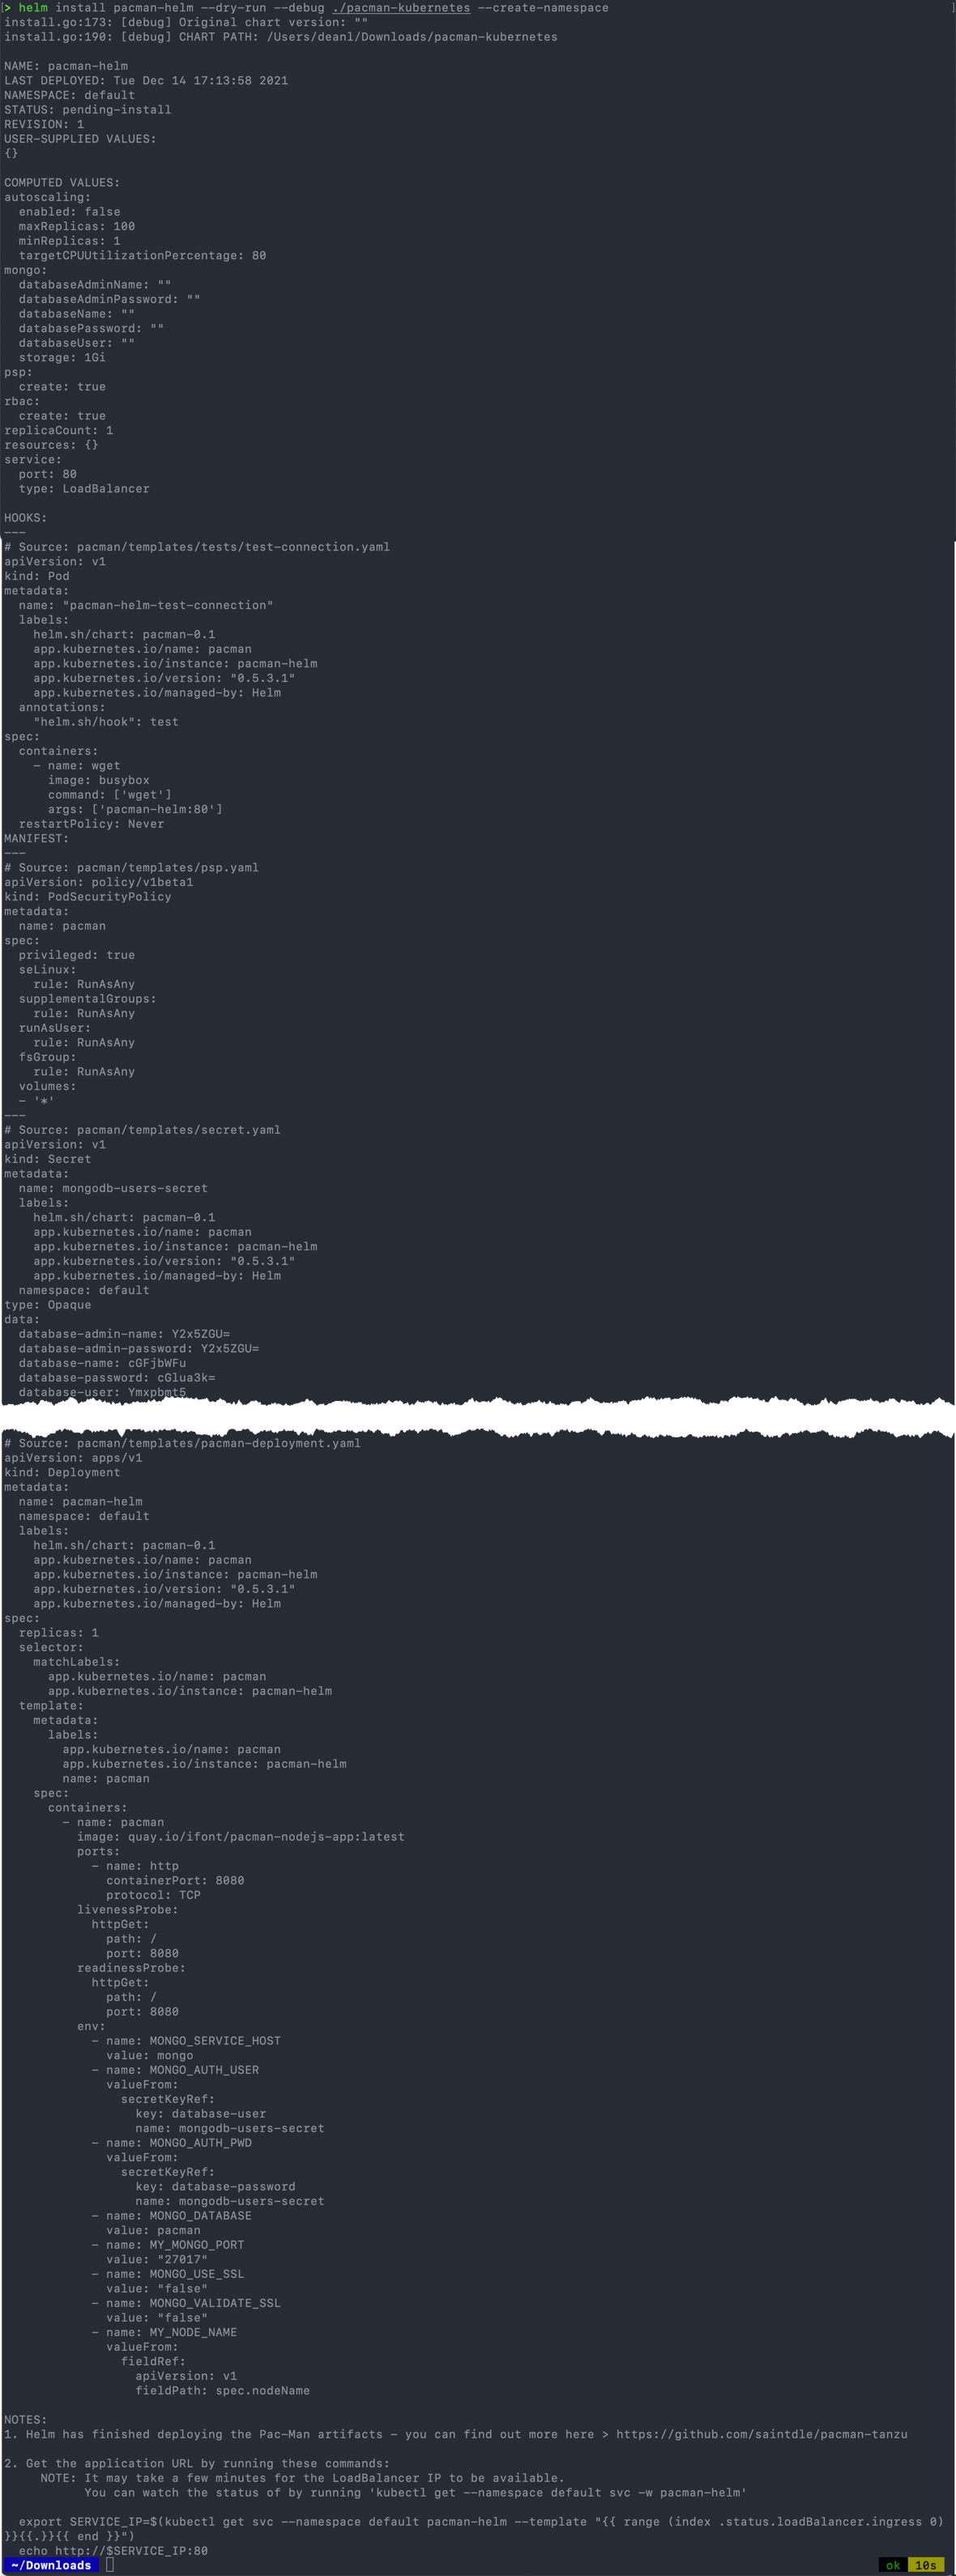
I decided to include the full output for anyone that wants to review it.

Packaging the Helm Chart
Now we are ready to package your file, which essentially takes everything you've created and puts it into an archive file. The file name will be generated from the Name and Version detailed in the Charts.yaml file of the root folder.
helm package pacman-kubernetes
Hosting the Helm Chart in a GitHub Repository
I used GitHub to host my Helm Chart repository, however you can use any web hosting option you prefer so long as it's accessible from the device you are running Helm from.
- Create a GitHub Repository as normal
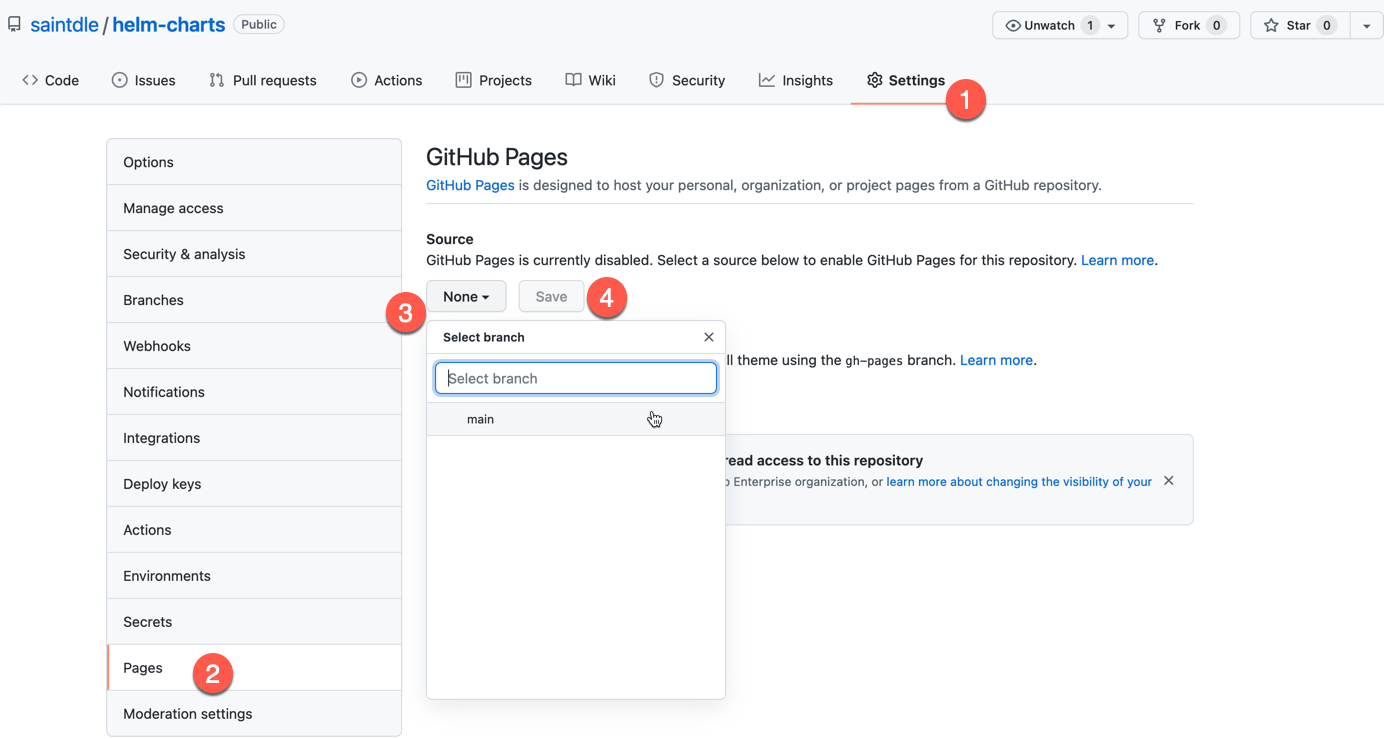
- On the repository page, go to "Settings"
- Click on Pages in the left-hand navigation
- Click a branch to publish
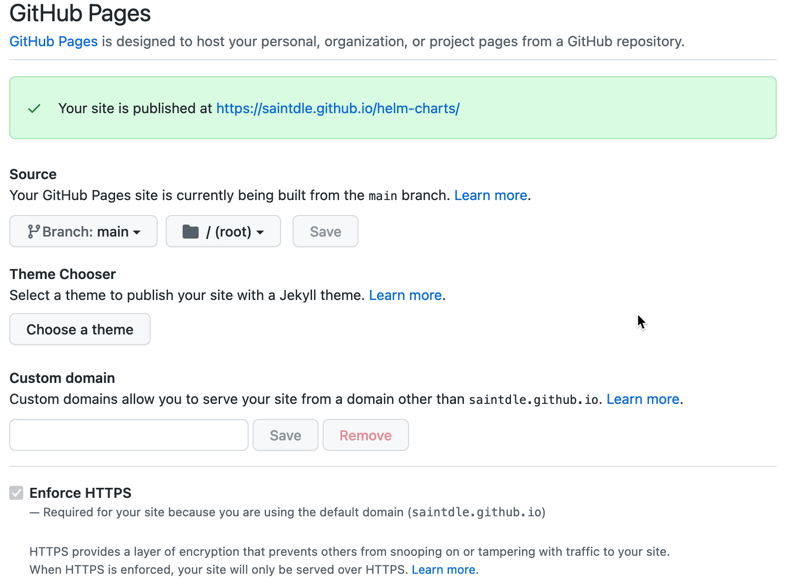
You will now see the URL in which your Repository is published. This URL will be used by Helm client configuration to find the charts.
Now we will generate a Index YAML file to be hosted from our page, which details all the available helm charts in the repository.
Note: if you have other Helm chart archives in your folder, these will be picked up into the index file. As you can see from this commit where I had to remove a local one I was testing.
To create the index file, run the following command against your repository URL and location of your charts, I used "." as the charts were within the folder I was located.
helm repo index --url https://saintdle.github.io/helm-charts/
You will need to generate a new Index file each time you update or create a new chart. You could also manually edit the YAML file.

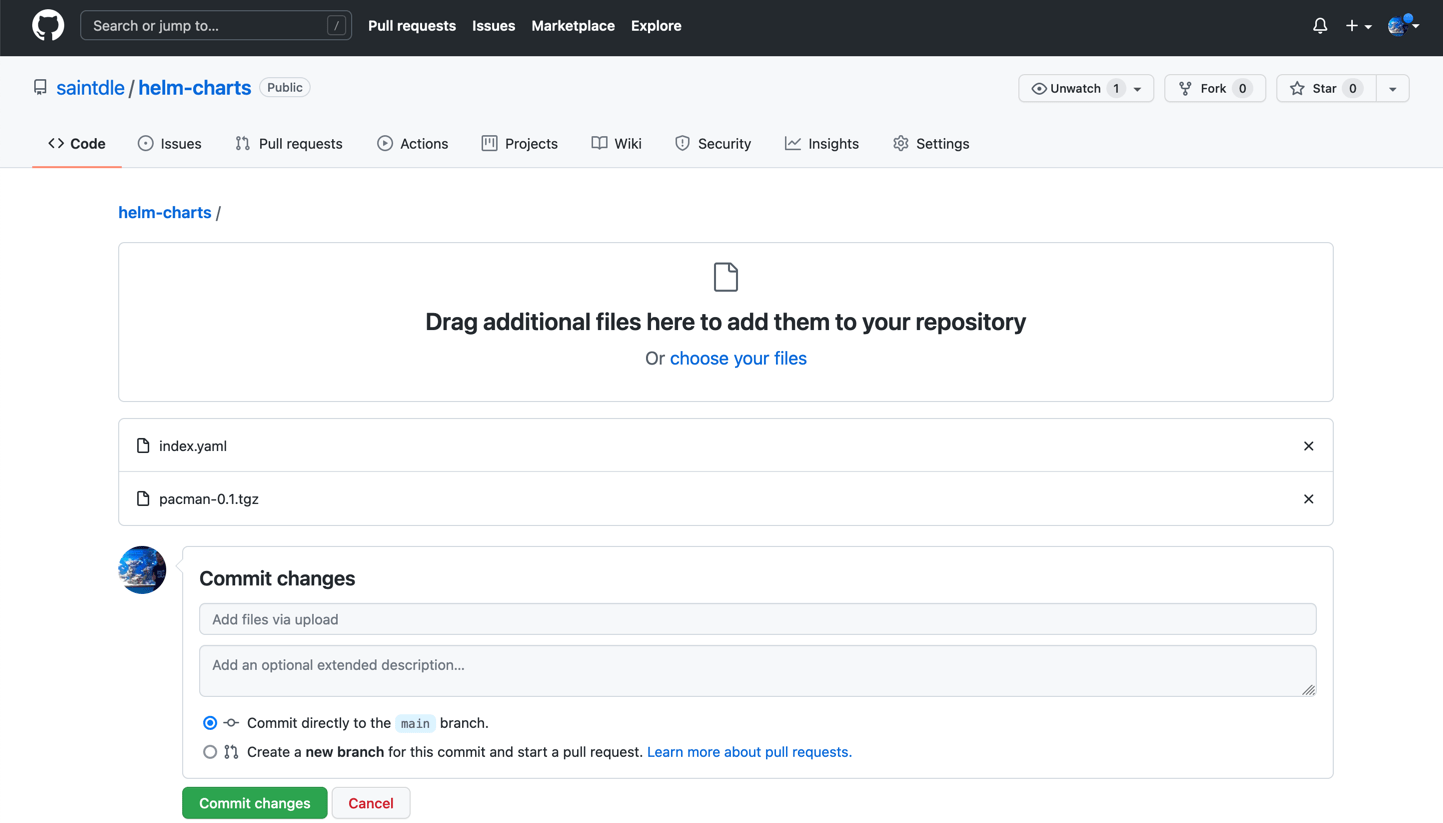
Now just simply upload both files to your GitHub Repo.
Installing and using the Helm Chart
To install the application using Helm, we need to add the Chart Repository to our Helm Client configuration, and then we can update the available charts, and even search for the available charts as well.
helm repo add veducate https://saintdle.github.io/helm-charts/

helm repo update

helm repo search pacman

# You can see the available values for the Chart by running

helm show values veducate/pacman
Finally, to install Pac-Man using the Helm Chart, you can run the first command, or the second command shows you how to set non-default values as arguments, or you can specify a values.yaml file.
helm install pacman veducate/pacman --create-namespace

# Example using the set argument to declare values

helm install pacman-helm ./pacman-kubernetes -n pacman-helm --set rbac.create=false,psp.create=false
Summary
Diving into creating a Helm chart helped me understand more of what Helm is, it's capabilities, and why it is so popular in the Kubernetes space right now. Creating a Helm Chart can be quite simple, and if your Kubernetes application artifacts are simple, you should be up and running in no time.
However, if you need something more complex, it's probably going to require a lot of testing, to be honest the "helm lint" and "helm install --dry-run --debug" commands/arguments were used a lot as I built this Chart so I could figure out what was working and what wasn't.
Overall once you have it up and running, it's a great way to package your deployments and make it easy for users to deploy your application.
Regards