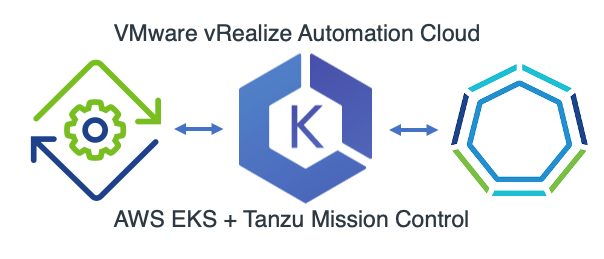
This walk-through will detail the technical configurations for using vRA Code Stream to deploy AWS EKS Clusters, register them as Kubernetes endpoints in vRA Cloud Assembly and Code Stream, and finally register the newly created cluster in Tanzu Mission Control.
Requirement
Tanzu Mission Control has some fantastic capabilities, including the ability to deploy Tanzu Kubernetes Clusters to various platforms (vSphere, AWS, Azure). However today there is no support to provision native AWS EKS clusters, it can however manage most Kubernetes distributions.
Therefore, when I was asked about where VMware could provide such capabilities, my mind turned to the ability to deploy the clusters using vRA Code Stream, and provide additional functions on making these EKS clusters usable.
High Level Steps
- Create a Code Stream Pipeline
- Create a AWS EKS Cluster
- Create EKS cluster as endpoint in both Code Stream and Cloud Assembly
- Register EKS cluster in Tanzu Mission Control
Pre-Requisites
- vRA Cloud access
- The pipeline can be changed easily for use with vRA on-prem
- AWS Account that can provision EKS clusters
- And basic knowledge of deploying EKS cluster
- This is a good beginners guide if you need
- A Docker host to be used by Code Stream
- Ability to run the container image: saintdle/aws-k8s-ci
- Tanzu Mission Control account that can register new clusters
- VMware Cloud Console Tokens for vRA Cloud and Tanzu Mission Control API access
- The configuration files for the pipeline can be found in this GitHub repository
Creating a Code Stream Pipeline to deploy a AWS EKS Cluster and register the endpoints with vRA and Tanzu Mission Control
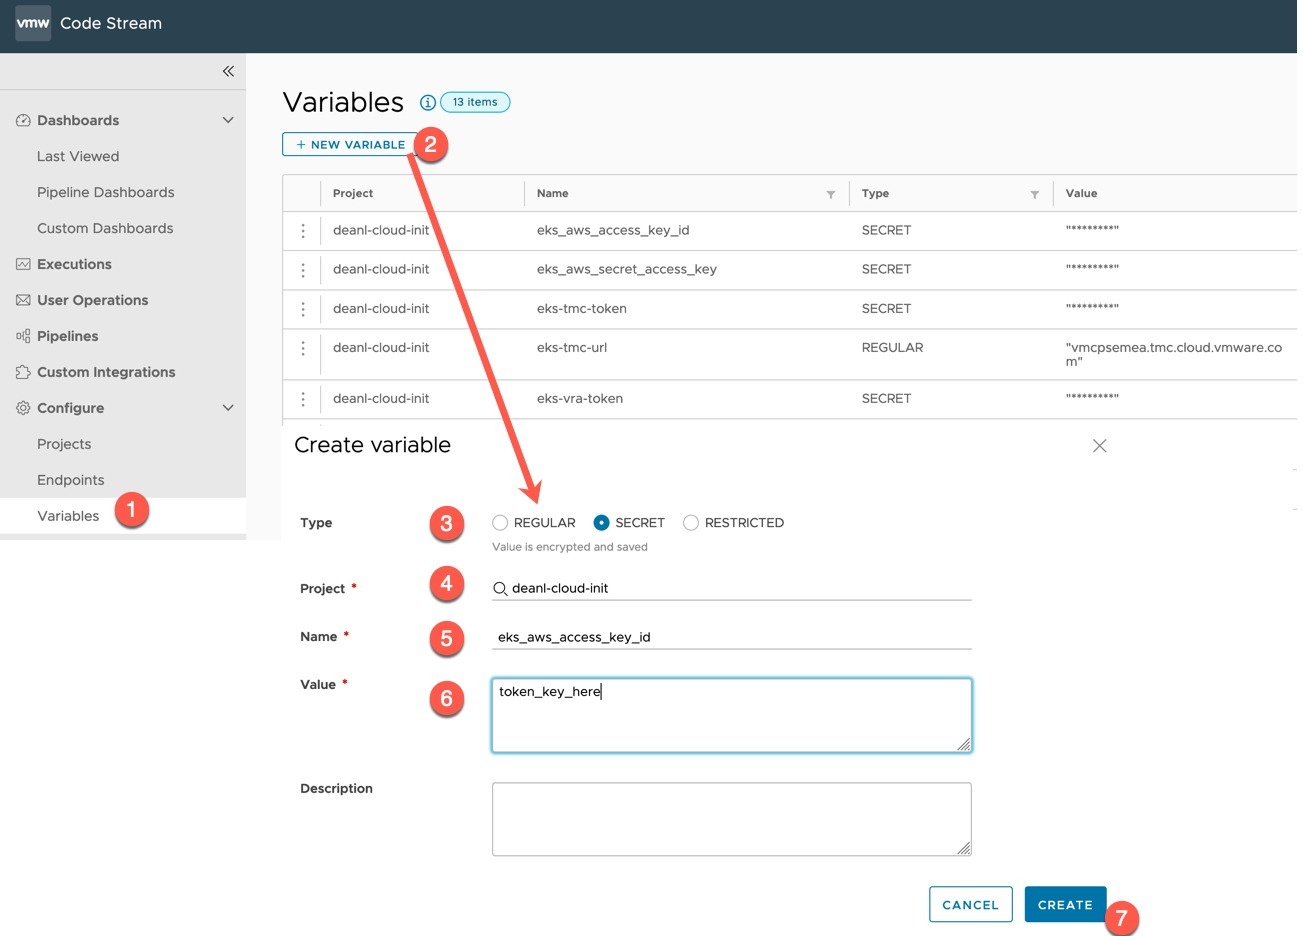
Create the variables to be used
First, we will create several variables in Code Stream, you could change the pipeline tasks to use inputs instead if you wanted.
- Create as regular variable
- eks-tmc-url
- This is your Tanzu Mission Control URL
- eks-tmc-url
- Create as secret
- eks_aws_access_key_id
- IAM Access Key for your AWS user
- eks_aws_secret_access_key
- IAM Secret for your AWS user
- eks-tmc-token
- VMware Cloud Console token for access to use Tanzu Mission Control
- eks-vra-token
- VMware Cloud Console token for access to use vRealize Automation Cloud
- eks_aws_access_key_id
Note: Sorry I noticed I mixed the use of hyphens and underscores in the variables
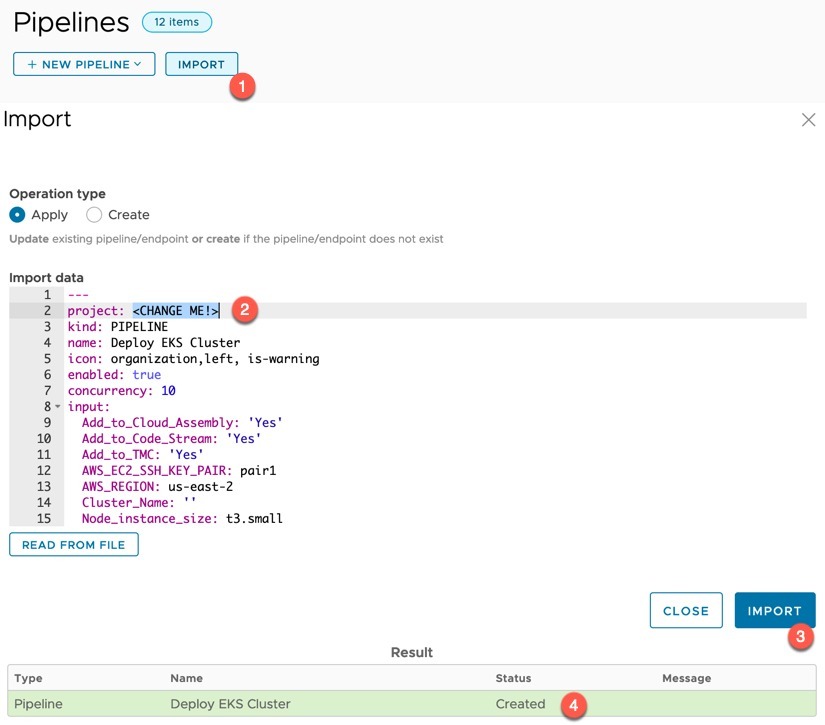
Import the Pipeline “Deploy EKS Cluster”
Create (import) the pipeline in Code Stream. (File here). Set line two to your project name then click import.
Open the pipeline.
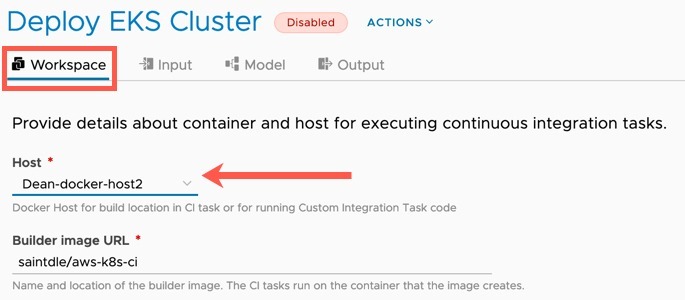
Go to the Workspace tab and set your Docker Host. Make any changes to the image registry and container image as you need (such as for air gap usage).
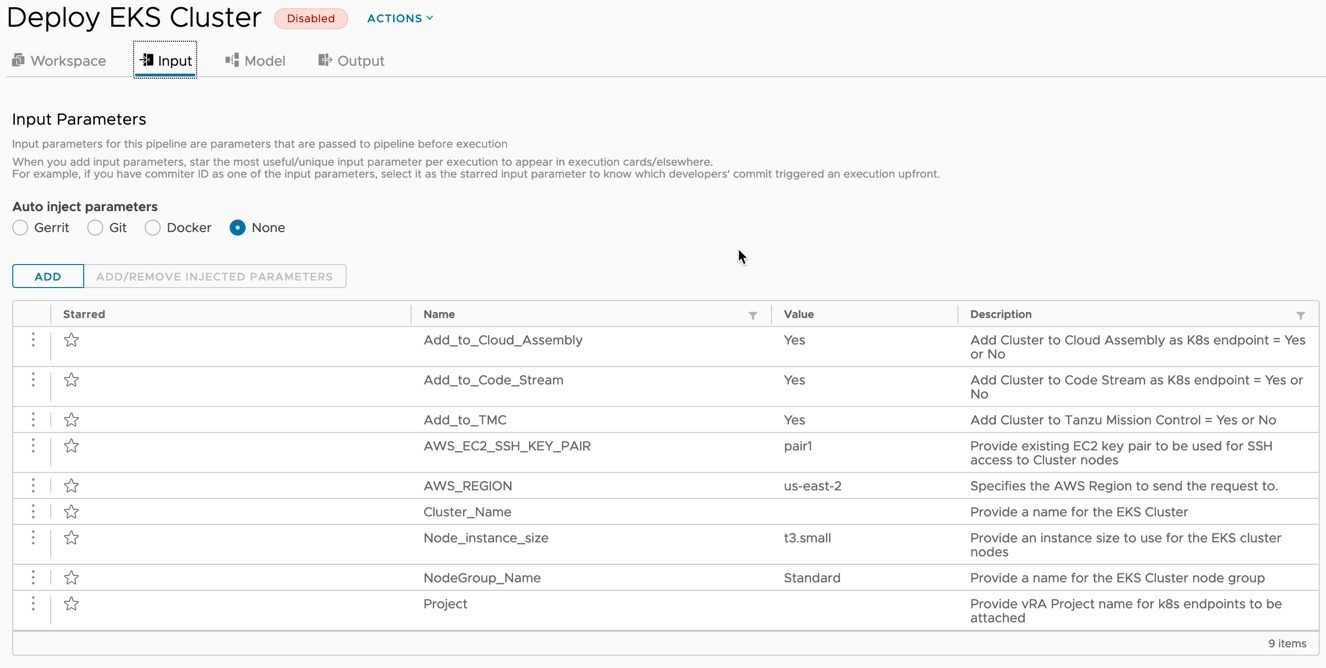
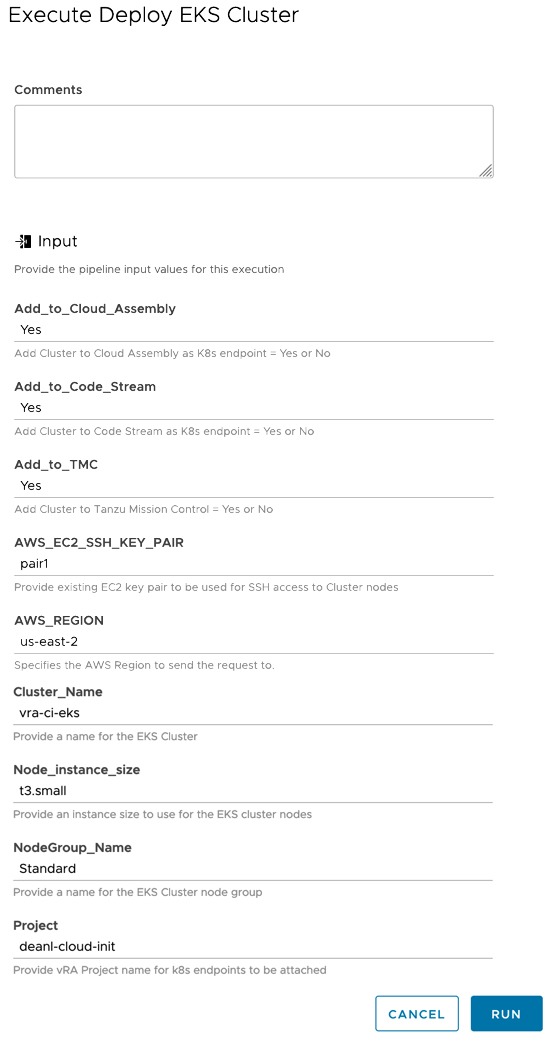
On the Input tab, set the default value as needed. I’ve tried to provide good descriptions for each input that is used by the pipeline.
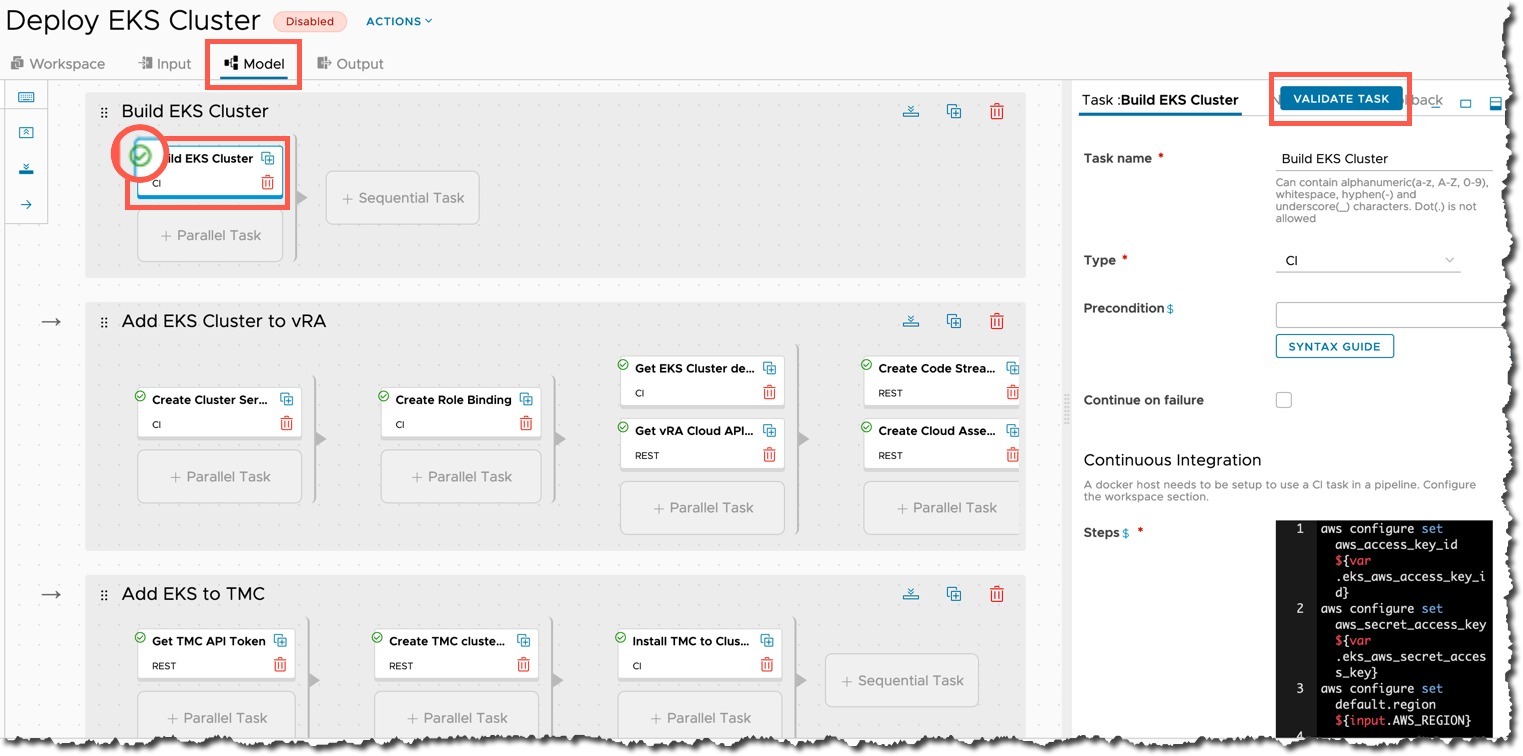
On the Model tab, select each task and click the validate button, ensure you get a green tick. If there are any errors displayed, resolve them. Usually, it’s the referenced variable names do not match.
You can also explore each of the tasks and make any changes you feel necessary.
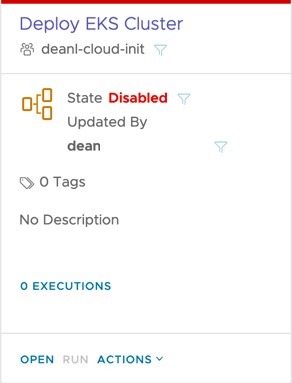
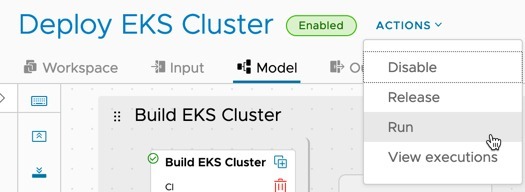
When you are happy, click save on the bottom left. Then enable the pipeline.
Running the pipeline
Now the pipeline is enabled, you will be able to run the pipeline.
Fill out the inputs and click run.
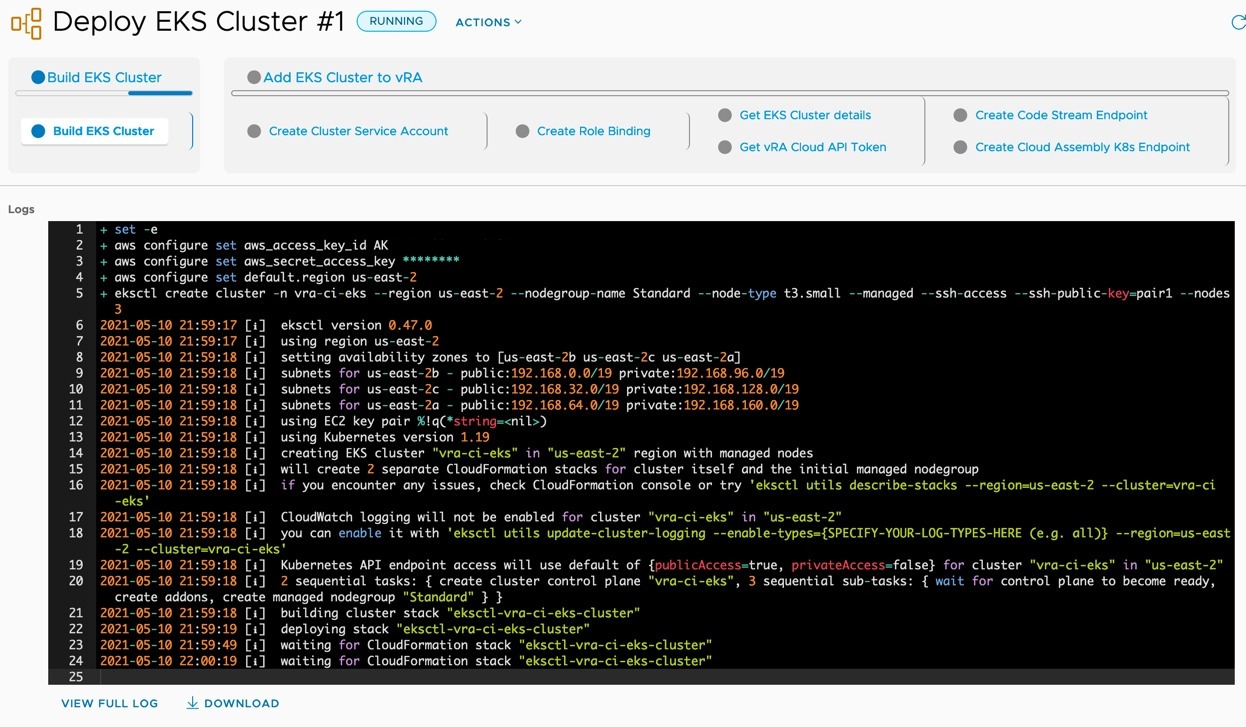
Click to view the running execution of the pipeline.
Below you can see the output of the first stage and task running. You can click each stage and task to see the progress and outputs from running the commands.
Once the pipeline has completed, you’ll see an output all green like the below screenshot.
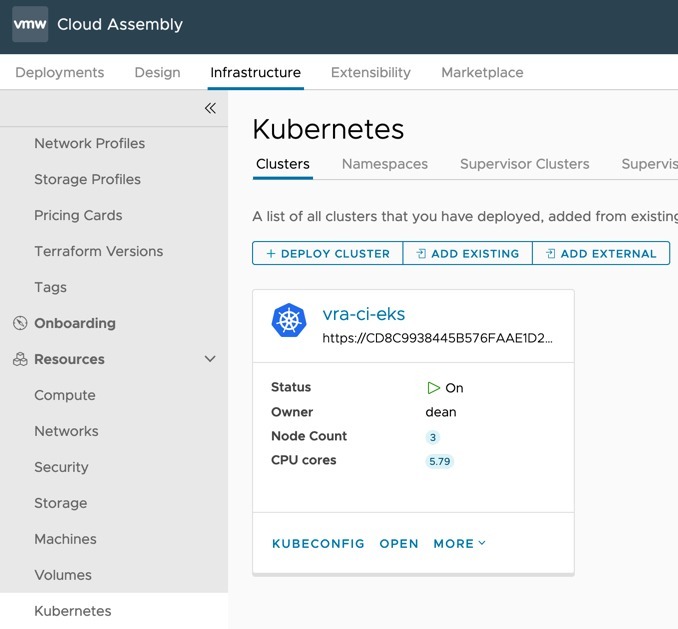
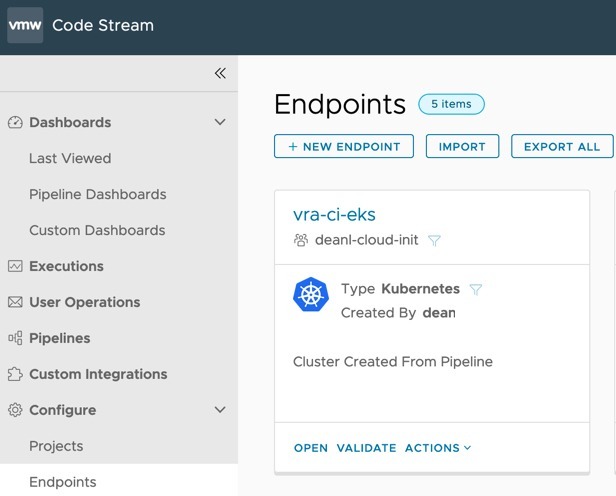
And finally, you’ll have the following items created and configured.
- EKS Cluster
- Cloud Assembly – External Kubernetes Endpoint
- Code Stream – Kubernetes Endpoint
- Tanzu Mission Control – Kubernetes cluster attached
Wrap up
So for this pipeline, I did create my own container image with all the tools I needed to make life easier. You could also use a simple container, and download/install all the tools you need as your first CI task if you wanted.
When you break down the various tasks, it’s all pretty simple and you could follow most of the same steps through the terminal on your local machine.
Hopefully you found this useful.
Regards





Great Blog – Thankyou for sharing