
This blog post is thanks to an internal query, that I thought should be easy enough to complete, however my usage of an ELK environment is limited, so it was a good chance to dig in and learn something new.
In this blog post, I'm going to detail the configurations for pushing vRealize Operations Alert notifications to ElasticStack (aka ElasticSearch, ELK) using the Notification Webhook feature.
Again, I am not an ELK expert here, so there may (read this as probably) better ways to configure this when it comes to the date handling.
Configure an ingestion timestamp in ELK
One of the first issues I hit when testing all of this, is the fact that ELK doesn't seem to like the date formats that vROPs alerts uses. Once an index (store of data records) is created, the fields are parsed, and the type attributed to a field cannot be changed. I went through various options to remedy this, so that my logs could be searched based on time stamps, but it seemed not easily feasible. If anyone knows of the best way to achieve this, let me know, see the end of this blog post for more details.
For those of you who do know ElasticSearch, vROPs sends the time/date in the notification payload in the following format "EEE LLL dd HH:mm:ss z uuuu"
The best way I found around this, is to add in the ability to create a ingestion timestamp on the data received by Elasticsearch, and add it to the settings of the created index.
To create this ingestion rule, in your Elastic UI, click on Three Lines to open the navigation options, then click on Dev Tools, under Management.
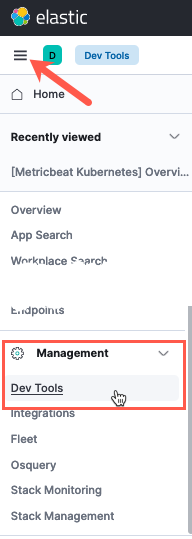
This will give you an in-browser console access to send configurations to the Elastic environment. When reading the documentation, you'll notice that the configuration for Elastic is provided a lot of the time via API commands and payloads. It seems like this is the preferred way to configure the system, with the UI lacking the ability to make these changes for most options.
Paste the content below the screenshot, which creates a pipeline rule to provide processing on the data that comes into the system.
When the syntax is validated, you will see a small Green Arrow appear to apply the configuration. The right-hand side console window shows the output from running the API call and payload.
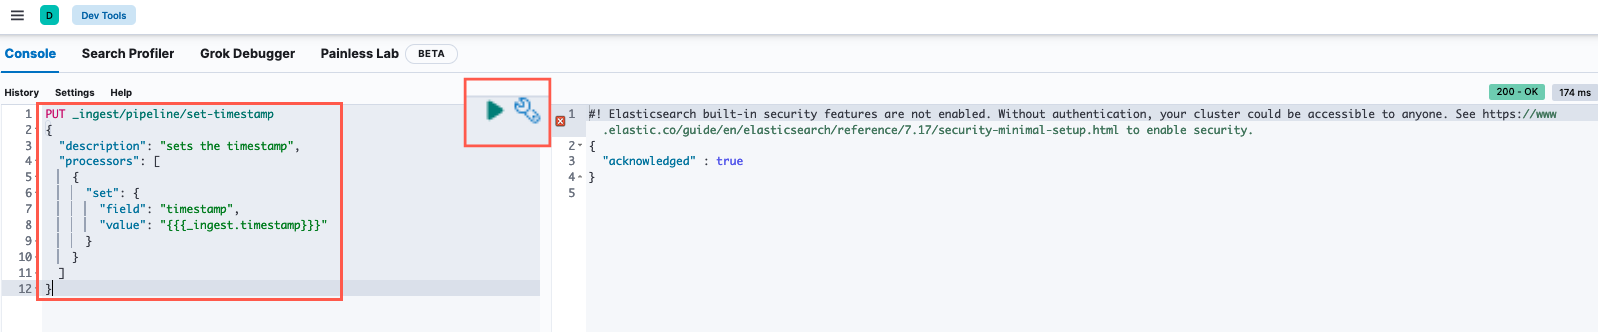
PUT _ingest/pipeline/set-timestamp
{
  "description": "sets the timestamp",
  "processors": [
    {
      "set": {
        "field": "timestamp",
        "value": "{{{_ingest.timestamp}}}"
      }
    }
  ]
}
Create the outbound webhook in vRealize Operations
Log into vRealize Operations and navigate to Configure > Alerts > Outbound Settings. And click to create a new outbound configuration.
It's key to note here, I'm specifying an index name that doesn't exist in Elastic currently, as this will be created upon the first message input from vROPs. (In testing, I found if the index name already exists, vROPs couldn't send data to that index.)
- Provide the instance name
- Set the URL
- This will be in the format of > http://{fqdn}:{port}/{index_name}/documents
- Example > http://elk.veducate.co.uk:9200/vrops/documents
- Provide the username and password as necessary, only basic auth is supported by vROPs.
- Set the max connection count
- Set the HTTP proxy as necessary
- Click to test the connection
By clicking to test the connection, this will send a test packet to Elastic, which will then create the new index, in my example, called "vrops". 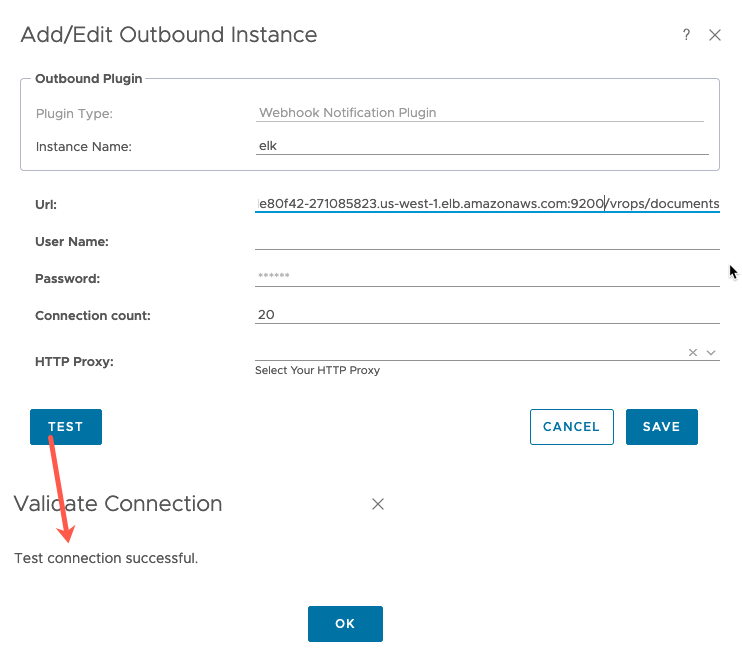
At this point you could also create the notification rule defined below, however some records added into the index will not have the timestamp added until the other steps below have been configured. Therefore, I split up the sets for configuring vROPs.
Configure the Elastic Index
Back in the Elastic UI, within the Dev Tools console, update the instance using the below payloads, which configures the processing rule to be used on the new index and the explicit mapping to include the timestamp field to any records created within the index.
First, apply the processor to the index (substitute the index name).
PUT /{index_name}/_settings
{
  "settings": {
    "index.default_pipeline": "set-timestamp"
  }
    }

Second, apply the mapping to the index (substitute the index name).
PUT /{index_name}/_mapping
{
      "properties": {
        "timestamp": {
          "type": "date"
        }
      }
    }

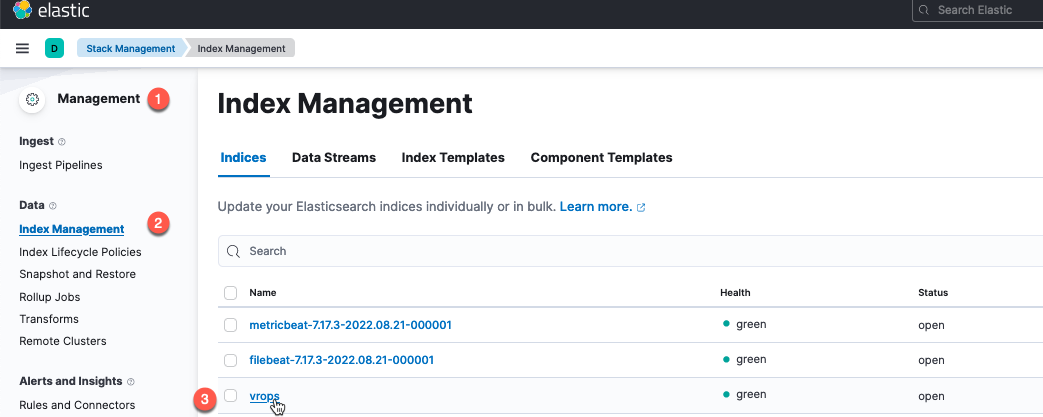
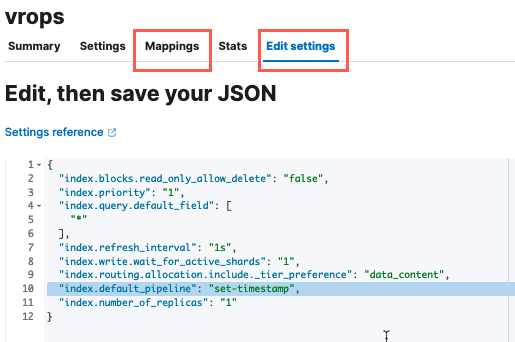
You can manually validate these settings have applied in the Elastic UI, going to Management > Data > Index Management. Select the index name and check the mapping and Edit Settings tabs.
Create an Outbound Notification Rule in vROPs
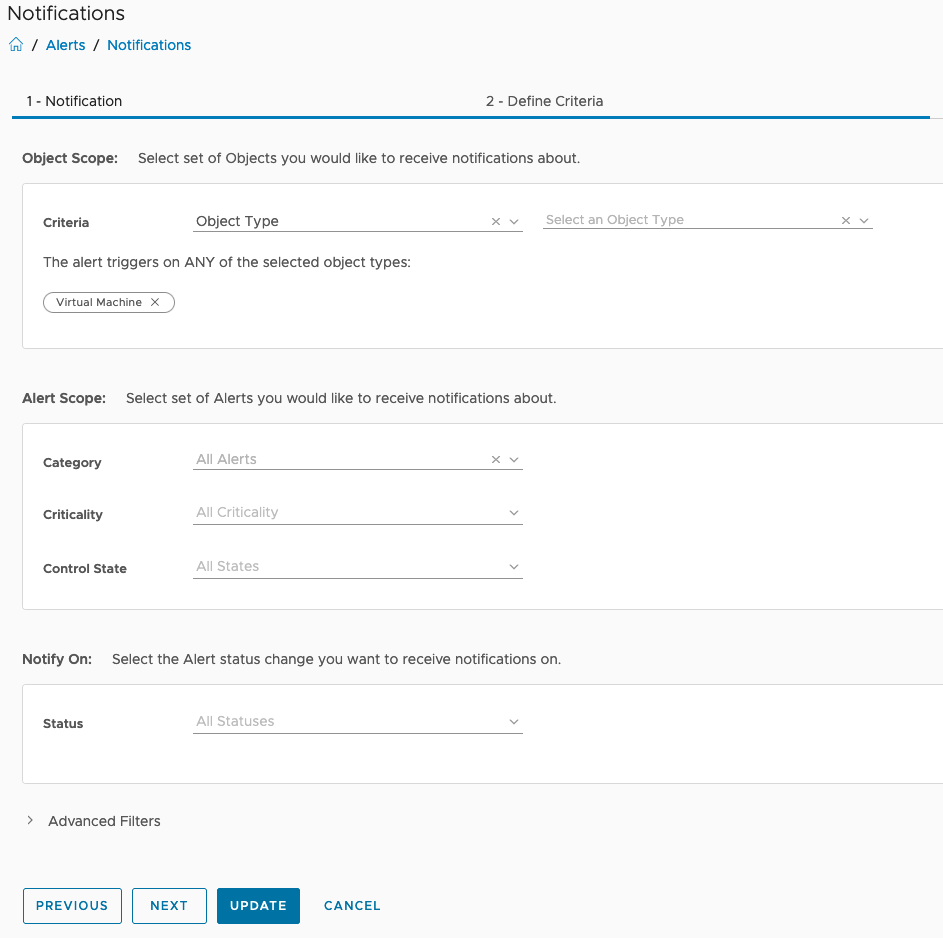
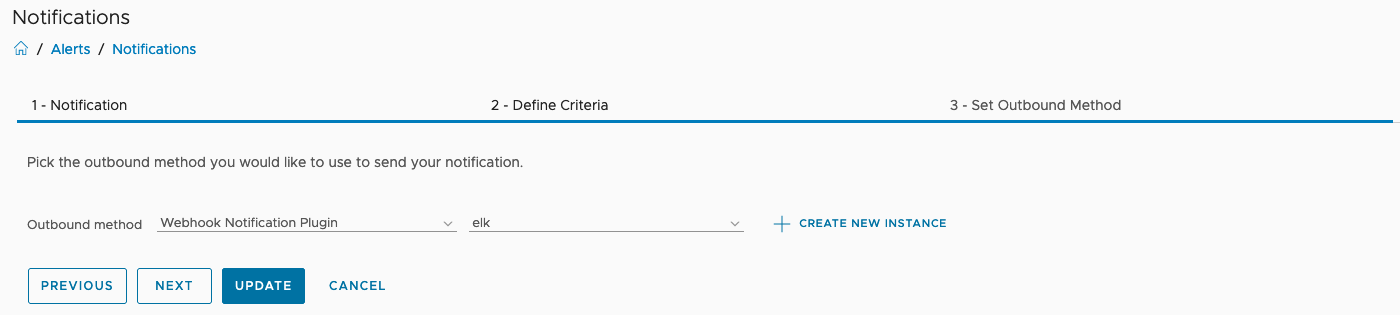
In the vRealize Operations UI, go to Configure > Alerts > Notifications. And click to add a new configuration.
- Provide a name for the notification
- Set to enabled
- Define the criteria to select which alerts should be forwarded
- Select the outbound method - The webhook we created earlier
- Select the Payload template - for this blog post I am using the existing default for Webhook.
- Click Create
Create a Elastic Index Pattern, and view the vROPs Alerts
We are now at the final configurations for this setup. Back in the Elastic UI under the management interface, go to Kibana > Index Patterns. These are a view configuration so you can access the data within a particular index. Click to Create an index pattern.
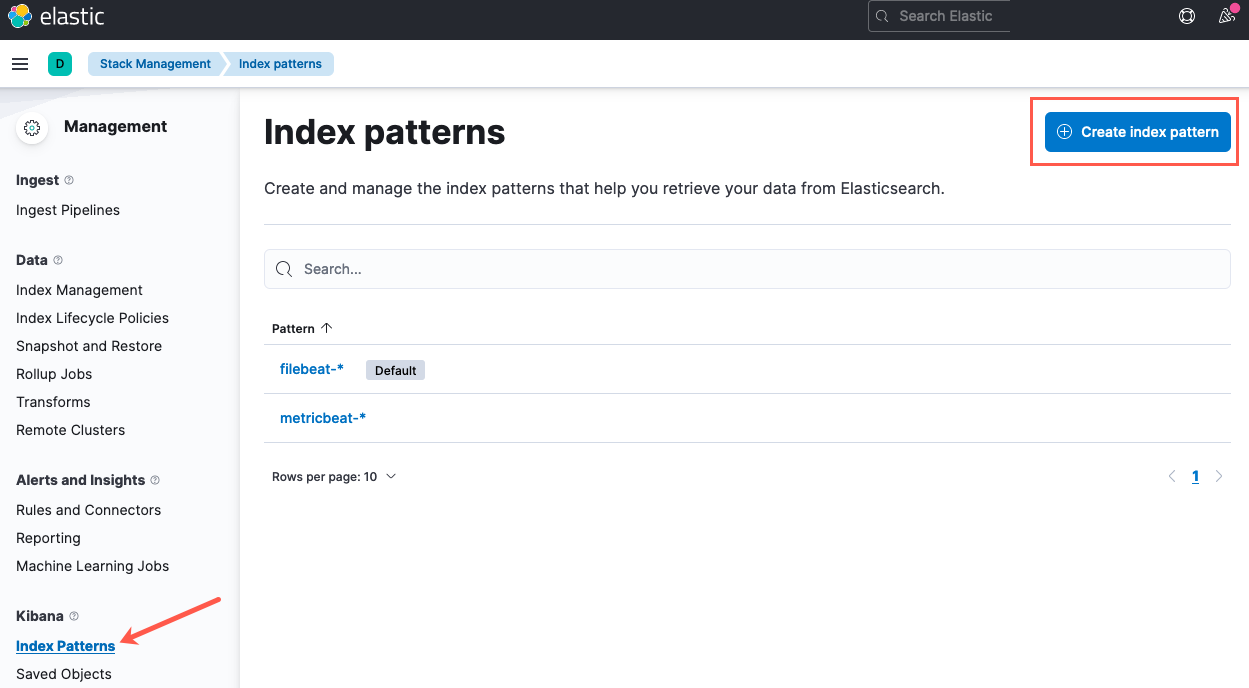
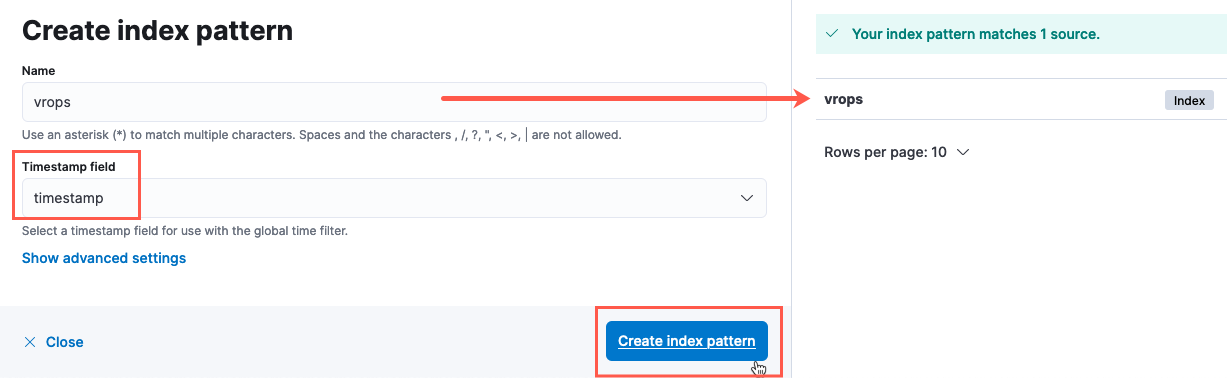
The name is a search field for the various index patterns available, you can use "*" as a wildcard. For my example, I'm just refencing the exact name of my index pattern.
Set the timestamp field, which you'll see only has one field populated. Click to Create the Index Pattern.
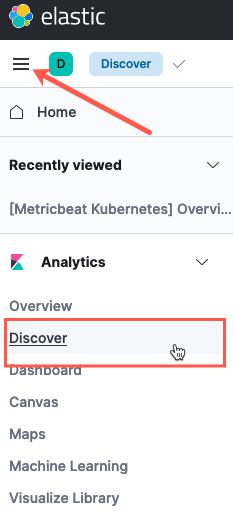
Now all that is left to do is view our data. Click the Three Lines navigation button in the top left-hand side, and under Analytics, click on Discover.
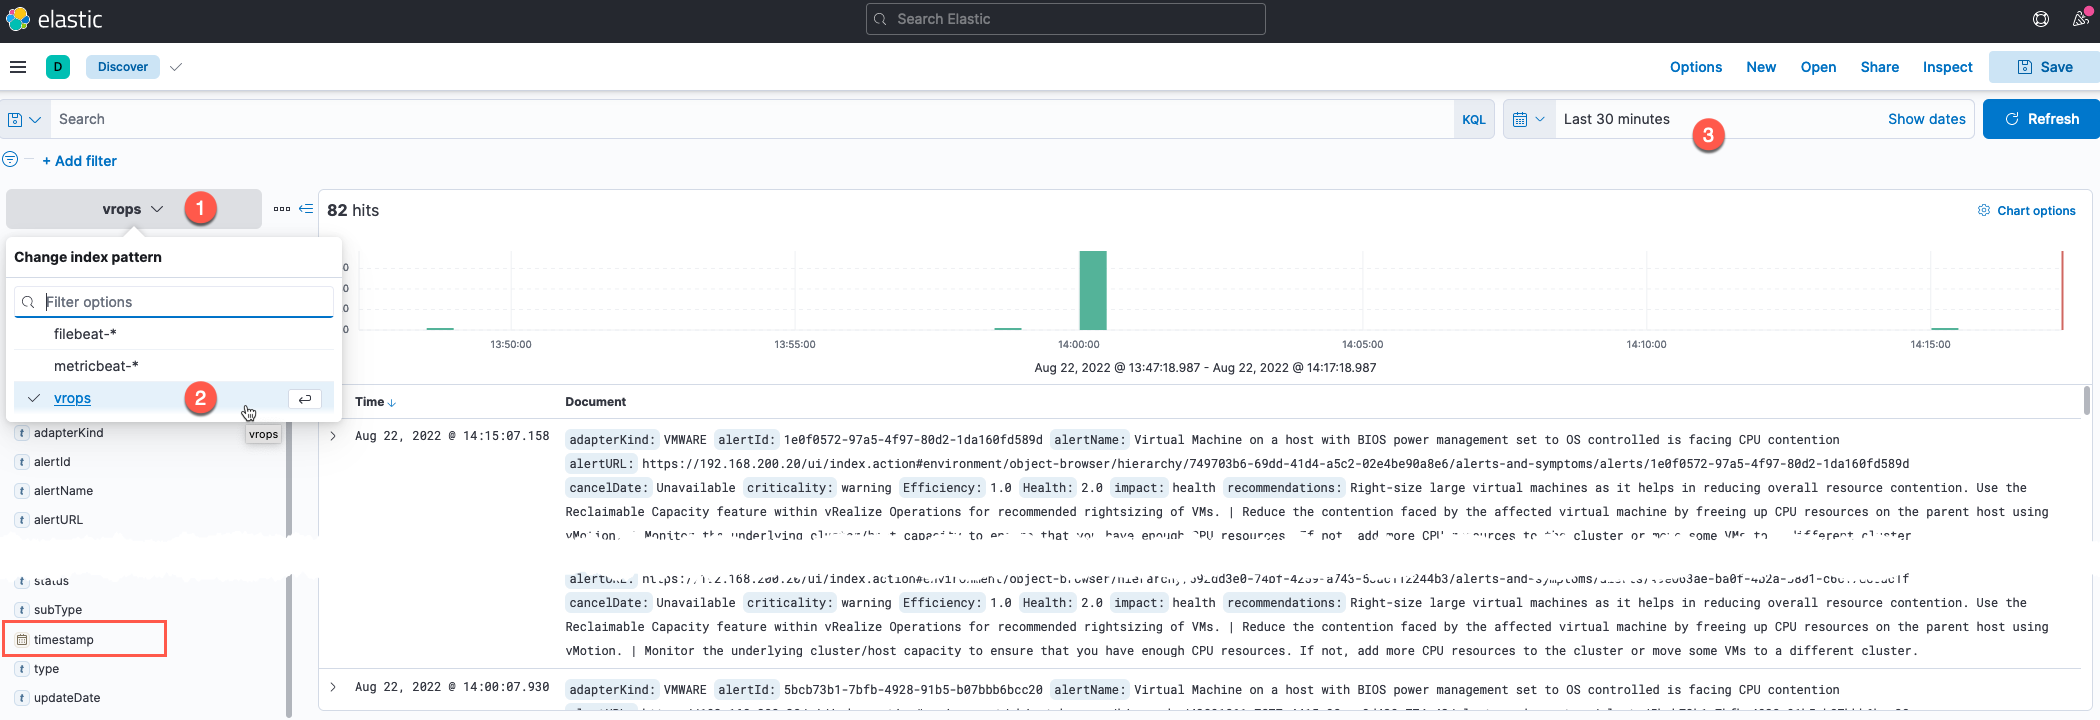
Set the Index Pattern you want to view, and then the timeframe. This will show all the logs without any queries provided, you can also see below I've highlighted the timestamp field as a selectable query.
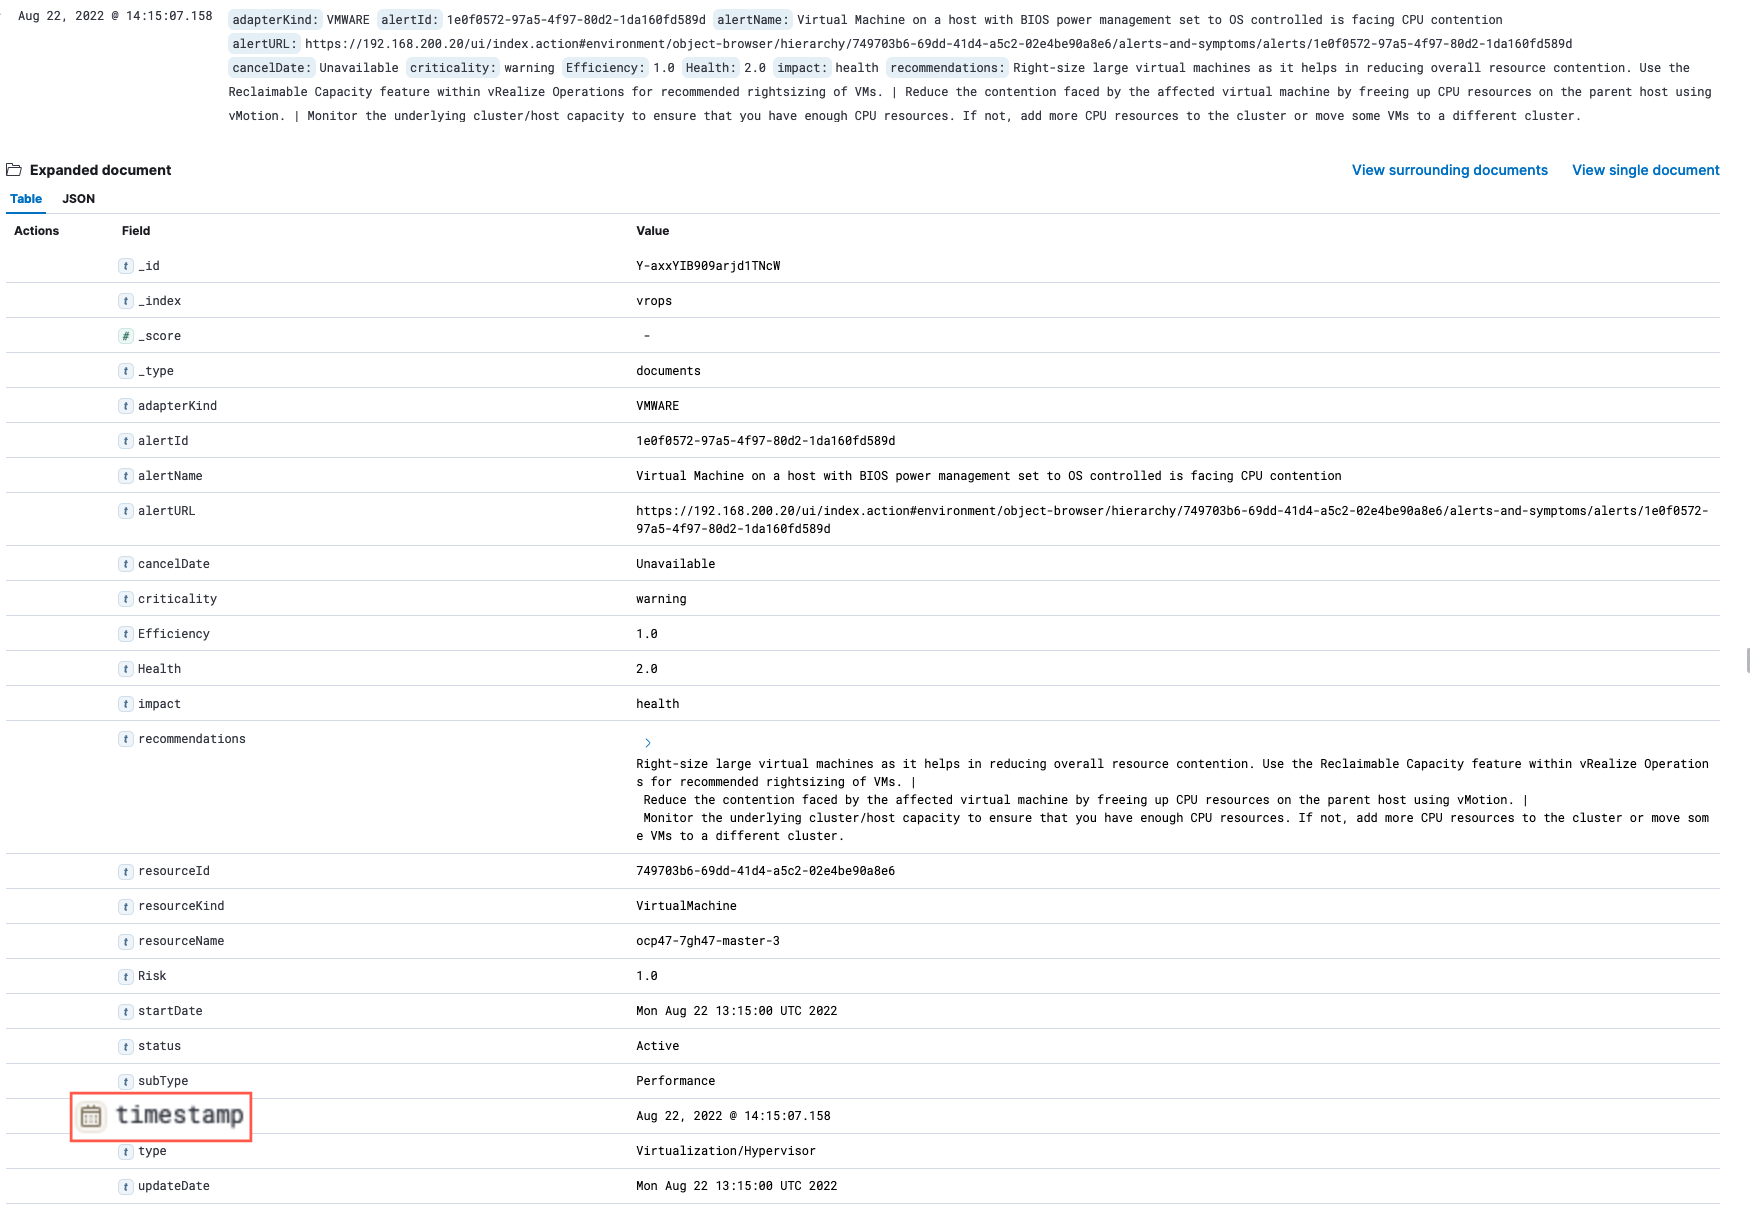
The last part I want to show was a full document record, or rather the payload of the alert information sent by vROPs to the Elastic cluster. You can see that the timestamp value shows as a type of "date" whereas the other fields such as "updateTime" show as text fields.
Some final bits about trying to correct the original fields sent by vROps
I thought I'd document the steps I took; in case someone reads this and can correct how I was trying to configure the solution.
I found that if I created the index in Elastic first, vROPs couldn't send any data to it. The test connection would fail.
If I had an existing Index created by vROPs, you cannot change the field types as they are immutable. But you can create an new index with the right field types and then re-index the data from the old to the new. The issue with this, is that it's a point in time rule. You can delete your old index, and set an alias on the new index to respond to the old name. Again, I found vROPs couldn't send data to it when this was done.
PUT /vrops-reindex
{
  "mappings": {
    "properties": {
      "updateDate":    {
      "type": "date",
      "format": "EEE LLL dd HH:mm:ss z uuuu"
       },
       "startDate":    {
       "type": "date",
       "format": "EEE LLL dd HH:mm:ss z uuuu"
        }
    }
  }
}

POST _reindex
{
  "source": {
    "index": "vrops"
  },
  "dest": {
    "index": "vrops-reindex"
  }
}

DELETE /vrops

PUT /vrops-reindex/_alias/vrops
Regards