So it’s just been a little over a year since Part 4 of my how to document series was posted. I hoped to keep adding to the series, but at the same time, only do it when I felt I had relevant content to share. So this post is to show how I have documented some recent backup configurations. Note: I mainly work with Veeam, but hopefully this will give you idea’s of how to present the setup of your other backup software
Below are the previous posts;
- Part 1 – The foundation of any IT infrastructure
- Part 2 – Rack and Server Diagrams
- Part 3 – Network IP’s & Interfaces
- Part 4 – Diagramming a network
The challenge
Note: The Visio file for these examples can be found at the end of the blog post.
Your backups evolve over time, as does your environment. Your backup schedules become more complex, and its hard to remember, what does what.
As past of my job, I setup backup solutions for customers, and then have the task of documenting how they are setup. I used to do this in a table format. It was quite simple
- Backup/replication job name
- Services backed up
- Job settings
- Storage/environment used
When you have a number of backup jobs, you have a lot of jobs and information to dig through. Its not user friendly.
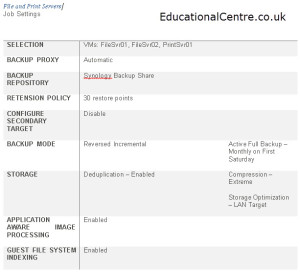
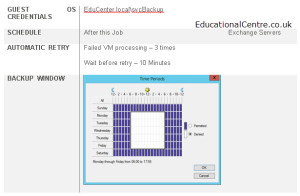
So I re-visualised the way to present the data, I still have the detailed tables, however I also have three Visio diagrams
- Backup Architecture setup
- Backup and Replication jobs – Servers/services included
- Backup and Replication job settings – high level
Continue reading How to produce good documentation – Part 5 – Diagraming your (Veeam) Backups


