Tag Archives: Configuration

vmware fah appliance 3

Using FAHControl to monitor multiple Folding@Home Clients

This blog post will cover how to centrally manage multiple Folding@Home clients.

  • Installing FAHControl
  • Monitor Multiple instances of VMware Appliance for Folding@home
  • Configuring Access to your Linux based clients or directly on the VMware F@H Appliance
  • Connecting FAHControl to your clients
  • Troubleshooting FAHControl issues
  • Firewall Rules

Installing FAHControl to monitor multiple installations

For Windows instances, this is installed as part of the FAHClient

  • “C:\Program Files (x86)\FAHClient\FAHControl.exe”

For Linux, you will need to install FAHControl separately

Monitoring multiple instances of the VMware Appliance for Folding@Home

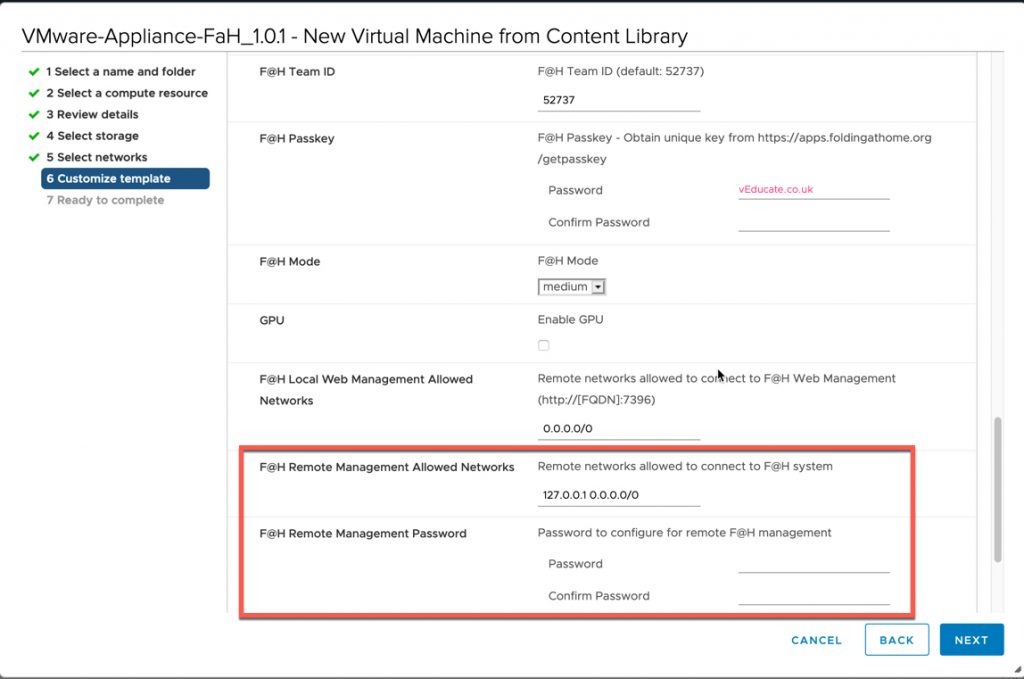
When you deploy you’re OVA you’ll be asked to configure the below highlighted settings, by default we input a rule of 0.0.0.0/0 meaning any FAHControl node can connect (using the correct password). You can alter this for your local subnets.

VMware Appliance for FoldingatHome FAHControl remote management networks

Configuring Access to your Linux based clients or directly on the VMware F@H Appliance

On your Linux machines or deployed OVAs

  • Connect via SSH
  • Edit the config.xml file
vi /etc/fahclient/config.xml
  • Insert the following code to enable FAHControl access
    • From within vi press ‘i’ to enter insert mode
  • To configure a single address to access your client
    • Without passwords;
<command-allow-no-pass v='127.0.0.1 x.x.x.x’ />
  • With Password;
<command-allow v='127.0.0.1 192.168.200.10' />

<password v='VMware1!' />

N.B. The localhost address must remain configured, otherwise the client work run

  • Save the config.xml file
  • Press ESC key
  • Enter without quotes “:wq!”

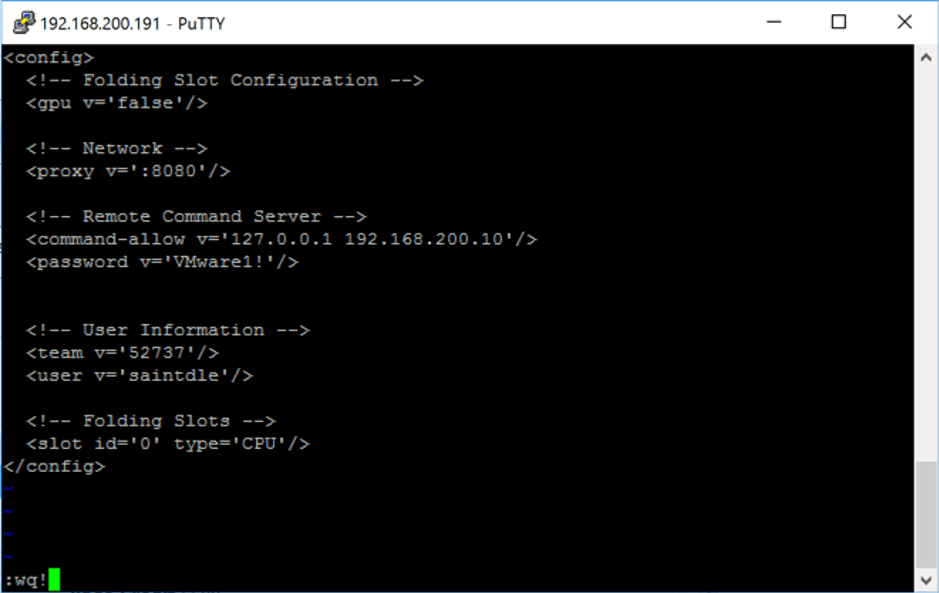
Using FAHControl to monitor multiple Folding@Home Clients example config.xml file

  • Reload the FAHClient
    • /etc/init.d/FAHClient restart

reload FAHClient init.d restart

If you see “Starting fahclient … FAIL” check your XML file again for any syntax errors.

Examples Config.xml changes

Using password with a single IP restriction

  <!-- Remote Command Server -->

  <command-allow v='127.0.0.1 192.168.200.10' />

  <password v='VMware1!'/>

Without a password against a single IP restriction

  <!-- Remote Command Server -->

  <command-allow-no-pass v='127.0.0.1 192.168.200.10' />

Without either a password or IP restriction

<!-- Remote Command Server -->

  <command-allow-no-pass v='127.0.0.1 0.0.0.0/0' />

Connecting FAHControl to your clients

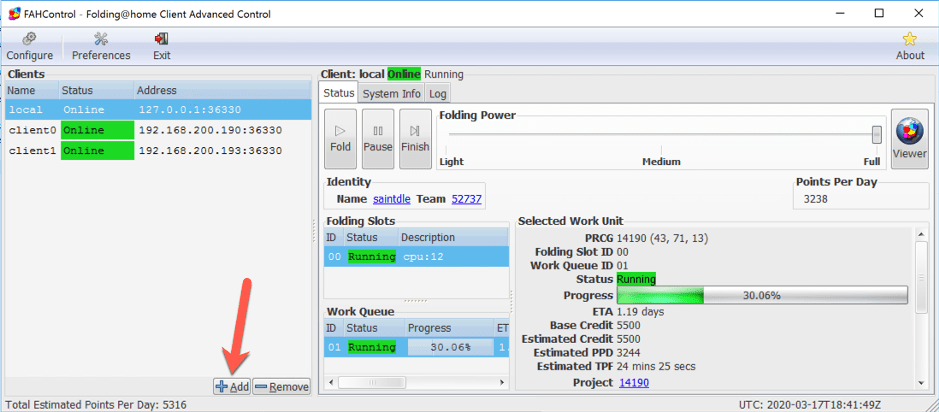
  • Open your FAHControl and click Add
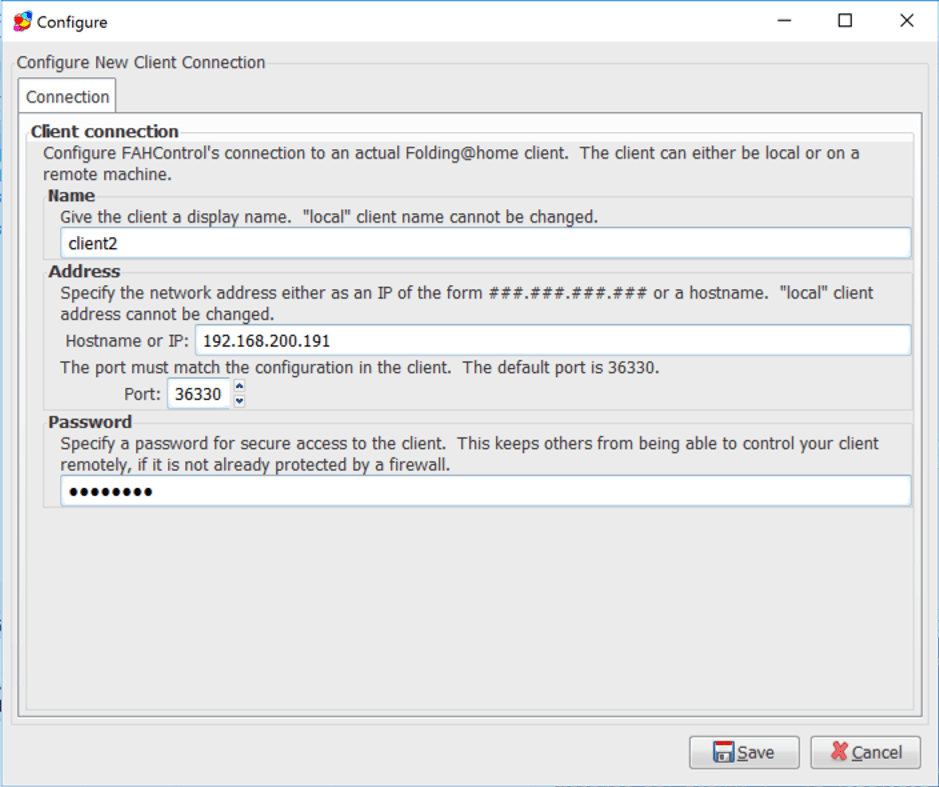
  • Enter the name of your client as you would like it to be displayed, the IP address of your client and your password if necessary, and click save
  • You should now see your client is connected in FAHControl.

Connecting FAHControl to your clients adding a client

Connecting FAHControl to your clients adding a client settings

Troubleshooting FAHControl issues

FAHControl uses the default TCP Port 36330

Test access with telnet you should get a response as below.

FAHClient telnet port 36330

The VMware Appliance for Folding@Home has IPTables configured to allow this port by default, if you did not specify a specific remote management address during deployment, then access is open to all IP addresses.

Ensure that the machine where you are running FAHControl is not blocking outbound connections to TCP 33630.

Appendix

Firewall rules

The below firewall rules have been added to the VMware Appliance for Folding@Home  by default to allow for FAHControl to remotely manage FAHClient.

If you are using these instructions for a Linux machine, you can use the below settings as well.

iptables -A INPUT -p tcp --dport 36330 -m conntrack --ctstate NEW,ESTABLISHED -j ACCEPT

iptables -A OUTPUT -p tcp --dport 36330 -m conntrack --ctstate NEW,ESTABLISHED -j ACCEPT


Regards

Nimble Secondary Flash Array Banner

Setting up a Nimble Secondary Flash Array from scratch

Nimble Storage have released their newest addition in the line up, the SFA, or to give its full name, the Secondary Flash Array. And in this post, we are going to look at how to set one up from scratch.

Taken from the following datasheet;

The Nimble Secondary Flash Array represents a new type of secondary data storage optimized for both capacity and performance. It adds high-performance flash storage to a capacity-optimized architecture for a unique backup platform that lets you put your backup data to work.

The Nimble Secondary Flash Array is optimized for backup, disaster recovery and secondary data storage. By using Flash, it lets you put your backup data to work for Dev/Test, QA and analytics. Instantly backup and recover data from any primary storage system. And our integration with Veeam backup software simplifies data lifecycle management and provides a path to cloud archiving.
Before you get started

As you can imagine it’s as easy as setting up one of the existing Nimble Arrays, as I blogged about previous (Setup via GUI, via CLI). Actually the configuration via CLI is the exact same!

First things to note; the SFA ships with the NimOS 4.x, which is now HTML5 based, and there is extra port requirement for access if you have a firewall or a web proxy in the situ, TCP 5392, which is used for RESTapi access. In my testing, I found that the Sophos web filter that was setup in transparent mode, caused issues with my login page on the Nimble, when I removed it from the equation, I noticed my Firefox gave me a pop-up window as per the below.

Nimble SFA port 5392 e1498081602430

How to setup the array – initial configuration
  • Launch the Nimble Setup Manager, this can be downloaded from https://infosight.nimblestorage.com

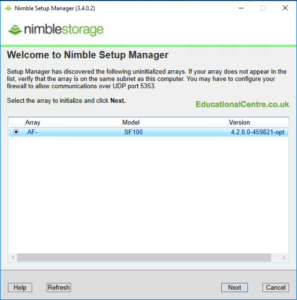
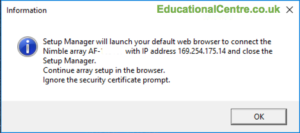
You’ll see below I actually used an older version, and it still worked fine discovering the array. When you click next, you’ll be presented a dialog box explaining that your default browser will be launched to continue the setup (as part of the new HTML5 interface).

Nimble Setup Manager connect to SFA Nimble Setup Manager Launch web browser to connect to SFA


  • Accept the certificate error, as the Nimble uses a self signed cert on the web interface

Continue reading Setting up a Nimble Secondary Flash Array from scratch

backup header

How to produce good documentation – Part 5 – Diagraming your (Veeam) Backups

So it’s just been a little over a year since Part 4 of my how to document series was posted. I hoped to keep adding to the series, but at the same time, only do it when I felt I had relevant content to share. So this post is to show how I have documented some recent backup configurations. Note: I mainly work with Veeam, but hopefully this will give you idea’s of how to present the setup of your other backup software

Below are the previous posts;

The challenge

Note: The Visio file for these examples can be found at the end of the blog post.

Your backups evolve over time, as does your environment. Your backup schedules become more complex, and its hard to remember, what does what.

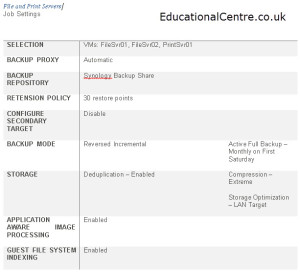
As past of my job, I setup backup solutions for customers, and then have the task of documenting how they are setup. I used to do this in a table format. It was quite simple

  • Backup/replication job name
    • Services backed up
    • Job settings
      • Storage/environment used

When you have a number of backup jobs, you have a lot of jobs and information to dig through. Its not user friendly.

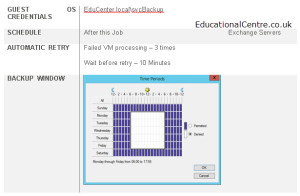
Veeam backup job settings table 1 Veeam backup job settings table 2

So I re-visualised the way to present the data, I still have the detailed tables, however I also have three Visio diagrams

  • Backup Architecture setup
  • Backup and Replication jobs – Servers/services included
  • Backup and Replication job settings – high level

Continue reading How to produce good documentation – Part 5 – Diagraming your (Veeam) Backups

2015 04 20 22 05 11

Deploy a Cisco UCS system – Part 1 – from scratch for VMware ESXi

First off, huge thanks to the following posts by Rene Van Den Bedem and his Cisco UCS installation guide.

My aim here is not to rip off his posts, but to detail the process myself and use my own screenshots, as along the way, the setup was slightly different to Rene’s, such as the configuration needed for the SD Cards, and the lack of boot from SAN configuration.

Covered in Part 1;

  • The hardware/software
  • Cabling diagram
  • Pre-Reqs
  • Understanding Cisco’s policy based management
  • Summary of Task List
  • Setting up Fabric Interconnects
  • Connecting to Cisco UCS Manager

The Hardware/Software Continue reading Deploy a Cisco UCS system – Part 1 – from scratch for VMware ESXi