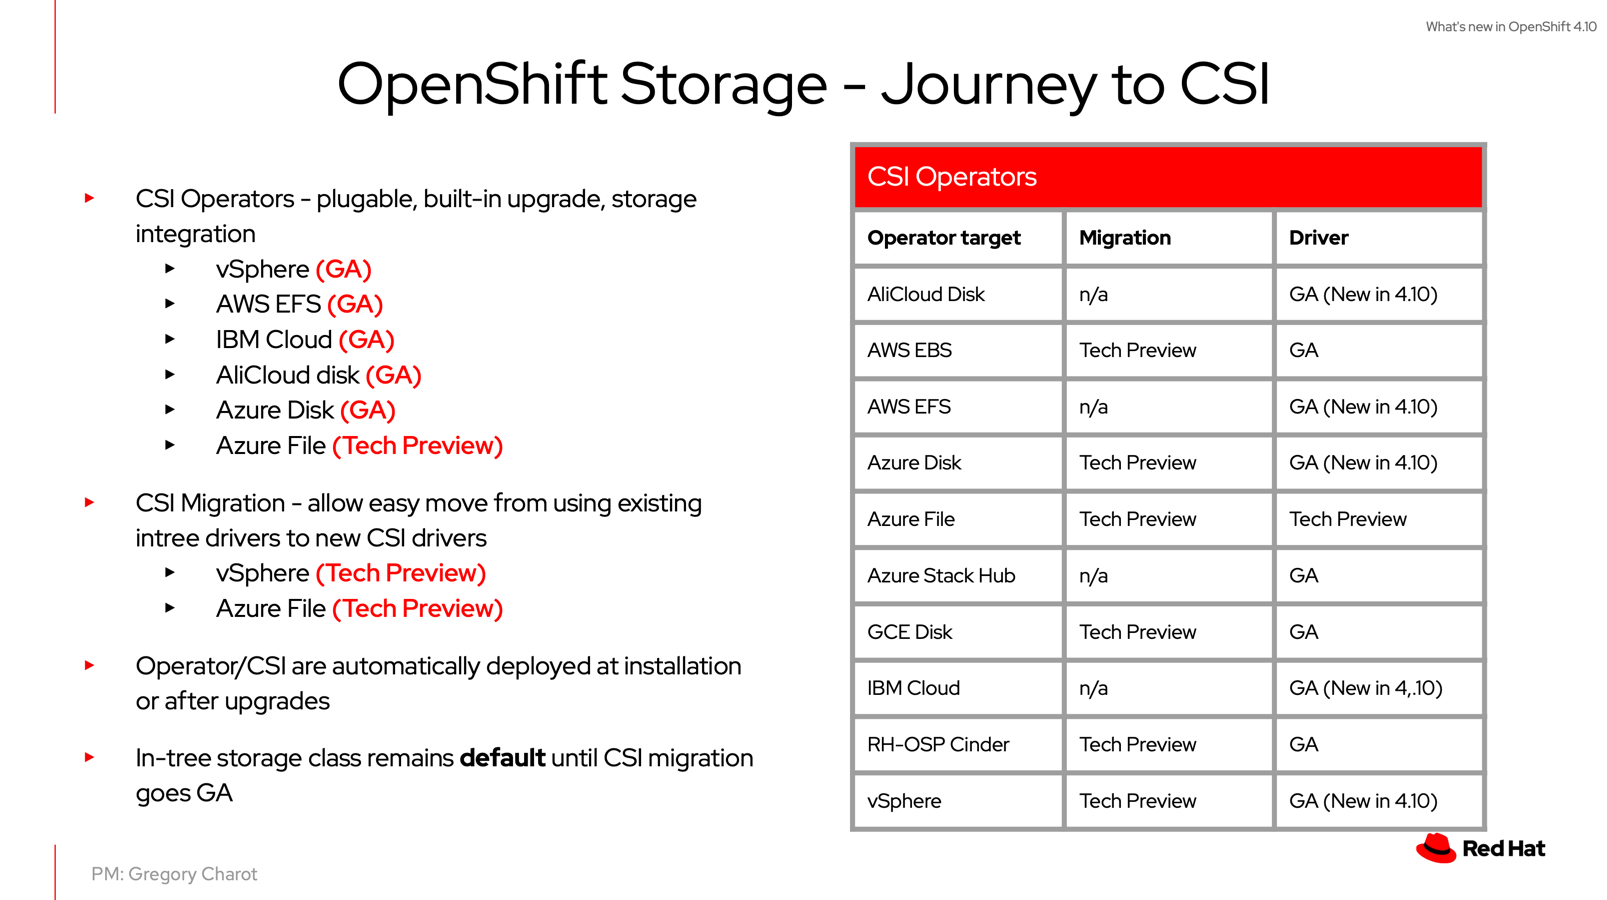
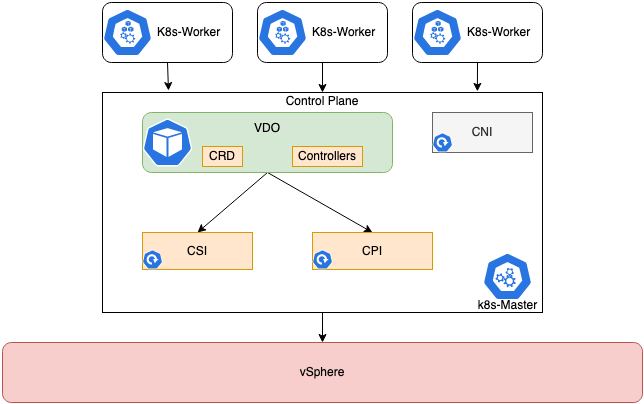
Note2: December 2021 VMware released the Red Hat Certified Operator "vSphere Kubernetes Driver Operator", which is now the preferred and recommended way to install CPI and CSI in your OpenShift environment.
- Using the new vSphere Kubernetes Driver Operator with Red Hat OpenShift via Operator Hub

Note: This blog post was updated in February 2021 to use the new driver manifests from the Official VMware CSI Driver repository, which now provides support for OpenShift
Introduction
In this post I am going to install the vSphere CSI Driver version 2.1.0 with OpenShift 4.x, in my demo environment I’m connecting to a VMware Cloud on AWS SDDC and vCenter, however the steps are the same for an on-prem deployment.
We will be using the vSphere CSI Driver which now supports OpenShift.
- Pre-Reqs
- - vCenter Server Role
- - Download the deployment files
- - Create the vSphere CSI secret in OpenShift
- - Create Roles, ServiceAccount and ClusterRoleBinding for vSphere CSI Driver
- Installation
- - Install vSphere CSI driver
- - Verify Deployment
- Create a persistent volume claim
- Using Labels
- Troubleshooting
In your environment, cluster VMs will need “disk.enableUUID” and VM hardware version 15 or higher.
Pre-Reqs
vCenter Server Role
In my environment I will use the default administrator account, however in production environments I recommend you follow a strict RBAC procedure and configure the necessary roles and use a dedicated account for the CSI driver to connect to your vCenter.
To make life easier I have created a PowerCLI script to create the necessary roles in vCenter based on the vSphere CSI documentation;
Download the deployment files
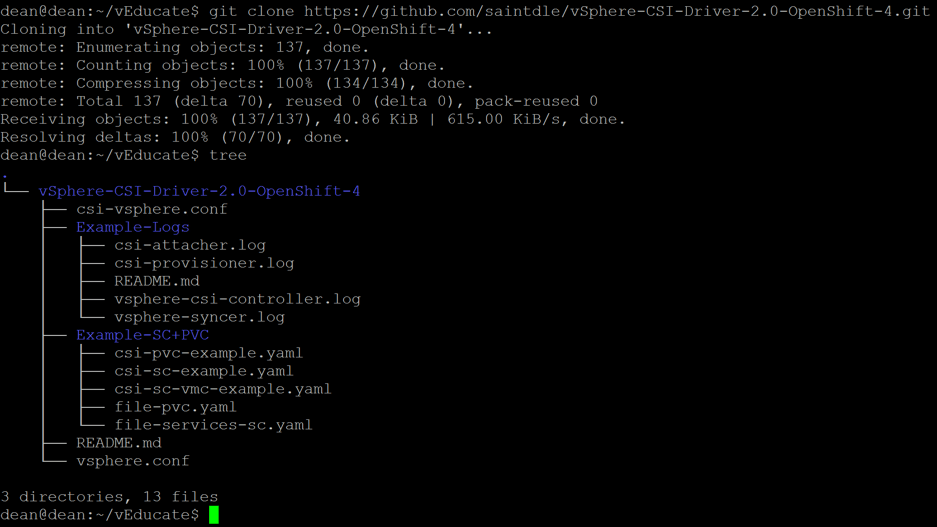
Run the following;
git clone https://github.com/saintdle/vSphere-CSI-Driver-2.0-OpenShift-4.git
Create the vSphere CSI Secret + CPI ConfigMap in OpenShift
Edit the two files “csi-vsphere.conf” + “vsphere.conf” with your vCenter infrastructure details. These two files may have the same information in them, but in the example of using VSAN File Services, then you may include further configuration in your CSI conf file, as an example.
[Global]

# run the following on your OCP cluster to get the ID
# oc get clusterversion -o jsonpath='{.items[].spec.clusterID}{"\n"}'
#Your OCP cluster name provided below can just be a human readable name but needs to be unique when running different OCP clusters on the same vSphere environment.
cluster-id = "OCP_CLUSTER_ID"

[VirtualCenter "VC_FQDN"]
insecure-flag = "true"
user = "USER"
password = "PASSWORD"
port = "443"
datacenters = "VC_DATACENTER"
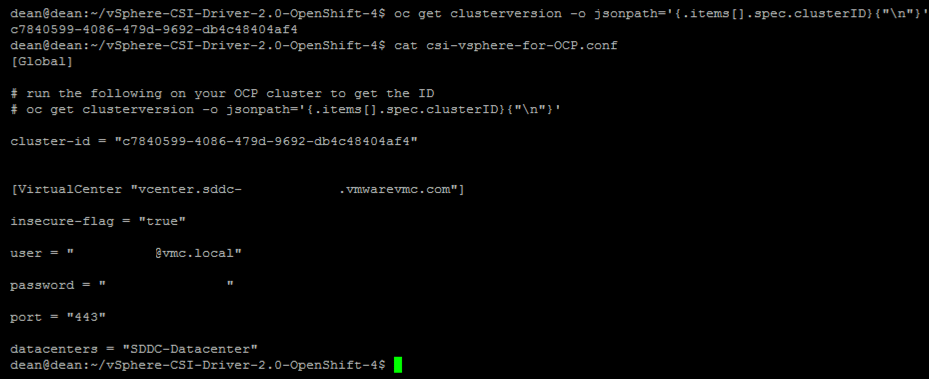
Create the CSI secret + CPI configmap;
oc create secret generic vsphere-config-secret --from-file=csi-vsphere.conf --namespace=kube-system

oc create configmap cloud-config --from-file=vsphere.conf --namespace=kube-system

To validate:
oc get secret vsphere-config-secret --namespace=kube-system
oc get configmap cloud-config --namespace=kube-syste
This configuration is for block volumes, it is also supported to configure access to VSAN File volumes, and you can see an example of the configuration here;
Remove the two local .conf files form your machine once the secret is created, as it contains your password in clear text for vCenter.
Installation
Install the vSphere CPI
Taint all OpenShift Nodes.
kubectl taint nodes --all 'node.cloudprovider.kubernetes.io/uninitialized=true:NoSchedule'
Install the vSphere CPI (RBAC, Bindings, DaemonSet)
oc apply -f https://raw.githubusercontent.com/kubernetes/cloud-provider-vsphere/master/manifests/controller-manager/cloud-controller-manager-roles.yaml

oc apply -f https://raw.githubusercontent.com/kubernetes/cloud-provider-vsphere/master/manifests/controller-manager/cloud-controller-manager-role-bindings.yaml

oc apply -f https://github.com/kubernetes/cloud-provider-vsphere/raw/master/manifests/controller-manager/vsphere-cloud-controller-manager-ds.yaml
You can verify the installation by viewing the providerID for the nodes, which must reference “vSphere”.
oc describe nodes | grep "ProviderID"

Install vSphere CSI driver
The driver is made up of the following components
- CSI Controller runs as a Kubernetes deployment, with a replica count of 1.
- For version v2.1.0, the vsphere-csi-controller Pod consists of 6 containers
- CSI controller, External Provisioner, External Attacher, External Resizer, Liveness probe and vSphere Syncer.
Note: This example shows the newer driver manifests for vSphere 7.0 U1.
Use the correct vSphere version manifests as per this link.
Create the CSI artifacts.
oc apply -f https://raw.githubusercontent.com/kubernetes-sigs/vsphere-csi-driver/master/manifests/v2.1.0/vsphere-7.0u1/rbac/vsphere-csi-controller-rbac.yaml

oc apply -f https://raw.githubusercontent.com/kubernetes-sigs/vsphere-csi-driver/master/manifests/v2.1.0/vsphere-7.0u1/deploy/vsphere-csi-node-ds.yaml

oc apply -f https://raw.githubusercontent.com/kubernetes-sigs/vsphere-csi-driver/master/manifests/v2.1.0/vsphere-7.0u1/deploy/vsphere-csi-controller-deployment.yaml
Verify the deployment
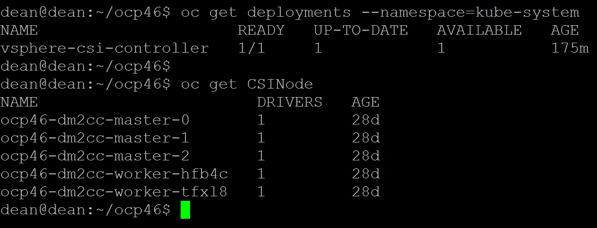
You can verify the deployment with the two below commands
oc get deployments --namespace=kube-system

oc get CSINode
Creating a Storage Class that uses the CSI-Driver
Create a storage class to test the deployment. As I am using VMC as my test environment, I must use some additional optional parameters to ensure that I use the correct VSAN datastore (WorkloadDatastore). You can visit the references below for more information.
In the VMC vCenter UI, you can get this by going to the Datastore summary page.

To get my datastore URL I need to reference, I will use PowerCLI
get-datastore work* | Select -ExpandProperty ExtensionData | select -ExpandProperty Info

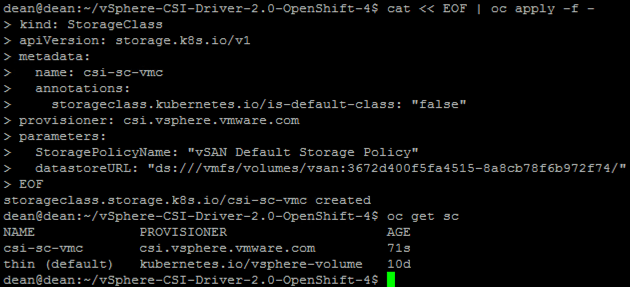
I’m going to create my StorageClass on the fly, but you can find my example YAMLs here;
cat << EOF | oc apply -f -
kind: StorageClass
apiVersion: storage.k8s.io/v1
metadata:
  name: csi-sc-vmc
  annotations:
    storageclass.kubernetes.io/is-default-class: "false"
provisioner: csi.vsphere.vmware.com
parameters:
  StoragePolicyName: "vSAN Default Storage Policy"
  datastoreURL: "ds:///vmfs/volumes/vsan:3672d400f5fa4515-8a8cb78f6b972f74/"
EOF
Create a Persistent Volume Claim
Finally, we are going to create a PVC. You can find my example PVC files at the same link above.
cat << EOF | oc apply -f -
apiVersion: v1
kind: PersistentVolumeClaim
metadata:
  name: example-openshift-vmc-block-pvc
spec:
  accessModes:
    - ReadWriteOnce
  resources:
    requests:
      storage: 5Gi
  storageClassName: csi-sc-vmc
EOF

You can see the PVC created under my cluster > Monitor Tab > Cloud Native Storage in vCenter.

Using Labels
Thanks to one of my colleagues (Jason Monger), who asked me if we could use labels with this integration. And the answer is yes you can.
When creating your PVC, under metadata including your labels such as the able below. These will be pulled into your vCenter UI making it easier to associate your volumes.
kind: PersistentVolumeClaim
apiVersion: v1
metadata:
  name: csi-pvc-test
  annotations:
    volume.beta.kubernetes.io/storage-class: csi-sc-vmc
  labels:
    appname: veducate
spec:
  accessModes:
  - ReadWriteOnce
  resources:
    requests:
      storage: 30Gi

Troubleshooting
For troubleshooting, you need to be aware of the four main containers that run in the vSphere CSI Controller pod and you should investigate the logs from these when you run into issues;
- CSI-Attacher
- CSI-Provisoner
- vSphere-CSI-Controller
- vSphere-Syncer
Below I have uploaded some of the logs from a successful setup and creation of a persistent volume.
Resources
Regards

