Cilium Network Policies, from first principles to production
This post teaches the Cilium policy model with clear scenarios and annotated YAML. It matches the style of practical technical blogs, explanation first and…
Read guide →5 vEducate articles tagged Hubble.
This post teaches the Cilium policy model with clear scenarios and annotated YAML. It matches the style of practical technical blogs, explanation first and…
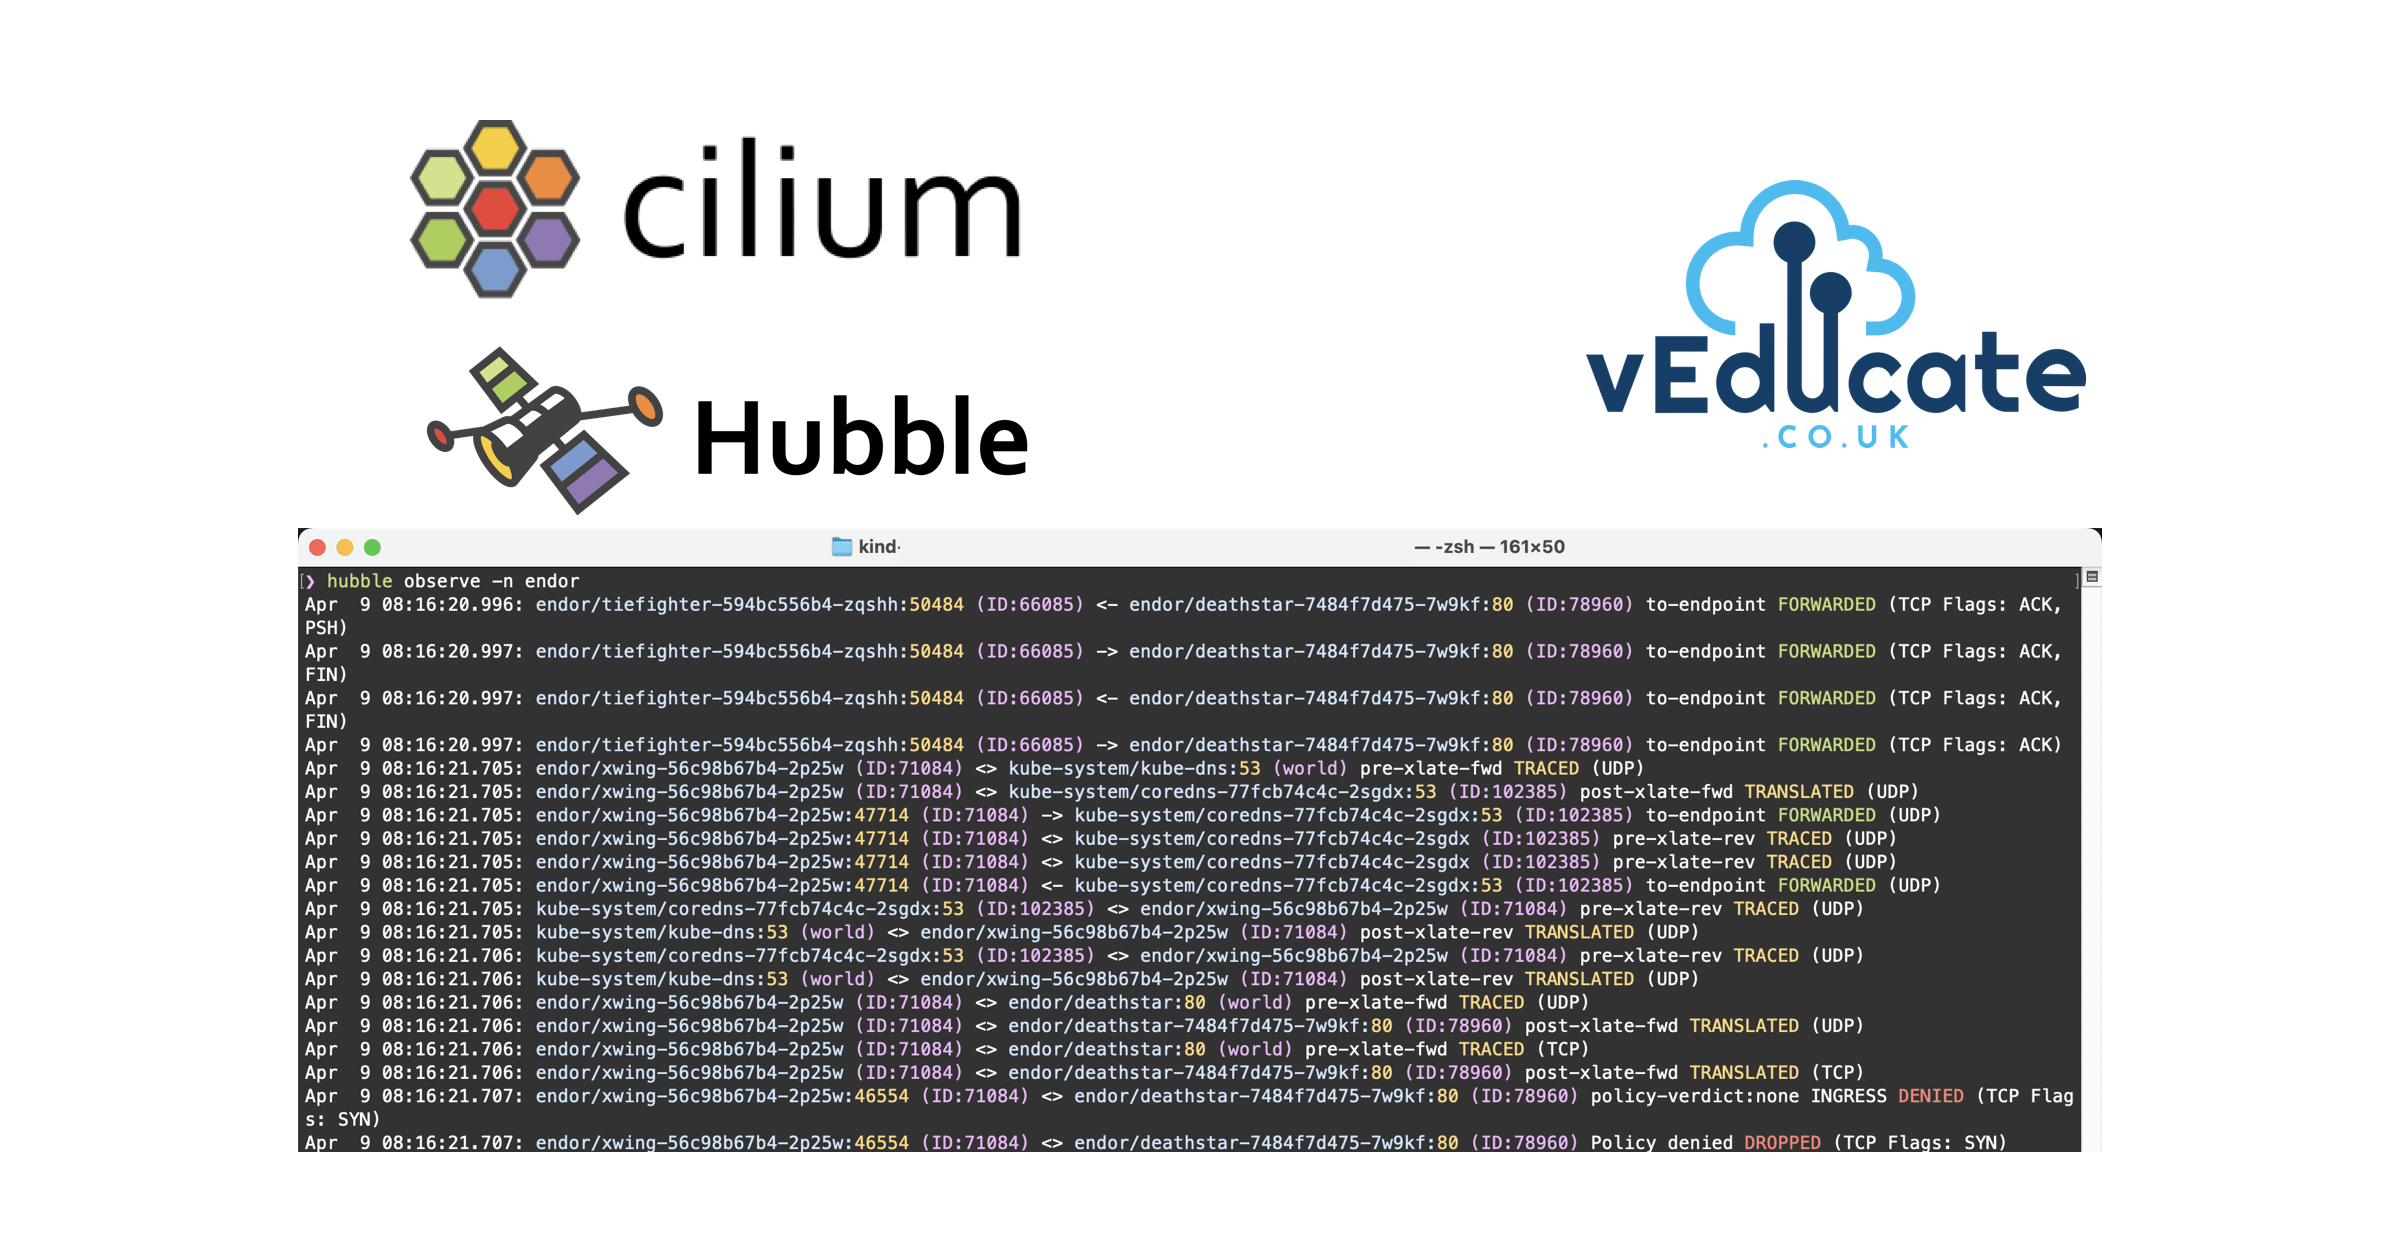
Read guide →The Issue In a platform that's deployed with Cilium, when using Hubble either to view the full JSON output or to configure which events are captured using the…
Read guide →One of the little nits I have is when I use the terminal, and as I start typing a command if I press the Tab key, autocomplete doesn't work. It feels like it…
Read guide →Did you know that the Cilium Hubble CLI supports using a configuration file? Below is an example command where Isovalent Enterprise for Cilium is deployed and…
Read guide →In this blog post I'm going to dive into how you can create a Tanzu Kubernetes Grid cluster and specify your own container network interface, for example…
Read guide →