This blog post will cover a technical walk-through on using Tanzu Mission Control to deploy Tanzu Kubernetes clusters to AWS.
The follow up blog posts in this series are:
Tanzu Mission Control
- Getting Started Tanzu Mission Control
- Cluster Inspections
- Workspaces and Policies
- Data Protection
- Deploying TKG clusters to AWS
- Upgrading a provisioned cluster
- Delete a provisioned cluster
- TKG Management support and provisioning new clusters
- TMC REST API - Postman Collection
- Using custom policies to ensure Kasten protects a deployed application
Using the AWS Hosted Management Cluster
In this example, we will use the default provided AWS Hosted Management cluster.
Alternatively, you can use the Tanzu CLI to provision a TKG Management cluster into AWS and attach this to Tanzu Mission Control.
Currently it is not supported to have a Management Cluster manage clusters across platforms.
- I.e. Management Cluster in AWS that manages workload clusters in Azure.
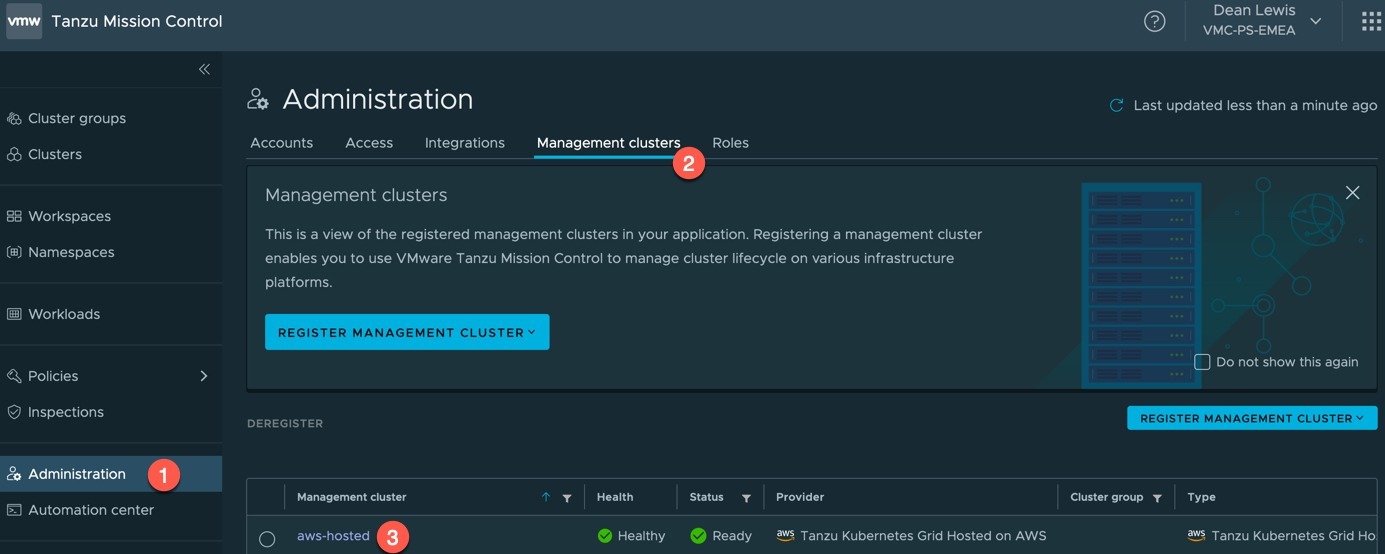
To get started:
- Go to Administration
- Click the Management Clusters Tab
- Click on the “aws-hosted” cluster object name
Create a provisioner
The default tab when selecting the “aws-hosted” management cluster object is the provisioner tab.
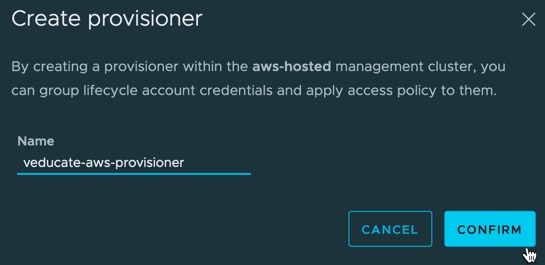
- Click create provisioner
- Provide a name for the provisioner
- Click confirm
You will be taken back to your provisioner object which is created. Using the radio button to select the object will allow you to delete it. No other action is available.
Create the AWS account
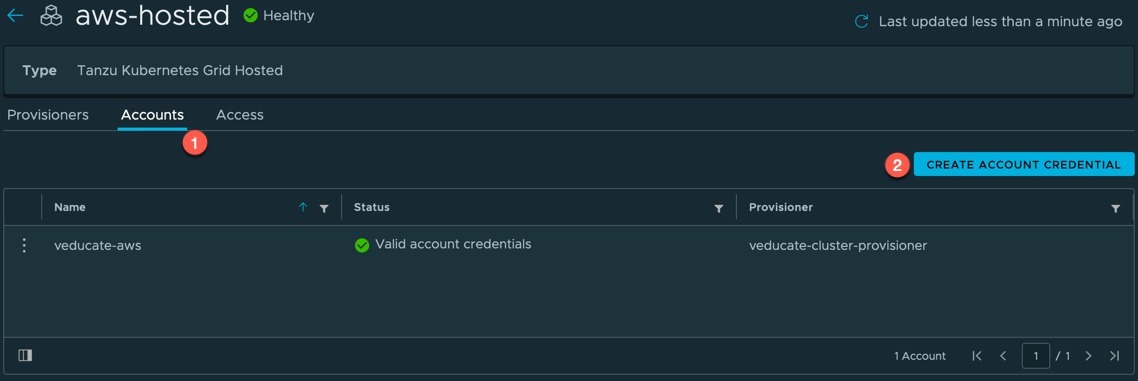
- Click on accounts tab
- Click the “Create Account Credential” Button
- Select the provisioner you created in the last steps
- Provide a credential name
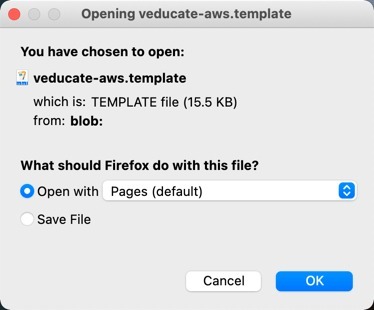
- Click “Generate Template” and download the template file provided.
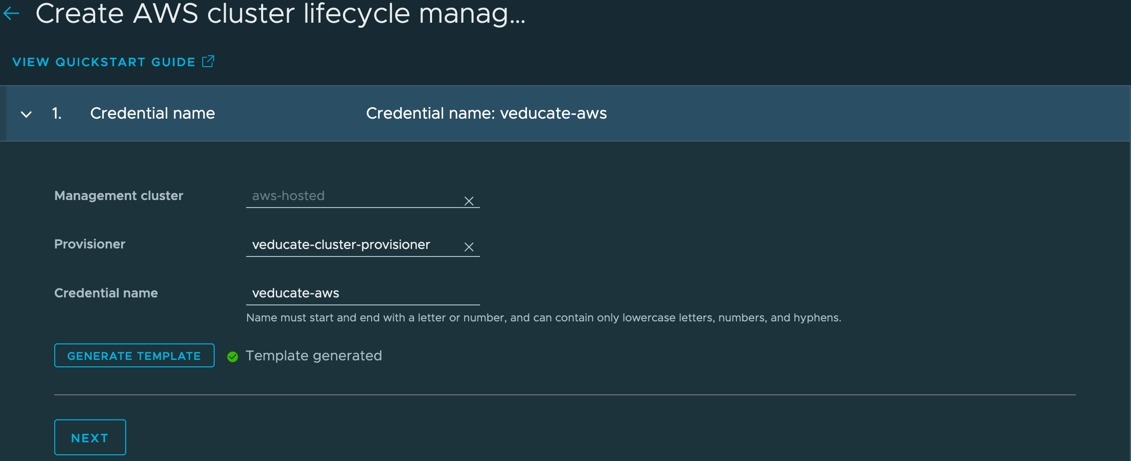
- Create your AWS ARN in the AWS console using CloudFormation, you can follow the documentation here for these steps.
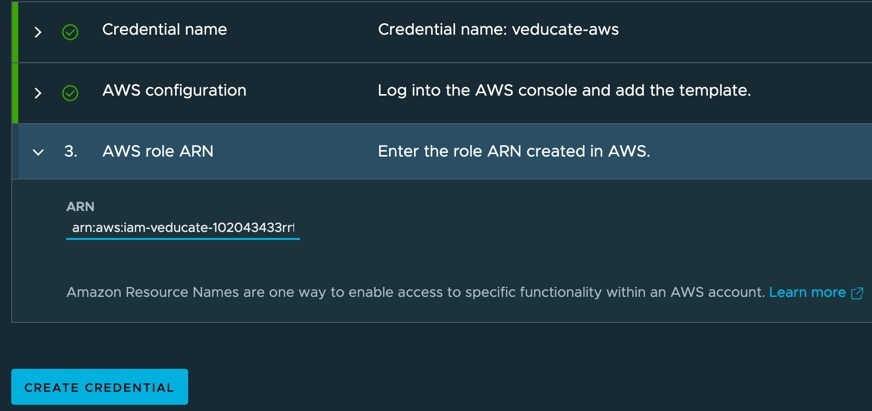
- Provide the ARN output from the CloudFormation Stack and click “Create Credential”
After a few minutes your account should have a green tick next to it when TMC has validated access to AWS using the ARN role details provided for the account.
Create a Tanzu Kubernetes Grid Cluster
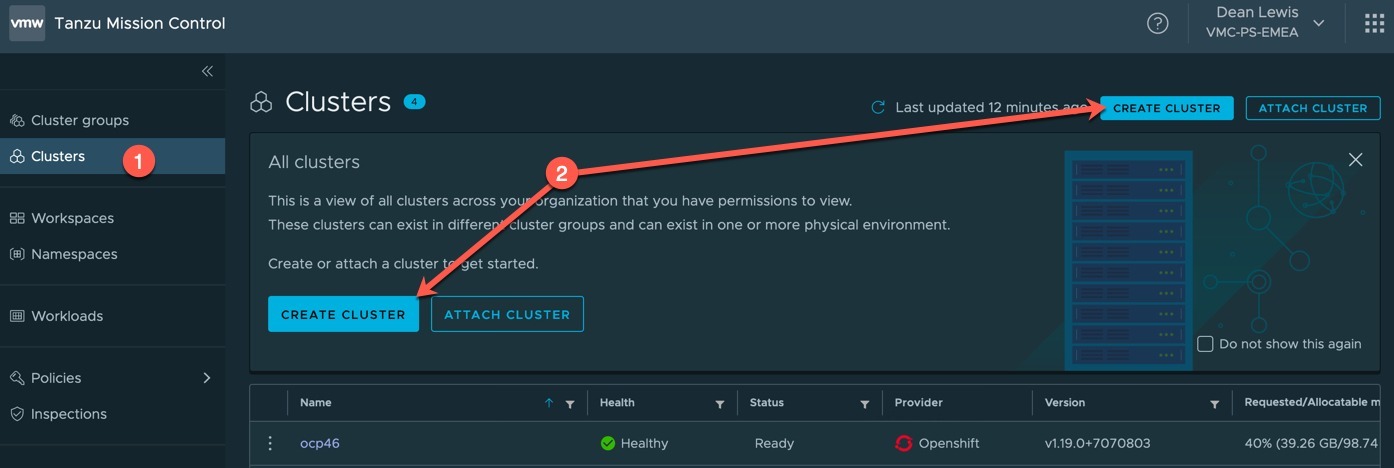
- Go to Clusters Tab in the left-hand navigation window
- Click Create Cluster
- Select your management cluster where you want to provision the new workload cluster
- Click “Continue to create cluster”
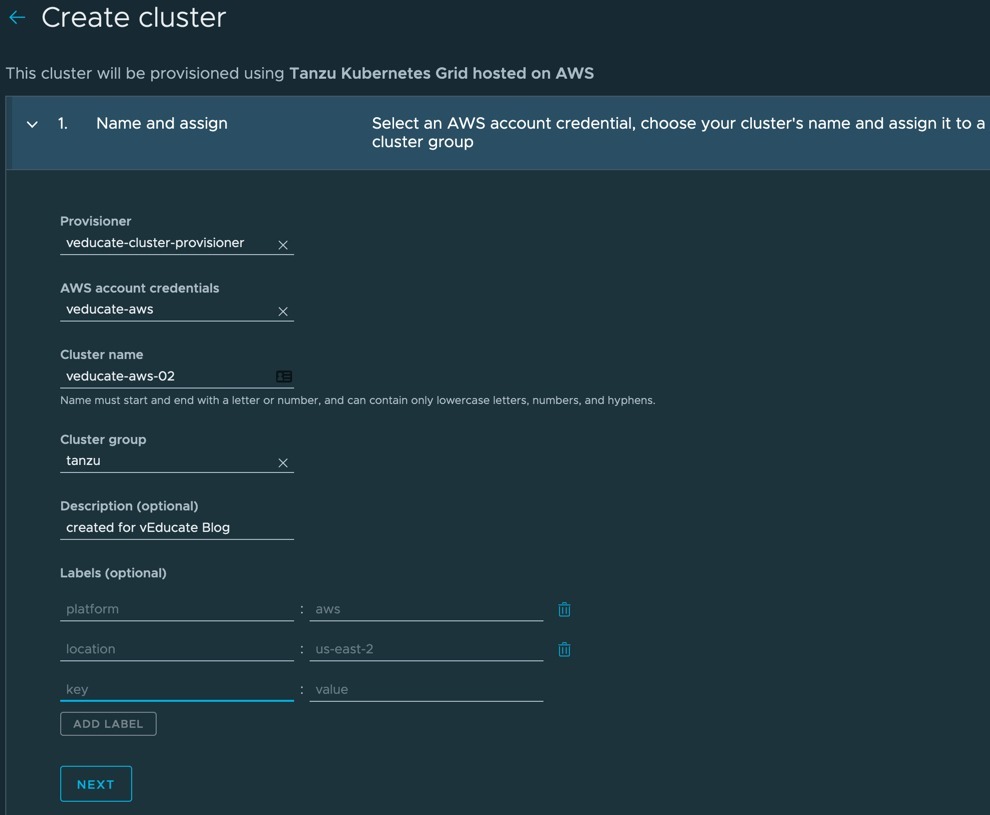
- Select your Provisioner
- Select your AWS Account Credentials
- Select your Cluster Group (if you’ve already created one)
- Add a description (Optional)
- Add labels (Optional)
- Click Next
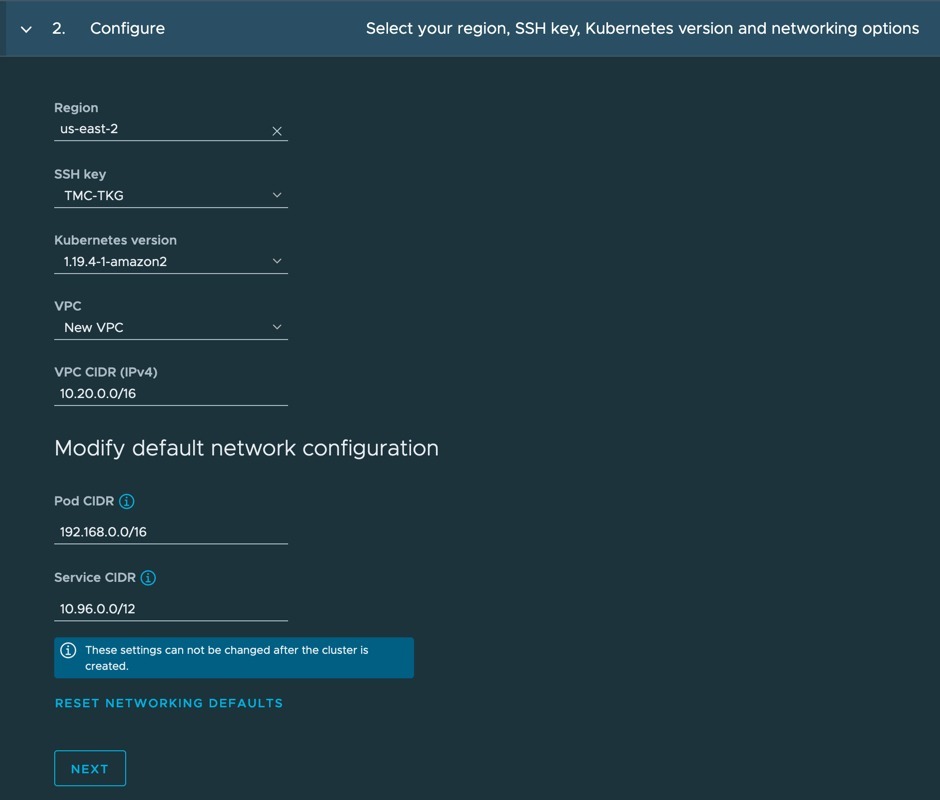
- Select Region
- Select your SSH Key Pair (You create these in your AWS EC2 Console)
- Select the version of Kubernetes you want to deploy
- Select to create a new or existing VPC
- Set the VPC CIDR if new is selected
- Set your Pod CIDR and Service CIDR
- Click Next
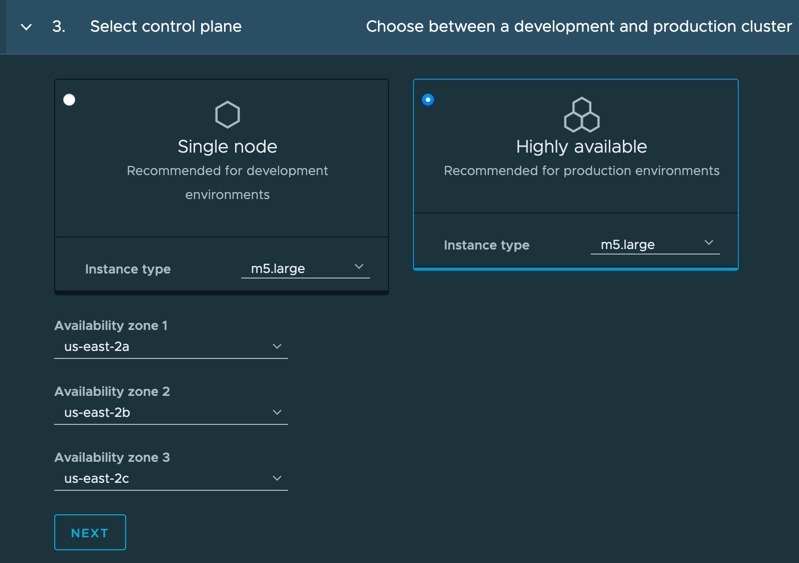
- Select your node deployment type
- Singe node – as it says on the tin
- Highly available – a three node deployment
- Select your availability zones to be used
- Select Next
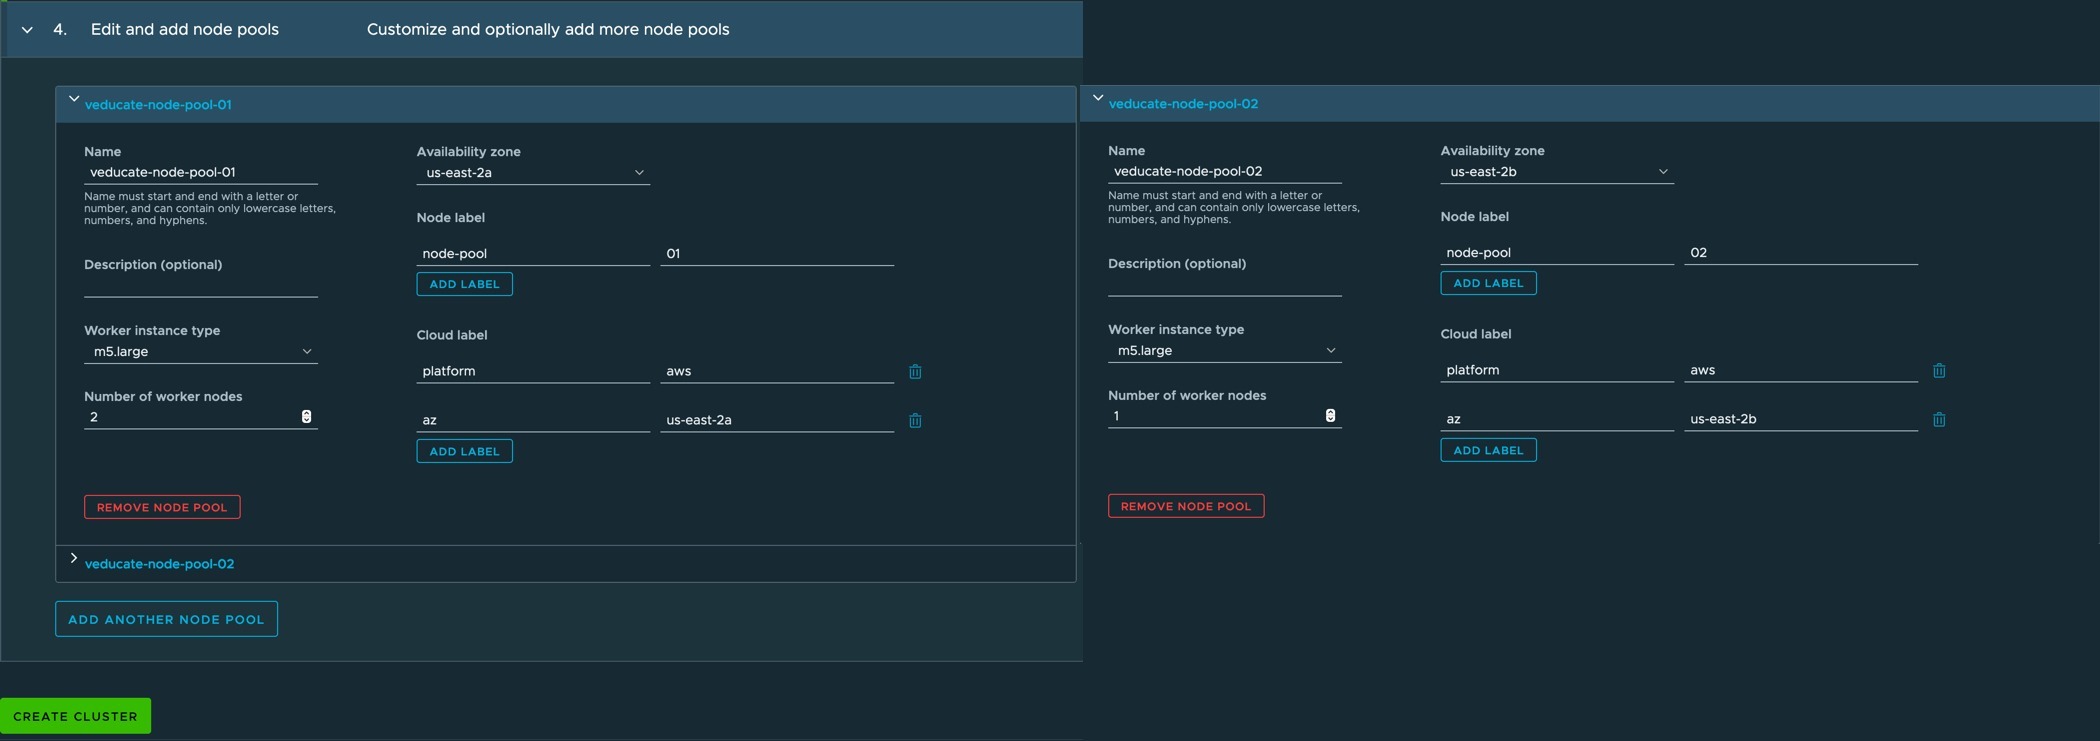
Node pools are a construct grouping worker node configurations.
- Set a name for your node pool
- Set a description (Optional)
- Set Worker instance size
- Set Number of worker nodes
- Set availability zone to be used
- Set Node Labels (Optional)
- Set Cluster Labels (Optional)
Add another node pool as needed, in my example my second node pool uses a different availability zone.
Click Create Cluster.
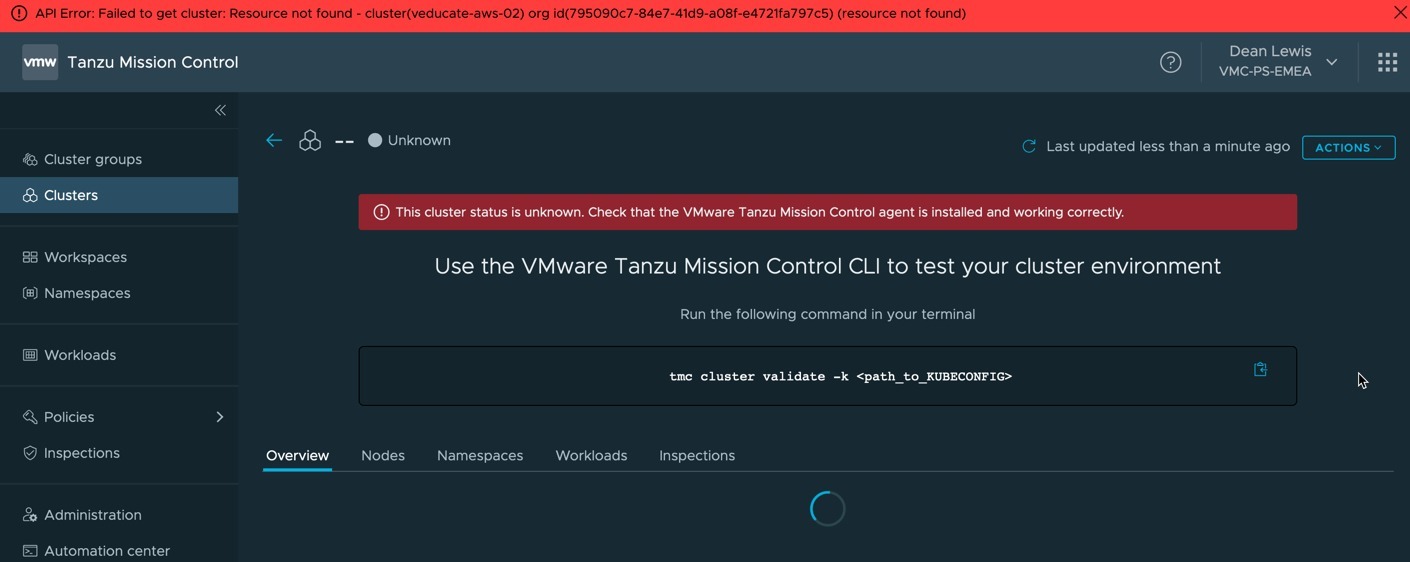
You will be taken to the Cluster Object UI page for the new cluster, but as it’s not created yet, you’ll get a warning/error message.
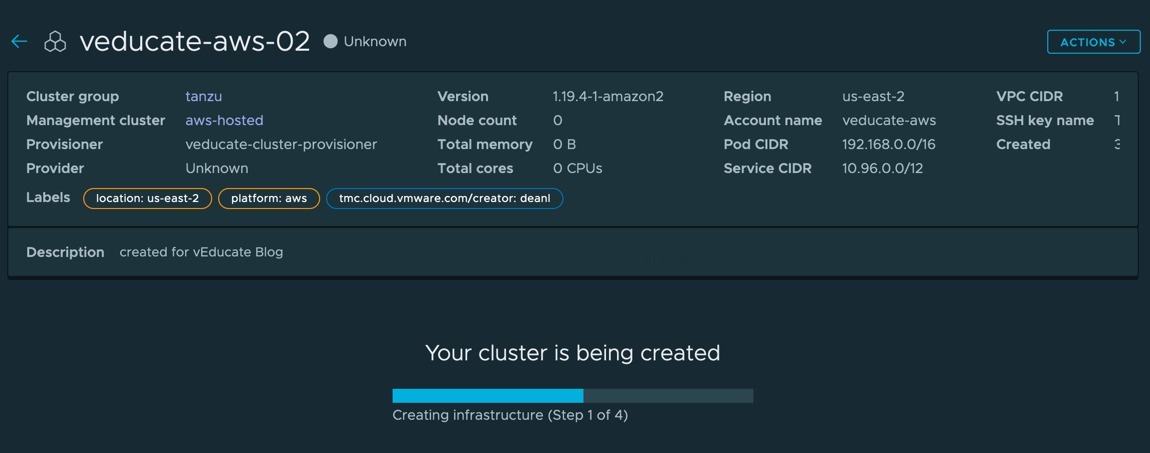
Wait 60 seconds or so and refresh your browser and you’ll get an updated status message for the cluster that is being created.
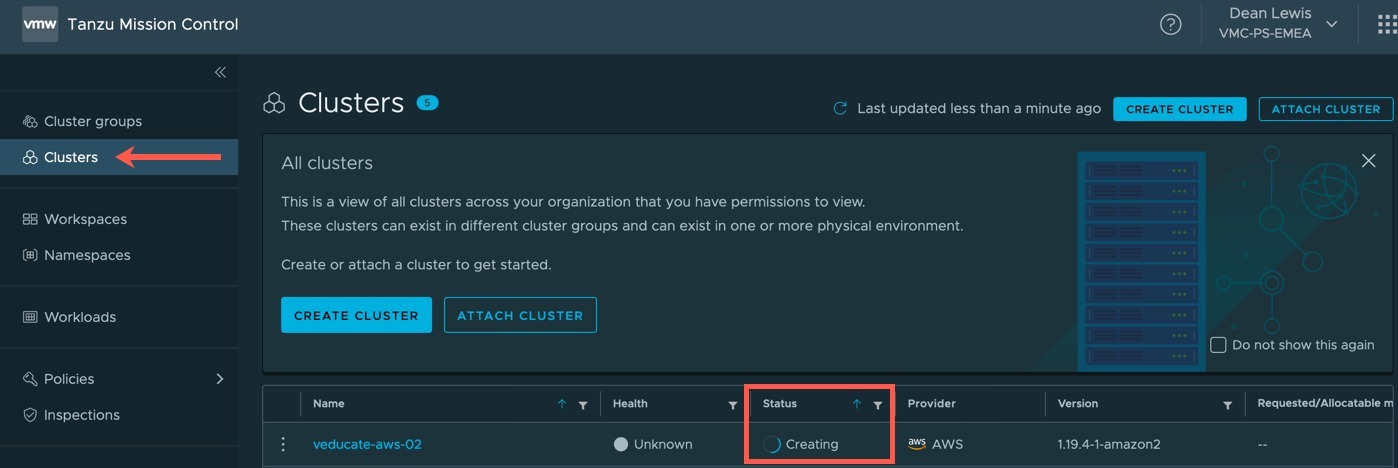
If you click Clusters in the left-hand navigation pane, you will see your cluster in the list with the creating status.
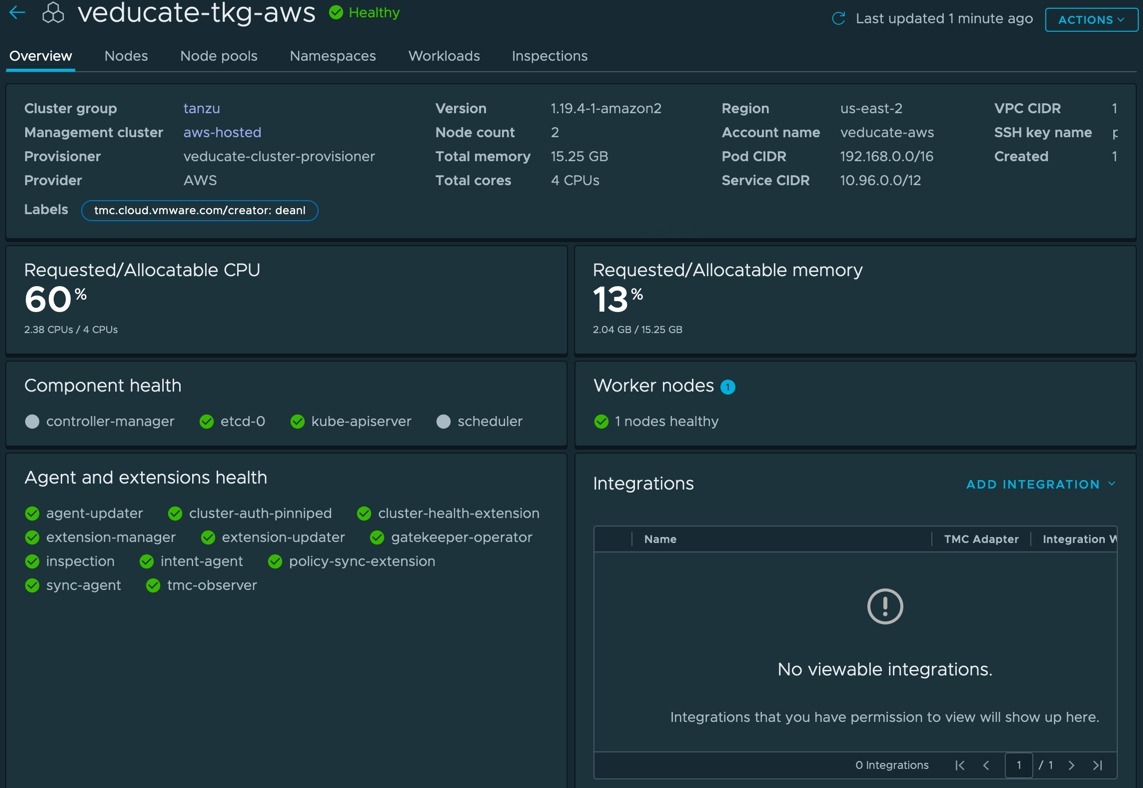
Finally, you will see the cluster status change to “Ready”. Below is a screenshot of one of my provisioned clusters.
Getting access to your cluster through the TMC UI
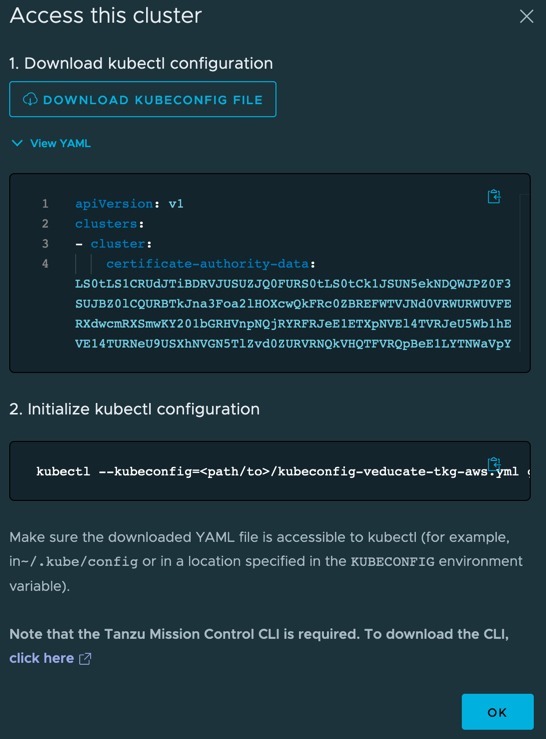
On your Cluster page, under actions, select “Access this cluster”
- You can download the kubeconfig file to be used
- View the YAML file in your web browser
- See an example Kubectl command line use the kubeconfig file provided
Getting access to your cluster through the TMC CLI
You will need the TMC command line installed and logged in using a CSP API Token.
- Install the Tanzu Mission Control CLI (TMC).
- In the left navigation pane of the Tanzu Mission Control console, click Automation center.
- On the Automation Center page, click Download CLI, and then choose the environment where you want to use the CLI.
- Retrieve an API token:
- On the Download CLI page, click the link to go to the My Account page in the VMware Cloud Services console.
- Click the API Tokens tab.
- Click Generate Token to create an API token with a scope of All Roles, and then copy the generated token.
tmc login

# Provide the API Token
# Provide the Organisation name
# Provide the management cluster name (default: aws-hosted)
# Provide the Provisioner Nam

The run the following commands:
# Get the details of your clusters managed by TMC

tmc cluster list
# Retrieve the kubeconfig file for your cluster. The below uses the argument to retrieve the admin configuration.

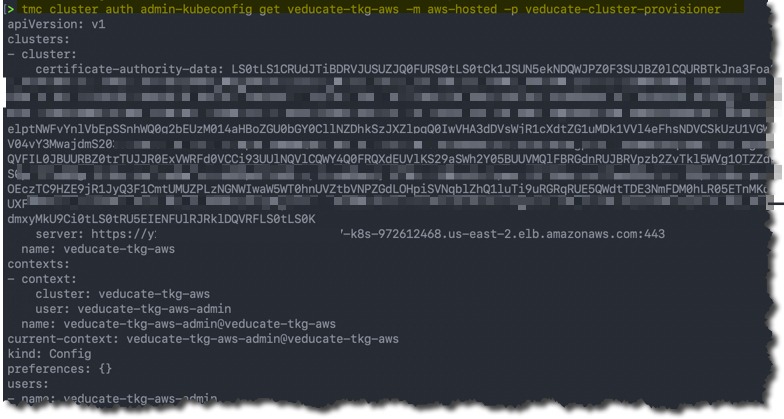
tmc cluster auth admin-kubeconfig get {cluster name} -m {management cluster name} -p {provisioner name}
# Example below which sends the output to a file

tmc cluster auth admin-kubeconfig get veducate-tkg-aws -m aws-hosted -p veducate-cluster-provisioner > veducate-tkg-aws
Finally run commands against your cluster using the config file.
kubectl {cmd arguments} --kubeconfig={output file location}

Wrap-up and Resources
In this walk-through we used Tanzu Mission Control to deploy a Tanzu Kubernetes Grid cluster to AWS, using the in-built hosted management cluster provided out of the box. All the steps provided in this blog post can be replicated using the TMC CLI as well.
As a reminder, to take real advantage of TMC I recommend you read the follow posts;
Tanzu Mission Control
- Getting Started Tanzu Mission Control
- Cluster Inspections
- Workspaces and Policies
- Data Protection
- Deploying TKG clusters to AWS
- Upgrading a provisioned cluster
- Delete a provisioned cluster
- TKG Management support and provisioning new clusters
- TMC REST API - Postman Collection
- Using custom policies to ensure Kasten protects a deployed application
You can get hands on experience of Tanzu Mission Control yourself over on the VMware Hands-on-Lab website, which is always free!
HOL-2032-01-CNA – VMware Tanzu Mission Control
- In this lab you will be exposed to various aspects of VMware’s Tanzu Mission Control including Kubernetes cluster lifecycle management, health checks, environment at-a-glance monitoring, access policies, and conformance testing.
And I’ll sign off with links to the official resources.
- Tanzu Mission Control
Regards
