In this blog post we will cover the following topics
- Data Protection Overview
- Create a AWS Data Protection Credential
- Enable Data Protection on a Cluster
- Running a backup manually or via an automatic schedule
- Restoring your data
The follow up blog posts are;
Tanzu Mission Control
- Getting Started Tanzu Mission Control
- Cluster Inspections
- Workspaces and Policies
- Data Protection
- Deploying TKG clusters to AWS
- Upgrading a provisioned cluster
- Delete a provisioned cluster
- TKG Management support and provisioning new clusters
- TMC REST API - Postman Collection
- Using custom policies to ensure Kasten protects a deployed application
TMC Data Protection Overview
Tanzu Mission Control implements data protection through the inclusion of the Project Velero, this tool is not enabled by default. This blog post will take you through the setup.
Data is stored externally to a AWS location, with volume backups remaining as part of the cluster where you’ve connected TMC.
Currently there is no ability to backup and restore data between Kubernetes clusters managed by TMC.
Create a AWS Data Protection Credential
First we need to create a AWS data protection credential, so that TMC can configure Velero within your cluster to save the data externally to AWS.
If you are looking for supported options for protecting data to other locations, I recommend you either look at deploying Project Velero manually outside of TMC (losing access to the data protection features in the UI) or look at another enterprise service such as Kasten.io.
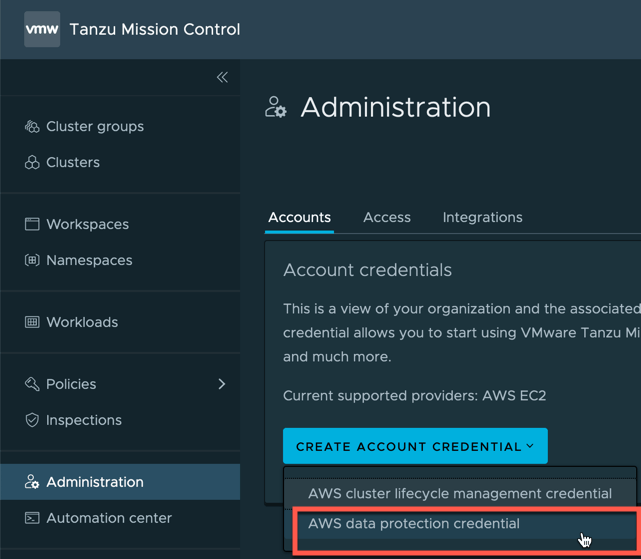
- On the Administration screen, click Accounts, and Create Account Credential.
- Select > AWS data protection credential
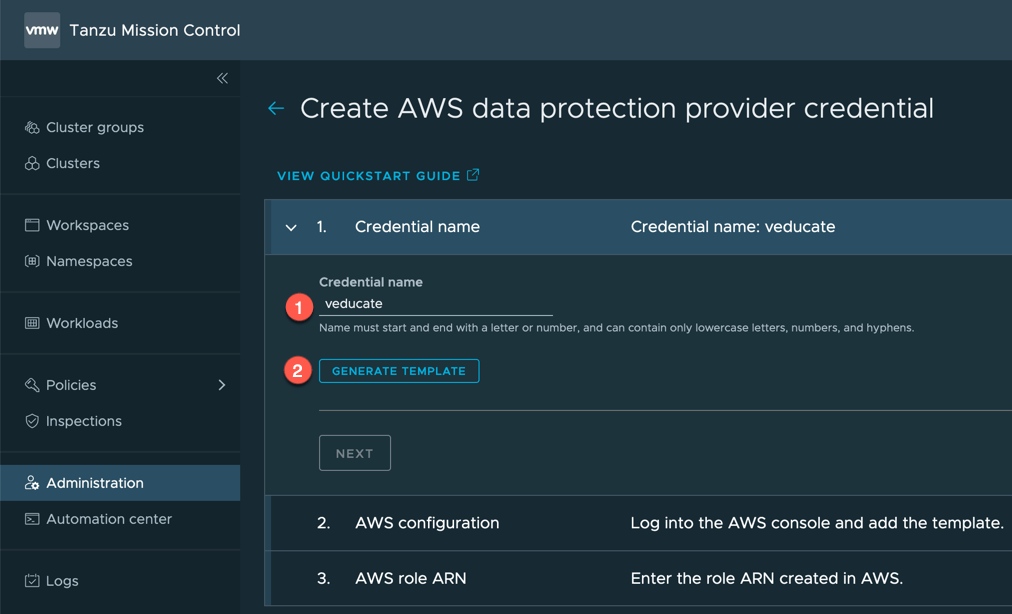
- Set your account name for easy identification and click to generate template and save this file to your machine.
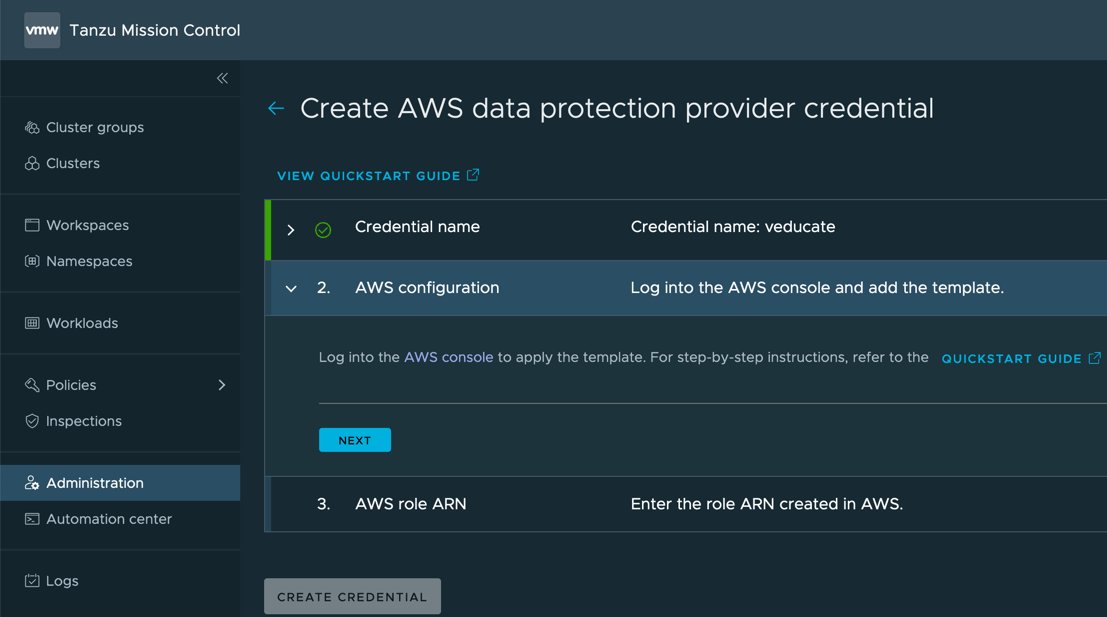
The next steps will require configuration in the AWS console to create resources using CloudFormation so that Project Velero can export data to AWS. Here is the official VMware documentation on this configuration.
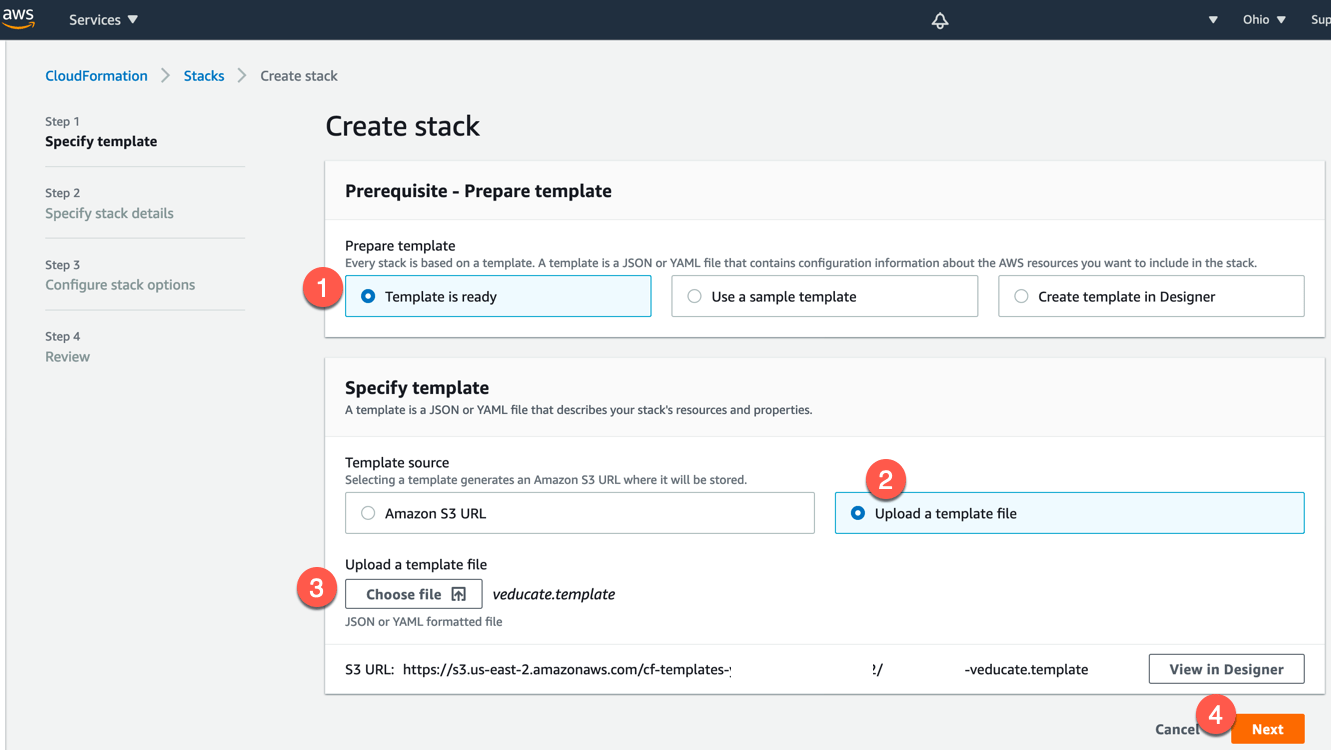
- In the AWS Console, go to the CloudFormation service

- Click to create a new stack
- Click “Template is ready” as we will provide our template file from earlier.
- Click to upload a template file
- Select the file from your machine
- Click next
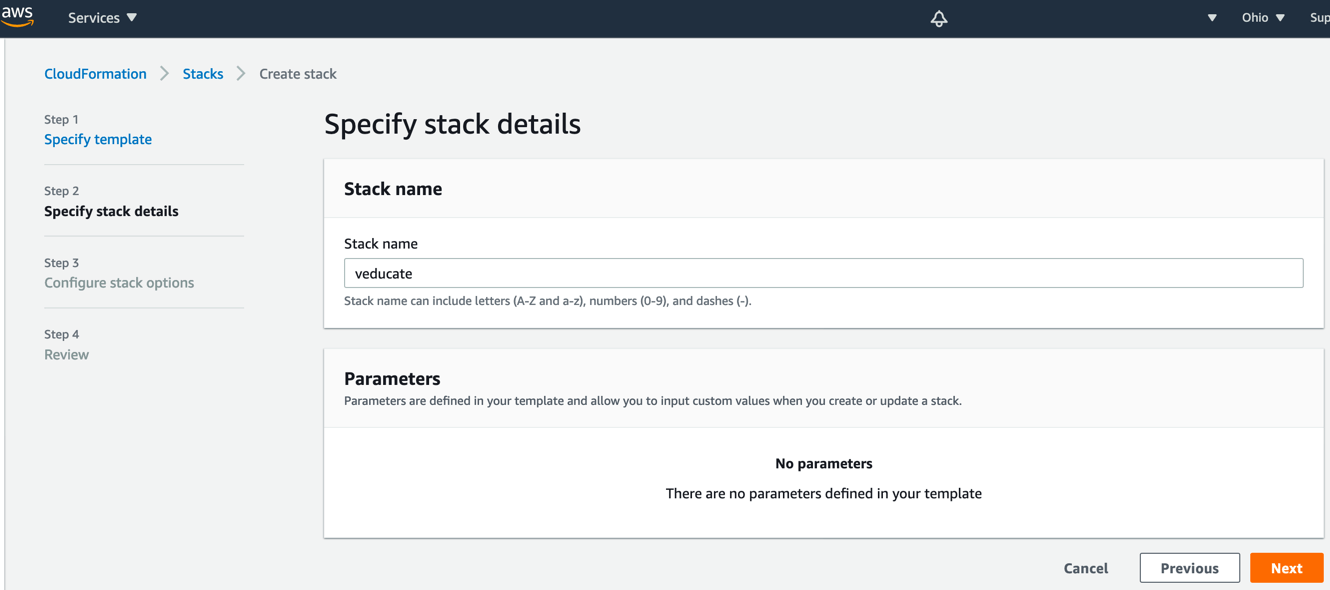
- Provide a stack name and click next
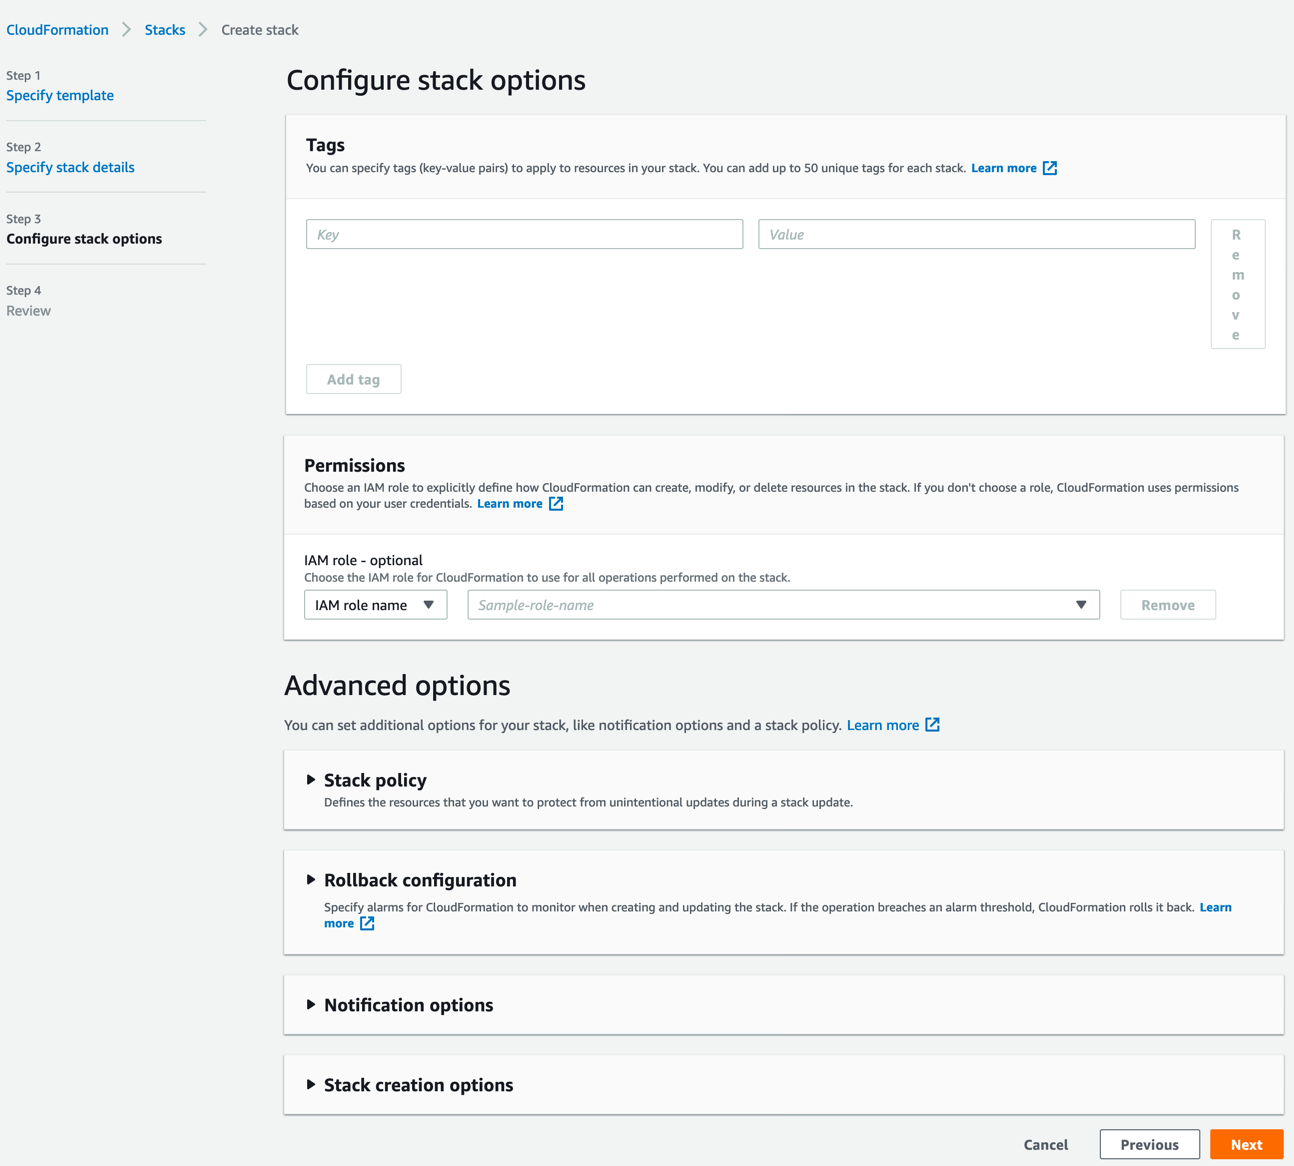
- Ignore all the items on this page and click next
- Review your configuration and click finish.
- Once you’ve reviewed and clicked create/finish. You will be taken into the Stack itself.
- You can click the Events tab and the refresh button to see the progress.

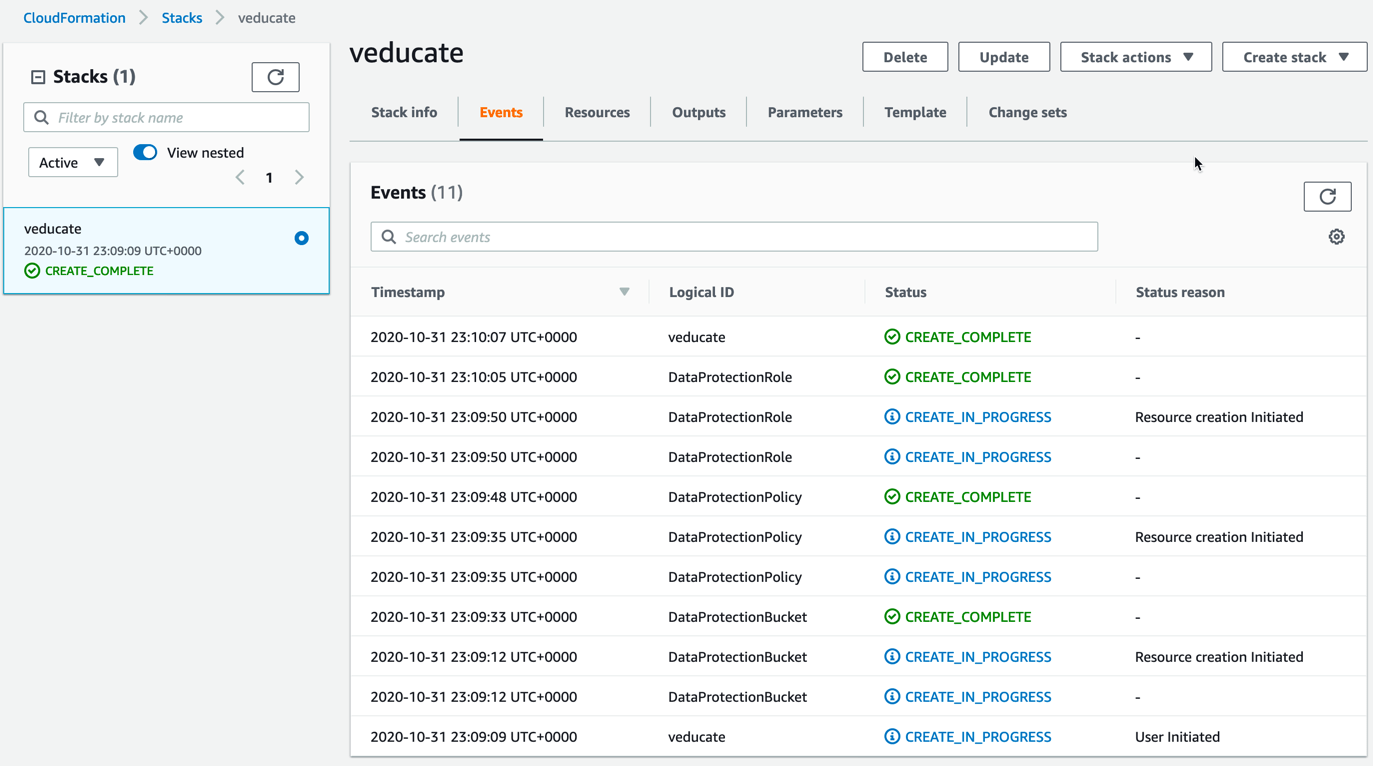
- Once you see “Create_Complete” on the left hand side stack name box, we are ready to get the output.
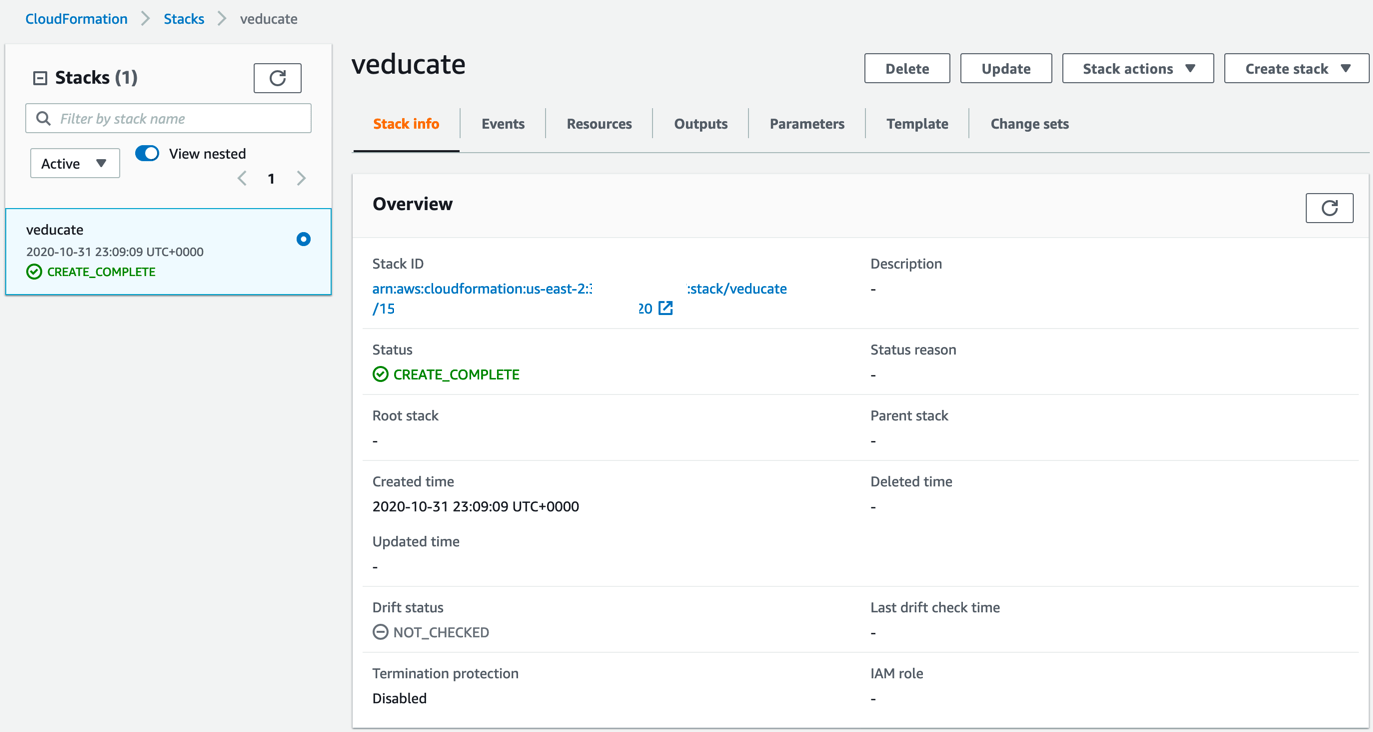
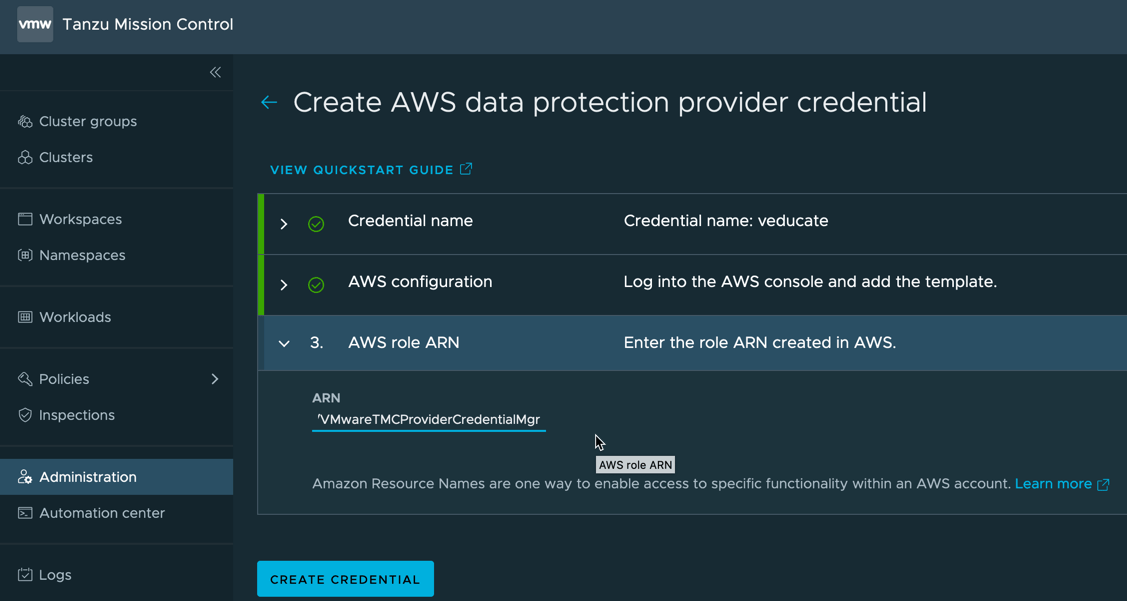
- Click the output tab and copy the ARN details from the message

- Back in your TMC UI provide the ARN details and click Create Credential
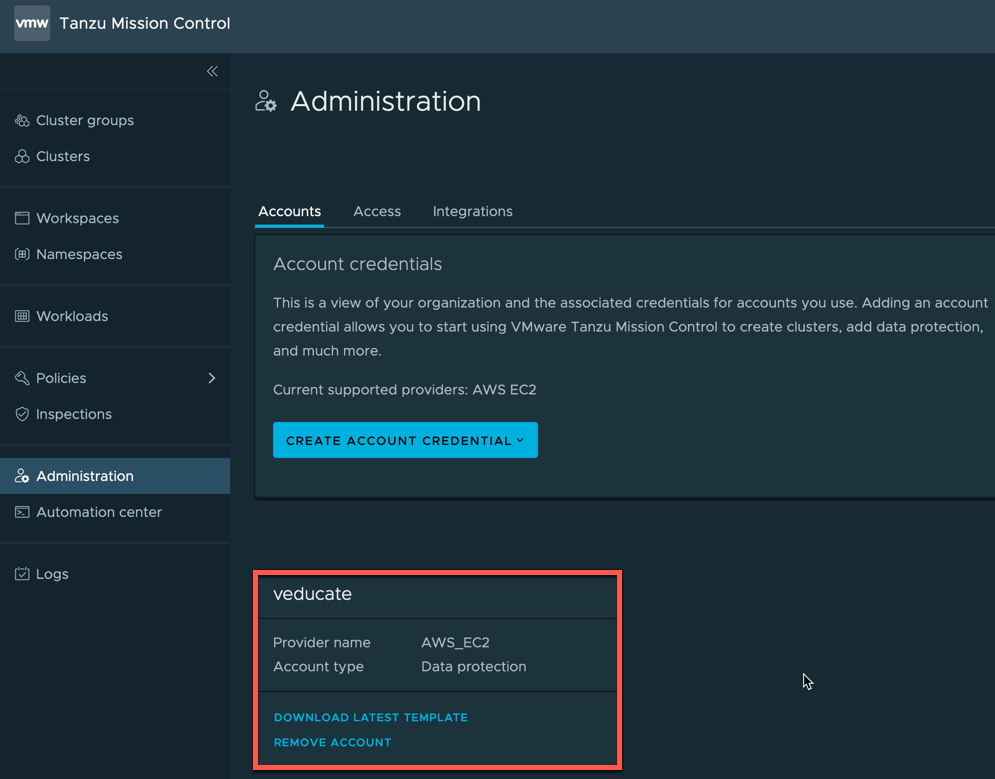
- You will now see the AWS account in your Accounts screen.
Enable Data Protection on a Cluster
Next up we will enable the data protection feature on a cluster which already appears in TMC.
- Open up your cluster
- Go to the bottom of the screen and click Data Protection
For enabling on Red Hat OpenShift, please see this blog post.
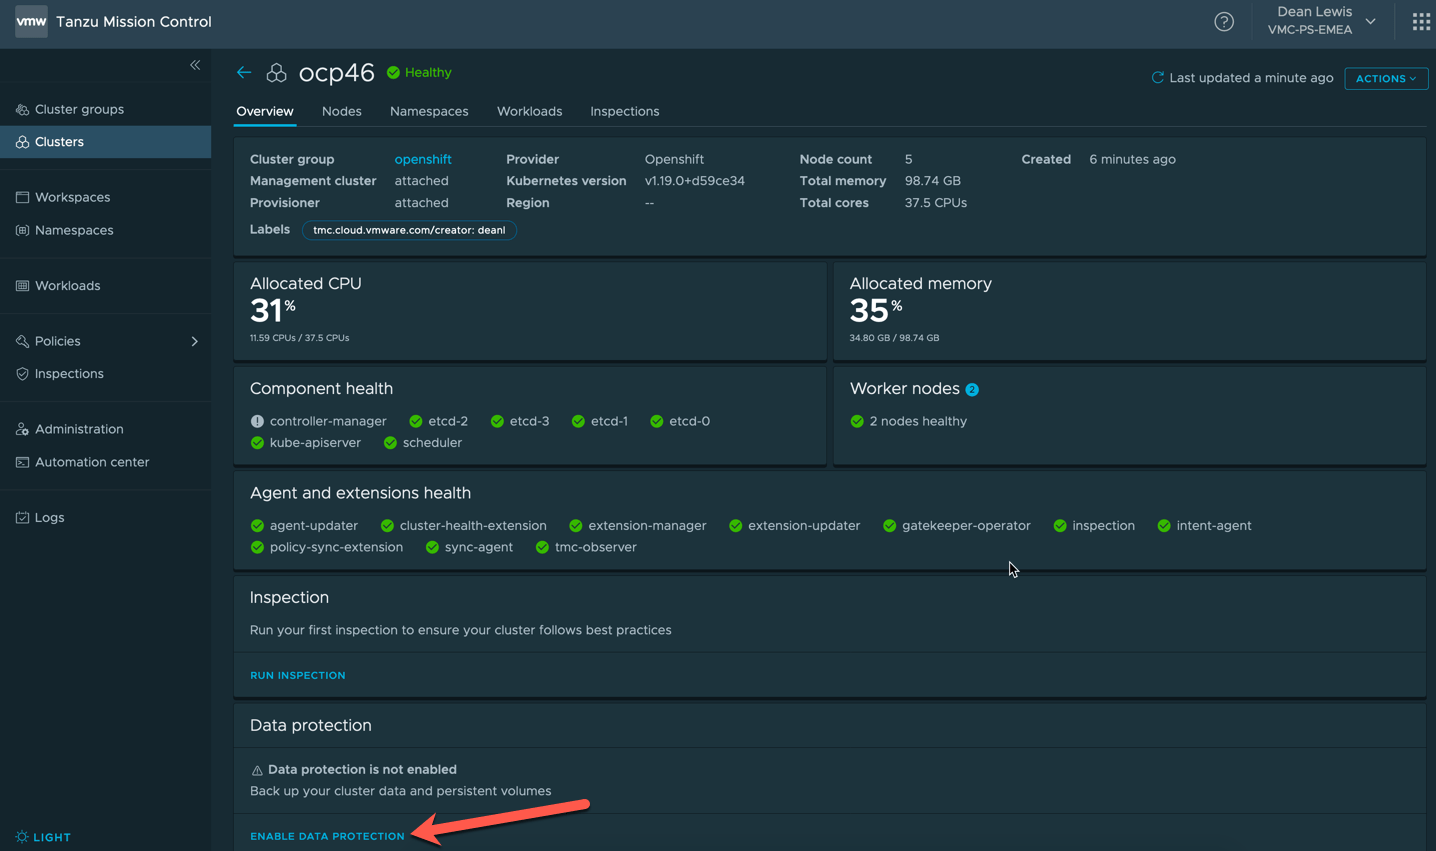
- This will now install Project Velero and the Restic tools to your cluster and can take some time.
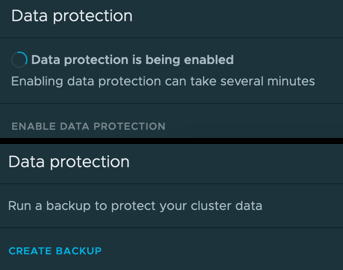
- Once the configuration is complete, you’ll see you are able to create a backup.
Create a Backup
- Click Create Backup on your cluster screen
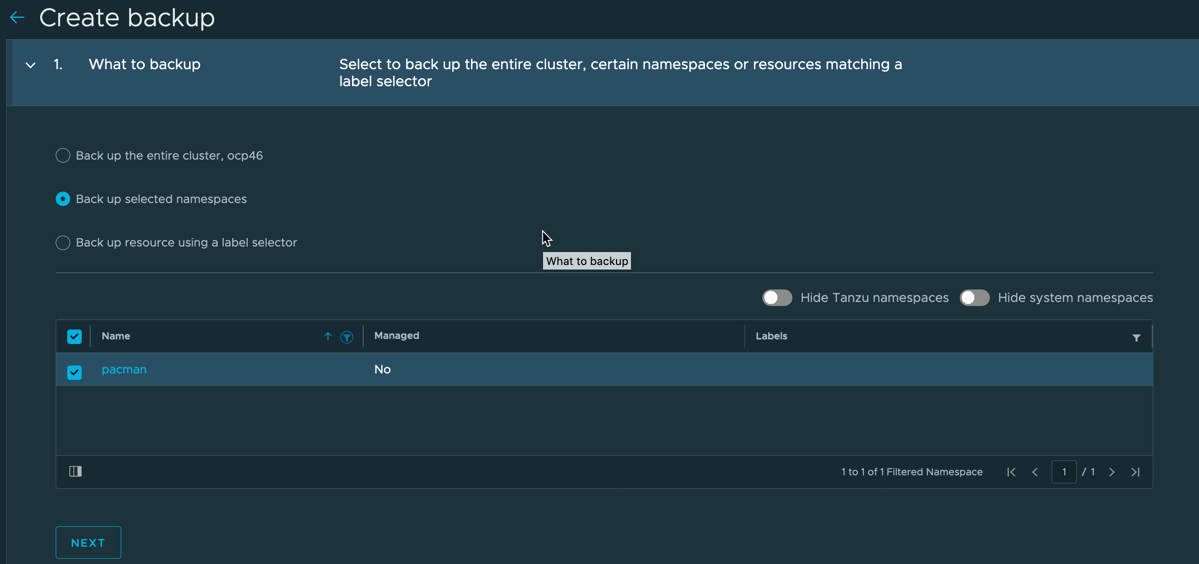
- You will need to select what resources you want to backup
- Full cluster
- Everything attached to a specified namespace
- Everything identified by a label selector
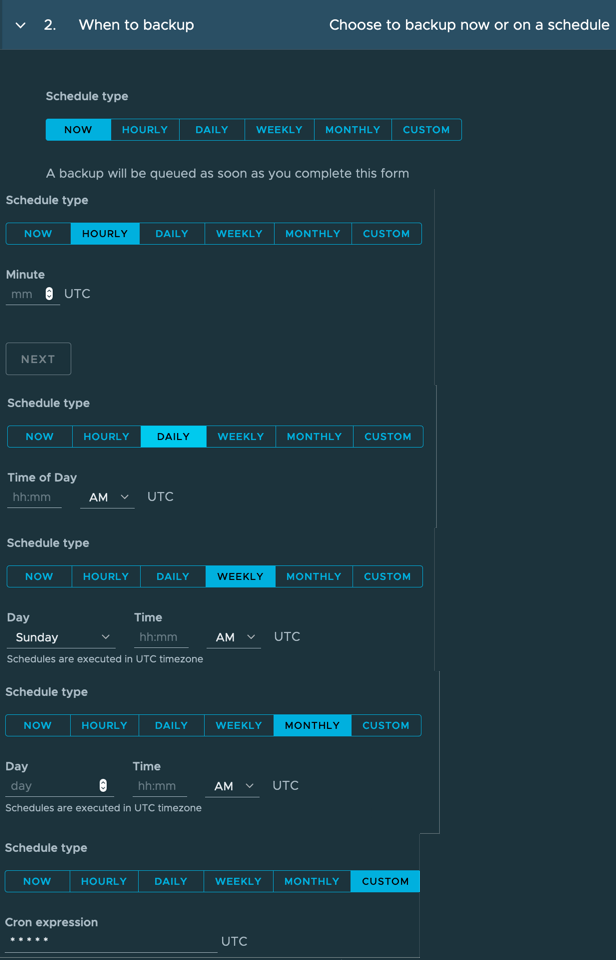
- I think we’ve all seen backup schedules before, I’ve shown you all options below
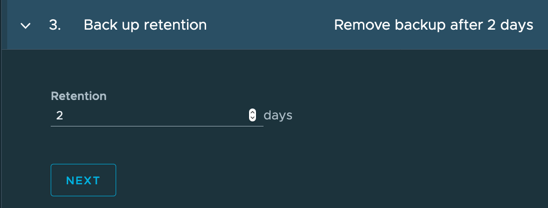
- Set your backup retention, currently the timeframe is only available in days.
- Finally set your Backup schedule name

Running a backup manually or via an automatic schedule
To run a backup on a schedule or as a manual one off, it requires you to go through the above steps.
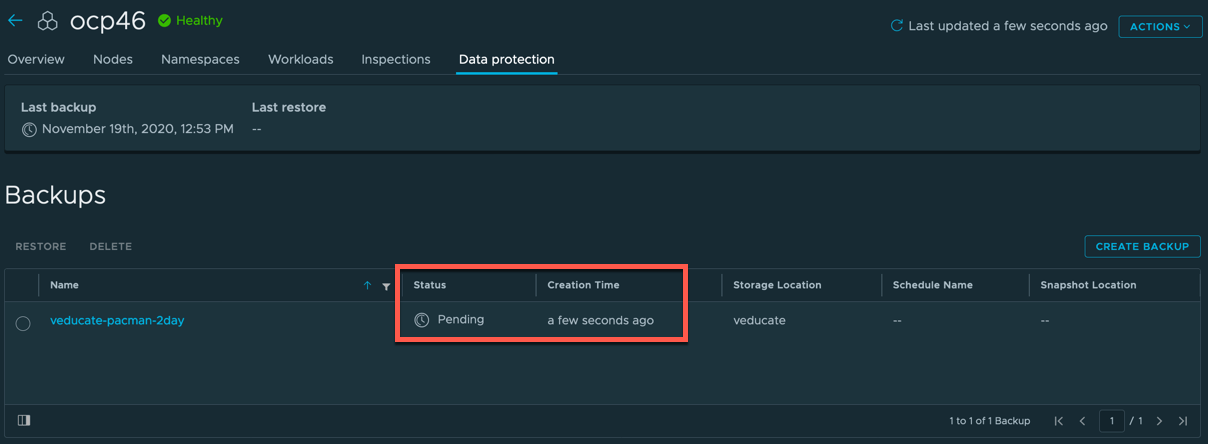
You’ll see the details of the backup schedules on the Data Protection Tab of your cluster.
When a backup schedule is running, you will see under the “vmware-system-tmc” namespace a new pod will create called “data-protection-xxxx”, which pushes the configuration down and manages the Velero install.
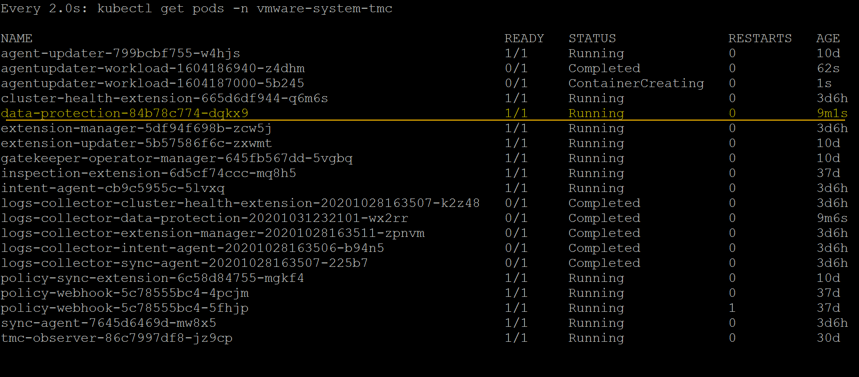
On your Data Protection Tab of the Cluster UI, you will see the details of your backups and the active schedules as below with the last status returned.
For both Backups and Schedules you have the option to select the radio button of your chosen object and delete it.


Protecting your volumes with the Restic integration
TMC uses Velero for data protection, however Velero does not currently protect your persistent volumes, this instead is provided by integration with a tool called Restic, which will protect your volumes and export the data to the same AWS location configured earlier. You can read more on why Project Velero uses Restic here.
Restic will be made available when you enable the data protection feature.

However to actually protect your volumes, you will need to do a little extra work. This is because TMC currently deploys Velero 1.4, these extra steps should disappear when TMC deploys Velero 1.5.
Run the following for each pod that contains a volume you want to backup
kubectl -n YOUR_POD_NAMESPACE annotate pod/YOUR_POD_NAME backup.velero.io/backup-volumes=YOUR_VOLUME_NAME_1,YOUR_VOLUME_NAME_2,...
For example;
kubectl -n pacman annotate pod/mongo-85948bc47-mbnw8 backup.velero.io/backup-volumes=mongo-db
To see your protected pod volumes, run the following command;
kubectl -n velero get podvolumebackups

Currently you cannot see the Restic protected persistent volumes in the TMC UI. However when you perform a restore in the TMC UI, the PV’s will be restored.
Restoring your data
To demo this, I’ve deployed my mission critical application Pac-Man onto TKG on AWS. This runs two pods (web front end and a database) and a single persistent volume for the database to store the high scores from users playing Pac-Man.
I’ve ran a backup as per the above settings, and annotated my pod to capture the volume.
I’ve deleted my “pacman” namespace.

To restore, it’s straight forward in the TMC UI, in the backup list you can select the radio button of the backup schedule you want to restore. Or you can click the backup schedule name, view more details about the schedule run, and restore within this screen.
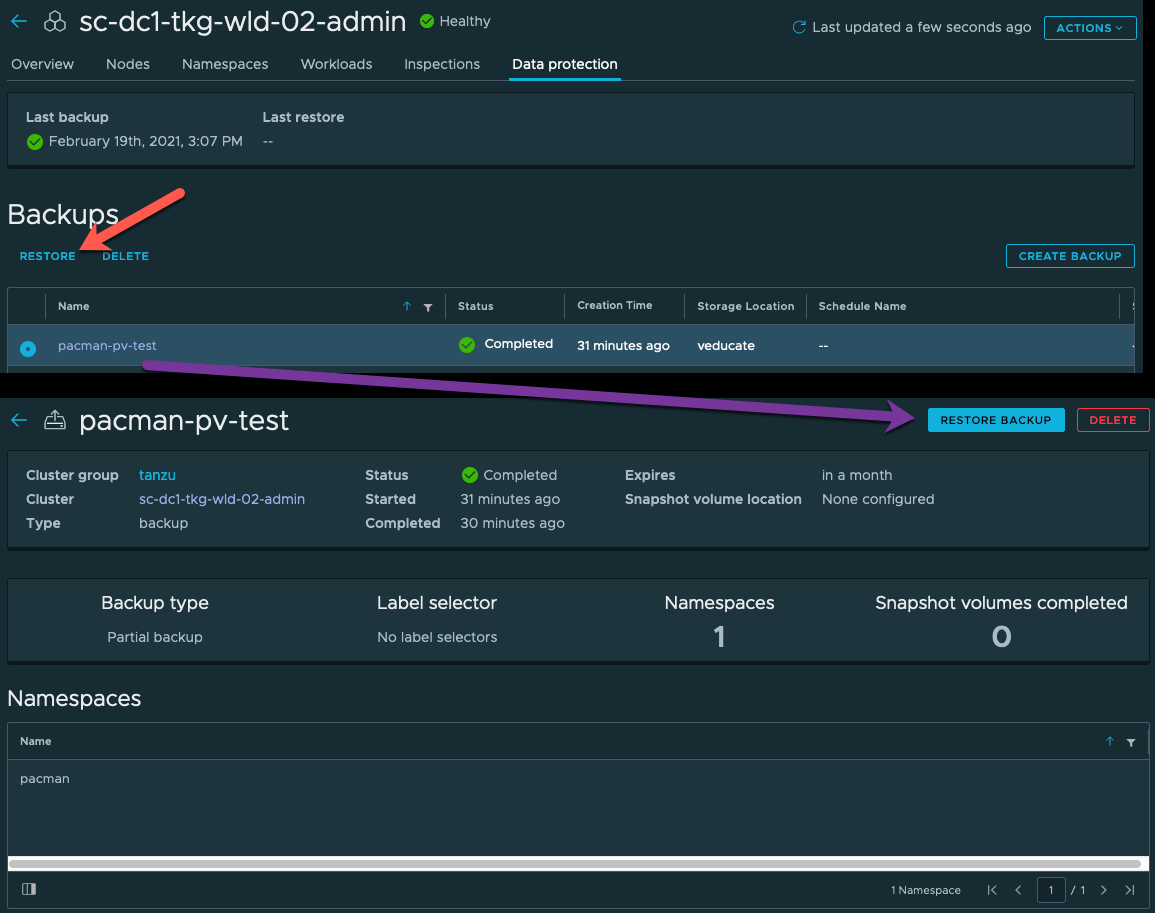
Once you’ve clicked the restore button, select what items from the backup you want to restore.
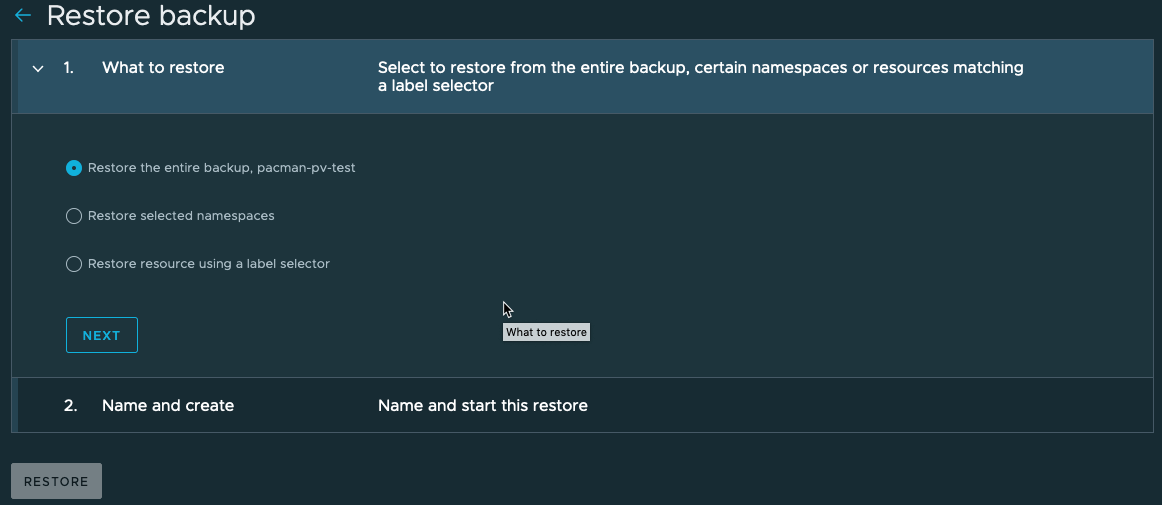
Set a name for the restore, and create the restore job.

Back on the data protection page for your cluster, you will see details of the restore.
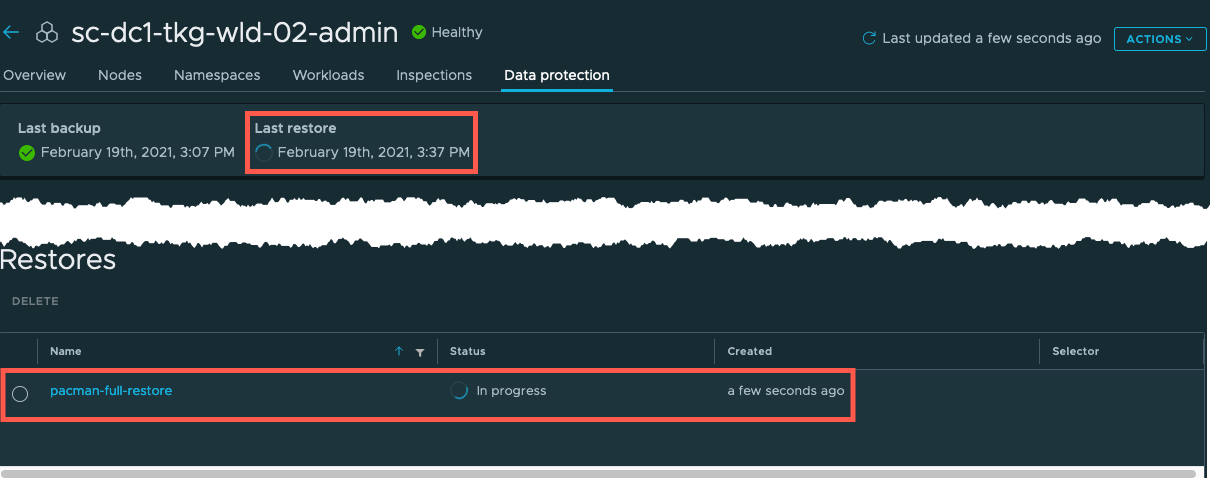
Below is a view when clicking on a restore.

Wrap-up and Resources
So through VMware’s open source contributions, we have the data protection enhancements to TMC. Which provides you an easy level backup of your data. If you are looking for a more full enterprise backup and data protection offering, then you may need to at the Kubernetes ecosystem. But as an easy getting started, it really can’t be more simple than this.
As a reminder, to take real advantage of TMC I recommend you read the follow posts;
Tanzu Mission Control
- Getting Started Tanzu Mission Control
- Cluster Inspections
- Workspaces and Policies
- Data Protection
- Deploying TKG clusters to AWS
- Upgrading a provisioned cluster
- Delete a provisioned cluster
- TKG Management support and provisioning new clusters
- TMC REST API - Postman Collection
- Using custom policies to ensure Kasten protects a deployed application
You can get hands on experience of Tanzu Mission Control yourself over on the VMware Hands-on-Lab website, which is always free!
HOL-2032-01-CNA – VMware Tanzu Mission Control
- In this lab you will be exposed to various aspects of VMware’s Tanzu Mission Control including Kubernetes cluster lifecycle management, health checks, environment at a glance monitoring, access policies, and conformance testing.
And I’ll sign off with links to the official resources.
- Tanzu Mission Control
Regards
