Tanzu Blog Logo Header

Tanzu Kubernetes Grid 1.6 – Management Cluster deployment failure – unable to patch the cluster object

The Issue

When deploying a brand new Tanzu Kubernete Grid Management Cluster to a vSphere environment we kept hitting failures like the below. The deployment was very vanilla with the default settings, no extra metadata inputted into the build.

!! [1223 15:26:17.84239]: init.go:732] Failure while deploying management cluster, Here are some steps to investigate the cause:
!! [1223 15:26:17.84256]: init.go:733] Debug:
!! [1223 15:26:17.84262]: init.go:734] kubectl get po,deploy,cluster,kubeadmcontrolplane,machine,machinedeployment -A --kubeconfig /home/michael/.kube-tkg/tmp/config_Qd01VhPd
!! [1223 15:26:17.84272]: init.go:735] kubectl logs deployment.apps/ -n  manager --kubeconfig /home/michael/.kube-tkg/tmp/config_Qd01VhPd
!! [1223 15:26:17.84278]: init.go:738] To clean up the resources created by the management cluster:
!! [1223 15:26:17.84283]: init.go:739] tanzu management-cluster delete
✘ [1223 15:26:17.84291]: init.go:91] unable to set up management cluster, : unable to patch cluster object: unable to patch optional metadata under labels: unable to patch the management cluster object with optional metadata: unable to patch the cluster object: error while applying patch for "&TypeMeta{Kind:,APIVersion:,}" tkg-system/tkg-mgmt-vsphere-20221223151757: Cluster.cluster.x-k8s.io "tkg-mgmt-vsphere-20221223151757" is invalid: [metadata.labels: Invalid value: "": name part must be non-empty, metadata.labels: Invalid value: "": name part must consist of alphanumeric characters, '-', '_' or '.', and must start and end with an alphanumeric character (e.g. 'MyName', or 'my.name', or '123-abc', regex used for validation is '([A-Za-z0-9][-A-Za-z0-9_.]*)?[A-Za-z0-9]')]

The Cause

The tooling creates an erronous value in the cluster config file, which causes the build error.

The Fix

Search for the latest yaml file created in:

~/.config/tanzu/tkg/clusterconfigs/

and comment out the following line:

CLUSTER_LABELS: :,

# The line will now look like this:

#CLUSTER_LABELS: :,

Now re-run the creation of your cluster using the CLI

tanzu mc create --file {file_name.yaml}

Regards

Dean Lewis

vRealize Operations Header

vRealize Operations – Where did my “Object Relationships” view go?

The Issue

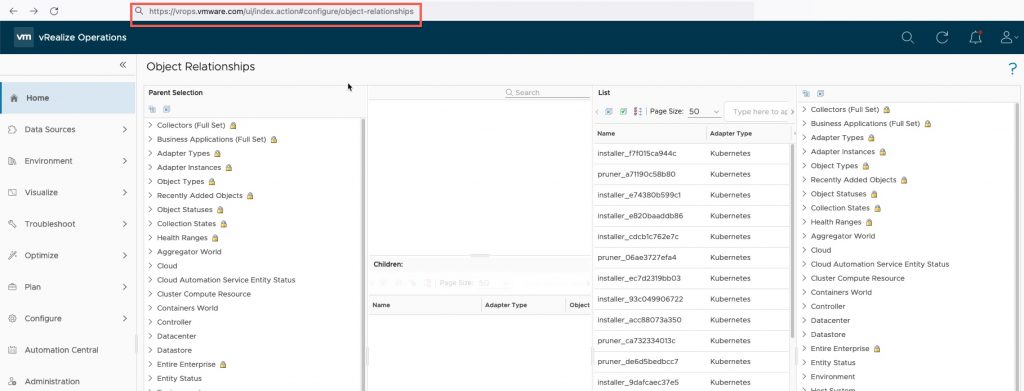
From vRealize Operations 8.6.2, it’s been noticed that the “Object Relationships” page has disappeared from the navigation column/settings pages in the product UI.

The Cause

This page is being redesigned by the VMware team, and is hidden from view in current releases.

The Workaround

You can manually access the page by going to the following web page suffix:

  • ui/index.action#configure/object-relationships
    • For example
      • https://vrops.vmware.com/ui/index.action#configure/object-relationships

vRealize Operations - Object Relationships


Regards

Dean Lewis

CloudFlare DNS delegation to Azure - Header

Configuring DNS Delegation from CloudFlare to Azure DNS

A quick post, following on from my other post which covers DNS Delegation from CloudFlare to AWS Route53.

In this walkthrough, we are going to cover the same setup, but for Microsoft Azure DNS.

Create a Azure DNS Zone

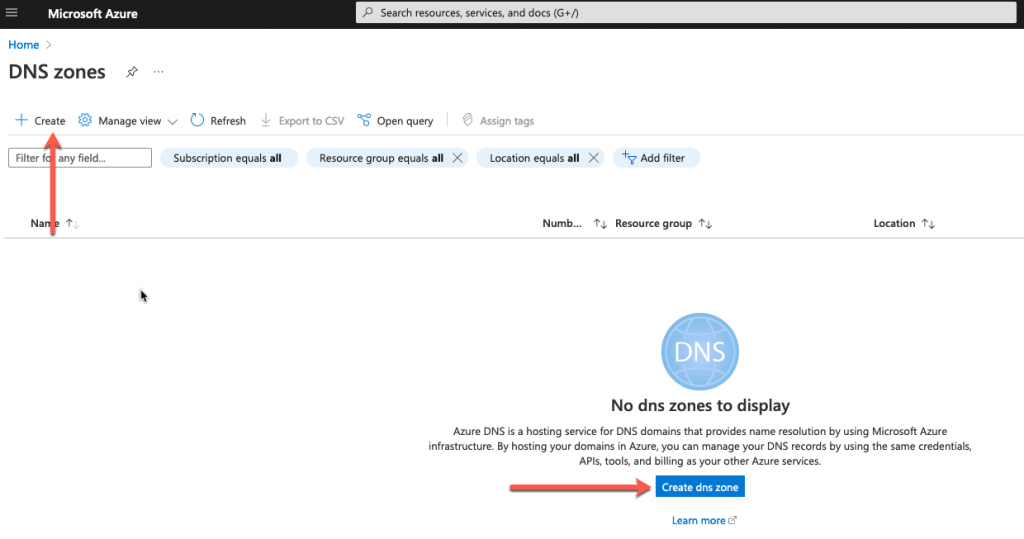
Starting in your Microsoft Azure console, search and find the DNS Zones service.

CloudFlare DNS delegation to Azure - Azure DNS Zone Service

Click to create a new DNS Zone.

CloudFlare DNS delegation to Azure - Azure DNS Zone Service - Create DNS Zone

Fill out the necessary information:

  • Subscription
  • Resource group (create a new one if needed)
  • Instance Details
    • Name – FQDN for the DNS Zone you need to create, in this example, I want a subdomain “azure” being managed by my Azure DNS.
    • Resource group location – this is where the metadata for the service is stored, however DNS zones are distributed globally!

Click Review and Create. Continue reading Configuring DNS Delegation from CloudFlare to Azure DNS

Tanzu Kubernetes Grid Cilium Header

How to Deploy a Tanzu Kubernetes Grid cluster using the Cilium CNI

In this blog post I’m going to dive into how you can create a Tanzu Kubernetes Grid cluster and specify your own container network interface, for example, Cilium. Expanding on the installation, I’ll also cover installing a load balancer service, deploying a demo app, and showing some of the observability feature as well.

What is Cilium?
Cilium is an open source software for providing, securing and observing network connectivity between container workloads - cloud native, and fueled by the revolutionary Kernel technology eBPF

Let’s unpack that from the official website marketing tag line.

Cilium is a container network interface for Kubernetes and other container platforms (apparently there are others still out there!), which provides the cluster networking functionality. It goes one step further than other CNIs commonly used, by using a Linux Kernel software technology called eBPF, and allows for the insertion of security, visibility, and networking control logic into the Linux kernel of your container nodes.

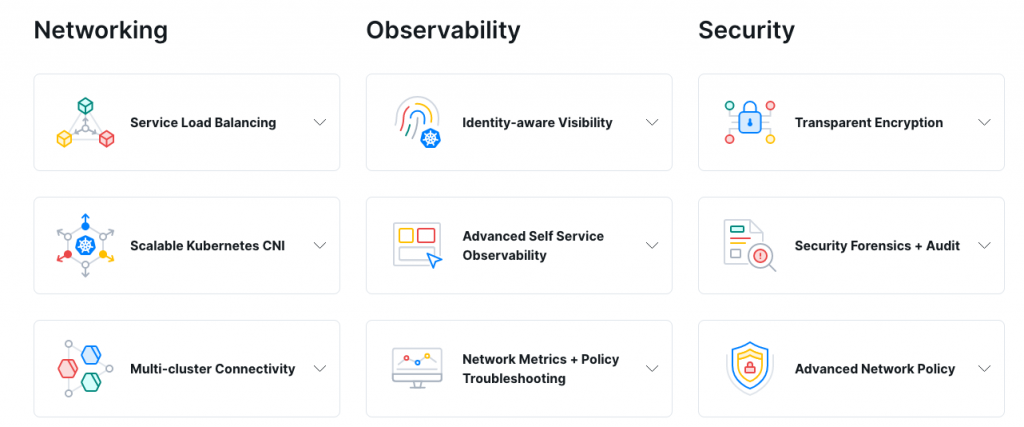
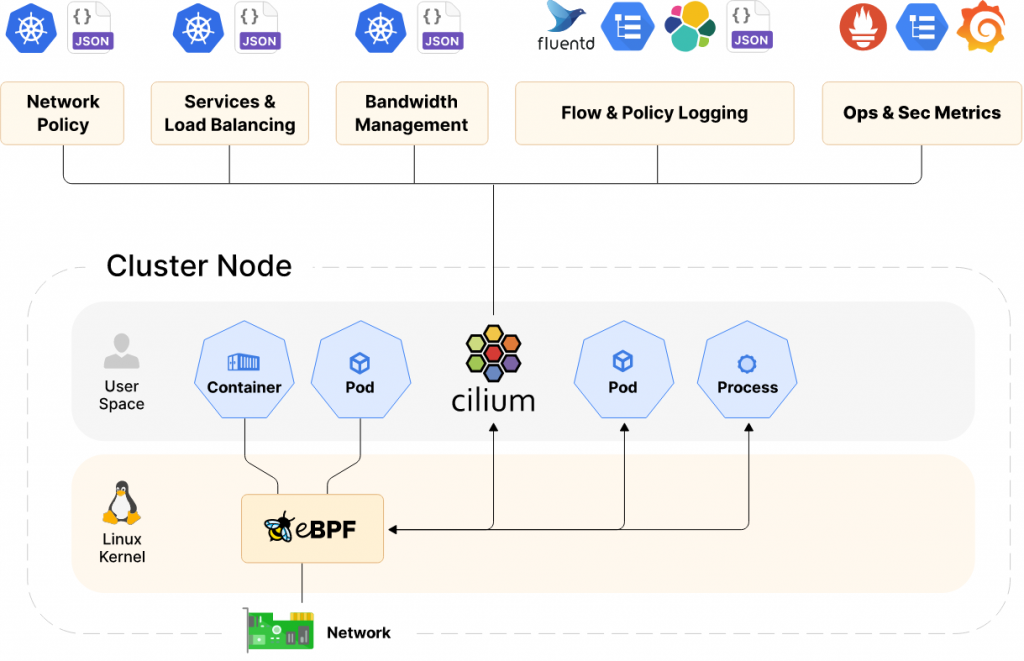
Below is a high-level overview of the features.

TKG Cilium - Features

And a high-level architecture overview.

Cilium Architecture

Is it supported to run Cilium in Tanzu Kubernetes cluster?

Tanzu Kubernetes Grid allows you to bring your own Kubernetes CNI to the cluster as part of the Cluster bring-up. You will be required to take extra steps to build a cluster during this type of deployment, as described below in this blog post.

As for support for a CNI outside of Calico and Antrea, you as the customer/consumer must provide that. If you are using Cilium for example, then you can gain enterprise level support for the CNI, from the likes of Isovalent.

Recording

How to deploy a Tanzu Kubernete Cluster with Cilium

Before we get started, we need to download the Cilium CLI tool, which is used to install Cilium into our cluster.

The below command downloads and installs the latest stable version to your /usr/local/bin location. You can find more options here. Continue reading How to Deploy a Tanzu Kubernetes Grid cluster using the Cilium CNI

vRA SaltStack Config Header

vRSLCM – SaltStack Config upgrade fails – LCMUPGRADEVSSC10103

The Issue

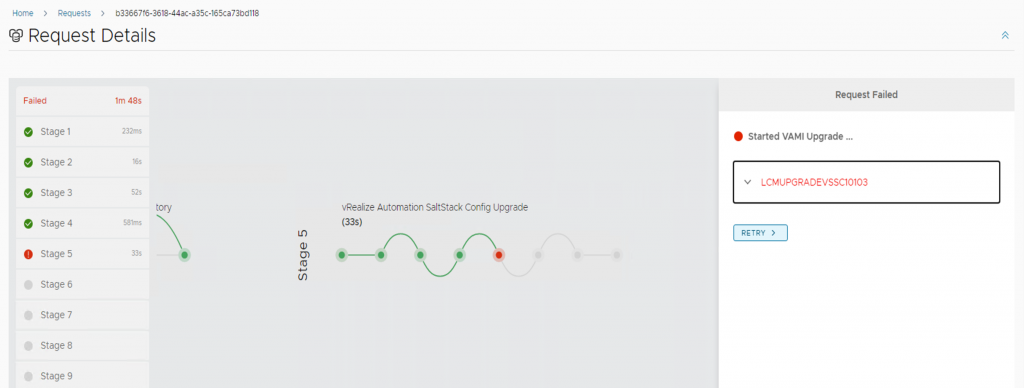
When upgrading to vRA SaltStack Config 8.9 using vRealize Suite LifeCycle Manager, I found I hit an issue stating that the upgrade failed as the VAMI version of the appliance was already at the build number to be expected.

Below is a copy of the error message:

LCMUPGRADEVSSC10103

Error Code: LCMUPGRADEVSSC10103
VAMI upgrade for vRealize Automation SaltStack Config failed. Check vRealize Suite Lifecycle Manager logs for more information.
VAMI is already at the version provided for upgrade. Retry the request by passing skipTask as 'true' to skip the VAMI upgrade and proceed further to RAAS upgrade. Check upgrade logs at /var/log/lcm-vami-upgrade.log on the vRealize Automation SaltStack Config host for more details.

com.vmware.vrealize.lcm.vsse.common.exception.VsscUpgardeException: VAMI is already at the version provided for upgrade. Retry the request by passing skipTask as 'true' to skip the VAMI upgrade and proceed further to RAAS upgrade. Check upgrade logs at /var/log/lcm-vami-upgrade.log on the vRealize Automation SaltStack Config host for more details.	at com.vmware.vrealize.lcm.vsse.core.task.VsscVamiUpgradeTask.execute(VsscVamiUpgradeTask.java:96)	at com.vmware.vrealize.lcm
The Fix

Rather than follow the error message, and retry the task by skipping the failure. I instead performed a inventory sync on the environment this part of. Then retried the task without skipping the failure.

This proved successful, leading me to think that maybe vRSLCM missed a collectiong point of information during the upgrade.

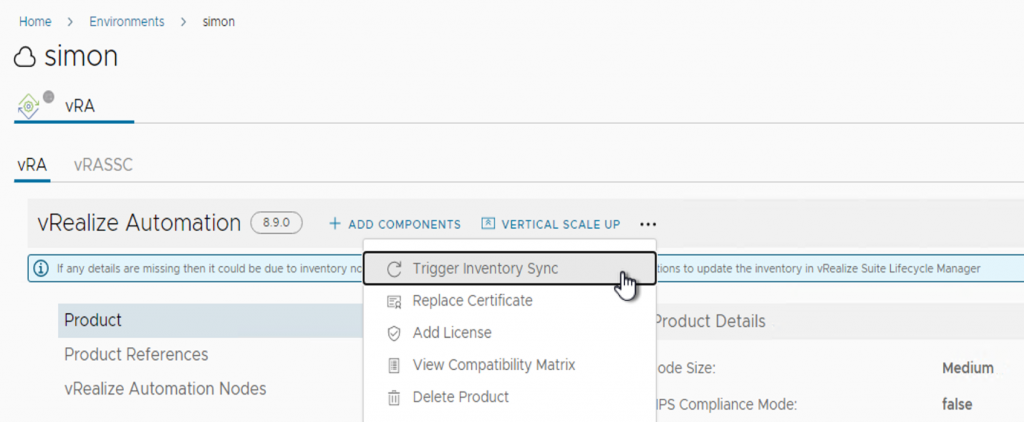
  • Go to your environment with SaltStack Config installed
  • Click the options to trigger the inventory sync

vRSLCM - Trigger Inventory Sync

Keep an eye on the requests, and once the inventory sync is completed, now click on your failed upgrade request.

vRSLCM - Requests

Within the request , click to retry.

vRSLCM - Request Details - Retry

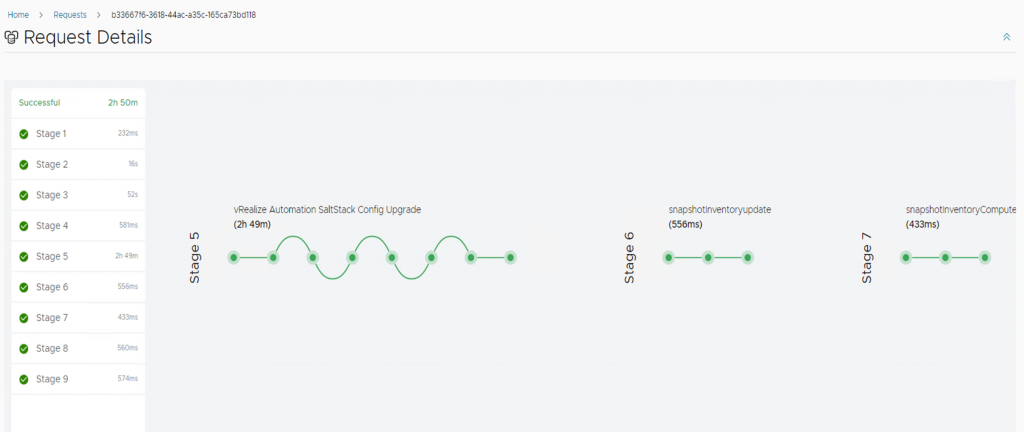
And after that you should hopefully see a successfully completed request.

vRSLCM - Request Details - Completed

Regards

Dean Lewis