Tag Archives: TMC

VMware Tanzu Header

Tanzu Mission Control – Deploying TKG Clusters to AWS

This blog post will cover a technical walk-through on using Tanzu Mission Control to deploy Tanzu Kubernetes clusters to AWS.

The follow up blog posts in this series are:

Tanzu Mission Control 
- Getting Started Tanzu Mission Control 
- Cluster Inspections 
- Workspaces and Policies  
- Data Protection 
- Deploying TKG clusters to AWS 
- Upgrading a provisioned cluster 
- Delete a provisioned cluster 
- TKG Management support and provisioning new clusters
- TMC REST API - Postman Collection
- Using custom policies to ensure Kasten protects a deployed application
Using the AWS Hosted Management Cluster

In this example, we will use the default provided AWS Hosted Management cluster.

Alternatively, you can use the Tanzu CLI to provision a TKG Management cluster into AWS and attach this to Tanzu Mission Control.

Currently it is not supported to have a Management Cluster manage clusters across platforms.

  • I.e. Management Cluster in AWS that manages workload clusters in Azure.

To get started:

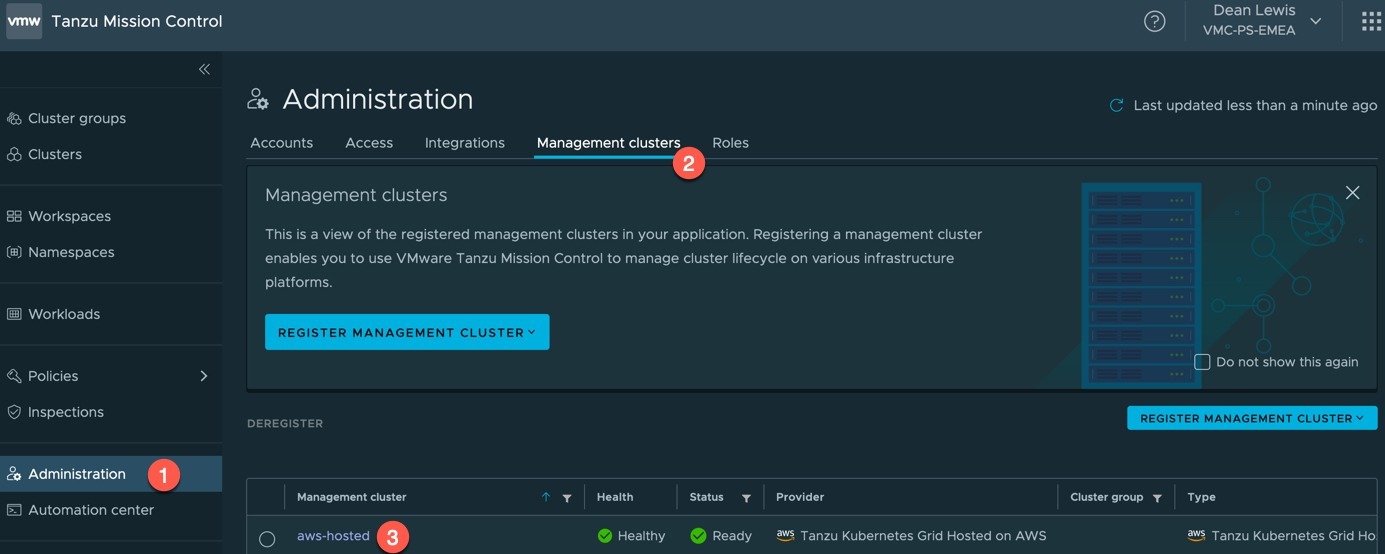
  1. Go to Administration
  2. Click the Management Clusters Tab
  3. Click on the “aws-hosted” cluster object name

TMC - Administration - Management Clusters

Create a provisioner

The default tab when selecting the “aws-hosted” management cluster object is the provisioner tab.

  • Click create provisioner

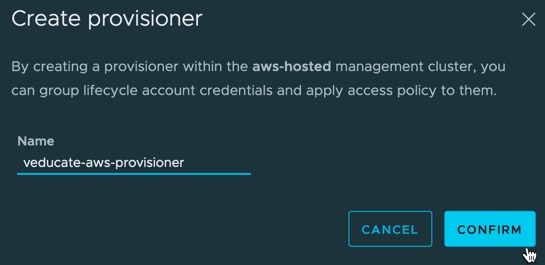
TMC - aws-hosted - provisioners - create provisioner

  • Provide a name for the provisioner
  • Click confirm

TMC - aws-hosted - provisioners - create provisioner - provide name

You will be taken back to your provisioner object which is created. Using the radio button to select the object will allow you to delete it. No other action is available.

TMC - aws-hosted - provisioners - provisioner created

Create the AWS account
  1. Click on accounts tab
  2. Click the “Create Account Credential” Button
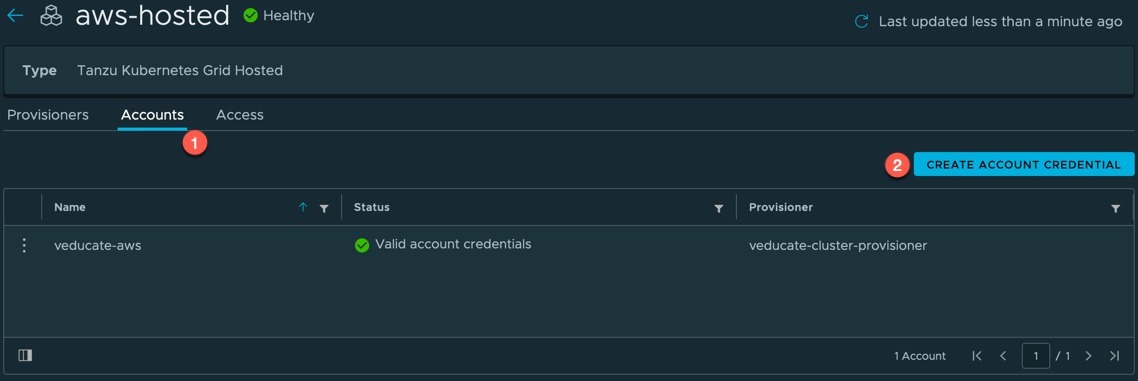
TMC - aws-hosted - accounts - create account credential Continue reading Tanzu Mission Control – Deploying TKG Clusters to AWS

vRealize Operations Tanzu Mission Control Header

vRealize Operations integration with Tanzu Mission Control for auto cluster discovery

A while ago I wrote about the vRealize Operations Kubernetes Management pack which works for all CNCF conformant Kubernetes platforms.

One of the best features of this management pack is the Tanzu Mission Control (TMC) integration it offers with vRealize Operations (vROPs).

This means when you use TMC to provision Tanzu Kubernetes Grid (TKG) clusters, currently on AWS or on vSphere, they will be automatically registered within vROPs as well.

Install the Management Pack
  1. Download the management pack pak file.
  2. Within vROPs go to Administration
  3. Click on Repository
  4. Scroll to the bottom of the page, and select “Add/Upgrade”
  5. Select the pak file for installation and follow the wizard.
Create a CSP API Token

For the vROPs management pack adapter to be able to communicate with TMC, we need an API token.

  1. Log into https://console.cloud.vmware.com
  2. Change to correct organisation that contains your TMC instance
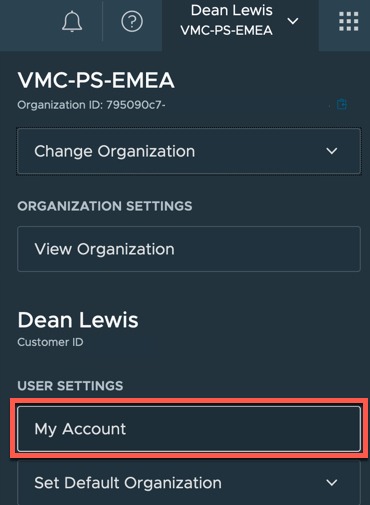
  3. Click your name in the top right hand corner and select “My Account”vROps TMC Integration - creating a CSP Token - Select my account
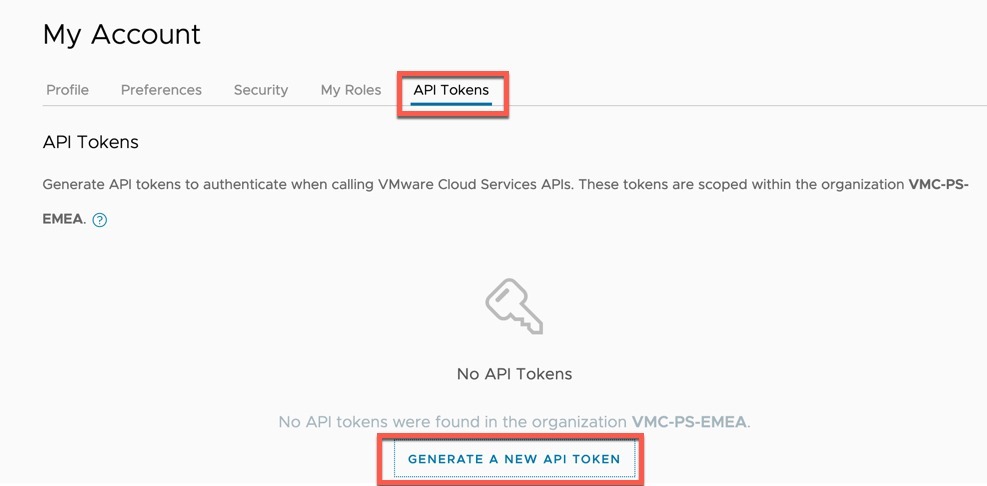
  4. Select the “API Tokens” tab, and then “Generate a new API Token” button.vROps TMC Integration - creating a CSP Token - API Tokens
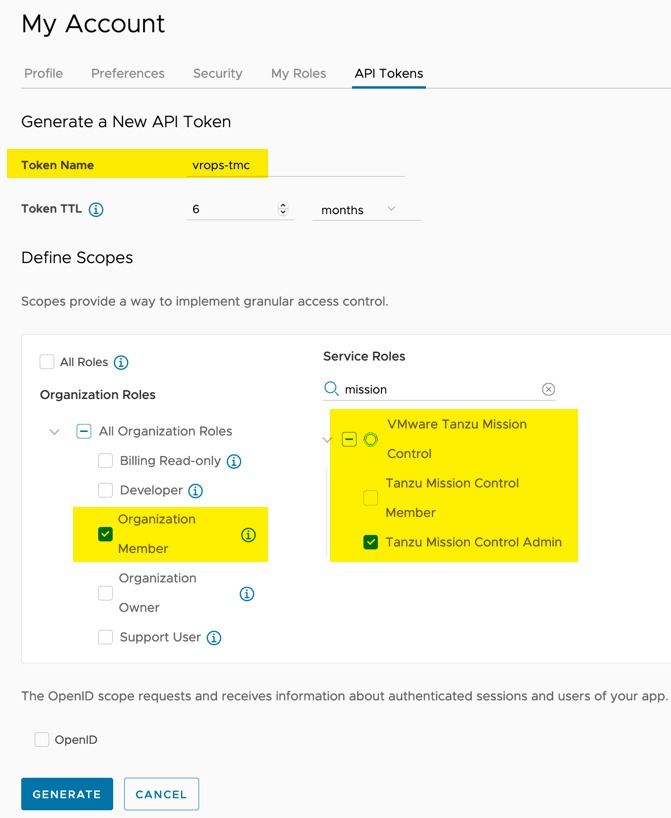
  5. Set your API Token name, expiry, and access control as required. Then click the generate button. vROps TMC Integration - creating a CSP Token - Generate a new api token
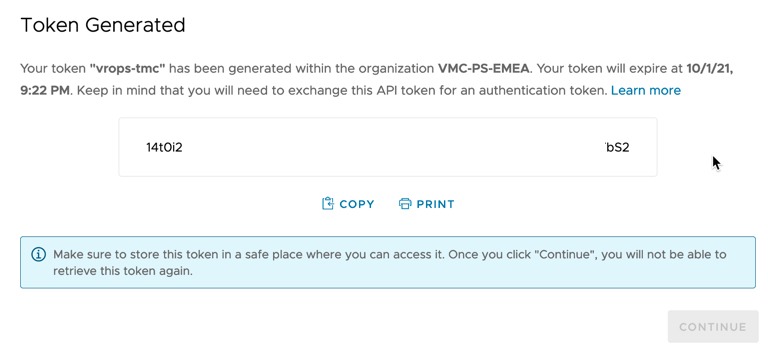
  6. You will be shown a dialog box with your generated token. Save this in a safe space we will use it later on. vROps TMC Integration - creating a CSP Token - Token Generated
Connect vRealize Operations management pack adapter to Tanzu Mission Control
  1. In vROPs UI go to Administration > Under Solutions, choose “Other Accounts” and click the “Add account” button. vROps TMC Integration - Add Account in vROPs
  2. From the account type list, choose Tanzu Mission Control. vROps TMC Integration - Add Account in vROPs - Account Type Tanzu Mission Control
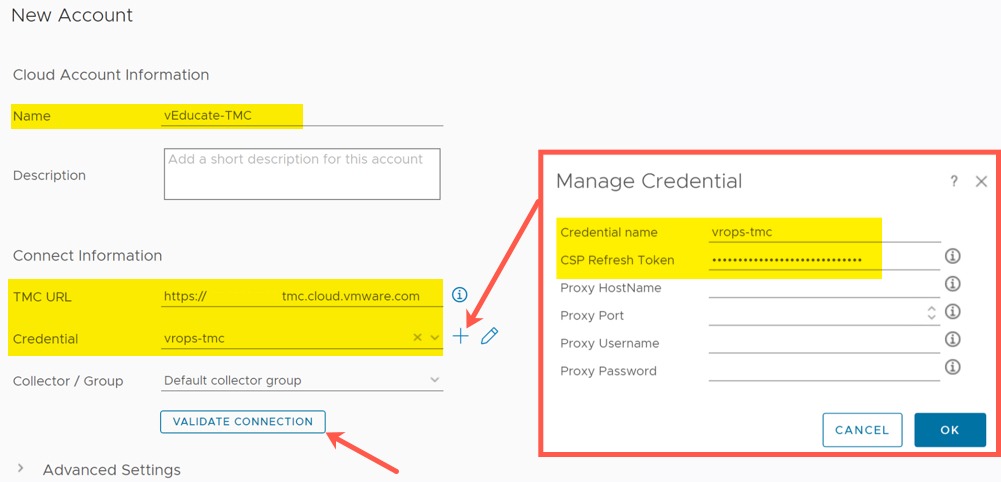
  3. Fill out the necessary details on the New Account screen.
    1. For the credential click the + symbol, add in a name for the credential, and the CSP token you created earlier.
    2. Select your newly created credential.
  4. Select the validate button.vROps TMC Integration - Add Account in vROPs - New Account
  5. Hopefully you get a successful message. vROps TMC Integration - Add Account in vROPs - New Account - Test Connection Successful
  6. You will see the account object in the Other Accounts view. vROps TMC Integration - Add Account in vROPs - New Account - Newly created account
Auto-Discovering Tanzu Kubernetes Grid Clusters

Now you have your account added, whenever you provision a new cluster using Tanzu Mission Control, cAdvisor will be configured in the Kubernetes cluster and a Kubernetes account type will be created in vROps automatically for you.

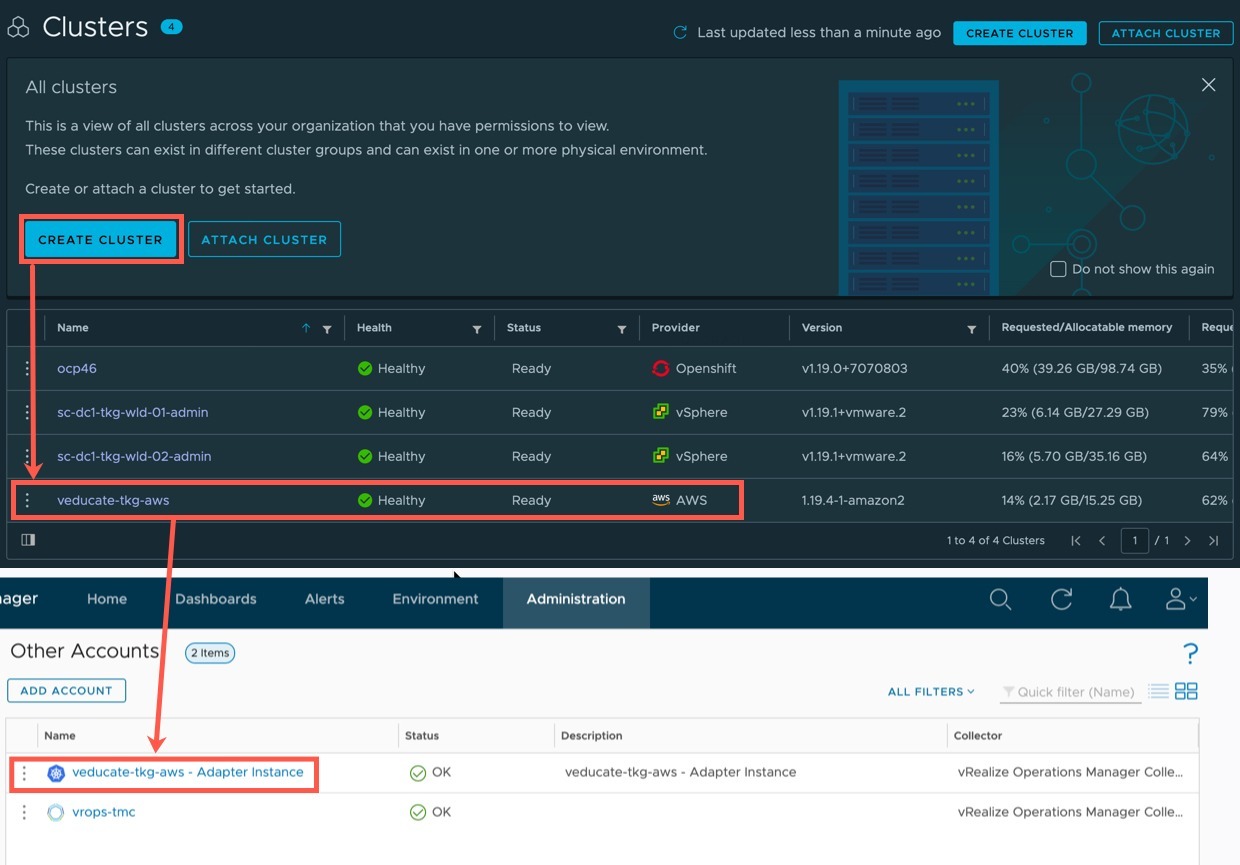
Below I’ve created a cluster in AWS, and we can see the object has been created in vROPs.

vROps TMC Integration - Provisioned cluster auto discovered

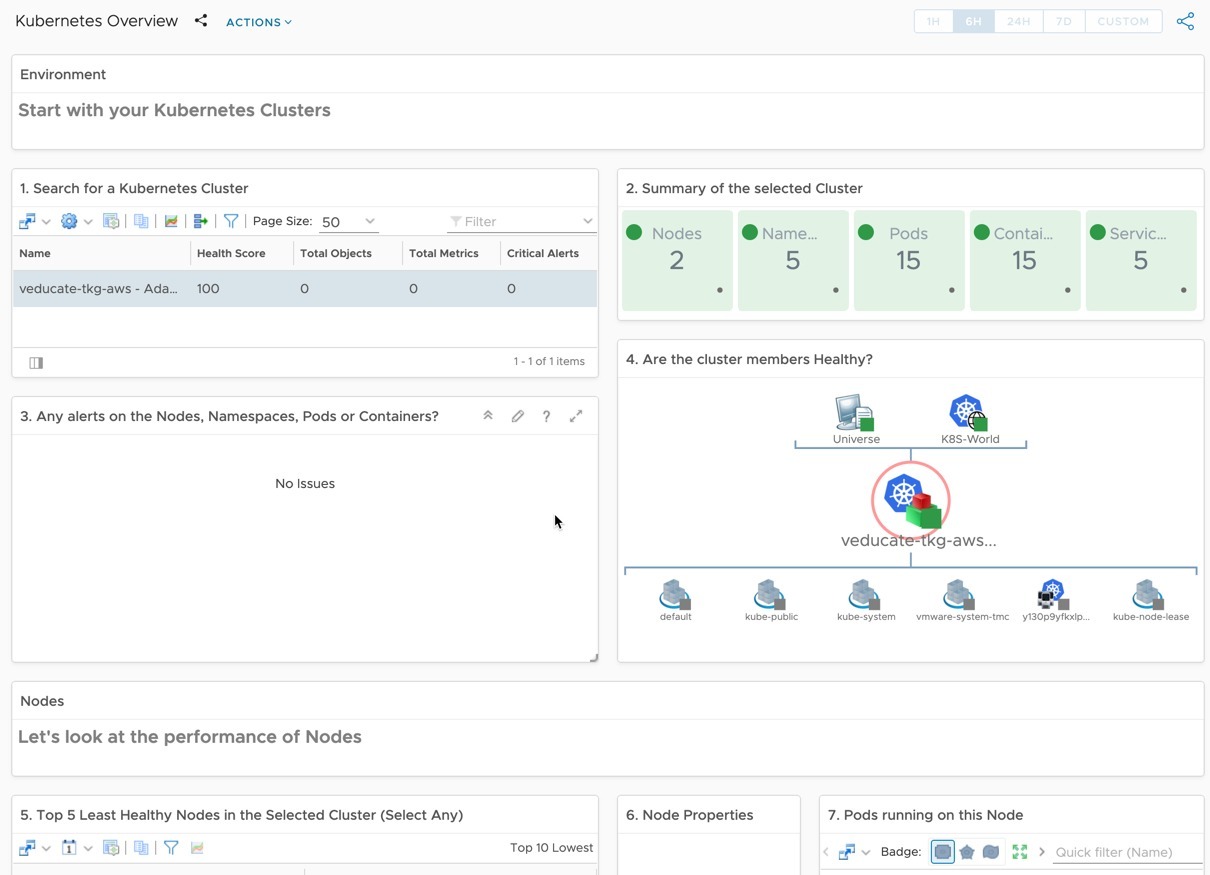
And finally, here is my cluster showing in the one of the Kubernetes Dashboards. vROps TMC Integration - Kubernetes Dashboard

This is a simple to implement feature but can make a massive difference in your ability to monitor your TKG clusters from the infrastructure view that vROPs provides. As your users create clusters via TMC, they don’t need to interact with the monitoring platform to ensure visibility.

Regards


VMware Tanzu Header

VMware Tanzu Mission Control – Using the Data Protection feature for backups and restores

In this blog post we will cover the following topics

- Data Protection Overview
- Create a AWS Data Protection Credential
- Enable Data Protection on a Cluster
- Running a backup manually or via an automatic schedule
- Restoring your data

The follow up blog posts are;

Tanzu Mission Control 
- Getting Started Tanzu Mission Control 
- Cluster Inspections 
- Workspaces and Policies  
- Data Protection 
- Deploying TKG clusters to AWS 
- Upgrading a provisioned cluster 
- Delete a provisioned cluster 
- TKG Management support and provisioning new clusters
- TMC REST API - Postman Collection
- Using custom policies to ensure Kasten protects a deployed application
TMC Data Protection Overview

Tanzu Mission Control implements data protection through the inclusion of the Project Velero,  this tool is not enabled by default. This blog post will take you through the setup.

Data is stored externally to a AWS location, with volume backups remaining as part of the cluster where you’ve connected TMC.

Currently there is no ability to backup and restore data between Kubernetes clusters managed by TMC.

Create a AWS Data Protection Credential

First we need to create a AWS data protection credential, so that TMC can configure Velero within your cluster to save the data externally to AWS.

If you are looking for supported options for protecting data to other locations, I recommend you either look at deploying Project Velero manually outside of TMC (losing access to the data protection features in the UI) or look at another enterprise service such as Kasten.io.

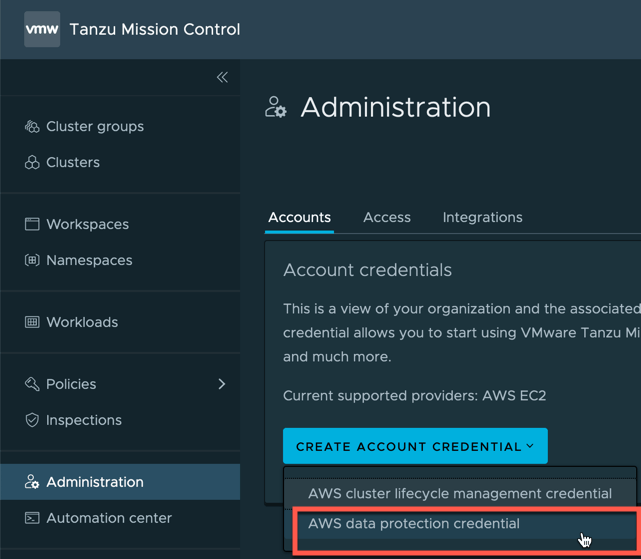
  • On the Administration screen, click Accounts, and Create Account Credential.
  • Select > AWS data protection credential

TMC Data Protection Create Account Credential AWS data protection credential

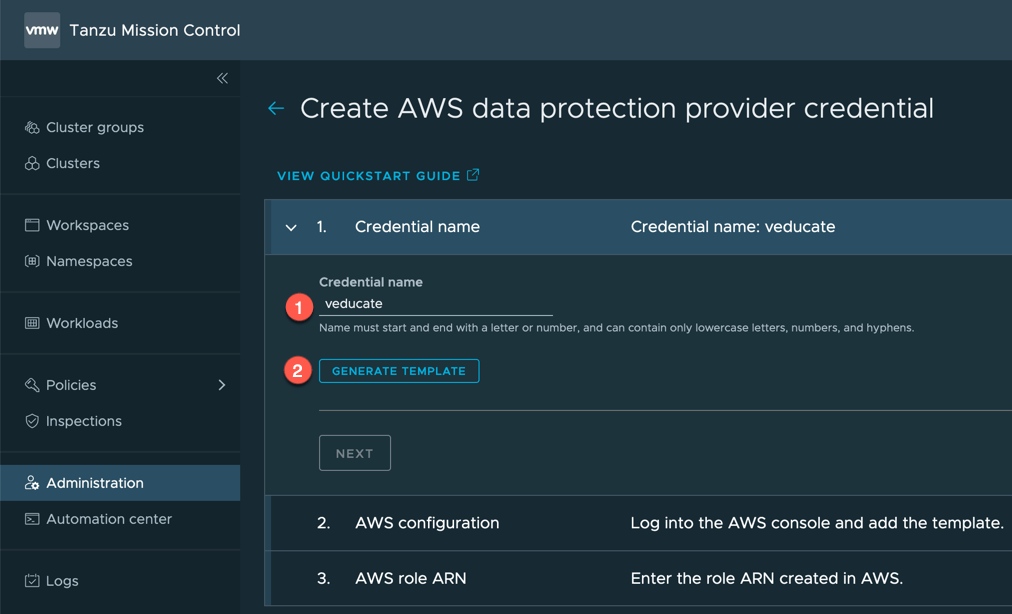
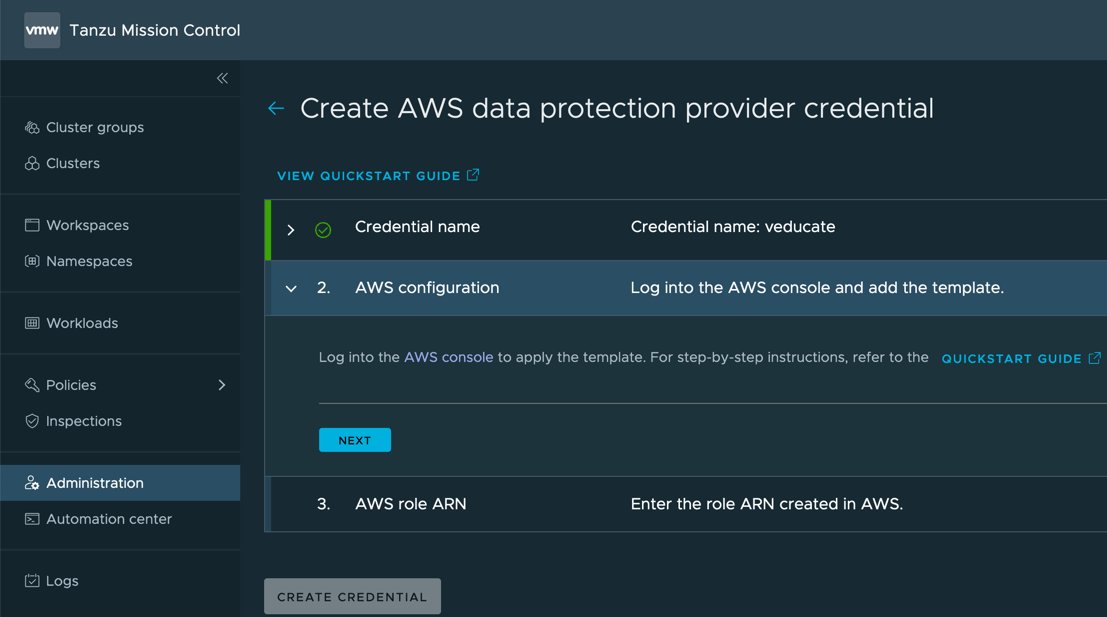
  • Set your account name for easy identification and click to generate template and save this file to your machine.

TMC Data Protection Create AWS Data protection credential Credential Name Generate template

The next steps will require configuration in the AWS console to create resources using CloudFormation so that Project Velero can export data to AWS. Here is the official VMware documentation on this configuration.

TMC Data Protection Create AWS Data protection credential log into the AWS console

  • In the AWS Console, go to the CloudFormation service

TMC Data Protection AWS Console Cloud Formation

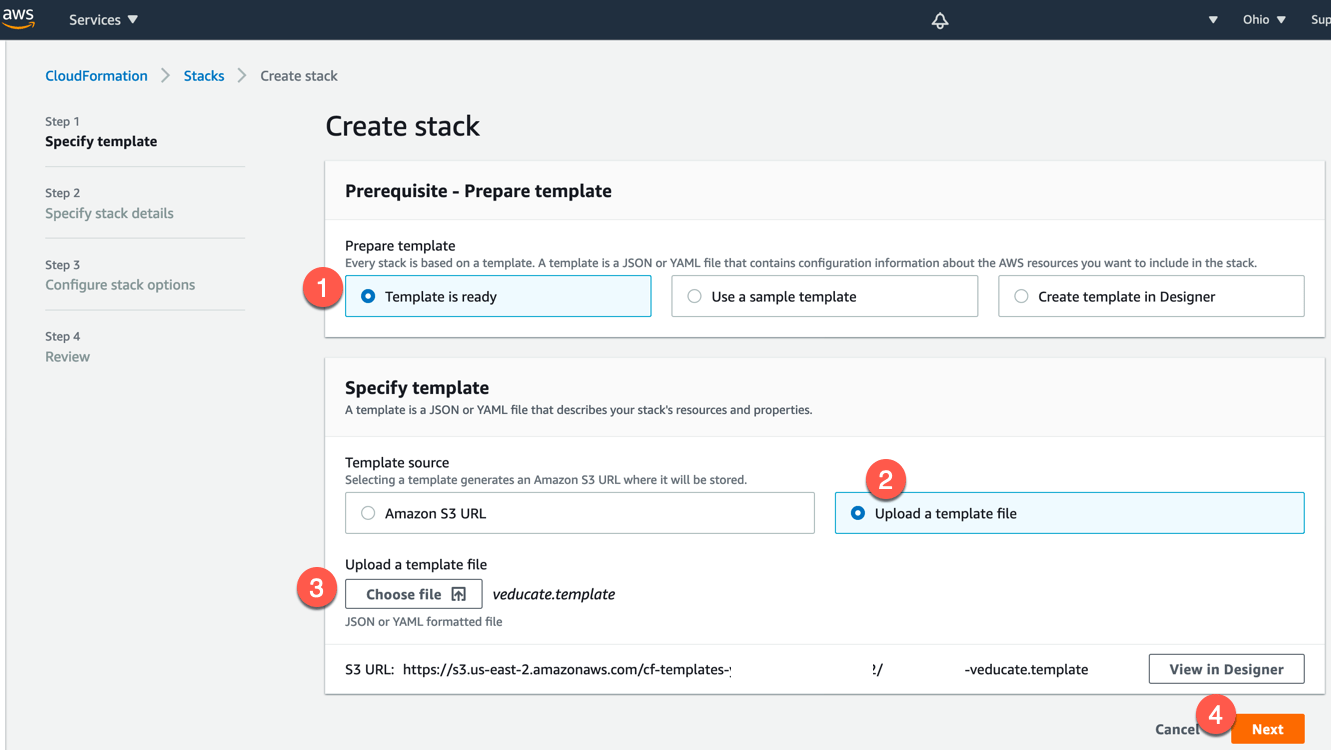
  • Click to create a new stack
  1. Click “Template is ready” as we will provide our template file from earlier.
  2. Click to upload a template file
  3. Select the file from your machine
  4. Click next

TMC Data Protection AWS Console CloudFormation Create a Stack Specify template

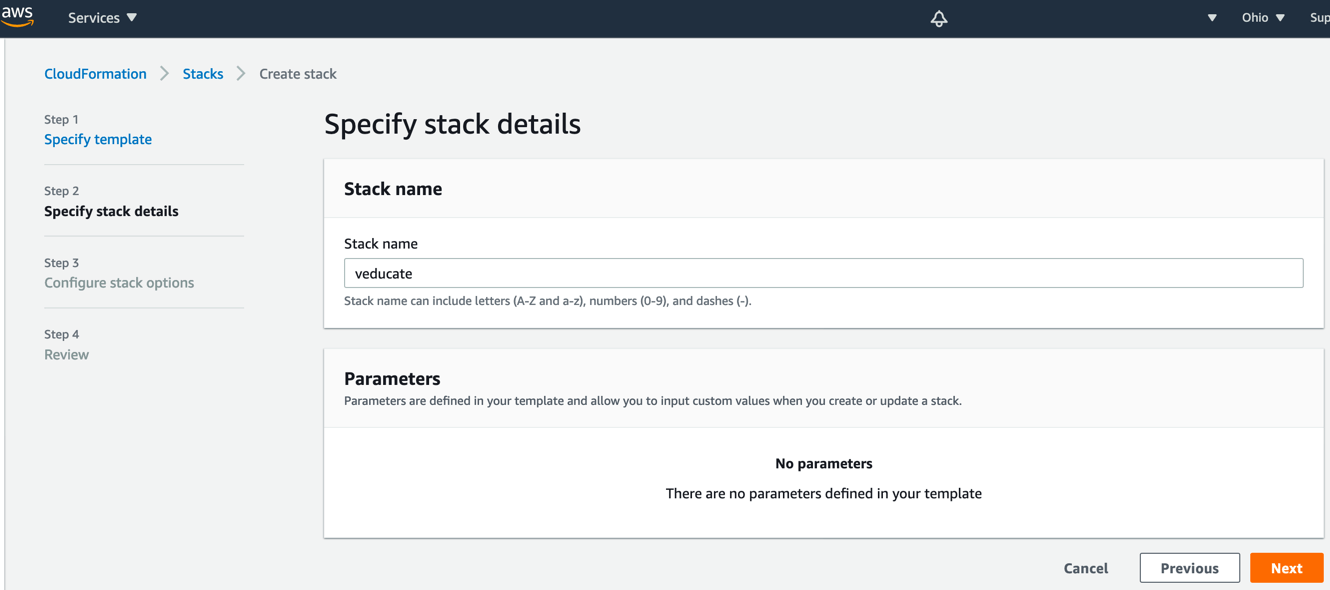
  • Provide a stack name and click next

TMC Data Protection AWS Console CloudFormation Create a Stack Specify stack details

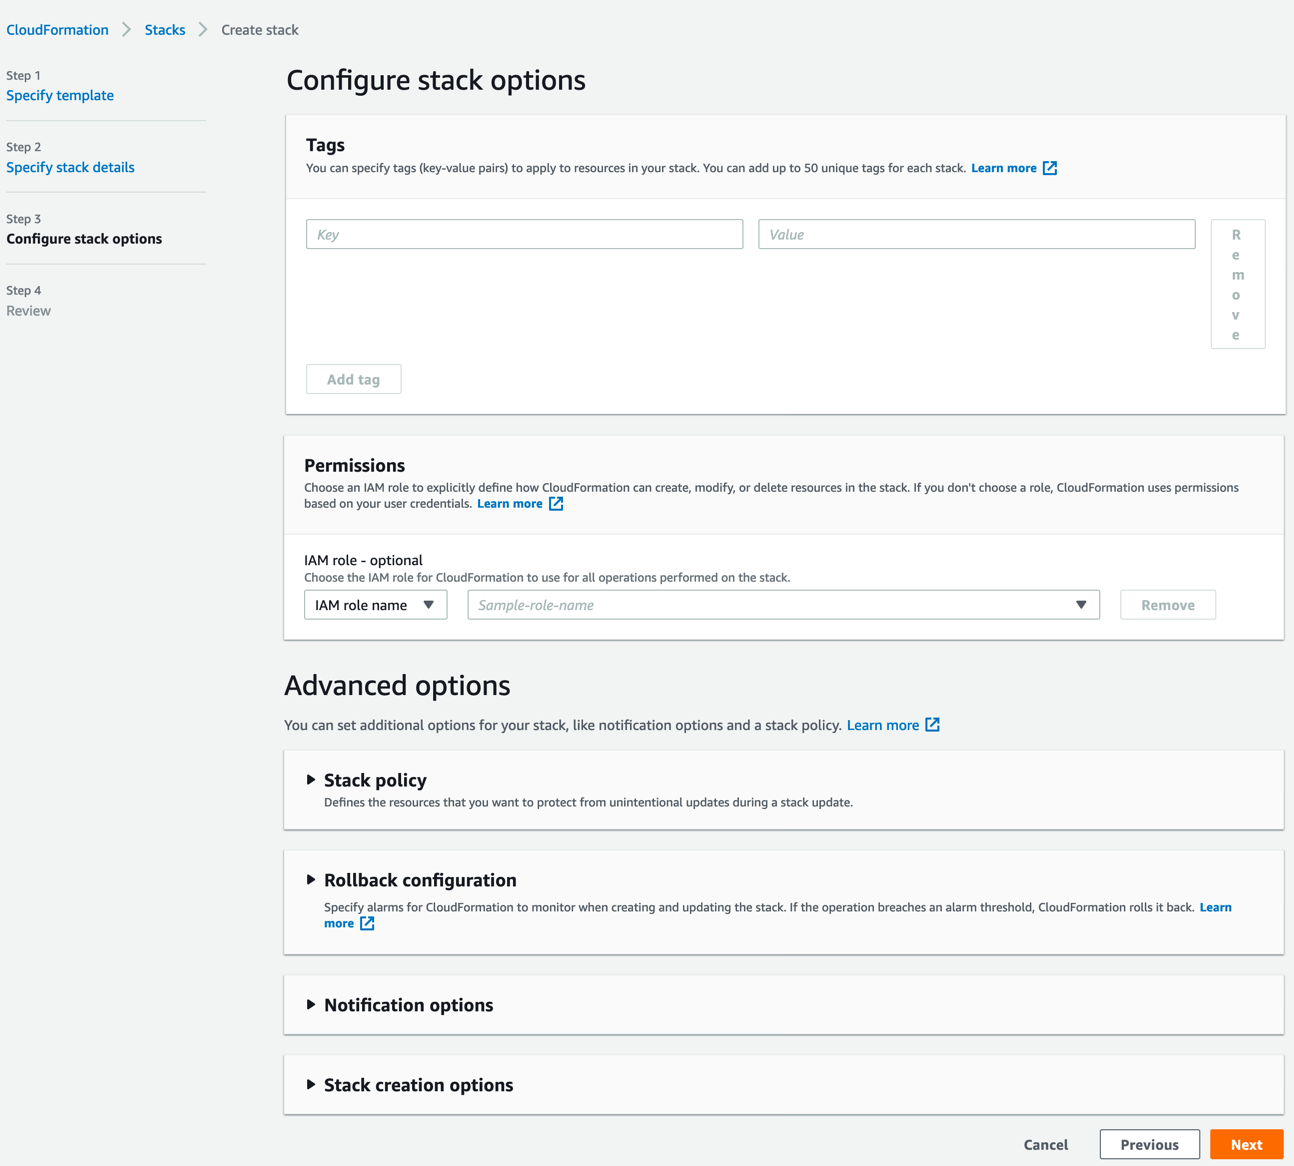
  • Ignore all the items on this page and click next
  • Review your configuration and click finish.

TMC Data Protection AWS Console CloudFormation Create a Stack Configure Stack Options

  • Once you’ve reviewed and clicked create/finish. You will be taken into the Stack itself.
  • You can click the Events tab and the refresh button to see the progress.

Continue reading VMware Tanzu Mission Control – Using the Data Protection feature for backups and restores

VMware Tanzu Mission Control Red Hat OpenShift header

Enabling Tanzu Mission Control Data Protection on Red Hat OpenShift

Just a quick blog on how to get the Data Protection feature of Tanzu Mission Control on Red Hat OpenShift. By default you will find that once the data protection feature is enabled, the pods for Restic component of Velero error.

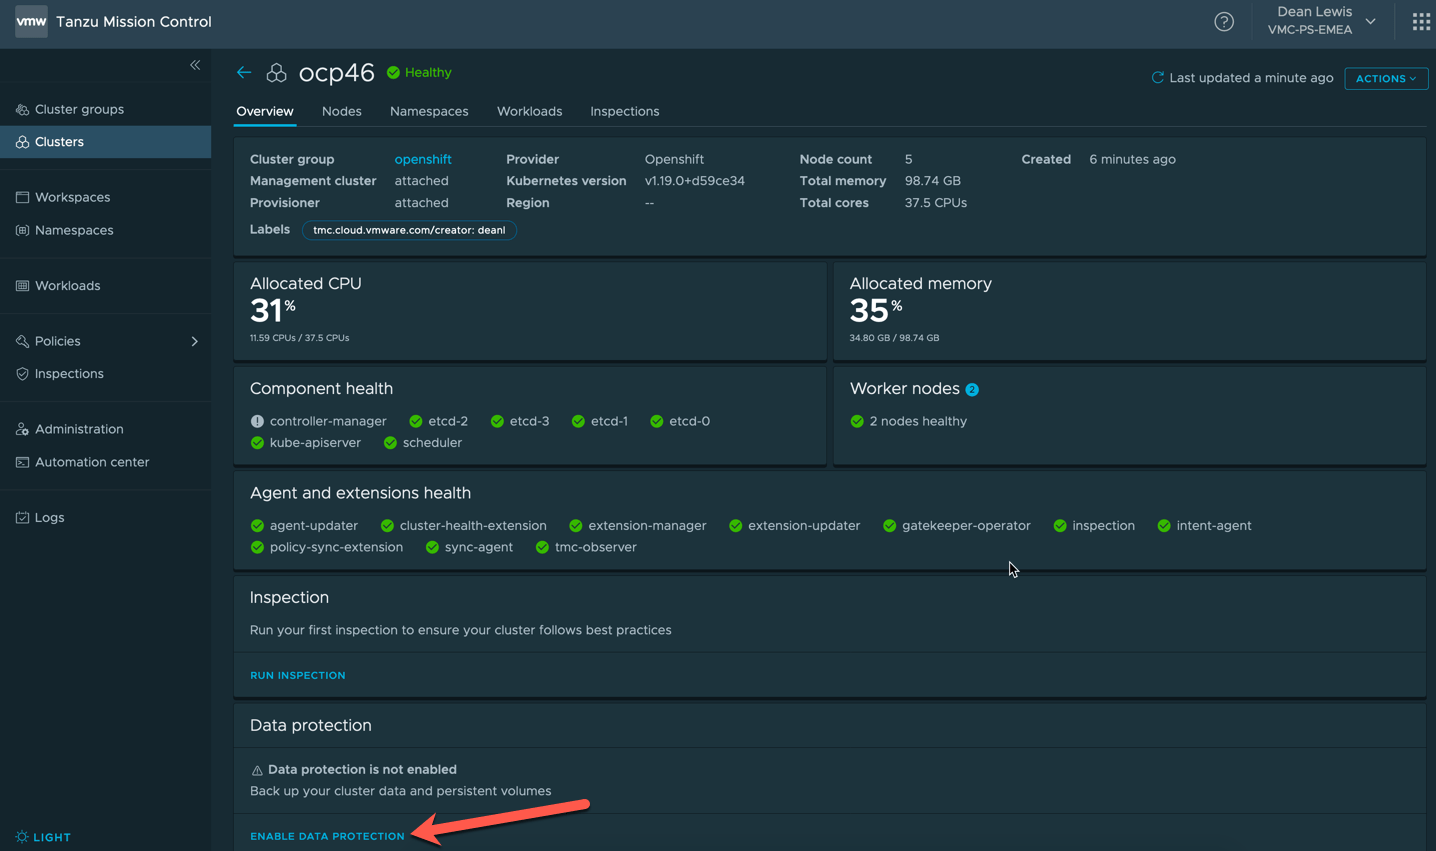
  • Enable the Data Protection Feature on your Openshift cluster

TMC Cluster Overview enable data protection

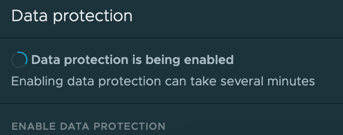
  • You will see the UI change to show it’s enabling the feature.

TMC Enabling Data Protection 2

  • You will see the Velero namespace created in your cluster.

TMC oc get projects velero vmware system tmc

However the “Data Protection is being enabled” message in the TMC UI will continue to show without user intervention. If you show the pods for the Velero namespace you will see they error.

This is because OpenShift has a higher security context out of the box for containers than a vanilla Kubernetes environment.

TMC oc get pods restic error crashloopbackoff

The steps to resolve this are the same for a native install of the Project Velero opensource install to your cluster.

  • First we need to add the velero service account to the privileged SCC.
oc adm policy add-scc-to-user privileged -z velero -n velero

TMC oc adm policy add scc to user privileged velero

  • Secondly we need to patch the DaemonSet to allow the containers for Restic run in a privileged mode.
oc patch ds/restic \
--namespace velero \
--type json \
-p '[{"op":"add","path":"/spec/template/spec/containers/0/securityContext","value": { "privileged": true}}]'

After this, if we run the command to get all pods under the Velero namespace again, we’ll see that they are replaced with the new configuration and running.

TMC oc get pods restic running

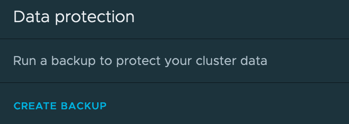
Going back to our TMC Console, we’ll see the Data Protection feature is now enabled.

TMC data protection enabled

Regards